Types of fireplace stoves
Structures suitable for summer cottages made of brick, wood, foam blocks or other material are intended for heating and cooking. How can you make a cozy fireplace out of an existing stove? In the form of a partition between the recreation area and the kitchen! The layout of the system is selected according to the layout of the home:
- buildings in which there are no load-bearing walls between the living room and the kitchen. It would be appropriate to build a stove or fireplace from high-quality brick in a corner location. The stove is placed near the kitchen, and the fireplace system is oriented at 45 degrees in the living room. Fireboxes are installed on the front or opposite walls;
- in rooms with uneven floors and an already equipped foundation, you can convert the stove into a fireplace using channels. A structure that is light in weight is installed near the cutting of the walls. Consoles balance the load on the base;
- During the construction process, the country house is supplemented with closed fireplace structures. In the middle of the large living room, systems are installed on chain fastenings.
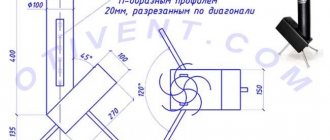
The shape of the product is subject to the style of the room. The U-shaped structure will emphasize the classic solution, and the D-shaped structure will give the space a country flavor. Rectangular or semicircular options are typical for design in the spirit of Art Nouveau.
Advantages of a corner fireplace
- in terms of room design, the corner structure opens up new possibilities for interior design; it does not come to the fore, but serves as the basic basis for other finishing elements;
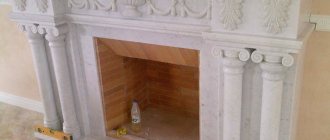
- The corner version of the fireplace is very popular for small houses; this model does not require excessive space and serves as the main heating center of the living space;
- in an already finished room, a corner fireplace is being built without rebuilding the existing structures, which cannot be done if the owner chooses the built-in option.
In order for the fireplace to please the owner and his household on cold winter evenings, it must be aesthetically designed, not emit smoke and other combustion products into the room, and be powerful enough to heat the air.
Required thermal insulation materials
Stone wool 50 mm thick serves as a fire shield between the chimney and other building elements. It is necessary to take this moment responsibly, especially when it comes to transition nodes in the areas of interfloor and attic floors.
The fireclay core and facing parts are sometimes separated by basalt cardboard, which has low thermal conductivity. Thanks to this thermal insulation layer, the temperature of the working core is maintained and the outer part of the fireplace does not overheat.
The tightness of the junction of metal elements to the brickwork is ensured using sealants that can withstand high temperatures. If this is not done, there will not be good draft in the chimney, which means the performance of the heating structure will decrease.
Drying the oven and first start-up
After the last brick takes its place, do not rush to light the stove; this will not be done soon.
To prevent this from happening, you need to dry the oven. The slide valve and the blower open. The air flow generated by the draft will promote the evaporation of moisture along the surface of the masonry. It is recommended to close the gate and door at night. The procedure should be repeated until moisture stops forming in the pipe.
All that remains is to dry the solution along the depth of the masonry. To do this, you will have to start starting the oven. The device is heated in small portions of dry wood, adding 1 kg of fuel every day. After the mass reaches 20 kg, a test burn is performed at maximum power, after which the condition of the masonry and seams is inspected. The absence of cracks gives a start to the full operation of the fireplace stove.
8594c97e9d55687012f8672c6ec381a3.jpeWhat types of stoves and fireplaces are there?
When deciding how to build a fireplace stove, they proceed from their capabilities and preferences.
According to their stove design, fireplaces can be divided into two types:
- Stove fireplace with two fireboxes. This design is chosen if the area allows. Many problems associated with heating, providing a country house with hot water and cooking will be solved by a powerful multifunctional brick stove and fireplace. It can provide not only a hob, an oven and a water boiler, but also the ability to connect to a water circuit. The fireplace can become an attachment to the heating and cooking stove, combining with it a common chimney. Thus, the structure will have two fireboxes, and it will be possible to heat the fireplace and stove at the same time, or separately.
- A fireplace stove with a single firebox. Suitable for a small country house. This heating device is also called a modernized “Swedish” or “Dutch”. It is a modern version of a compact heating stove with an enlarged combustion chamber and a door made of heat-resistant glass.
The spatial layout of the structure is of great importance. The layout of a stove with a fireplace largely depends on the layout of the premises.
Among all the constructive diversity, several different types can be listed:
- one-sided (fireplace and stove inserts on the same line)
- double-sided (fireplace and stove inserts on different sides);
- corner;
- T-shaped in shape.
If we are talking about a small structure, you can limit yourself to a fireproof glass door in a single firebox.
Tips and secrets
Heating a fireplace with wood is a big responsibility. Incorrect actions may result in heat loss or fire. It is necessary to correctly assess the intensity of combustion. It can be adjusted by slightly opening or closing the ash pan door. Typically, the correct combustion mode is accompanied by the crackling of firewood and a slight hum of warm air escaping in the pipe. A strong hum is a sign of excessive draft and will cause the wood to quickly burn out, and all the heat will escape into the chimney.
You can assess the position of the ash door by the color of the flame of the melted fireplace; it should be bright yellow. An increase in brightness, up to white, indicates an excess of oxygen, a dark flame indicates its deficiency.
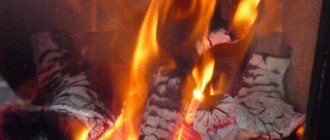
Live fire in an open hearth
You cannot use different methods to put out a fire in a fireplace. Temperature changes can cause the firebox finishing materials to burst. The logs should burn out and go out on their own. As a last resort, if you urgently need to leave the house, you should remove the smoldering coals and extinguish them outside the fireplace.
The chimney damper cannot be closed immediately, since carbon monoxide is still released from the smoldering coals. But an open view will lead to heat loss, so you should look for a neutral solution - close it a couple of hours after the fireplace has cooled down.
The rules that tell you how to properly light a fireplace are also relevant if the fireplace is coal-fired. The only difference is in the kindling process. To light a coal-fired fireplace, you should light wood chips and splinters, on which a small layer of special fireplace coal is applied. After waiting for the flame to settle, feel free to add large coarse coals and adjust the draft as described above.
Charcoal is much harder to light than wood, so you often have to use chemicals in the form of tablets. Modern fireplaces are equipped with electric and gas kindlers.
Everyone should think about how to properly light a fireplace stove. This issue addresses safety, not just energy efficiency. First of all, improper use of the firebox can lead to irreparable consequences when a fire destroys everything that is most precious.
Step-by-step technology for arranging a fireplace and stove installation
When planning how to build a heating system for a country house or cottage, start by forming the foundation.
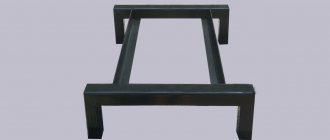
Foundation construction process
You will need rubble stone blocks, cement mortar and formwork boards. Work like this:
- Create a trench that extends to the depth of the main foundation. The width of the pit should be 10 cm greater than the parameters of the stove.
- Place crushed stone at the bottom of the hole and compact it.
- Erect formwork ending near the floor surface, waterproof it with bitumen, and dry it.
- Place rubble blocks on the bottom, and fill the distance between them with medium-fraction crushed stone.
- Prepare a solution based on 1 part cement, 3 parts sand and water. Fill the rubble and crushed stone with the mixture.
- Lay out the stone and fill it with mortar again. Continue until the structure reaches a distance of 7 cm from the floor.
- Fill the top layer and leave to dry for 1 week.
After hardening, apply waterproofing using a liquid bitumen composition.
Creating mortar for laying bricks
The oven is laid with your own hands on a clay-sand composition with high heat resistance. The mixture is made from clay with a high fat content, soaked in a wooden barrel. The solution is infused for 7 days, foam and debris are occasionally removed from it. After a week, the water is drained, and sand and porcelain tile glue are added to the clay. Cement is added in portions, trying to ensure that the composition comes off the trowel.
5b6027f1fd565a39b7d9f054b8937253.jpe d4c248074f8a46e4f1b275d8d06f7af7.jpe 98c9e68750d44580abcdea0a2e9c520c.jpe
Classic ordering scheme
Have you ever wondered how to professionally make a functional fireplace out of an existing stove? Follow the classic masonry technology. Practicing builders advise making one heating unit from high-quality material without a glossy sheen or chips. Brick laying is done like this:
- Form the 1st row from substandard material. Level the stones as much as possible.
- The 2nd row includes the arrangement of blower doors. Place asbestos or basalt material on the bricks, fix the door frame with reinforcing rods, pulling them through the holes.
- 3rd row - continue fixing the doors. Pass the burnt wire through the side holes of the frame and masonry seams. Form a grate in the firebox.
- 4th row - close the blower doors with bricks. Make a grate and start forming a smoke channel. Place it on its side and attach the latch. Level the solution with your hands until it is perfectly smooth.
- 5th row - install the firebox doors, securing them vertically with pins and wire. Line the space between the metal frame and the masonry with heat-resistant material.
- 6th row - install the furnace door and work according to the scheme up to the 8th row.
- 9th row - close the door of the combustion compartment with a brick stone, until the 11th row work according to the scheme.
- 11th row - install the hob. It is better to place the bricks without mortar, mark the cooking area with a marker, and number the bars. Use a grinder to deepen the slab at the level of the main masonry.
- 12th row - close the fireplace doors. Place a steel corner at the top of the bricks. The 13th – 15th rows are designed according to the pattern.
- Row 16 – create a vault above the stove. You will need to place a corner and a strip of metal in front.
- The 17th row is brickwork, next to which there is a steel strip to support the vault.
- 18th row - fill the corner with bricks, install a metal sheet in place of the valves. A small piece of corner will serve as a support.
- 19th row - make grooves from stone 5 mm larger than the thickness of the main material of the valve. Check the quality of the chimney closure and secure the doors for cleaning.
- 20th row - fix a strip of steel above the valve, smaller in size. Continue laying according to the diagram.
- Row 21 – Place the steel for the chimney support on top of the bricks.
- From the 22nd to the 26th row they work, narrowing the smoke exhaust paths. At the end of the 26th row, a bolt is made on the frame.
- From the 27th to the 28th row, the system is overlapped, narrowing each level by ½ brick block.
- After completing the work, dry the system and perform testing - the first firebox.
A self-made chimney is located inside the building to improve draft. The vertical design will ensure the quality of removal of combustion products and prevent the occurrence of condensation. External chimneys are made of brick material or special sandwich pipes. A do-it-yourself fireplace combined with a stove is a guarantee of high-quality heating of the home. Only a responsible approach to construction, studying the design, and purchasing quality materials will make the operation of the heating device comfortable.
The procedure for arranging a fireplace stove with your own hands
The following materials will be required for fireplaces and stoves of this design solution:
- solid and fire-resistant bricks;
- steel strips;
- clay mortar;
- oven;
- hob;
- steel doors.
Next, installing a fireplace stove with your own hands is done in the following sequence:
- The 1st and 2nd rows of bricks serve to level the structure being constructed, since as a result of pouring the foundation, unevenness will still form on its surface. After completing the second row, the building level must show an absolutely flat surface, otherwise the life of the structure will be short.
- On different sides of the fireplace stove there is one ash pan and two cleaning windows.
- A steel door is installed on each window. An additional steel strip is placed above the blower door. A fireplace compartment is installed on the front side of the structure, preferably with a side so that combustion products do not fall out of it.
- The doors are covered with brick, and a portal is opened on the side of the fireplace.
- A grate is placed above the ash pit. The long narrow compartment is covered with a steel strip.
- The side channels are divided in half by bricks. Open the combustion window.
- Install the combustion door.
- The firebox door is covered with a steel strip and covered with brick.
- Also, a strip of steel covers the fireplace.
- The channel above the firebox is connected to the nearest well. The front side of the fireplace is covered with brick and a smoke intake is formed.
- The hob is located above the firebox. The remaining space above the passage and well is covered with steel strips.
- The channel above the fireplace is narrowed and a cooking compartment is formed.
- The 14th and 15th rows are performed similarly to the 13th.
- An exhaust hood is installed between the nearest well and the cooking chamber.
- A metal cleaning door is installed in the hood.
- The rear well, located above the hood, is divided in half. The one that will go outside is covered with a summer curtain. The well above the hearth takes on the size of 1 brick. Steel strips cover the cooking chamber over the entire area.
- The cooking chamber is closed.
- The 20th row is similar to the previous one.
- The 2nd rear channel is expanded to its maximum size and a cleaning window is removed from it. A damper is installed above the well with the fireplace.
- Install the cleaning door.
- A metal oven is placed in the cavity. On the far side there remains a vertical smoke well.
- On one side of the oven, smoke flows into the central pipe.
- The actions are repeated.
- They make a transition from the cavity to the pipe because the oven has run out.
- The cavity and well are covered with steel strips.
- On top of the strips, the area is covered with bricks. A winter valve is installed in the last unused well.
- All wells are connected to the fireplace using horizontal passages. Install the cleaning door.
- The 30th and 31st rows are similar.
- The area is covered. Install a common damper.
- The 33rd row and further - the structure is narrowed - it goes into a pipe.
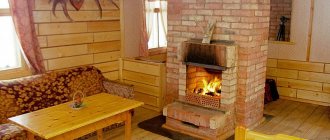
Today, in country houses, you can no longer find conventional stoves as often as before, since there are more modern heating and cooking systems. First place comes to fireplaces, which can perform almost the same functions, but their appearance is more decorative. The fireplace can be placed in any room: bedrooms, living rooms, halls. Such a hearth gives more coziness, provides soft warmth, which quickly warms up a small house.
How to make a fireplace durable and comfortable? It is worth immediately noting that the work is not only complex, but also significant financial costs. It is required to invite a professional master. You can save a lot if you buy a ready-made metal fireplace that requires only external decorative finishing, but this option cannot be called the best.
Sometimes, when buying a country house, it happens that it already has an ordinary Russian stove, which is not used for its intended purpose. In this case, based on this stove, you can make a fireplace with your own hands. Such an alteration consists of assessing the condition of the furnace and determining a plan of work that may be needed. As a rule, most often it is necessary to expand the firebox, install a door and a new chimney pipe.
Several ways to remake
If you received a stove as a dowry when you bought a house, then most likely you have no idea what internal structure this device has. Therefore, there is no way to do this without partial disassembly. To determine which elements can be left unchanged and which need to be modified, begin to disassemble the stove carefully, removing each brick. The material that remains intact can be reused, so it is recommended to fold it separately.
Already passing several rows will give a complete picture of the structure of the smoke channel. At this stage, you will have to determine whether you will leave the chimney in the same form or build a fireplace version, which is a regular vertical channel.
By comparing the diagram of the actual device with the most suitable fireplace design, decide which part of the masonry will remain untouched. Evaluate the possibilities of modifying the rows and then begin cleaning all cavities of the body. It is much easier to clean the stove in a disassembled state than in an operating one.
Restored brick building
Each brick should be cleaned of old mortar and soot. If necessary, you can use water. These bricks are most likely unsuitable for laying outer layers, as modern materials are more aesthetically pleasing and attractive. But when installing a chimney, they will be indispensable.
If it is impossible to understand the diagram and after partial disassembly the picture does not become clearer, you will have to continue to disassemble the stove. If there is a lot of damage in the masonry, then repairing them may be more time-consuming and expensive than building a new fireplace. This idea forms the basis of the second method of converting a stove into a fireplace. It will be necessary to disassemble the oven completely to the bottom rows of the base
Dismantling must be carried out with extreme caution, since soot contacted with the skin and respiratory system causes irritation.
When disassembling the stove, you should not regret the design. With a lot of cracks it would cause a lot of problems. The very existence of the foundation and foundation is a huge legacy that the fireplace stove has left behind. Having carefully examined the condition of the base, you can carry out installation work on it. But verification is not just about integrity control. Using a level, you need to make sure that the plane is horizontal.
7196f3e665317c6c8bc3485445b7def9.jpe
The remaining foundation marks the boundaries of the fireplace complex. With such dimensions it will be possible to build not just a decorative element, but a real functional fireplace with a hob for cooking. In addition to the fact that the firebox will need to be made according to the dimensions calculated from the parameters of the room, immediately focus on the location of the chimney so that it comes out as close as possible to the existing hole in the roof of the house.
A fireplace made from a stove with its complete or partial disassembly can radically change the style of room layout. In some cases, the furnace undergoes minimal changes. They mainly relate to the size of the firebox. Then it makes sense to preserve it in its original form, decorating it with folk art paintings. Naturally, modern materials are used for this, which do not leave marks and retain their appearance after long-term use.
It should be noted that with the help of such solutions, two important tasks can be solved: installing a fireplace and preserving the memory of Russian craftsmen in the house. After all, the Russian stove differs from the designs of other countries in the presence of a stove bench. This bench can be left for decoration, or it can be turned into a working fireplace unit.
Finishing
In absolutely all cases, the resulting fireplace will have to be decorated from the outside. It can simply be coated with a layer of glossy or matte paint. Here you need to remember the elementary laws from the physics course. Dark bodies emit more energy, and since our task is to remove energy, black colors will be a priority.
Good to know: Pass-through double-sided fireplace in the interior and features of its use
The fireplace can be finished with special fireproof materials. These include tiles made of ceramics, artificial and natural stone. When gluing tiles, you should remember the thermal expansion of the metal, so the seam gap should be slightly increased.
With the possibility of making your own fireplace, a lot of opportunities open up for you to realize your old dream exactly in the form in which it interprets itself. Desire and work in a certain sequence will ensure an excellent result.
Location of brick fireplace stove
To decide where it is best to install a fireplace stove, you need to know the layout and dimensions of the house.
Optimal solutions for the location of the fireplace stove:
- in the middle of a large common room;
- in the center of the building at the junction of interior partitions;
- in the wall between the common room and the kitchen area;
- between the hallway and the bedroom.
If you place the fireplace stove in the center of the room near (against) one of the internal walls, several rooms are heated at once. It is convenient if the heating stove, which serves as a fireplace and cooking apparatus, is located between the common room and the kitchen. The fireplace side will be in the family room and the cooktop will be in the kitchen area.
The heat shield plays the role of a warm partition if the stove is built between the living room and bedroom.
The greater the power characteristics of the combustion chamber, the more spacious the area of the fireplace room should be.
To improve the microclimate inside the building and ensure normal combustion, additional air supply is provided. This can be done in different ways. Regular window vents or special channels for air flow from the street will do. Their diameter depends on the type of combustion chamber. For a closed firebox, the channel is made at least 10 cm, for open fireboxes - at least 20 cm.
65d91714e9f551d9c35d1d79a14cd49a.jpeFunctioning of a fireplace stove
A self-built fireplace based on a stove will combine elements of two products. Open fireplace systems quickly warm up the room during the combustion of fuel materials. Stoves have the ability to retain heat for a long time due to smoldering. Integrated design increases heat dissipation time and burns up quickly. Thanks to two fireboxes, owners can light the stove or fireplace separately. Long smoke exhaust channels reduce the process of removing hot gases. For this reason, fuel is saved, which is used as firewood, peat or coal. A stove combined with a fireplace operates according to a special principle:
- fuel is loaded into a special chamber with a grate;
- in the case of a stove, air masses enter through a hole at the bottom of the compartment and ensure ignition of wood or coal;
- a fireplace compartment with a special convection chamber improves heat circulation throughout the rooms;
- combustion products are discharged through special channels;
- valves and dampers eliminate premature heat transfer.
Two heating devices in one have increased efficiency, good traction force due to which hypothermia is eliminated.
Do-it-yourself brick fireplace stove - step-by-step instructions and drawings
For a beginner without experience in the stove business, laying out a brick fireplace with your own hands is a very difficult task. But three components - time, patience and great desire - will help you succeed and create a wonderful home, a source of comfort and warmth in the living room. We will provide all the theoretical information and tell you about the procedure for carrying out masonry work in the form of simple instructions.
General information and device
In fact, a traditional English fireplace is a stove of a simplified design, consisting of the following basic elements:
- a large open firebox in the form of a rectangular niche (portal), lined with solid ceramic bricks;
- the straight chimney shown in the diagram is equipped with a special protrusion - a chimney tooth and a tapering part - a smoke collector;
- the pre-furnace front platform plays a decorative role and at the same time protects the floors from sparks from the firebox;
- valve for adjusting draft.
Note. In simple designs, grates and an ash chamber are not provided; firewood is burned directly on a brick hearth.
In current conditions, fireplaces are built solely to create a unique atmosphere of comfort in private homes and cottages, and not for the purpose of organizing heating. The fact is that open hearths are extremely ineffective; even more complex models with two smoke circuits have an efficiency of no more than 20%, since the lion's share of the heat simply goes out into the street through the pipe.
Diagram of a complex fireplace with two smoke circuits
The room is heated by infrared radiation emitted by an open flame. As soon as it fades, heat transfer stops. Convective heating does not work here - the draft of the chimney, which has a large cross-section, literally sucks the heat out of the room along with the air flow. It is impossible to reduce the transverse size of the pipe - the fireplace will begin to smoke into the room. For the same reason, brick walls practically do not accumulate heat.
Advice on calculating the size of the hearth. When building fireplaces with your own hands, it is important to achieve a compromise between smoke in the room and too strong a draft, which helps remove heat along with the air. The flow area of the chimney should be 1/9 of the area of the open part of the firebox (portal). In turn, the dimensions of the front opening are taken in the ratio of 1/50 to the area of the room, and its height is 1.5-2 times the depth of the firebox.
So that you can choose the correct dimensions of the fireplace without delving into calculations, we present a table with the dimensions of the main elements tied to the area of the room.
Instructions for laying a fireplace
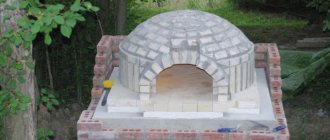
On various Internet resources and in technical literature, it is easy to find a variety of designs for home and outdoor fireplaces, accompanied by orders and photos. But all proposed designs are based on a traditional English fireplace, which we suggest that beginners install. As an example, let's look at the relatively small model shown in the drawing and designed for a room with an area of 20-25 m².
Note. If your room has different dimensions, then the dimensions in the drawing can be changed in accordance with the table, only more accurately adjusted to the length and thickness of the brick (taking into account 5 mm seams).
The step-by-step stages of work are as follows:
- Preparation - choosing a location for the future hearth and purchasing building materials.
- Construction of a reliable foundation - reinforced concrete or brick foundation.
- Preparation of mortar and laying.
- Test ignition and warming up.
By design, fireplaces are divided into wall-mounted, corner and built-in. We chose the first option because of its simplicity of execution - the building is erected next to the existing wall. Making a corner model without proper experience is much more difficult, and to embed the structure into a partition, the latter will have to be disassembled.
The optimal placement of the fireplace is near the internal load-bearing wall or partition, closer to the center of the room. At the same time, try not to complicate the passage of the chimney pipe through the roof - make sure that it does not get into the ridge. On both sides of the fireplace, you need to provide at least 1 m of free space along the walls. The worst place for the fireplace is near the outer fence or next to the doors.
Advice. It is not recommended to place fireplaces in very small rooms up to 12 m². Moreover, it is not allowed to build them in apartments of multi-storey buildings. The way out is to install a gas or electric fireplace insert and make a cladding of decorative bricks and plasterboard, as shown in the diagram.
Necessary building materials
To assemble a fireplace yourself according to the drawing presented above, you need to prepare the following materials:
- ceramic solid brick – 300 pcs.;
- fireclay (fireproof) brick – 120 pcs.;
- chimney valve;
- dry building mixture for refractory masonry – 150 kg;
- ready-made clay-sand mixture for laying out ovens – 250 kg;
- metal equal angle corner 50 x 3 mm – 2.5 m;
- oven inspection door.
Red ceramic brick grade 150-200 is the main material used in the kiln business. Choose a solid stone of standard dimensions 250 x 120 x 65 mm without cracks, preferably with smooth sides. Low quality and used building materials cannot be used for laying fireplaces.
Fireclay bricks, used to form the fireboxes of wood and coal stoves, are produced in different sizes. A stone 250 x 124 x 65 mm of the ShA brand, laid on a special solution of refractory clay and mortar, will suit you.
Tip for saving material. Ordinary ceramic bricks can easily withstand temperatures of 700 °C, which corresponds to the heat generated by burning wood. Fireproof stones, whose price is significantly higher, are designed for a maximum temperature of 1690 °C. Hence the conclusion: if you do not plan to heat the fireplace every day, then feel free to make the combustion chamber from cheaper red brick.
Kiln masters know how to prepare masonry mortar from individual components - sand and clay (no cement is added!), intuitively selecting the exact proportions. Beginners have no choice but to build a fireplace using ready-made dry mixtures sold in stores. If you want to make the solution yourself, we strongly recommend that you first get your hands on simpler designs. For example, build an outdoor grill or barbecue, choosing the proportions experimentally to feel all the nuances of working with clay.
Setting up the foundation
Since the total mass of a brick fireplace exceeds 1 ton, it is impossible to do without a reliable foundation. It must be arranged separately from the foundation of the house, maintaining a minimum offset of 5 cm. If the fireplace is supposed to be built in a living room, then you will have to open the floor in an area that exceeds the dimensions of the future structure by 100 mm in each direction. For our example, the dimensions of the site will be 137 x 124 cm (according to the diagram given above, the dimensions of the building are 127 x 114 cm).
Construct a foundation for a fireplace according to the following step-by-step instructions:
- Dig a pit and compact the bottom thoroughly. The depth is determined by the existing foundation of the house.
- Place sand on the bottom and compact again. The final thickness of the pillow is 100 mm.
- Fill the pit to ground level with rubble stone. During the filling process, fill all cavities with liquid cement or lime mortar mixed with clay.
- Form a flat concrete platform on top and, after hardening, lay 2 layers of waterproofing made from ordinary roofing felt on it.
Note. Scraps of concrete, old brick, shell rock and other piece materials can be used as backfilling.
The second stage of laying the foundation can be done in two ways: pouring a reinforced concrete slab or laying a base of red brick. The first option, shown in the drawing, is more reliable and convenient for further construction, since a solid slab allows you to lay the wall anywhere on the site. It is implemented like this:
- Make and install wooden formwork to the height of the finished floor of the building so that the foundation slab protrudes beyond the dimensions of the future fireplace by 50 mm in all directions.
- Tie a mesh of iron reinforcement with a diameter of 12-16 mm and place it at a height of 5 cm from the roofing material, using small wooden linings.
- Prepare concrete grade 150 by mixing M400 cement, sand and crushed stone in proportions 1: 3: 5. Place the concrete mixture in the formwork and level the site according to the building level.
After 7 days of concrete hardening, remove the formwork and treat the foundation walls with bitumen mastic. Before laying out the fireplace, wait until the reinforced concrete slab has completely hardened (another 3 weeks), then cover it with 2 layers of roofing material and proceed to the laying itself. To avoid mistakes when laying the foundation, watch the video from the furnace master:
Fireplace rules
Laying a regular wall and the body of a fireplace made of brick are two different things. So before you build a home, familiarize yourself with the general rules for its construction:
- when making refractory and clay mortar, strictly observe the ratio of dry mixture and water indicated on the packaging by the manufacturer;
- First lay out the stones of each row dry, adjust and file according to the order, and only then place them on the mortar;
- Before placing the red brick in place, soak it in water for 3-5 minutes until air bubbles stop appearing;
- observe a maximum joint thickness of 5 mm;
- do not connect sections of masonry made of ceramic and fireclay bricks;
- constantly check the vertical at different points with a plumb line and the horizontal with a building level;
- When installing metal corners, a row of stones resting on it must be laid without mortar.
Note. It is not recommended to soak refractory stones, but only rinse them with water to remove dust, because the material releases moisture for a long time and may burst after kindling.
While working, bricks can be tapped, but moving them in a horizontal plane is extremely undesirable. Remove any bulging excess mortar with a trowel, and wipe the entire wall from the inside with a damp cloth to create a smooth surface. For a detailed description of the process, see the next video:
Work order
First of all, the foundation slab is covered with a sheet of galvanized roofing iron, and on top - with basalt cardboard. However, according to experts, the latter is successfully replaced by felt impregnated with liquid clay. The required set of masonry tools is shown in the figure.
The first two rows of ceramic bricks form the base of the fireplace and the firebox area; the 3rd and 4th rows form the hearth part of the firebox. Please note: in the order, red and fireclay stones are indicated in different colors. The fifth and subsequent rows (up to the 11th) form the walls of the combustion chamber and the outer contour of the portal.
After laying the 12th row of stones, install steel angles to support the front wall. The next levels form a smoke collector and a chimney tooth, as shown in the sequence diagram. On the 16th row, a cleaning door is built into the back wall.
The rows of bricks from the 17th to the 23rd form the body of the fireplace, and the remaining 3 levels form the chimney. On the 26th row, a valve is built into it.
Further laying of the chimney is carried out to the required height according to the same pattern, excluding the passage through the ceiling. Here it is necessary to lay out a special extension - cutting, whose task is to protect wooden structures from hot flue gases. According to fire safety rules, combustible flooring material must be protected by a brick wall 38 cm thick. All requirements for the chimney pipe, including its height, are reflected in the diagram:
In conclusion - trial lighting of the hearth
After the solution has dried, which will take 10-14 days, make the first kindling. It is important to follow one rule here: the entire masonry must be heated gradually so that cracks do not occur. Place a small armful of brushwood or wood chips on the bottom part, open the damper completely and set them on fire. Then add firewood in small portions over several hours, keeping an eye on the walls of the hearth and chimney. Record the appearance of cracks and then seal them with the same solution.
The finished fireplace can be decorated in various ways - plastered, decorated with tiles and tiles, or painted. Of course, provided that after complete heating it functions properly and the masonry has not developed large cracks. If you did everything according to the instructions and without haste, then commissioning will probably be without problems.
Choosing an installation location
Before building a brick fireplace stove with your own hands, plan its location. In a wooden building, separate the heating unit from the wall with a gasket made of asbestos, metal, or ceramic tiles. A fireplace stove in the center of the room is a great idea for zoning the space. It is better to turn the fireplace insert into the bedroom, and the cooking compartment into the kitchen. If space allows, use partitions. Make load-bearing walls from asbestos strips. Having chosen the shape and location of the structure for a brick house, “try on” it. Draw your markings on a paper plan or make a sketch on the ceiling, walls, and floor surfaces. Before starting work, perform the necessary calculations.