Relief is a special sculptural technique when the composition is created only partially in the form of a three-dimensional image on a plane. It is considered a separate subtype of art. Data on where the relief was first applied has not been preserved. It developed unevenly in Ancient Greece, India, Ancient Rome, Egypt and the countries of the Far East. One of the most famous examples of relief, which has survived to this day in a partially destroyed form, is the Pergamon Altar of Zeus, now located on the museum island in Berlin.
general characteristics
The monument is a structure with a wide staircase and a colonnade, under which there is a long panoramic relief. It depicts separate groups of people, animals and giants engaged in battle. Relief is classified into four types:
- Bas-relief. The sculptures protrude less than half above the flat background.
- High relief. The sculptures greatly extend beyond the background and are sometimes even partially separated from it.
- Counter-relief. It is a negative, that is, the composition is not convex, but concave.
- Ankre, or koylanaglyph. Only the outline of the image is cut out on a plane (usually a wall), that is, the composition is as concave as the counter-relief, but its depth is the same everywhere. This type is considered more primitive. It became widespread only in Ancient Egypt.
Bas-relief was rarely used in the interior of simple houses. Only very wealthy people who had real palaces at their disposal could afford it. More often, bas-reliefs were used to decorate the exteriors of Gothic-style houses and the interiors of cathedrals and churches. In modern interiors, decorating with such sculptural compositions has become accessible. You can even create a bas-relief yourself. We’ll talk further about the features of such sophisticated decor and how to make it yourself.
Bas-relief made of putty - technology, materials and instructions
A bas-relief is a decorative panel that protrudes above the main plane by no more than half its full volume. Since ancient times, relief images have decorated the pediments and walls of Greek temples and Roman palaces. In Russia they became popular at the beginning of the 19th century. Initially, only very rich people could decorate their homes with decorative moldings. Nowadays, knowing the manufacturing technology and having the necessary tools, everyone can make bas-reliefs from plaster and putty with their own hands.
Pros and cons of bas-relief
The bas-relief is made of wood, clay, alabaster, plaster or stone. The latter method is very labor-intensive and requires a high level of skill from the sculptor, since any mistake cannot be corrected. Bas-reliefs are created from wood by carving, and clay is the most accessible material, suitable even for beginners. They were still doing modeling during their school years. Bas-relief products, unlike ordinary sculptures, allow you to maintain a 1:1 scale and at the same time save on materials. After all, clay, for example, to sculpt a full-length person will require almost 60-70% less than to create a similar full-length statue. Previously, any types of reliefs decorated walls and ceilings and at the same time remained part of them, that is, the composition was static and could not be moved. Now you can make a small bas-relief on a special canvas stand and move it around the apartment if necessary.
Volumetric compositions are invariably associated with classical styles. Indeed, such decor would look appropriate in the design of the same name, Art Nouveau, Art Nouveau, Baroque, Rococo, Empire. But here we are talking about traditional sculptures, with soft lines and many small, elaborate details. In the center of the composition, as a rule, people, deities, mythical creatures or complex ornaments appear. A minimalist bas-relief will organically blend into the modern style:
- City panorama;
- A piece of forest;
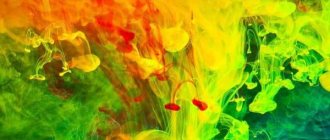
- Volumetric “swirls” of the shaken liquid;
- Imitation of an “old” layer of finishing or brick under crumbling plaster.
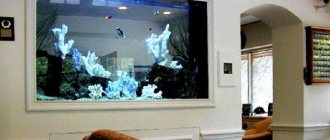
Three-dimensional images of schools of fish, skates, algae, coral “fields” and fantastic panoramas of Triton’s possessions are suitable for the marine style. Of course, a beginner will not be able to make such compositions the first time without errors. You will have to train and get better at it for a long time. This is perhaps the main drawback of the bas-relief. It is impossible to create it beautiful without spending a lot of time on learning the skill of a sculptor. The only exception will be abstract reliefs, which are suitable for the style of the same name or minimalism. Unlike decorative painting, bas-reliefs do not need additional highlighting with color. The backlight will perfectly highlight every line. This type of design is popular for decorating arches, fireplaces, openings and accent walls. With its help, you can intelligently disguise surface unevenness, hide communication lines, or distort the space in an irregularly shaped room.
The bas-relief perfectly emphasizes the peculiarity of the ethnic style, regardless of which country the interior “comes from”.
Italian motifs will be emphasized by vines and decorative columns or a three-dimensional landscape from a false window. The Japanese flavor will be complemented by a 3D sakura branch dotted with numerous flowers, and the Chinese will be complemented by a dragon with a grinning muzzle. Themed elephants on the walls and decorative sculptures of multi-armed Hindu deities will harmoniously blend into a house with elements traditional to India.
What can be decorated with bas-relief
For many people, when they think about bas-relief, photos of works by famous masters decorating the facades of buildings or the pedestals of statues immediately come to mind. However, even in the most ordinary apartment you can find many places and surfaces on which the bas-relief will look good.
- A small bas-relief will be an excellent decoration for the surface of various objects such as photo frames, mirrors, decorative panels and boxes. This type of finish can also be placed on cabinet doors, dresser drawers, and desks.
- Larger bas-reliefs can decorate doorways and the doors themselves, fireplaces, and the ends of large furniture.
- A wall is a suitable place even for a medium to large bas-relief. Daisies, galloping horses, a snow-covered tree or a flowing waterfall - incredibly beautiful compositions can look harmonious on the wall in any room, be it a dining room or a bedroom.
In addition to its decorative role, the bas-relief can also perform a practical function, for example, successfully mask uneven walls, utility lines, create a smooth transition from one functional area to another, or simply advantageously distort the space.
The bas-reliefs on the wall do not need additional painting - they are beautiful in themselves. However, sometimes after creation they are varnished or painted in order to emphasize individual elements of the picture or fit into a certain interior style.
USEFUL INFORMATION: Choosing ceramic tiles for the bathroom
Preparing for work
The bas-reliefs are made by hand. Of course, on the market for cheap decorative elements you can buy ready-made plaster stampings, but this will not add uniqueness to the design. Before you start working on your first full-fledged composition, you need to train your hand. It is most convenient to practice on clay, plaster or plaster. The materials are plastic and allow you to correct mistakes before they dry completely. The canvas will be plywood with a low wood frame. In rare cases, you can create a composition directly on a section of the wall. This option is suitable only for those sculptors who are firmly confident in their abilities. They also create large-scale panoramas directly on the wall, which would be simply inconvenient to hang after production on separate canvases. You also need to make standard forms for repeating elements ahead of time to reduce the labor intensity of the process.
For example, it is much easier to produce each berry of a grapevine in molds. These elements are often made of gypsum, but alabaster is considered the optimal material. We'll talk about where to get molds a little later. Instead of a stencil, regular cling film will be used. First, it is placed on a hard surface and the outline of the individual elements is drawn. Then the stencil will be applied to the composition and the same outlines will be transferred to a still soft and pliable base. Now let’s begin a short, general master class on creating a bas-relief for interior decoration.
Bas-relief technology
When making a bas-relief on a wall with your own hands, you should adhere to a simple technology that can be divided into several small stages.
Stage No. 1: First of all, it is necessary to determine where the bas-relief will be made, as well as its size;
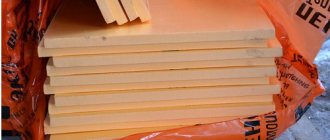
Stage No. 2: Selecting the material from which the bas-relief will be made: plaster, putty, alabaster;
Stage No. 3: Select a sketch or stencil for the future bas-relief;
Stage No. 4: Prepare tools and surface;
Stage No. 5: Transfer the sketch or stencil to the prepared surface;
Stage #6: Direct execution
bas-relief. The application of the sculpting itself requires great concentration and painstakingness. When making a bas-relief, you must remember that in the widest places of the future bas-relief, it is advisable to first fasten, for example, self-tapping screws or self-tapping screws according to the sketch. This creates a framing and strengthening effect to keep your sculpt stable. Cardboard can also serve as a kind of corsac, which simply needs to be modified with plaster or plaster. To obtain a solution, the material is diluted with water and applied to the “imprint” (left by a stencil, if you used one). Each layer is applied only when the previous one has dried. The last layer can be applied with a primer so that your composition does not fall apart;
Stage No. 7: Subsequent finishing if necessary.
Creating a bas-relief with your own hands
To make a bas-relief, you first need to prepare the base. In its role, “Marseille wax” or simple plaster is used. Using a spatula, apply the mixture to the wall or plywood canvas. First, they are leveled, and then they are given relief if necessary (with sponges, foam rubber, crumpled bags or pieces of fabric).
The next step is to transfer the design from the film stencil to the prepared canvas. The picture is applied to a section of the wall or plywood and the outline of the picture is pressed into the not yet completely hardened plaster. As a result, the primitive sketch is ready. Now you need to give it volume. To do this, mix the modeling mixture. Alabaster is optimal, since after complete hardening it is not inferior in strength to concrete. But plaster can crack, crumble and is afraid of water. Dry alabaster is mixed with water immediately before work until smooth. Then they begin to add volume to the applied pattern. This is not done immediately in one fell swoop, but gradually, layer by layer. Recesses can be made by scraping out part of the base or by applying additional “extra” layers to nearby objects. In certain places, pre-made elements in molds are attached to the canvas. If necessary, if the mass dries quickly and the work progresses slowly, it must be moistened with water.
When forming parts, not only tools are used, but also the sculptor’s fingers. After the work is completed, it is given time to dry. Then the composition is sanded using sandpaper, removing excess layers or smoothing out roughness.
General technology for creating bas-relief
It is better to start the first steps in mastering the technology of creating bas-reliefs with simple small-sized products, such as medallions. It is better to make the basis for relief stucco molding from plasterboard reinforced with a frame. Such a mobile composition can be easily moved from one room to another.
Regardless of the level of complexity, the process of making bas-reliefs using stencils consists of several main stages:
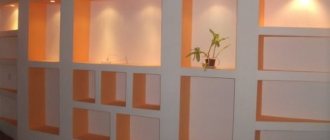
Bas-relief made using a stencil:
Wall mount
The problem of attaching the bas-relief to the base can be avoided if you sculpt it directly on the wall. In other cases, the composition is placed on liquid silicone or a special adhesive. If the relief was modular, then after fixing the joints, they are carefully rubbed down with putty. It is not recommended to decorate “flimsy” plasterboard walls with this decor. The base material must be reliable and strong. The joints between the bas-relief and the wall are also carefully masked. It is important to know. By the way, the modular composition is convenient for beginners. If unsuccessful, any of the relief components can be replaced without harm to it.
Making a mold for plaster with your own hands
Forms or molds can be bought in stores, but their range is not as wide as we would like. In addition, the standard mold will no longer be a unique part of the bas-relief. To make a mold yourself, you will first have to make a sample of the element. The technology is the same for all materials, but let’s consider one of the most popular recipes. For it you will need:
- Putty;
- Water;
- PVA glue.
As for the proportions, then for 500 gr. putties take 1 tbsp. a spoonful of glue and 100 gr. water. The mass is kneaded with the gradual addition of liquid. The result should be a material similar in consistency to hard dough or hard plasticine. Proportions may vary depending on the composition of the putty. Parts and elements are molded from the mass. In the process, you need to pay special attention to flaws that will be passed on to the mold. The stucco molding is given time to harden. 12 hours will be enough. Then, to make the mold, take:
- Set of self-tapping screws;
- Pieces of plywood for assembling the box;
- Liquid silicone.
A prefabricated box without a top is created from plywood using self-tapping screws. A sample of the element is placed in it and filled with silicone. Then the composition is allowed to harden. After which the walls of the box are unscrewed so as not to damage the mold, and a sample is fished out from its depths. The silicone mold is ready for reusable use.
In gypsum products, voids in the form of bubbles are often found. They can be modestly located inside the element or partially come out, thereby violating the integrity of the surface and spoiling the appearance. They can additionally be masked with a solution from which the main part of the bas-relief will be made.
If plaster is poured into the mold, then to avoid sticking, the mold is lubricated with vegetable oil.
Materials for creating a bas-relief
Bas-reliefs are rarely sculpted in plaster. This material hardens very quickly, which makes its subsequent processing difficult. Most often, when creating relief panels, gypsum putty mixtures containing special additives are used that make the work easier.
Each craftsman has his own favorite materials that allow him to create truly unique things. Those who are just starting to try their hand at it are recommended to use mixtures from the following list:
In addition to the base material, preparatory impregnations are required. They penetrate deeply into the mixture, preventing crumbling.
Important! Large relief panels are heavy, and if the base is not strong enough, the bas-relief may fall.
One of the best impregnating materials is Pufas moisture-protective primer concentrate. It is suitable not only for mineral substrates, but also for wood. For loose, powdery bases, it is better to use Aquastop.
Attention. Beginners cannot always dilute dry putty correctly the first time, so it is recommended to purchase a ready-to-use mixture. It is sold in sealed containers.
Useful tips
If the sculptor plans to create large bas-relief details, then for additional stability it is better to use wire. The frame will also simplify the sculpting process. The top of the bas-relief can be coated with a layer of primer or water-based paint. For alabaster, such a coating will only add gloss, but for more fragile plaster or sensitive plaster it will provide additional protection. While working, it is better to use a professional set of stacks that will help you create even the smallest details.
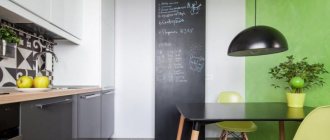
Choose the bas-relief not only to the style, but also to the character of the room. Culinary themes are suitable for the kitchen: voluminous still lifes, flower arrangements or panoramas of ancient cities. Stylish images of natural elements will look organic in the bedroom: bouquets, trees, animals. In a children's room, with the help of relief, you can create a real fairy tale, and its scenes decorate the entire perimeter of the room.
Professional decorators recommend not using false walls, arches or furniture to zone small studios. Bas-reliefs are perfect for these purposes; in combination with color differentiation, without further ado, they will make it clear where the functional zones are divided.
Bas-reliefs are not very often used in design. It is much easier to cover a wall with photo wallpaper with the desired image. Many people are intimidated by the complexity of the process. If you have patience, you can find hidden talents in yourself and decorate every room of your apartment with three-dimensional paintings, making its design original and unique. To get inspired, you can study the magnificent sculptures decorating Moscow's Bolshoi Theater or the numerous houses on the streets of St. Petersburg.
How to make a bas-relief on the wall with your own hands
Step-by-step instructions, which will allow you to understand how to make a bas-relief on the wall with your own hands, includes several mandatory points.
- Work on creating a bas-relief on the wall surface should begin with preparing a sketch. Print or draw the desired image in full size and evaluate how it looks in the interior. If everything suits you, you can proceed to further actions.
- Clean the surface on which the selected decorative element will be located. The best adhesion to gypsum occurs if the surface of the wall is first leveled, plastered and primed at least twice.
- Place a transparent thick film on the previously prepared drawing and trace the contours with a marker or pencil.
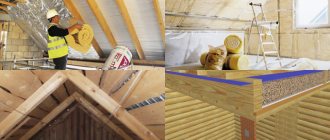
USEFUL INFORMATION: Drywall - how to fix it? Step-by-step instructions, screw and glue
- Place the film stencil on the treated wall and secure with masking tape. Trace the contours with a hard pencil so that the outlines of the future bas-relief remain on the putty surface of the wall.
- The most difficult and time-consuming stage is applying plaster or gypsum to the surface and creating a three-dimensional image. Small details can be worked out with brushes and even your fingers. Be patient!
- When the work on creating the bas-relief is completed, you need to let the plaster dry. Then you should sand your masterpiece to give it a finished shape. Finally, the surface of the product is coated with a primer or painted with water-based paint.