The use of interior partitions allows you to independently create the most comfortable conditions not only for living, but also for working at home. Essentially, these are structures necessary to perform zoning of a room. After even the simplest redevelopment of a room, you can easily create several separate rooms by reducing other rooms.
In the form of a partition, either mobile or stationary fixed structures usually act. They can be easily installed and dismantled without the help of professionals.
Collapsible partitions are usually used when zoning is necessary for rooms such as a bedroom and wardrobe or a kitchen and dining room. It can also be used to create a room for receiving guests in a large hallway. A huge number of different options can be seen in photos of partitions in magazines dedicated to interiors.
What should be the ideal partitions in a house?
Any partition made of plasterboard or any other material must meet a number of requirements.
Firstly, it must be as stable as possible and necessarily durable so that there is no danger for residents in the future.
Secondly, if you are thinking about how to make a decorative partition, you must understand that there should be absolutely no gaps on the surface, including in those places where it will adjoin another structure. Otherwise, various rodents and insects may appear.
Thirdly, it must withstand the required service life after installation.
Types of decorative partitions
Open zoning of a room with plasterboard partitions involves only a visual demarcation with a decorative false wall. This option is preferred if dividing one large room into two small ones is impractical, but it is necessary to zone it. The structural element is not capable of completely isolating areas of the room, but it allows you to clearly define the boundaries of functionally different areas.
There are many types of decorative partitions for zoning space in a room. Most often it is built:
- ledge adjacent to the wall;
- two identical structural elements starting from opposite walls;
- partitions of varying heights that do not reach the ceiling;
- semi-arch shaped bulkheads;
- false walls with niches, through shelves, columns.
The open type of delimitation allows you to place the partition anywhere, even in the center of the room: contact of the walls with the partition is not necessary at all. It can be divided into two components, one side being larger than the other.
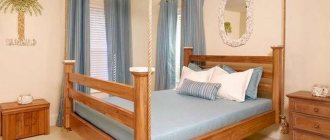
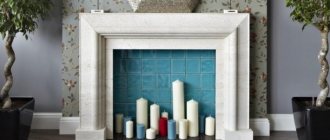
In such a structural element you can fit a fireplace, the flames of which will be visible on both sides, as well as an aquarium or terrarium. The partitions dividing the room into a sleeping area and a living room are made with an opening for the TV, shelves and bedside tables on one side and a beautifully designed frame for the head of the bed on the other.
Partition elements with an abundance of non-standard openings, equipped with neon or LED lighting, are interesting.
Curved bulkheads are not that easy to install. But if you know certain nuances, you can create even a complex partition structure with your own hands without the involvement of craftsmen. The installation is carried out in two stages.
Step-by-step plan for the first of them:
- Work begins in the same way as when assembling a rectangular frame base.
- After fixing the guides on the floor, walls and ceiling, you need to consult the drawing to select the location of the rack profile. It is necessary to identify the point farthest from the wall, from which the edge of the partition element becomes curved. There the rack profile is mounted. Additionally, jumpers are attached to give the partition stability.
- Some bulkheads can be so extravagant in appearance that there is nowhere to put the rack profile. To strengthen the metal frame, mount the rack diagonally. It is already possible to attach a jumper to it from the middle.
- When the frame frame of the bulkhead for demarcation is ready, you will need to take gypsum plasterboard, with which it is planned to veneer the sidewall of the partition element. First, the sheet is marked with a pencil, and then carefully cut with an electric jigsaw or other tool. Another gypsum board is formed in a similar way, with which the second side of the frame is lined.
- They sheathe one side of the frame, fixing it with screws at a distance of 150 mm. The sheet is also attached to all jumpers to give greater rigidity to the partition.
As a result, a partition element ready on one side is obtained to delimit the room.
Installation of the figured frame is the final stage. A guide must be installed along the inner edge of the plasterboard sheet. To do this, its ribs are cut to the base with a distance of 50–80 mm so that it bends well in different directions. V-shaped cuts are made to easily bend the profile inward.
Be very careful, because the profile bends quite easily under the pressure of the screw and you have to press it with your hand. It is necessary to hold the part not at the point where the hardware is screwed, otherwise there is a risk of piercing your hand.
Self-tapping screws press the sheet against the cut guide, forming a metal rim. Fastening is carried out in each petal or through one.
It is much easier to veneer the second side, since the rim from the profile is already installed. Therefore, the drywall is fixed to the frame and the “snake”. As a result, we get a shaped guide that completely follows the bend of the gypsum board.
According to a similar scheme, a plasterboard bulkhead with openings of various shapes is erected. They are also framed with a cut guide that can accurately follow any curves. If the “waviness” is insignificant, the drywall can easily take the required shape. You can use more flexible and less brittle arched gypsum boards. All that remains is to cover the seams with putty and prepare for decorative finishing.
Special Requirements
When looking for step-by-step instructions on how to make a partition, pay special attention to the fact that for various types of partitions erected in bathrooms, a particularly important factor is resistance to steam and, accordingly, moisture.
It is best if they are made from the most waterproof materials that will not allow the slightest ingress of moisture into your structure during operation. Recently, it has become especially popular to additionally cover the partition with high-quality waterproof material.
When creating partitions and other glass structures, do not forget about reliable and high-quality glass fittings. Which will allow you to perfectly perform your functions for a long time.
When creating an attic partition, special attention should be paid to the low weight of the structure, since the attic itself can withstand much less weight.
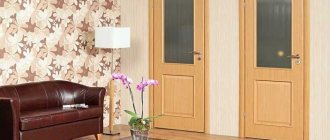
For additional illumination of a room located in the back of the house, you can install a classic wooden partition, carefully considering additional artificial lighting, or initially opt for a translucent partition.
If it is necessary to lay various communications in the future, such as chimneys or electrical wiring, it is best to choose an ordinary stationary partition with a slightly increased thickness for the house.
If you plan to divide a room into two zones that differ from each other, including temperature conditions, then you need to give preference to a partition with high thermal insulation.
In addition, an important point is that almost all systems require good soundproofing of the rooms. Massive structures or lightweight partitions can cope with this task without any problems, but only if they contain soundproofing material between the skins.
Ideas for partitions for zoning space - photo
Note! Fabric paintings - how to create them yourself? Instructions with ideas in the photo!
Let's discuss this article together:
Click to cancel reply.
Classification of partitions by purpose
If we talk about the classification of partitions depending on their purpose, then it is customary to distinguish two categories: home, office.
Office partitions are usually closed or open partitions that do not reach the ceiling in height. To create them, a plastic or aluminum frame is usually used, inside of which there is either wood or glass.
In order to divide a large area into several separate rooms, partitions are most often chosen to be solid and made of material with the greatest sound absorption.
If you need a partition to divide a room into several zones, you can use almost any material you like. Preference can also be given when choosing the type of structure: fixed or sliding. Typically, the passage in this case is either a door or an arch.
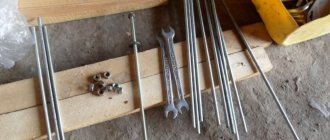
Constructing a partition from plasterboard with your own hands - step-by-step instructions
- spatulas;
- regular or laser level;
- gypsum board planes;
- metal scissors;
- roulette;
- hammer;
- screwdriver;
- hammer drill;
- metal ruler;
- marker.
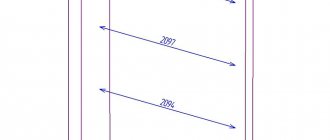
When erecting a partition from plasterboard, first of all, you need to mark out the room for installation according to a previously created drawing: Their disadvantages are low mechanical strength and a high fire hazard. And from an environmental point of view, this is not the best choice. Partitions made of plasterboard allow you to turn a large room into several small and functional ones: zone a child’s room, separate the kitchen from the living room or dining room, isolate the hallway in a studio apartment, hide the toilet in a combined bathroom. Covering the upper part of a door or window opening can be done in this way: mark the required length on the profile, adding 150 mm on each side. These will be kind of guides.
From the sides of the profile, we measure 45° angles according to the marks and cut along the cut line. Then we bend the outer parts towards the profiles to form a U-shaped structure. We put this blank on the racks with its bent ears, after which we raise it to the required height and fix it with self-tapping screws.
Installing a plasterboard partition does not require high professionalism, but to simplify the work, we offer step-by-step instructions that will help novice builders coordinate their actions. For a room 8x8 m with a ceiling height of 2.5 m, in which it is necessary to make a zoning (not completely separating the room, but only separating part of it) partition 5 m long, you will need
DIY photo of partitions
How to make a wooden interior partition in a room
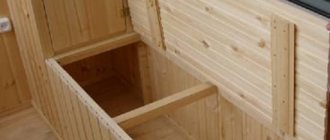
Wooden partitions are good only from an environmental point of view. Wood has low fire and moisture resistance, as well as insufficient sound insulation. They are beautiful and, due to their low weight, are easy to install.
- It is necessary to knock down a frame from boards selected according to the size of the opening. The boards should be 1 cm shorter.
- According to the prepared markings, nail 2 beams with a groove to the floor, the size of which corresponds to the thickness of the frame boards. A beam with a triangular cross-section is attached to the ceiling.
- The frame must be inserted into the groove between the lower bars. Fix it and attach it to the top beam.
- The frame can be sheathed with clapboard, plywood, and boards. During the upholstery process, a place for the doorway is formed, the door frame and doors are installed.
Types of materials for partitions
Before choosing the material for making a partition with your own hands, you should decide what functions the new wall should have. If it is necessary to clearly delineate space and suppress noise, it is better to choose foam concrete or brick. However, the latter weighs quite a lot, so it is practically not used in everyday life in apartments. But if a partition is installed in a house for the purpose of decorating and zoning the space, you may prefer glass blocks. They have different designs, colors, shapes and textures.
Brick systems
Interior partitions in the attic cannot be made of brick, since its weight is so great that it can create a huge load on the floor. Brick can be used to build a wall in a private house on the ground floor or in the basement.
The wall turns out to be reliable, copes well with noise reduction and is characterized by a long service life. But the cost of material and masonry work is quite high, which is further aggravated by the need to carry out decorative work. Otherwise, the brick holds fasteners well, so it can be used as part of a partition for hanging heavy objects, which cannot be said about structures made of lightweight and cellular concrete or plasterboard.
Foam concrete
Modern production produces foam blocks specially designed for the construction of partitions. It is cheaper than the structural version, but provides the necessary reliability. When carrying out masonry work with your own hands, you will be able to complete the construction in a short time.
Foam blocks are also good because they have ideal geometric parameters, so working with them is quite simple. The material does not have such an impressive weight, so the partition can be made with your own hands without creating a solid base.
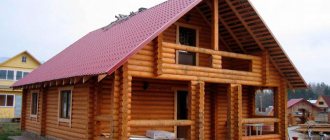
An additional advantage of such interior partitions is their low thermal conductivity. The material is fire-resistant, which is especially important in a log house built from fire-hazardous material.
Gypsum blocks
You can also make a partition in a one-room apartment from gypsum tongue-and-groove blocks. They are quite easy to assemble, have voids inside to make the structure lighter, and are also moisture resistant. This is especially true when you need to make a partition in a bathroom or kitchen, where operating conditions are characterized by high humidity and constant temperature changes.
Such interior partitions do not shrink, which means that finishing work can begin immediately after their construction. Interior partitions made of gypsum boards promote normal air microcirculation. You can even find shungite blocks on sale that can neutralize electromagnetic waves emanating from household electrical appliances.
Drywall
You can also make a partition in a one-room apartment from plasterboard. It is installed on the frame and then finished with any of the selected materials. In apartments, such lightweight walls are built most often, since their construction technology is not complicated. Using sheet material, you can easily level the frame, which is then immediately painted, finished with wallpaper or decorative stone.
?????
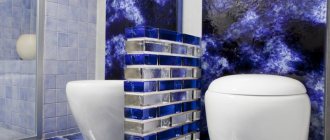
Glass blocks
You can also make a partition between rooms from glass blocks. They transmit light by 80%, look modern, and do not visually burden the space. You can also make a partition from this material in the shower. The blocks are not at all afraid of water, are easy to care for and do not create a favorable environment for the occurrence and development of fungus and mold. Glass blocks in bathrooms usually separate the shower from the rest of the room. This is true when the house has a sump installed or there is a sewer drain in the floor.