The decoupage technique has been known since time immemorial; Even in the Middle Ages, Venetian masters successfully mastered it, adopting the art of decorating furniture with carved images from their Chinese colleagues. Nowadays, decoupage is associated with interiors in the Provence style, shabby chic, with palace interiors in the spirit of Baroque, Rococo, and classical design. This is due to the fact that the technique is used to update old furniture or give new pieces of furniture an aged effect. In both cases, chairs, sideboards, coffee tables, chests of drawers, cabinets and stools acquire individuality, and sometimes a new life.
Types of decoupage
The basic principle of decoupage is gluing the prepared surface with different materials, followed by varnishing. However, this technique has several subtypes. Some of them require certain skills, others are quite accessible to beginners who dream of restoring or simply decorating furniture with their own hands. The following are used as finishing decorative materials:
- wallpaper;
- textile;
- napkins and decoupage cards;
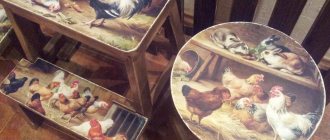
- drawings printed on a regular or 3D printer, clippings from magazines, newspapers (as in the photo below).
Decoupage techniques
There are five main types of decoupage:
- Direct (the image is glued to the outside of the thing or object being decorated).
- Reverse (used to decorate transparent glass surfaces, in this case the picture is glued with the front side to the back side of the glass object).
- Volumetric (some of the decorative elements are deliberately made higher than all the others; for this, many layers of decoupage fragments or special modeling masses are used).
- Smoky (this type of decoupage is to imitate artistic painting, the border between the image and the surface is almost invisible, a smoky halo appears around the picture).
- Decopatch (the entire surface of the object is covered with paper pieces of different textured materials - napkins, corrugated paper, sheet paper, etc.)
The choice of decoupage technique depends on the decorator’s idea and the style of design of the entire room into which decoupaged items will be “introduced.”
The process of decoupage furniture with wallpaper
Regardless of the chosen technique and method of decoupage, the surface must first be prepared by walking over it with a grinding machine or treating it with sandpaper. This is done in order to remove paint and varnish when restoring old furniture. If necessary, a solvent is used. Cracks and chips are treated with putty. If you plan to create a collage from pieces of different wallpaper with gaps, you need to apply background paint to the prepared surface.
If you plan to cover large areas, the fronts of dresser drawers, countertops, or the inner wall of a shelving unit, you can do without paint. The wallpaper is glued with wallpaper glue and carefully smoothed with a roller or a clean cloth, starting from the center towards the edges. After the glue has completely dried, several layers of varnish can be applied to the wallpaper.
You can update a coffee table with your own hands without using acrylic: just cut out a suitable piece of wallpaper and place it on the tabletop, and then cover it with glass. This option is suitable for those who have not yet mastered the art of decoupage or are not sure of the correctness of the decision. If desired, the table can be quickly returned to its original appearance.
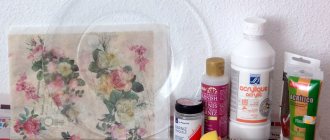
Necessary tool
Before you begin the process of updating or decorating, you need to stock up on materials for decoupaging furniture: napkins with all kinds of motifs, pieces of wallpaper or fabric.
The following tools will be required:
- Special scissors for decoupage or manicure with sharp tips, a stationery knife.
- Brushes of different widths: small for fine work and wider for treating large areas.
- Sandpaper for leveling surfaces, removing roughness and pre-sanding the varnish layer.
You will need PVA glue for napkins or fabric; if the decoupage technique is performed with wallpaper, then wallpaper glue. The varnish is chosen according to the desired result: matte or glossy, acrylic or water-based.
If you plan to create a three-dimensional drawing or tint, you will need modeling paste or putty and paints. In addition, in the process of preparing surfaces, a primer is used, and if painting is necessary, aerosol paint is used.
How to make decoupage with fabric with your own hands?
Since fabric is very different in structure and other characteristics from paper, updating sideboards and chests of drawers with pieces of fabric requires a special approach. You should carefully consider the future composition, arrange the scraps according to colors and prints so that the final picture looks harmonious, not clumsy, and fits well into the interior of the room.
Updating a table, chest of drawers or cabinets begins with removing old paint using a solvent. Then the surface is sanded, leveled, primed or painted. PVA glue is applied to the furniture, and pieces of fabric are impregnated with special glue for decoupage and carefully glued to pre-designated areas. The fabric is repeatedly treated with glue from a spray bottle, then the future masterpiece is allowed to dry and covered with 3-4 layers of acrylic varnish.
An alternative to decoupage using fabric is stencil painting of old furniture. In this case, instead of a stencil, you can use old lace, tulle and other openwork materials.
LiveInternetLiveInternet
Quote from MOLODA_I
Read in full In your quotation book or community!
DECOUPAGE OF A TABLE WITH ELEGANT FABRIC (master class)
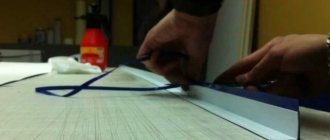
If you are no longer happy with the look of an old wooden table, and you don’t want to cover it with cheap oilcloth, then we offer a wonderful idea for restoring a table with your own hands - decorating the tabletop with a beautiful scarf or fabric. The costs of such a modification are minimal, and the appearance of the new table will please you for a long time. DIY table decoupage with fabric - master class.
You will need: *Wooden table *A scarf with a cool print slightly larger than the size of the tabletop or a piece of beautiful fabric *Iron *Stain *PVA glue *Wood varnish *Brushes. If you are decorating an old table, then you need to remove the old covering and sand the surface. Apply stain to the back of the table top and to the table legs. There is no need to apply stain to the top of the countertop.
When the table surface is prepared, take a scarf and iron it thoroughly with an iron. Then glue the scarf to the tabletop. Move the glue brush from the center to the edges, straightening the design and all folds in the fabric. Don't forget to tuck the edges of the fabric under the tabletop. Dry.
It is advisable to dry it outside. Tape the folded edges of the fabric well.
When the glue is completely dry, apply 6-7 thin layers of varnish. Before applying the next coat of varnish, let the previous one dry. The varnish will finally dry and the smell will disappear after 3-4 days. Now you can enjoy aromatic coffee or tea at your new beautiful table!
Making a table decoupage with fabric with your own hands is not a difficult task, but even very exciting; the end result is always interesting! Another advantage is the minimum amount of costs: a beautiful scarf can be bought at a second-hand store, a table can also be bought at a sale or second-hand. And if you are a fighter for the second, third, twentieth life of objects and the use of imagination in the most unusual places, then the result will please you. The varnish coating of the table is durable and practical, it can be washed, wiped with a damp cloth, put dishes on, but without fanaticism, it is better not to put a hot frying pan off the stove! Good luck with your rework and creative inspiration! SOURCE: https://rukami.yourarticles.ru/
Series of messages "DECOUPAGE":
Part 1 - TECHNIQUE OF DECOUPAGE PLATES Part 2 - SOLVING PROBLEMS WITH DECOUPAGE ... Part 4 - MASTER CLASS ON DECOUPAGE WITH PRINTING AND "PORCELAIN" CRACKELURES Part 5 - VOLUME PAINTING WITHOUT PUTTY Part 6 - DECOUPAGE STO LA WITH ELEGANT FABRIC ( Master Class)
Series of messages “FURNITURE”:
Part 1 - INSTRUCTIONS FOR SAFELY PAINTING FURNITURE Part 2 - CABINETS AROUND THE WINDOW - 10 INTERIOR IDEAS Part 3 - 20 GENIUS IDEAS FOR YOUR BALCONY Part 4 - DECORATING BEDTIME STANDBANDS WITH MIRRORS (interesting!) Part 5 - DECOUPAGE TABLE FABRIC (master class)
Decoupage technique with napkins and special cards
The process of decorating using napkins or cards is simple and suitable for beginners. Classic techniques for restoring old and personalizing new furniture are used for processing dishes, glass surfaces, various containers (caskets, boxes), decorating cards, Easter eggs and homemade accessories.
You can use multi-layer napkins with pictures or professional cards for decoupage. The napkins are divided into layers, and the layer on which the images are printed is selected. The designs are cut out with nail scissors or torn out by hand (the process goes much faster if you have decoupage cards in your hands) and applied to the prepared surface (wood, cardboard, metal, plywood, chipboard), treated with PVA glue. The designs are smoothed with a brush, roller or dry, clean cloth, dried and varnished (when decorating Easter eggs, it is recommended to use egg yolk).
The process of decoupaging furniture with newspaper clippings, printouts of paintings and plots (the latter are best done on thin carbon paper) is similar to decorating with napkins and special cards.
Decorating furniture with wallpaper
Decoupage of furniture is done not only with napkins or decoupage cards. Wallpaper is also used for restoration. To see how to decoupage a table with wallpaper, we offer an interesting master class for beginners. Using this technique you can create decoupage of a coffee table. This uses much less material. So, you will need the following additional items, in addition to wallpaper:
- decoupage glue;
- acrylic based varnish;
- brush and foam roller;
- sandpaper;
- scissors.
Read
Creating volumetric decoupage using various materials
Before you start creating table decoupage or coffee table decoupage, you need to sand the entire surface of the furniture to give it a smooth look.
Since the table decoupage will be done with wallpaper, measure the required length. There should be a few extra centimeters left in stock.
Apply glue to the entire surface of the table and the inside of the wallpaper. This process is shown in detail in the photo.
It is necessary to carefully align the pasted wallpaper. You must get rid of air bubbles and wrinkles that have formed. To do this, use a roller. Do the work slowly and with careful movements. Otherwise, you may damage the base material. Furniture decoupage continues.
When the surface has dried a little, you need to sand the edges of the table. After this, apply acrylic varnish, which protects the furniture from external mechanical damage. This master class was not difficult, so for beginners it will be easy to repeat. The result is an updated table that will serve your family for many more years. In the video you can see how to make decoupage of a coffee table with your own hands.
Some techniques and types of decoupage
Over the entire existence of the art of decorating surfaces with glued patterns, the following varieties of decoupage have appeared:
- classical;
- volume;
- smoky or artistic;
- back;
- decopatch.
Classic decoupage involves applying napkins or cards with drawings to the surface of furniture using a dry, wet or hot method. After the glue has dried, the picture can be tinted, given various effects, and then covered with acrylic varnish.
Volumetric decoupage is performed using stencils and drawings printed on a 3D printer, napkins, fabric, and various additional materials (modeling pastes, gels, putties, paints). The effect of depth is achieved by drawing the background and shadows and requires a high level of artistic skill from the performer.
Artistic decoupage also involves the use of special paints for the background and processing of the design itself. The surface of the furniture is painted in several tones, the paints are mixed to give the image a vague, fuzzy, airy feeling. It is not for nothing that this technique is called smoky, since mixing pastels and acrylic paints creates the effect of a real painting with a deep background, as if filled with clouds of colored smoke.
Reverse decoupage differs from classic decoupage in the sequence of actions: a pattern is applied to a transparent surface, then the glass is primed and varnished. In this way, transparent doors of kitchen cabinets, sideboards, and decorative dishes are updated.
Decopatch is a tandem of patchwork and decoupage techniques. Pieces of special paper imitating stone, fur, fabric, other textures and materials, as well as old newspapers are glued close to each other or overlapping, creating a background picture with stunning effects. After the glue has dried, the decor is varnished.
We use fabric in decoupage instead of napkins using the example of decorating a tea house
This master class can be called “textile decoupage”. For a long time I tried to learn how to do decoupage, but unfortunately I lacked accuracy in working with the thinnest napkins, which tore, crawled and did not want to look beautiful on the surface being decorated. Maybe I just lacked the skill or I did something wrong, I don’t know, but one day I came across a master class at the Crafts Fair, where a woman decorated an old tabletop with beautiful fabric. Based on this idea, I decided to use textiles in the decoupage of my tea house. Please don’t judge harshly, I don’t think I discovered America, but this is my first master class in my life. This technique, I think, is suitable for beginners. So, for work we will need: 1. Fabric of two shades - for the roof and for the walls of the house (in my case it is cotton), but in general any fabric will do, from the finest silk to burlap. 2. PVA glue. 3. Brush (any brush, I have a thin, regular pony). 4. Ruler. 5. Decoupage varnish 6. Acrylic paints (in case you decide to paint the inside of the house). 7. Scissors and stationery knife. 8. Blank for decoupage. In my case, this is a tea house.
I assembled the house and glued it together using Crystal Moment glue. After that, the inside was painted a soft lavender color. This color can be obtained by mixing 2 parts white paint, 1 part red and 1 part blue paint.
After drying, I coated the inside of the house with varnish and set to work on the cladding. I chose two scraps of fabric I liked from my supplies and, having measured the length and width of all the walls of the house and adding 5 mm for the seam, I cut off the scraps of the length and width I needed.
I did not use primer, since my fabric had sufficient density, and the dark edges from the laser cutting of the workpiece were not visible. Next, having coated one side of the house with PVA glue, I glued the fabric to it.
Here it is important to smooth everything out well and stretch it, without fear that the fabric will tear. Make sure that no bubbles or wrinkles form. In this way we glue all 4 sides of the house. Glue the remaining 5 mm of the seam with an overlap and carefully smooth it out.
We dry our workpiece, and after drying we cut off the excess fabric, freeing up the hole for the bags
After this, we coat the house with varnish. We do the same procedure with our roof.
Ready!
If desired, you can glue decorative elements to the house. If something goes wrong in the work, we simply tear off the fabric “in one piece,” quickly and with little effort, and work on the decoration in a new way, taking into account the mistakes. This trick will not work with napkins - removing the glued napkin and after coating with varnish will take much more time. I also attach a photo of a tea box with decoupage using the same textile method.
Happy creativity!
Artistic processing with different effects
For craftsmen who have mastered various DIY renovation and restoration techniques, it will be interesting to learn how to make tables, cabinets and cribs even more elegant and sophisticated. Thus, the following artistic processing methods are combined with decoration using the decoupage technique:
- toning (applying layers of colored paint to give the drawings a special shade);
- patination (imitation of a thing “with history” using black, colored, dark patina on corners, edges, places of contact with human hands);
- aging (artificial creation of abrasions, a retro effect using wax and sandpaper);
- gilding (coating the design with gold, silver, bronze paint, giving the piece of furniture a luxurious and exclusive look);
- craquelure (creates the effect of a coating cracked by time, for which a special varnish is applied to the design on top of or between two layers of paint).
Materials for decoupage
Decoupage does not require a lot of materials.
Having paper pictures and suitable glue, you can get a wonderful decorative element. There is also a small nuance - to give individuality and nobility to products decorated using the decoupage technique, additional materials may be needed.
Application of paper
Favorite pictures from postcards, colorful magazines, labels and even wallpaper - all this can become an object that is pasted during decoupage. In the skillful hands of decorators, calendars, newspaper notes, and wrapping paper can find their second life as a decorative element.
Helper napkins
The main materials that are affordable in price, quality, and variety are paper napkins. You can use regular three-layer napkins and small four-layer paper handkerchiefs. These napkins are sold both in hardware supermarkets and in specialized handicraft shops. When purchasing napkins from “craft supplies”, you can buy them individually, choosing the only one that you need according to your creative plan.
Cards for decoupage
There are also special glossy cards with drawings on sale - thematic sheets of paper of different sizes, which are grouped into so-called decoupage cards. These “helpers” for needlewomen can be produced in a double-sided version (for reverse decoupage) and in several identical copies (to add volume).
The advantages of decoupage cards are that they practically do not tear when wet, and almost do not change size when gluing. If napkins are glued mainly to a light surface, then fragments of decoupage cards can also be used on dark surfaces. The cards are very elastic and resistant to friction.
Textured paper
You can use rice paper to decoupage large and glass surfaces. It is easy to use and even a novice needlewoman can handle it. The only requirement when working with it is not to cut out fragments, but to tear them out. The paper is fibrous and lays easily on the surface. The raw material for its production is rice straw.
Rice paper napkins will give the product an original and unusual look, because... they completely repeat the shape of the object (due to the fibrous structure).
There is also mulberry and banana paper, which are also loved by decoupage artists. Rough and loose, such paper includes various inclusions; it is used in background and textured coatings.
Glue
To make the decoupage product look neat and high quality, you need to purchase water-based glue. Of course, it is best to use specially developed glue, but in the absence of one, you can use regular PVA.
Surface coating materials
For painting and aging surfaces use:
- acrylic and oil paints;
- pigments;
- metallized pastes;
- bitumen.
To make the coating look like gold plated gold leaf and metallized foil are used.
The materials used by decoupage masters are not limited to those listed above; in fact, there are much more of them.
Master class on furniture decoupage for beginners
Decoupage is a universal technique that is accessible even to untrained beginners. With the help of simple techniques, you can update furniture with your own hands, disguise small defects, and add special chic and flavor to inconspicuous and faceless pieces of furniture, even new ones. For decoration, you can choose any drawings and motifs, which will allow you to make a table or cabinet using the decoupage technique an organic element of the interior in the style of Art Nouveau, Provence, retro, classic, ethno, country, modern or oriental apartment design. It is recommended to start mastering the technique with the simplest method of decoration using napkins.
Materials and tools
To decorate wooden furniture with napkins you will need the following supplies:
- the napkins themselves or printed drawings;
- scissors with sharp blades (special, manicure or medical) and a sharp scalpel (for applications made of thick paper);
- glue (PVA, wallpaper, egg white or special for decoupage);
- acrylic lacquer;
- putty or primer;
- acrylic paints, pastels, tinting paints for backgrounds;
- brushes (for glue, varnish, paints);
- solvent, grinding machine and sandpaper for surface preparation;
- sponge, napkin or roller for smoothing the pattern.
Step-by-step instruction
The master class on decoupage of a cabinet door or wooden tabletop includes the following steps:
- Surface treatment with solvent (removal of old paint), sanding (removal of varnish, uneven surfaces).
- Apply primer or putty to level the background, fill cracks and chips with wax.
- If desired, the surface is painted in a pre-selected shade with acrylic paint (it is better to choose a light tone, since the translucent napkin will be invisible against a dark background).
- The top layer with the pattern is separated from the napkin, it is cut out with scissors or torn out by hand.
- The glue can be applied in two ways: on the surface of the furniture or on the back of a napkin. In any case, the design is saturated with glue and then carefully smoothed with a brush or roller.
- After the glue has dried, acrylic varnish is applied in 3-4 layers with intermediate drying. For the first experiment, it is better to choose an aerosol can.
The good thing about decoupage is that this technique can be improved, each time introducing new creative ideas into the process and achieving unusual visual effects. Any theme, plots, style - applications on furniture will help you realize your wildest fantasies at minimal cost.
I like 0
Decoupage Furniture decoupage Furniture Furniture restoration Furniture restoration Handicrafts Handmade Interior Interior design Design
Related Posts
leave a comment
Only 3 comments.
153759vlad
with us 2 years, 2 months, 27 days
2019-05-21 10:32:46For such work, you still need a 2 mm PVC edge, you can find it in Nison and then all the corners and bends will be easier to make, judging from my experience, but this is an option
153759vlad
with us 2 years, 2 months, 27 days
2019-04-28 13:33:33beauty and how much painstaking work
Alina
with us 2 years, 11 months, 30 days
2018-07-27 14:03:04Thank you for the interesting information. I also do decoupage, I like to give a second life to old furniture. A fun activity that develops your imagination and helps you take your mind off the daily hustle and bustle. At first I was faced with the problem of removing varnish from furniture, I didn’t know how best to remove it, sometimes I used acetone, the smell of course was not the best. My husband, seeing that I couldn’t do it, brought me a solvent from work, I don’t remember the number, but it became easier to work with. His team, which works in the leather and footwear industry, always purchases everything they need for their work on the DCP website https://www.dcpt.ru/ This enterprise is one of the oldest in the industry of production of products for paint and varnish, rubber butyl acetate and food acetic acid , so they are famous for quality.
Decoupage of kitchen furniture
To understand all the nuances of the process, you need to start with simple decoration. You can decoupage furniture in the Provence style with your own hands using paper napkins with the image of a bouquet of flowers.
To make the master class complete, you should consider all types of surfaces and techniques for working with them.
Surface preparation
High-quality surface preparation is the key to a positive result.
If you are decorating a wooden wall, old chips, knots, and holes cannot be avoided. Therefore, it is necessary to first putty all visible imperfections. Then the surface is carefully sanded with sandpaper. First the coarser spray, then the finest. The preparation of the wooden surface ends with the application of a wood primer.
If the design will be glued to plastic or glass furniture, it is important to degrease it with alcohol or dishwashing detergent and lightly sand it. For primer, it is better to use acrylic art or automotive primer.
Metal furniture must be degreased, sanded and be sure to get rid of old rust. Citric acid and soda, vinegar will help with this, but it is best to purchase a special solvent. Metal is primed using the same means as plastic (glass).
Preparing the drawing and applying glue
For beginning craftswomen, cutting out beautiful patterns with uneven edges and all sorts of elements can be quite difficult. The napkins are thin, so you need to handle them carefully. In our case, a floral motif is used.
To cut out small leaves and branches, use scissors with sharp ends, directing the cut from the edge deep into the design and so on around the entire perimeter.
You need to apply the glue with a soft brush to the back side of the element, after which it is applied to the surface intended for decoration. After gluing with the same brush, the paper is leveled, small folds and air bubbles are removed.
Surface varnishing
After the image has completely dried, you need to coat it with varnish to protect it from the external environment, as well as for decorative purposes. Varnishing is carried out in several layers, with an interval of 1 hour.
Varieties
Since its inception, the discussed decoration technique has not only gained great popularity, but has also changed somewhat. Combining and experimenting, people introduced new elements into it. This is how several directions appeared, each of which has its own characteristics.
Based on
The decoupage technique uses completely different motifs. The main ones can be identified as follows:
- Landscape. There is often a whole story hidden in an image. If possible, such pictures should be glued to the entire product. Boundaries must be clearly defined.
- Flowers. The most common motif in decoupage. To make the image look good on furniture, you need to choose options with a light background. Size is no less important - a picture that is too small will be lost on the product.
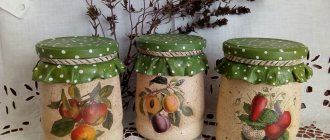
- Fruits, berries, vegetables and mushrooms. Napkins with similar images are often used to decorate kitchen cabinets.
- Religious motives. The faces of saints can be used to make icons.
- Historical. Motifs such as antique, Gothic, Romanesque reflect styles that arose at different times. For work, napkins, clay, mosaics, leather, and metal fittings are usually used.
- Pastel shades. The most versatile option that will fit into most classic styles.
The image of a grapevine is popular. Such motifs are appropriate in a country house or in a country house decorated in country or Provence style.
Scenery
Flowers
Fruits Religious motives
Historical subjects
Pastel shades
By style
There are several styles in decoupage:
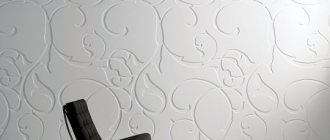
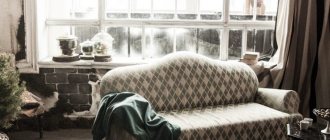
- Shabby chic. Translated it means “shabby chic”. As you can guess from the name, the main features of this trend are the worn surface and cracked paint - craquelure. In combination with pastel colors and romantic motifs, this technique gives the furniture a special charm. The style is characterized by a light or white background, images of roses, angels and floral patterns. Craquelure or regular paint is used as a base.
- Victorian. Luxurious and pretentious style, which combines several directions at once. It is characterized by gilding, a dark background and natural wood. Victorian style in decoupage is often complemented by gilded and voluminous elements.
- Provence. A common trend, the characteristic features of which are images of lavender, grapes and flowers in pastel colors. The basis is taken from bleached wood, often aged.
- Semple City or "simple city". This type is characterized by the use of newspaper clippings and pictures with torn edges. This style does not require clear boundaries, which is why it is often chosen for modern, vibrant experiments.
- French vintage. It combines different directions, but at the same time maintains simplicity and sophistication. For decoupage in this style, you need to choose light shades and simple images.
Although Provence and shabby chic styles are very similar, they are not the same direction. They differ in shades and the presence or absence of gilding.
Shabby chic
Victorian style
Provence
Semple City
French vintage
By technique
There are several types of decoupage based on the technique used:
- Straight. The simplest style is gluing an image to a surface. The picture can be cut out from paper, printout or napkin. You can glue the image onto glass, wood, ceramics, and plastic. The surface can be pre-painted.
- Volume. This technique uses a combination of classic decoupage and volumetric elements. You can paste the image onto a ready-made relief or form it yourself using paper, fabric and other materials. Creating a decorative item in this direction requires creativity.
- Art. The image is glued to the surface and then completed with paints. This way you can make the picture brighter, more voluminous and more naturalistic. Drawing requires certain skills, so this type of decoupage is suitable only for professional artists.
- Back. In this case, the image is glued to the back of the object; accordingly, this decoupage is only suitable for transparent products. The technique looks unusual, creating a feeling of a three-dimensional pattern.
- Decopatch. In this technique, furniture is covered with pieces of paper not partially, but completely. In this case, many fragments are used, which, when combined with one another, form a real picture.
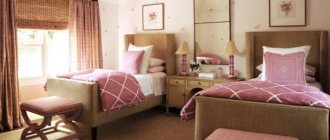
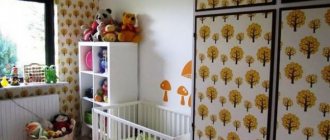
Features of furniture for a children's room for boys of different ages
Some types of decoration are available only to people with professional art education or a high level of skill, for example, artistic and volumetric decoupage. For beginners, it is better to start with a direct technique or decopatch, only then can they move on to more complex work.
Straight
Volume
Art
Back
Decopatch
Solid decoupage
This type of decoupage is the simplest and most popular. There is no need to cut out pictures or thin the paper, since the entire surface is covered. Any material is suitable - an old book, newspaper, wallpaper, posters or even fabric, but nevertheless the furniture does not look rough, but rather looks like a designer’s whim.
The only point is that if you decide to cover a large surface with small sheets, then it is still better to thin out the edges of the paper. Here, thinning comes down to the fact that the edges of the sheets need to be torn off, and not cut with scissors. This way it turns out more natural and there are no sharp transitions that make the surface rough and sloppy.
As you can see, decoupage is very multifaceted. There are no special rules and you can paste over any surface - a kitchen cabinet or a coffee table. The main thing is to select quality materials and take your time.