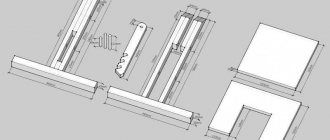
Sharp cat claws often cause problems for the owner if his pet does not leave the apartment. Not everyone knows how to trim their claws on their own, especially since during this procedure the animal can be seriously injured. Therefore, the best way out of the situation is to purchase or make a scratching post for your cat with your own hands. Let's find out how to properly organize this process at home.
What is a scratching post for?
The simplest reason that a cat sharpens its claws is the need to hunt, despite the fact that pets no longer have to get food on their own.
No less interesting is the hypothesis about the relationship between cat health and the claw scratching procedure. There is an opinion that here we are talking about a kind of exercise for the whole body. The surface on which the cat rests acts as a training device. All muscles and bones of the skeleton take part in the process.
The next reason also concerns health. There are many nerve endings and blood vessels leading to the ends of the paws, pads and claws. By scratching, the cat massages sensitive areas, raises its tone and even gets pleasure. Often, a cat, stretching on a scratching post, purrs contentedly, as if such training gives him pleasure.
There is an opinion about the stress factor - a cat uses even a primitive scratch in order to get rid of negative “emotions”.
Veterinarians believe that with the help of a nail polisher, animals renew their claws and thus prevent the possible development of inflammatory processes in the paw pads.
This is interesting! A cat's skeleton consists of 240 bones, while a human's has 212.
How to make a cat scratcher from brushes
Where do cats often itch? Of course, where people live! The kitchen is rightfully considered the most inhabited place in the house. Notice how the cat leans on the legs of the table and chairs. Let's take advantage of this and screw it on for our beloved pet... brushes. Yes, yes, the most ordinary brushes. Surely the mustachioed-striped one will appreciate such self-care. The brushes are screwed at cheek level or slightly higher. An outer corner or table leg is suitable for this. Better than a table: unlike a chair, it will not move under the weight of a cat.
What materials to make it from?
In order to make a scratching post for a cat yourself, you need to prepare drawings. Wood, fabric, rope and cardboard can be used as materials for a scratching post.
Wooden scratching post
You can make a wooden scratching post with your own hands in one of the following ways:
- Any snag or small cut of a trunk is an excellent sharpener for cat claws.
- A wooden beam wrapped with thick jute rope is a typical example of an industrial scratching post.
The only serious requirement is matching the diameter or cross-section. The cat should rest its two front paws comfortably on the surface.
DIY scratching post made of cardboard
The cardboard scratching post should be horizontal. The cat stands on it with all four paws, although traditionally it pays more attention to the two front ones. Sometimes they make combined versions in two planes - both under the feet and a small column.
You can make a scratching post with your own hands from corrugated cardboard, which was left over after purchasing large household appliances (refrigerator, stove) or electronics (TVs).
The easiest way to quickly make a scratching post for a kitten is as follows:
- Cut the corrugated cardboard into equal strips 5-6 cm wide.
- Glue these pieces together into a large thick panel (for example, 50x50 cm) and press with a press for a better connection.
After the composition has dried, you can additionally cover the sides with remaining cardboard to give the entire product an aesthetically finished look.
Important! A roller made of thick fabric, wrapping paper rolled into a tight drum - the cat will scratch its claws on everything that the owner offers it. But the lifespan of such home-made structures is very short; they literally turn into scraps before our eyes.
Cardboard rectangular scratching post
With a rectangular or square option, the operating principle is the same:
- Cut cardboard strips of the same width and length depending on the desired size of the future scratching post.
- Make the base also from cardboard or use a ready-made box, then adjust the strips to its size.
- Glue each strip using a heat gun or other reliable glue, then lay tightly in a row next to the other until the box is completely filled.
- This design can be placed on the floor or fixed to the wall using double-sided tape. To do this, wide strips of tape are glued to the bottom of the box at the top and bottom, then the structure is attached to the desired location.
You can sprinkle catnip on the bottom (under the cardboard strips) or put a piece of fabric soaked in it.
How to make a scratching post with your own hands
There are many ways to make a scratching post with your own hands from scrap materials:
- A piece of an ordinary rug or runner is nailed to a wooden base and a fully functional prop is obtained. Moreover, you can put it under your feet and attach it to the wall so that your pet can take a comfortable vertical stance.
- Corrugated cardboard - a scratching post made from it can also be made in the form of one sheet, which is glued to the base.
When calculating the scheme, you need to take into account the size of the cat's body. For example, the height of a scratching post for a Maine Coon should be at least 1 m. For other smaller representatives of the cat family, a “modest” 60 cm is enough.
Rope post
The standard height of a scratching post is usually 50-60 cm. When making such an “accessory” for a cat, you need to take into account important factors:
- You will need a base stand to which the main element is attached.
- A platform-bed is usually provided on top - cats love to watch what is happening from a height.
- The upper part can be used to place hanging soft toys.
- You can additionally attach a rope to the post - cats love ropes and enjoy playing with them.
In the process of making a claw post, special attention should be paid to the base (stand).
Manufacturing recommendations:
- The platform should be made of a piece of thick plywood or chipboard cuttings.
- Its size depends on the height of the structure and the weight of the cat. We must not forget that the animal will most likely jump from above, pushing off with four paws. This will give such a load that the unstable structure on a small stand will simply tip over. Low scratching posts (50-60 cm) must be provided with a base of 50x50 cm. But for a longer post you will need a platform measuring 75x75 cm.
- You need to prepare all the necessary materials in advance: a post, fabric for gluing the base and top platform, a sufficient number of meters of thick rope, self-tapping screws and a screwdriver, insulating tape, metal corners (6-8 pieces).
- If you plan to make a scratching post with a house, it is best to provide additional fastening to the wall.
- As a material for the post, you can use a plastic pipe or a rectangular wooden beam.
Step-by-step process for making a scratching post with your own hands:
- Screw 3-4 metal corners on both sides of the post. Later they will serve to attach the scratching post to the base and secure the upper platform.
- Wrap the end of the rope with electrical tape and screw it to the pipe or beam with a self-tapping screw through this seal.
- Wrap the rope tightly around the entire length of the post, leaving no free space.
- Secure the top edge of the cord with electrical tape.
- Place the scratching post on the base and secure it with screws through the corners.
Next, you need to cut out the fabric and paste the horizontal surfaces - the base and shelves. All that remains is to hang the soft toy on a long rope (if such an attribute was planned).
Scratching post-mat
Some cats love to sharpen their claws on horizontal surfaces. For example, an animal does not pay attention to the corners of furniture, but tears the upholstery on the sofa. If your pet has just such inclinations, then you can quickly make a simple scratching post for your cat with your own hands.
To work you will need:
- a piece of plywood or chipboard 500x500 mm;
- a piece of old carpet, rug or any dense fabric;
- glue.
You also need to take a drill, a large needle, strong thread or fishing line.
A horizontal cat scratcher can be made as follows:
- Cut out the wooden base.
- A fabric covering is prepared to suit its size.
- Thin holes are drilled along the perimeter of the plywood at a distance of 4-5 cm.
- The surface of the base is lubricated with a suitable glue and connected to the fabric.
- The structure is placed under a press until the glue dries.
Through pre-prepared holes, both elements are sewn along the edge with a strong thread or fishing line.
You can attach additional cat accessories to the scratcher - this could be a hanging soft ball or a mouse.
Corner scratching post
To make a corner scratching post, soft elements (scraps of thick fabric), corrugated cardboard, and old bath mats are suitable. Work progress:
- Take 2 identical sheets of any plywood or fiberboard and glue them on one side with a regular cloth or bandage. The result will be something like a folding book.
- Holes are drilled along the perimeter of these two elements at a distance of 4-5 cm from each other.
- The surface of the scratching post is covered with cloth.
- Place the workpiece under the press and wait for the glue to dry completely.
- The final stage is to sew both layers of the scratching post through pre-prepared holes.
In order to secure a corner scratching post, sometimes it is enough to place it in a corner and press the edges with furniture. Some owners use double-sided tape for fixation, with which you can firmly attach the structure to the wall.
Scratching post house
The most difficult option of all presented. You can make a cat scratching post with a house with your own hands using one of the following methods:
- Develop two separate elements (house and stand), and then connect them together. A very profitable option, since in the future you can add a play space to this design in the form of a ladder, passage or labyrinth.
- Another simpler method is to design a cat scratching post and a house together as a single whole.
The second option has an advantage. A horizontal scratching post can easily be placed on a flat roof, and a high wall can be adapted for a vertical scratcher.
It’s easy to make a house with a scratching post for a cat:
- The walls are cut out according to the intended dimensions.
- To make the structure harmonious, the interior space can be divided into two floors - the pet will only be happy with the extra “room”.
- It is necessary to provide at least two exits in different directions - it is recommended to design one of them on the second tier.
- All structural elements are connected with metal corners or using wooden slats.
- The roof must be removable - through it, the house is subsequently cleaned and disinfected.
- The inner walls must be covered with any thick fabric, and the outer walls must be covered with material suitable for scratching posts (for example, carpet trimmings).
Important! If you attach a stick with a hanging soft toy above the entrance, then the overall project will only benefit, and the cat will receive additional entertainment.
DIY wall-mounted scratching posts for cats with photo samples
Each cat has its own character and preferences. There are pussies happily scratching the posts with their claws, others are happy to do a manicure on a flat floor scratching post. We suggest considering wall models.
Scratching post on a flat wall
The scratching post is mounted not on a bare wall, but on a wooden panel. The width can be any, and the height should ideally be twice the length of the cat without a tail.
A wooden panel or plywood is used as a base. A height of 70 cm is more than enough
Using a drill, you need to drill 6 holes into which screws are inserted, and the board itself is wrapped very tightly with jute twine. The panel is screwed to a wooden panel on the wall and the cat is called.
Simple and convenient!
Kotofey will no longer tear up furniture
Scratching post on the corner of the wall
For such a model, you do not need to allocate a separate place on the walls - you can borrow any free protruding corner.
The design is made in the same way as a simple wall model, but two wooden panels are used, which are placed on the corner
The corner model does not take up much space
Mistakes when making a cat scratching post
The most common mistakes when making a scratching post yourself can be associated with the wrong choice of materials and failure to follow step-by-step instructions:
- To create a vertical scratching post, use a rope that is too thin and weak - the cat will quickly break it.
- Horizontal rugs are covered with low-quality fabric.
- Instability of the posts - if the structure falls and frightens the cat, it will no longer come to the scratching post.
- Open elements of metal fasteners, screw heads or other similar parts can injure the cat.
- The use of synthetic fabrics and adhesives can cause poisoning.
Required materials and tools
Before you start making a nail clipper, you should stock up on the necessary materials. The main thing is to remember that, if possible, they should be natural, because cats are very sensitive to odors, and they are unlikely to be suitable for a synthetic product. For rags you will need materials such as:
- Jute. This is a rope made from fibers of a plant of the same name. It is absolutely safe for the cat’s health and is inexpensive, but quickly becomes unusable.
- Sisal. It is made from agave fibers and is characterized by increased strength and higher cost.
- Carpet. It is a material similar in structure to carpet. Instead of carpet, you can use pieces of old or unnecessary carpets and rugs, as well as burlap.
- Cardboard. Usually used for the simplest models of scratching posts. Its main drawback is its fragility.
- Tree. It is used in both processed and natural form.
- Plywood. Serves as a basis for wall-mounted claw models.
- Natural dyes. Sometimes used to improve the appearance of a product.
- Cotton wool. In some cases, a ready-made device is stuffed into it.
- Foam rubber. Also suitable for stuffing.
In addition to materials, to create a scratching post you will need a number of tools. These are scissors, a stapler, a hammer, a saw or jigsaw, nails or screws. If glue is required during production, types that do not have a strong odor should be used. The amount of materials and the choice of tools depends on the product model.
DIY scratching post repair
Most often, owners have to deal with the restoration of fabric and rope structural elements:
- It is better to completely remove the weak and thin cord from the vertical posts and replace it with jute rope.
- Damaged fabric upholstery is replaced with new one.
- Scratching posts made of corrugated cardboard are not worth repairing - they are simply thrown away and the next one is made.
- With wooden houses you have to tinker - you need to disassemble the entire structure, correct defects and fasten it back together. But if the project was originally completed with high quality, then no significant troubles can happen to it.
Claw houses cause trouble only in one case - if they are assembled with self-tapping screws, without corners or slats. Large cats weaken the structure and it quickly fails.
Corner scratching post
The simplest option for a corner claw is to cover the corner of a doorway or wall with a piece of carpet.
Another option is to build 2 flat poles of the same size and attach them to the corner on both sides.
Would need:
- Jute rope
- 2 boards identical in width, thickness, length. Wooden boards, chipboards, and wall panels are suitable.
- Drill.
- Screws.
- Glue.
Mark holes for screws in each board. Then wrap it tightly with a rope secured with glue and screw the boards at the desired height into the chosen location.
A more thorough approach to making a corner fight in a video story
Scratching post with shelves
To create such a scratching post for a cat with your own hands, you will need to follow the following steps.
Stages of making a scratching post:
1. Making a drawing , calculating dimensions and purchasing materials.
2. Using a jigsaw, cut out parts of the required configuration and size from a furniture panel or sheet of plywood. Cut pieces of pipes to the required length.
3. On the board that will be the base, mark the place where the pipe is attached by tracing it. Straight plasterboard hangers They place a pipe between them and also secure it with self-tapping screws. This type of fastening is reliable.
DIY scratching post with a cat bed. Photo
4. The base is covered with fabric , making a hole in it for the pipe. Fasten the fabric using a furniture stapler.
5. Next, to make a scratching post for a cat, attach a shelf . The canopies are fixed to the pipe. Holes are cut in the shelf in the right places. Canopies are threaded through them, bent and fixed.
6. Two pipes of smaller diameter are installed on the shelf. Fastening is carried out in the same way as in the case of a large pipe.
7. A layer of foam rubber . It is covered with fabric on top, making holes for the pipes. The fabric is fixed with a stapler.
8. A shelf is installed on the pipes and secured in the same way as the previous one. It is covered with a foam sheet and fabric.
DIY cat scratching post step by step instructions. Photo
9. All pipes are wrapped with rope, securing the ends with durable glue.
how to make a scratching post for a cat. Master Class
How to make a scratching post from corrugated cardboard: master class
It's a well-known fact: cats just love cardboard boxes! So why not use this information strategically? In addition, such a scratching post is built even faster than the previous version! So, you will need:
Actually, corrugated cardboard. You can replace it even with the most ordinary cardboard boxes
- Good weight paper
- A knife that is convenient for cutting paper
- PVA glue or adhesive tape
- Any fabric that can be used to decorate a scratching post
Now all that remains is to assemble the structure:
- Stripes are drawn on cardboard . The width can be anything, but it must be the same for all workpieces
- Now the strips are cut
- so-called core is formed from a twisted strip
IMPORTANT: Preferably roll tightly.
- Now the stripes are attached to each other , wrapping around the core
- The frame can be wrapped in fabric chosen for decoration
- The blank is placed on thick paper - the bottom of the future scratching post
- The final touch is attaching the cardboard-fabric structure to thick paper
It turns out to be such an interesting scratching post from cardboard. You can make such a scratching post-bed from cardboard. You can also make such a simple scratching post-stand from cardboard.


