A knife stand is an indispensable accessory for storing them safely. The device is also convenient because cutting tools are always at hand. You can choose a suitable product in any household goods store - the range today is simply huge. But creative people will be much more impressed by a DIY knife stand, which can become a bright accent in the interior. It’s not difficult to make, the main thing is to stock up on the necessary materials and strictly follow the instructions.
Knife holder with filling
You can make an original knife stand with filling with your own hands. At the same time, it would be nice for her to come up with an interesting design that would match the interior of the kitchen. For this device, you should select suitable materials and take into account some design features of the housing.
Fan stands look very interesting with a series of shades PHOTO: knifecenter.com
Making the base: possible options
The container, which will play the role of a stand for kitchen knives, can be made of different materials that differ in texture. For example, the housing for an accessory is:
- from a plastic pipe of sufficiently large diameter. Typically, a previously unused sewer pipe (residue) is used for this purpose. In order for the frame to be complete, stubs are also used. A similar DIY plastic knife stand can have a spectacular decoration in the form of a painting or an accessory;
- from wooden blocks . To do this, you will need five pieces of material of the same thickness. Using separate walls, you can form a parallelogram, which will become the basis of the stand;
- An old book or any culinary collection that you do not use can also serve as a base But there is a drawback - you cannot store wet, just washed knives in such accessories.
The stand itself can be made from other materials, for example, used wine bottles, measuring cups. Sometimes even unnecessary piggy banks are used.
Don’t forget to make a preliminary drawing PHOTO: golos.id
Types of fillers
You can use anything you can get your hands on as fillers. The main thing is to make the structure reliable, airtight and convenient for inserting tools. Among the available materials are the following.
- Bamboo sticks. A sufficient number of them will be required. It is necessary that the material occupies the space in the stand as tightly as possible, of course taking into account the fact that additional knives will be placed inside. Please note that the length must be sufficient for the blade to fit completely.
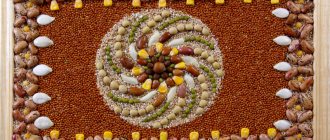
- Cereals and legumes . They look impressive in a transparent stand, especially if the layers alternate. Peas or beans of different colors are often added. This decor becomes truly interesting and accents the kitchen. Long grain rice absorbs moisture well, so you can insert knives into it immediately after washing.
- Plastic bristles from brushes . To install the knife stand inside the brush, you just need to cut it off in solid bundles. One brush may not be enough for this purpose. To seal the insert, you can use two or three tools.
- Sawdust or small wood shavings . A DIY knife holder with this filling is intended exclusively for dry tools. If you place a wet knife inside such a stand, mold will soon form inside.
Original separate stand for dessert knives PHOTO: m.123ru.net
Tools and materials
Among the most popular hand made stands are the wooden, magnetic and filled models. The set of tools and basic materials will vary in each case.
In order to make a stand with filler, you will need: a plastic pipe, a tray or plug, Moment glue, 2 brushes with plastic bristles, hot glue, a can of paint and varnish. Moment glue needs to be mixed with soda - this composition glues plastic parts better.
To work you will need:
- hacksaw;
- medium-sized sharp scissors;
- dark permanent marker;
- tweezers;
- sandpaper;
- brush.
The stand body is made of 4 boards, a wooden pallet and nails. Bamboo sticks can also serve as filler. The only tools you need are a screwdriver and a hammer.
To make a magnetic knife stand you will need a wooden plank, hot glue and 4-5 neodymium magnets. The tools used are a chisel and a glue gun. The design of such a device is usually not original. However, you can work on the color and texture to get an exclusive item that will fit perfectly with the interior of the kitchen.
To build a wooden stand with holes, you need to prepare boards, hot glue, electrical tape, varnish and sandpaper. The tools you will definitely need are:
- carpentry equipment;
- screwdriver;
- glue gun;
- ruler.
The presented lists are advisory in nature and can be changed at your discretion depending on the desired end result.
DIY wooden knife stand
Making a wooden knife stand with your own hands is easy if you have ever encountered carpentry or carpentry work. It is important to prepare inventory, all the necessary details, so as not to miss anything during the work.
Wall-mounted shelf stand with open structure PHOTO: samodelki.org
Original separate stand for dessert knives PHOTO: m.123ru.net
Wall model in the form of a shelf
To make this model, you will need a small amount of wooden boards or blocks, as well as self-tapping screws and an electric screwdriver. A jigsaw (they work faster) or a hacksaw may come in handy. Follow the algorithm to make the accessory correctly.
- Take two boards of the same perimeter with a thickness of 15-20 mm. On one of them, make a sketch of the blades of the knives that will be stored in the stand. To do this, place the knives one by one and outline the blades themselves with a pencil.
- Do this so that in the future there is a small distance of 3-5 mm between the tools. This is done to ensure that the knives do not touch.
- Cut out the sketches, going only 2-3 mm deep. Take into account the thickness of the knife. You can make the holes a little wider.
- Then make a lattice from the second plank so that the blades of the knives are completely visible. To do this, you can install additional strips between the niches for knives.
- Attach three horizontal strips on top of them, which will serve as stops so that the knives do not fall out.
All fastening actions do not have to be performed with self-tapping screws. They are often replaced with good wood glue. After gluing, the do-it-yourself stand for kitchen knives must be left for a while for more thorough drying. As a result, excess material is removed, and the surface is sanded and varnished (optional).
Instead of a cutting board on a stand, it is appropriate to use modern gadgets for video communication PHOTO: fdforp.com
This stand is suitable for watching a video or movie on a tablet while cooking PHOTO: chipchick.com
On a note! When creating a stand from bristles, in order for the material to be glued evenly, it is necessary to install it in a circle, ending in the middle.
Tabletop model with legs
In fact, it’s quite easy to replicate factory-type wooden stands with your own hands. To do this, it is enough to have only a block of the desired shape, a chisel and a small list of tools.
- Take a block with a side of 15-20 cm. It is important that it is not hollow inside.
- Using a plane and chisels, make an inclined parallelepiped from it.
- A block cut at an angle will act as a solid stand.
- In the resulting figure, cut a groove from the outside; a small shelf-holder for a cutting board will be inserted into it.
- Then, in the upper part of the workpiece, cut several holes with a chisel or on a machine, matching the shape of the knife blade. Make as many niches as you plan to store tools.
- Then cut a rectangle with the prepared cutout from a small piece of plywood. Lubricate the groove for this shelf on the stand itself with adhesive. Next, attach the holder with the cutout to the top.
- Open the prepared stand with varnish; you can additionally decorate it with an emblem or sticker.
In such stands, knives can be placed in any convenient way. Form a pattern, for example, if the number of PHOTOS allows: fissman-group.ru
Insert the knife into the holder only after you are absolutely sure that it is dry.
On a note! Be sure to make small holes on the back of the accessory in the places where the knives will be inserted. This will allow the instruments to be well ventilated, even if drops of moisture remain after washing.
Narrow places
As a rule, good functionality of a kitchen set includes small pull-out sections for storing different types of knives
This knife case looks very cute and homey. A great option for country style
Now are you convinced that knife stands and other special places for storing them are not only about order and safety? Of course, the indefatigable imagination of designers offers us a lot of creative and most unexpected accessories that can become the central figure of the interior. All that remains is to choose the best option for your kitchen.
How to make a knife stand with your own hands from plywood
A homemade knife stand can be made from plywood. By the way, this is the material that everyone can find in their household. This design does not have any difficulties. It is very important to use the right equipment.
Why not use multilayer plywood to create a niche for kitchen knives PHOTO: chinasalesbay.ru
List of materials and tools
To work you will need:
- small plywood. But, of course, it is better to have some reserve;
- electric jigsaw;
- marker or paint stick;
- reliable wood glue.
If the plywood does not have a tint, then the finished stand is additionally painted. However, in most cases the model is left in the original color.
Step-by-step instructions on how to glue a knife stand in the shape of a person
Below, our editors suggest studying photos and descriptions of how to make a knife stand with your own hands.
| Illustration | Description of action |
| Create a rough sketch of the man on plywood using a thick marker that dries quickly. The shield for the stand is drawn separately, and the “warrior” separately. | |
| Take a jigsaw and cut out the shapes one by one. You can deviate a little from the drawing to make the shape of the product smoother. | |
| We make a stand on which the little man will be attached. It can be free-form. For example, a model with cut-out edges looks very interesting. | |
| Sand the edges and round them. To do this, you can use shaped cutters. | |
| We separate the man's head a little from the mane. To do this, use a grinding machine to cut off the excess so that the comb is thinner than the head. | |
| Taking into account the thickness of the blade of each knife, we make small holes with a drill. Next, use an electric blade to make a slot between the two holes. | |
| We drill a small hole in the character's outstretched hand. We do the same with both legs. We make holes in the stand at the distance of the legs. Then we insert special beads and fix the parts together. To ensure secure fastening, additionally coat with glue. |
On a note! Oversized narrow knife stands can be placed in a separate drawer from other cutlery. It is important that the cutting parts do not come into contact with any other kitchen tools.
Magnetic tape
Magnetic tape is another great option for saving space in the kitchen. This is a convenient, practical and even very cute gadget. Easy enough to mount on the wall
Every type of knife is now visible and always at hand
As for aesthetics, the magnetic tape is often hidden behind a nicer material, and the magnet itself is visible only at the place where it is attached
Product options for other tools used in the kitchen
A knife in the kitchen is certainly an alternative helper, but there are other tools that we find it difficult to live without. In this section we will talk about what holders for sharpening tools and scissors can be made from. But first things first.
Elementary creation of a stand for scissors
You can make a stand for scissors with your own hands from different materials, including wood. Some people practice the following option - drilling an additional hole for inserting scissors.
Make coasters in the shape of any animal. Wooden models can then be painted with paints PHOTO: www.pinterest.fr
If you have to store a sufficient number of tools, then you can separately make a version of holders similar to those for knives. You'll just have to make the holes wider to insert the blades. Be sure to think about where the center of gravity will be located. To do this, an additional heavy metal plate is built into the platform.
Knife sharpening stand
You can make a stand for sharpening knives with your own hands from wood and metal. Also, for convenience, conventional sharpening devices are simply attached to pieces of chipboard or plywood, then screwed to the table in the workshop. In the video below you will learn how to make a simple version of a sharpening device with a holder.
Another simple option
You will also need a wooden board, electrical tape and glue. For seven knives you will need to cut eight identical elements. Then a couple of side curved parts.
On eight parts, make a notch whose width will be three to four millimeters wider than the largest knife. Collect everything. After this, you need to seal the grooves with electrical tape, and lubricate the edges well with glue.
Once everything is dry, remove the tape and clean the surface. Cut out the handle and attach it to the stand. Decorate as you see fit.
Filler sticks
In addition to sticks, chopped in large quantities from fresh firewood or planed from thin branches of any tree, bamboo is also used, sold in any hardware store or craft store. Instead of sticks, it is acceptable, for example, aluminum wire (you can pull out the “cores” from an old cable), cut into pieces of the same length, blunted at the ends.
If there are no bamboo sticks, open a new broom and cut its rods appropriately.
Hanging stand
If the design of your kitchen is so advanced and perfect that quick methods of making a stand will only ruin the whole look, use an option that is not inferior to industrial products in either neatness or quality. To make the stand you will need:
- a board equal in length and width to the future stand;
- lath or plywood;
- glue or screws.
Do the following:
- mark the board in accordance with the location of the horizontal and vertical sections of the slats;
- glue thin (slightly thicker than the blade of the largest knife) pieces of slats to the board (there are several of them) in accordance with the markings, parallel to the inserted knives;
- Next, glue three longitudinal (perpendicular to the previous) sections - two at the edges and one in the middle.
The resulting structure can either be supplemented with side struts or legs that prevent it from falling, or fixed on the wall by attaching two additional slats to the latter.
The second version of the hanging stand is much simpler. A groove is cut into any rail or bar into which small neodymium magnets are inserted and secured with glue. The design is hung on the wall or, for example, the side of a kitchen cabinet. It is enough to attach the knives with the blades to the places of the magnets - they will hold securely on them. This magnetic holder is the best solution for knives that do not need to be wiped due to the huge number of repetitive actions when cooking food is set to a wide flow.
What is included in the design of the stand?
Any ready-made or home-made container or box is suitable as bearing container The latter is made of plywood and/or lath. The finished container is often a water filter jug whose insert holding the replaceable filter cassette has broken.
In addition to the supporting container, it must contain a reliable filler. The height of the container and the level of the filler are such that a knife inserted with the tip downwards is buried in the filler up to the handle, without the end of the blade reaching the bottom of this container.
Accordingly, the filler is selected so that the knife stands stably in the stand, without falling onto adjacent knives or towards the edge of the stand itself. The filler itself should not move when the stand is stationary.


