As energy prices rise, it becomes necessary to minimize heat loss through walls/floor/ceiling. To solve this problem, a layer of insulating materials is laid (its thickness depends on the purpose of the room, climatic conditions and the characteristics of the selected type of material). But this raises another problem: with the inevitable temperature difference between the outer and inner surfaces, condensation forms. If it forms in the insulation layer, this entails a decrease in its characteristics. It has been established that when the humidity of thermal insulation increases by 5%, the thermal insulation properties decrease by 50%. After drying, the properties are partially restored, the thermal insulation gradually becomes worse, and heat loss becomes more significant. Since the humidity in the room is almost always higher (and even more so in the bathhouse), the steam tends to escape outside, getting “stuck” in the insulation along the way. To prevent the penetration of steam, a vapor barrier is laid on the side of the room.
Types of vapor barrier
How steam is formed
The peculiarities of the climate of our latitudes force people to maintain a temperature in their living quarters higher than outside for a significant part of the year. The density of cold air is greater than that of warm air, so with such a difference, excess moisture settles in the form of condensation on the elements of the house.
Even more ideas for building private houses can be found on the website: https://masterinterera.ru/doma/
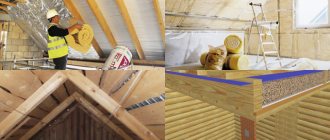
Types of vapor barrier for ceilings
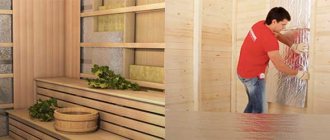
Installing a vapor barrier material when arranging the ceiling or carrying out finishing work is an indispensable condition, regardless of what room we are talking about. With the correct selection of material and proper installation, you can not only significantly reduce heat loss, but also protect the ceiling from damage by fungal microorganisms and the development of rot and mold.
The ceiling is a multi-layer structure. In this regard, it is necessary to very carefully install protective vapor barrier material, since hot air, saturated with moisture, rises upward and the risk of waterlogging the materials that make up the ceiling is very high. In addition, fungi and mold can also develop on the outer surface of the ceiling, which adversely affects human health.
Typically, ceiling vapor barrier installation is performed from inside the room. However, in some regions where minimum air temperatures in winter reach -32 ⁰C, vapor barrier is additionally installed on the outside.
The installation options for vapor barrier material are related to its structure and the surface on which it is fixed. However, it is better to adhere to certain rules when installing:
- Before installing a vapor barrier, on the surface where the installation will be carried out, it is necessary to seal all joints and cracks. Carefully seal the area around the chimney and ventilation ducts.
- A vapor barrier layer is installed between the room and the heat insulator.
- The vapor barrier must continuously (without gaps or breaks) cover the entire required surface of the ceiling.
- The material must be fixed so that it lies flat, without sagging, eliminating folds. But excessive tension should also not be allowed, since it will simply burst due to temperature changes.
- During installation, pieces of material are always overlapped with an allowance of approximately 10 cm. There should be no joints in the corners. To fully cover the corner, you need to select a single piece of canvas.
- At least 20 cm around the perimeter of the ceiling must be left for an allowance extending onto the wall.
- First, the surface on which the vapor barrier layer will be installed must be dried and cleaned of dust and dirt.
Important! Installation of any type of vapor barrier must begin after carefully studying its structure and properties, as well as the advice of professionals.
Immediately before installing the vapor barrier, we prepare the surface on which it will be laid. When using material in rolls, it is necessary to eliminate gaps and cracks on the working surface. If a liquid paint vapor barrier is used on a concrete base, then all irregularities are first rubbed over. Next, a primer is applied and after drying, the vapor barrier is applied directly.
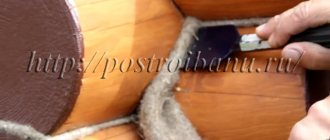
The vapor barrier material in the form of a sheet is fixed to the base with a construction stapler. It is important to carefully lay the corners. The vapor barrier is installed around the perimeter with an overlap of 10–15 centimeters. Sufficient tension must be maintained (sagging of more than 1.5 cm is excluded). Additionally, vapor barrier panels are connected with tape. When installing in the space between the beams, nails with a special widened head are used, which are driven in in increments of 30 cm. The joints are also taped with construction tape for reliability. When installing a vapor barrier after the insulation, slats are secured on top of the latter with self-tapping screws.
Sheet vapor barrier is installed on an aluminum frame. It is sold in large hardware and construction stores. Instead of an aluminum profile, to save money when creating a frame, you can use thin wooden blocks. However, professionals still recommend a standard profile, since it already has grooves for installing vapor barriers. When all the solid sheets are installed, the joints must be taped with PVC film.
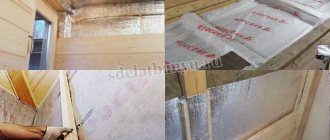
The rolled vapor barrier is secured with a profile (slats), having previously been rolled out from the bottom up. Foil-based materials are mounted with a shiny surface inside the room. This reduces heat loss due to the reflective effect.
Important! Having decided on the type of vapor barrier, when purchasing it is necessary to correctly calculate its required quantity. Do not forget that the rolled material is mounted overlapping with mandatory allowances; accordingly, the consumption increases by their area.
Taking into account the surface on which it is installed, the vapor barrier has certain details of fastening.
Installation on a concrete ceiling
Step 1. Thorough preparation of the concrete surface. Having cleared it of dust and dirt, we seal the seams with a putty solution. It is better to use a high-quality sealant and carry out the work very carefully to protect the seams as much as possible from moisture penetration.
Step 2. Waterproofing the ceiling. The easiest way is to apply polymer mastic to the surface. This will protect the heat insulator from leaks from above.
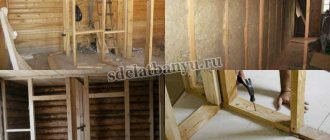
Step 3. We install the sheathing to install the vapor barrier. We first lay insulation under it. In this case, there should be no cracks or gaps between the surface and the insulation.
Step 4. We fix the frame to the ceiling with self-tapping screws. We install a vapor barrier on the sheathing. We unfold the rolls taking into account the required allowance. We secure them first around the perimeter, then in fact with intermediate slats.
Step 5. Usually one roll cannot cover the entire ceiling. In this regard, we use the next roll, not forgetting to overlap it with an allowance of 10–15 centimeters. We additionally seal the edges with vapor barrier tape. The most suitable solution is double-sided self-adhesive tape.
Attention! Don't forget to leave a ventilation gap between the vapor barrier material and the finishing layer. For these purposes, it is necessary to install a counter-lattice made of a bar measuring 50 x 50 mm, the surface of which is protected with an antiseptic.
You may also be interested in: Brick plinth panels: a beautiful house facade at minimal cost
What varieties are there?
More recently, this building material was produced in only one variety - glassine. However, technology does not stand still, and today the market offers many better and more durable products. So, there are the following types of vapor barrier:
Polyethylene film. Best suited for protecting ceilings in living rooms. Relatively inexpensive and effective. Available in standard versions, reinforced and with a layer of foil.
Polypropylene film. It differs from the previous one in its increased resistance to ultraviolet radiation and mechanical stress.
Liquid rubber. Used as a vapor barrier for floors. Sold in liquid form, applied with a roller or brush. After drying, it reliably adheres to the surface, forming a seamless, highly elastic coating. Also used as waterproofing.
Breathable membrane. It can be single-layer or multi-layer, single-sided or double-sided. Does not require a ventilation gap. Prevents the penetration of moisture inside, while freely releasing it outside.
Membrane with reflex coating. Helps increase the thermal protection of the room due to the ability to reflect part of the heat. It has improved vapor barrier characteristics, making it well suited for rooms with high humidity.
Rules for installing vapor barrier film
Installation of vapor barrier films does not require special qualifications. The main thing is to lay the material with the desired side to the insulation and ensure that the joints are completely sealed.
Important details:
- Before starting work, be sure to read the instructions on the packaging.
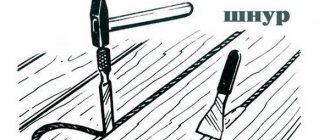
- Prepare the necessary tools in advance: scissors, a staple gun, tape measure, insulating tape and a pencil.
- Cut the panels to size and only then proceed with installation.
- Lay the strips with an overlap of 5-15 cm, seal all joints with Ondutis BL or tapes.
- When installed indoors, the vapor barrier film is laid close to the insulation.
- When carrying out external work, it is necessary to arrange a ventilation gap.
You will find more detailed instructions in the article “How to properly install a vapor barrier film” and in the installation video.
2 votes, please rate the article:
The best manufacturers
To purchase high-quality building materials, you need to focus, among other things, on the manufacturer. Choosing a reliable and trusted supplier will help you avoid possible problems. Let's look at the two most famous ones.
Izospan
A domestic manufacturer whose products meet all international standards. Produces 3 types of products:
Izospan C. Two-layer film, one side of which is slightly rough. It retains excess moisture, facilitating its effective evaporation. It is laid on the other side, which is smoother. Well suited as a vapor barrier for roofing.
Izospan B. Differs from the previous one in that it is more suitable for protecting walls.
Izospan D. Universal film equipped with an anti-condensation coating. It has increased strength, thanks to which it can be used as a temporary roof and cladding of external walls.
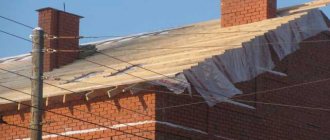
Roof protection
When choosing a vapor barrier for a roof, you need to take into account the type of roof. In this case, the thermal conductivity of the roofing material is of paramount importance.
There are floorings with low thermal conductivity, in particular, these include:
- Roof tiles;
- Slate;
- Onduline and onduville coating;
- Coating made of bitumen compound.
For such a roof, a vapor barrier with diffusion membranes is used, and it is supplemented with a ventilation gap.
For roofs made of metal tiles, profiled iron and other types of heat-conducting coatings, the vapor barrier is made on the basis of anti-condensation waterproofing. To screen condensation from the inside of a metal roof, use a film.