Wooden houses began to be built in ancient times. Previously, there was quite a lot of such building material, so all the walls were built in one piece and only at the end were openings made for windows and doors.
The process of installing a door in a log house depends on what material will be used for construction.
In the modern world, to achieve maximum savings, all openings are marked in advance. This will reduce waste. The installation of a door in a log house is carried out after the construction of the walls and roof has been completed. When building walls, it is very important to leave solid logs or beams in the area of the door opening; this will prevent the crowns from being squeezed out. After the entire structure is strengthened, solid logs are cut from the opening.
The process of installing a door in a log house directly depends on what material is used for construction. Regardless of what is used (log house or timber) for building a house, the installation of the door is carried out in the same way. It is very important to pause when installing the door. Such a temporary break should be counted from the moment of complete completion of the construction of the walls and completion of the assembly of the entire roof structure and be about 6 months.
Doorway arrangement.
During this period, the house will undergo partial shrinkage. Over the next year, the structure will shrink as much as possible. Shrinkage rates will depend not only on the technical characteristics, but also on the moisture level of the wood.
On average, the period of complete shrinkage can reach 6 years. Over the course of a year, a house can change its height by up to 5 cm. Based on these indicators, work on installing a door in a log house must be carried out using a special technology. By following certain rules, you can avoid such a phenomenon as skew. Today there are two options that can be used to install a door:
- installation of a special casing;
- installation of casing when using timber.
General stages of installing doors in a bathhouse
Regardless of whether your door is purchased from you or made yourself, whether it is made of glass or wood, or even metal, there are some basic points that apply to all of them. Below we will take the time to consider the nuances of installing a bath door made of each material.
Preparing the doorway
We will have only a couple of requirements for the opening:
- it must match the dimensions of the door frame plus a couple of centimeters of gap between them ;
- the geometry of the opening must correspond to the verticals and horizontals in level.
If the opening is not 2 cm larger than the box on each side, it can be narrowed . Since we are talking about a bathhouse, you should not use chipboard and similar materials for this . Use the boards.
BUT! Please note that the platbands will cover no more than 4 cm, so the narrowing should be within these limits. If you need more, change the door.
Get your geometry in order before proceeding further.
Box assembly
Produced separately on a flat surface. To do this, you can use either the floor or a table , or better yet, two tables of the same height, which can be placed at a distance of up to a meter.
The box can be completely ready for fastening with self-tapping screws - its ends are cut at 45 degrees and its dimensions are 2 cm smaller than the opening . In this case, you just need to screw in the screws as shown in the picture below:
If the box beam is not edged at 45 degrees or is longer than required, you will have to cut it first. a miter box or miter saw for this .
Installation of hinges
ADVICE! The loops should be placed like this: step back 20 cm down from the top edge of the fabric - this is the mark of the top edge of the loop, 20 cm up from the bottom edge of the fabric - this is the bottom edge of the second loop. If a third loop is needed, it is placed 20-30 cm below the top one.
For butterflies, a recess can be made only in the door or only in the jamb
There are several types of loops, which you can read about in this article. Any of them can be installed on bath doors of different sizes.
There should be no problems with external invoices They are screwed on with self-tapping screws from the outside - just make the markings.
Screw-in ones are included in the design of hinges for glass doors for saunas and baths, but there shouldn’t be any problems with them either - the frame comes with a glass panel and screwing a couple of parts on each hinge won’t be difficult.
But mortise card loops and awnings may require creating a recess under the flags (or cards) so as not to create an extra gap between the canvas and the box. To make the cut, you will have to work either with a hand router or with a chisel. It is better to take on the latter by those who already have work experience.
IMPORTANT! When choosing a cut area with a chisel, you cannot increase the depth.
The recess is made by 2.2-2.7 mm over the area of the flag.
GENERAL RULE! Before screwing in the screws, be sure to pre-drill a hole 0.75 from the diameter of the screw. The screws themselves must be threaded all the way to the head.
Installing a box in an opening: methods of attaching to a wall
How to properly install a door to a bathhouse so that it does not lose its thermal insulation properties, not to mention that it does not simply fall out of the opening one day? To do this, it must be properly attached to the wall. We will look at several methods, but we will immediately say that their effectiveness is unequal. In addition, of course, there are more than three of them, but it all comes down to mounting tricks.
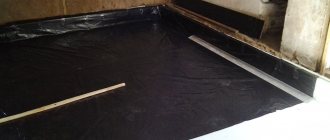
ON A NOTE! First, about polyurethane foam: there are several rooms in the bathhouse, but only in the steam room you should not fill the gaps between the frame and the wall with it . Therefore, we will talk about it, but for the steam room, instead of it, you can put jute - the kind that is placed between the logs of a log house.
Method one: foam
This is the most unreliable method . It does not involve any other fastening of the box in the opening other than polyurethane foam. The method is suitable only for the lightest doors.
WARNING! Foam breaks down over time. Factors leading to this are: moisture, sunlight, ultraviolet radiation. However, moisture alone is enough. If the box is supported only by it, then first there will be drafts, and then the door may simply become loose and fall out!
However, we have our own example of the longevity of foam in a bathhouse. We made our own video proving that foam is different from foam. Here is a practical example of how it has lasted for three years and has only turned yellow from ultraviolet radiation:
Therefore, we present the technology. Firstly, the frame is placed either with a door leaf and spacers (for example, cardboard) between the door leaf and the frame, or with spacers . Both are necessary to counteract the deforming force of the foam, which increases in volume, puts pressure on the box beam and is capable of deforming it.
The frame (with a door or spacers!) is inserted into the opening, first fixed movably with wooden wedges to align the verticals and horizontals with a level. When everything is in order, the fixation with wedges is made rigid and checked again with a level.
All that remains is to foam the gaps. The hardening time depends on both the brand and the “professionalism” of the foam (there is household foam, there is PRO - the first with a straw, the second requires a gun). Household ones have a large expansion, professional ones have less. PRO hardens in about 15 minutes.
ADVICE! Foam is difficult to remove, so protect surfaces with cloth, film, or masking tape.
Useful video
This video demonstrates the installation of a door using foam only:
Unfortunately, the sound is “walking”. If you want, you can watch the installation and location of the wedges in another video:
Method two: with staples or direct hangers
Direct hangers for drywall have long been used for other purposes than their intended purpose.
They are successfully used for hidden fastening of doors. The idea is extremely simple: the middle part of the suspension is screwed to the box with self-tapping screws. And when the box is installed in the opening, the folding parts move onto the wall on both sides.
It is enough to fix them on the wall, and cut off the excess (here you need to focus on the platbands and extensions) to get a fairly strong mount .
Of course, the box is first wedged , adjusted with a level or plumb, and only after that (with constant monitoring) is it fixed.
In some cases, sections of walls for suspensions are slightly recessed . Subsequently, it can be disguised with plaster, for example (if not with platbands). But this means that installation is carried out before the walls are finished .
The result is foaming the gaps, installing platbands and, if necessary, extensions.
A visual demonstration of how installation on hangers is implemented is in this video, here it was done for a heavy door:
Method three: on anchor bolts
Let’s clarify right away: anchor bolts are only an option. Some people consider it too thorough and are content with self-tapping screws with dowel plugs, screws, and frame dowels. The main thing is that the principle is the same.
True, there is a hidden fastening , when the box is drilled under the hinges and lock, which makes it possible to cover them with metal parts, and there is a conventional installation , when the holes with fasteners are masked with simple plugs. In the first case, the fastening goes only to three points , in the second, usually to six .
Of course, the space under the plates of the hinges and the striker (the counter part of the lock) is marked so as not to interfere with the fixation of the plates themselves.
With the three-point option, the bottom of the door remains free, not secured. Therefore, it must be secured with a spacer. It is clear that with a hidden fastening, the door cannot be hung immediately and serve as a spacer.
The six-point method does not look so nice - the places of the plugs are visible , the plugs themselves can fall out (they are glued so that they do not fall out), but the strength of this method is such that the door stands quietly for a long time without repairs or additions.
First you need to drill holes in the box for the plugs. This is done with a drill with a diameter of 14 mm and a depth of 10 mm. After this, another through hole with a diameter of 10 mm for the anchor (the anchor can be thinner, but the hole must correspond to its diameter).
The box is placed in the opening, and a continuation of the hole for the anchor is drilled opposite the holes in the wall. After this, the anchor is carefully inserted and twisted. When twisted, the sleeve expands, securely fixing into the wall. All that remains is to install the plugs.
GENERAL RULE! You need to wedge the door and check the geometry in both cases. The wedges remain with any fastening method. You can foam the gaps with polyurethane foam, or you don’t have to foam them.
Useful video:
The first video shows a hidden three-point mount:
https://youtu.be/P_w6LX1-Lng
Second roller – mount with plugs:
And we couldn’t pass by the video, which combines the advantages of using direct awnings and hidden fastening with three-point screws. No plugs, and high reliability:
Installation of platbands
They are installed at the final stage of installation , when the door is already in the opening. After marking directly on the jamb, the trims are trimmed at 45 degrees either in a miter box or with a miter saw.
IMPORTANT! The cutting sequence matters: first you make the left casing, then the top, then the right.
If the platbands are shaped, they are secured using headless nails or flat pins.
ADVICE! Check immediately whether the platband does not interfere with the movement of the canvas.
Making a door frame
- First, let's decide on the sizes. Since the canvas has a thickness of 80 mm, we set the width of the box racks to 120 mm, and their thickness to 50 mm. Thus, we will need to acquire blanks for two vertical posts (flat and hinged) and two horizontal crossbars of appropriate sizes and a cross-section of 50x80 mm. Based on the width (650 mm) and length (1800 mm) of the canvas, we cut bars 1870 mm - 2 pieces, and horizontal bars 50-80 mm longer - also 2 pieces.
- In all blanks, we select quarters for the canvas with dimensions of 20x80 mm according to their length. It is better to use a hand router for this or, as a last resort, a circular saw and a chisel. The surfaces of the selected quarter on all workpieces must lie in the same plane, parallel to the longitudinal edges of the workpieces. The tightness of the connection of the canvas to the box will depend on how we do this - whether there will be cracks or not.
- On the hinge stand we draw the contours of the hinge sash and mill out seats for them with a depth equal to the thickness of the hinge sash. Number of loops – 3 pcs. We lay long pieces on a flat surface (table, workbench, floor) and place the door leaf on the selected quarters. Using wooden wedges on the side of the hinges, we make a gap of 2-3 mm, and for the other three - 5 mm, so that the future door opens freely. We apply horizontal blanks and accurately measure their length in accordance with the distance between the outer edges of the long blanks. Use a hacksaw to cut along the markings.
- All that remains is to make quarters in the corners and join together all the elements of the bath door frame.
- To do this, we lay the not yet assembled boxes, put the canvas on them, insert the hinges into place, and use wedges to create a gap along the contour. It is important to ensure that all angles are 90°. If the results of our work are positive, we make marks for the loops in the canvas and mill the seats for them.
- We carry out the final assembly with the hinges fixed, set the gaps and fasten the box with wood screws, 2 pieces each. at each joint. To prevent cracking at the joints, we drill holes 0.5 mm larger than the maximum diameter of the screw, and 1-2 mm smaller in the quarter being fastened.
- We check for opening. If the door opens freely to the full swing, and there are no gaps in its fit when closing, then we have done everything correctly.
Return to content
The nuances of installing doors in a bathhouse made of logs or timber
The walls in a bathhouse made of logs need additional strengthening when openings for windows or doors are cut into them. For this purpose, the installation of doors in a bathhouse made of timber or a log house is preceded by the creation of a frame , to which either the door frame will be attached, or, if a quarter is cut out on the frame, then it will be the finished door frame.
There are two ways to make a socket, both based on tongue-and-groove joints . However, in the first case, the groove is made in the logs or timber, and the ridge is made on the insert strip, and in the second case, on the contrary, the ridge is cut out on the logs, and the groove on the plank. Such a connection is necessary in order to give the log the ability to slide (shrinkage lasts for years).
ATTENTION! Be sure to leave an empty space above the door, which is given to the log to shrink.
We highly recommend watching the following video, where all the principles and variations of the frames are shown on simple blocks (which applies to both windows and doors):
Preparatory activities
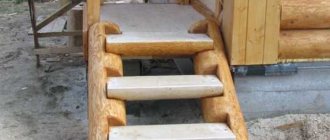
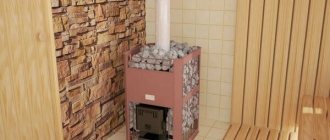
To reduce shrinkage, install a frame for the future door
Installation of a sauna door should begin with preparation. If you plan to make the structure yourself, you need to draw a diagram indicating the exact dimensions of the product. The length and height are determined, which is calculated depending on the opening. It is recommended to add an additional few centimeters to all obtained sizes. The excess can be trimmed off as you work.
The walls of log houses have an uneven structure, which leads to shrinkage occurring after the door is installed. When installing the box, you need to use four beams. Next, grooves are cut along the vertical ends of the opening. They are designed for combs. At the ends of the beams, fastenings are placed, which are selected taking into account the thickness of the canvas. The box is secured using a tongue-and-groove system, then additionally secured with self-tapping screws.
How to install a door to a wooden bathhouse
A wooden door can be installed in any or all areas of the bathhouse. They install either a solid wood or a frame door with cladding , for example, clapboard.
Hinges or canopies are mainly used either internal (butterfly) or external , or mortise (card).
The sequence of installation operations is described entirely above - everything was about wooden doors.
The difference between indoor and outdoor ones can only be in the number of hinges (for a heavier one, three are installed) and a more complex lock. Locks inside the bathhouse are made simple : roller, magnetic, etc.
In a Russian bath there is usually a high threshold at the entrance to the steam room , in a sauna there is no threshold, there is a gap between the sheet and the floor . Therefore, an important point is to determine the size of the door to the steam room of a Russian bath.
IMPORTANT! Wood impregnations can be used everywhere except doors in the steam room.
Materials used
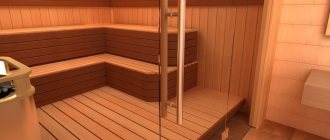
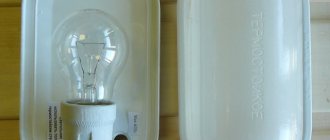
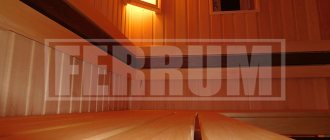
When constructing a steam room, the canvas can be made of wood or glass. There are options for combined designs.
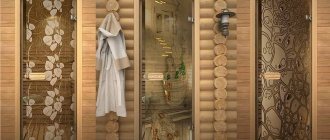
Glass
Glass doors are most often installed in a steam room or sauna.
Glass products are most often used in saunas and Turkish baths, where air humidity reaches 100%. The material tolerates high temperatures and high humidity levels well. Its main advantage is easy maintenance, so this option for the washing machine is considered the most optimal. The material allows diffused light to pass through, which creates an atmosphere of coziness and comfort in the room. It is possible to stick special films that allow you to achieve multi-colored shades of light.
The downside of a glass door is its price. The material must be reinforced to ensure safety. The production uses glass 8 mm thick, which has been pre-hardened. It is impossible to make such a design yourself.
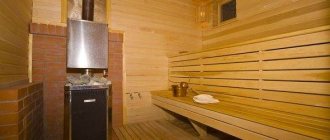
Log house
Wood has a number of advantages:
- ease of processing;
- attractive appearance;
- environmentally friendly, the material is completely safe for health, it does not emit toxic substances when heated.
But not all types of wood are suitable for a steam room. The material must withstand temperature changes and be resistant to high humidity. For the bath it is recommended to use oak, aspen, and birch. Exotic species work well. Most often you can find products made from pine, as it is the most affordable material. But experts recommend using it only as an entrance group, and not for a steam room.
Combined
A combination of wood and glass is considered a convenient and beautiful option. The main canvas is made of natural material and a window is mounted into which glass of various sizes and shapes can be inserted.
Installation of a metal bath door
An iron door is, of course, heavier than any other. Therefore, it should definitely be placed on anchor bolts .
Such doors are purchased, so installation instructions will be included with them. It is not much different from the one described above, it’s just less work - the hinges are already ready, the holes are made in the box. You just need to screw it to the opening and foam it.
If difficulties arise, you can watch a video in which the author goes through all the stages of installing a metal front door together with the audience:
Method No. 2. Circular casing made of timber
Installing doors in a log house using the second method can also be done with your own hands. The principle of its implementation is not much different from the first. All you need to do is install the blank under the box, following the rules mentioned above.
In other words, it is necessary to install bars around the entire perimeter of the opening. They can be fastened to each other in several ways:
- tongue and groove method;
- self-tapping screws;
- nails.
In addition, it is possible to install the casing without the use of fasteners. To do this, you need to fit the bars as tightly as possible to each other.
It should be noted that in most cases, the construction of log houses is carried out according to this principle. The pressure created by the weight of building materials is quite sufficient for the stability of the structure. The bars must be installed by surprise.
How to properly install a glass bath door
Glass doors are installed in the steam room and washing room. They come to the consumer already with everything they need. On site, the door is unpacked, the panel is removed and the frame is mounted in the opening after preliminary wedging.
Next, the canvas is returned to its place and secured. The handle is installed and installation is completed. To confirm the ease of installation of a sauna door, watch the video:
The advantages and disadvantages of each material allow you to determine which door is best to install in the bathhouse.
***
We think we coped with the task and told you quite clearly and in detail about how to install a door to a bathhouse. A separate article is devoted to important aspects of door insulation. Now we are waiting for your feedback and comments. Did you manage to install the doors yourself? What were the difficulties?
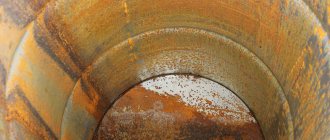
Cutting and designing an opening in a log wall
- Before proceeding with this operation, it is necessary to temporarily secure even beams to the wall near the places where the opening was cut. This will prevent the wall logs from moving.
- Using a level or plumb line, draw the outlines of the opening in the wall. For our door they will be equal to the following values: width - 940 mm, height - 2090 mm. This takes into account the gaps between the door and casing frames (10 mm on both sides), and the fit of the casing posts into the tenon of the log wall. The lower level of the opening begins at half the diameter of the crown of the bathhouse frame, following the embedded crown.
- Using a chainsaw, we cut out the opening from top to bottom. Using an ax, we chop the upper and lower logs to the drawn horizontal lines.
- Next, using a chainsaw and a chisel, we cut out vertical spikes in the wall logs on each side of the opening with dimensions: width 60 mm, height 40 mm, symmetrically relative to the central axis. In the vertical posts of the casing, we select the appropriate longitudinal grooves and grooves for the upper spacer beams. We prepare a threshold with grooves for vertical tenons and quarters for planting vertical casing posts in them.
- We insert the threshold into the spikes, press it to the bottom plane of the opening and give it a horizontal position. Securely fasten with self-tapping screws.
- We place the vertical post at an angle at a quarter of the threshold and, using a hammer or an ax, drive it into the threshold and the tenons of the opening.
- We install the upper spacer bar into the grooves of the racks and hammer it into the grooves until it stops.
- We secure all connecting connections with self-tapping screws: in the corners, along the length, in the grooves, in the tenons, etc.
- So, the casing is ready, and the upper spacer beam has a gap between it and the cut opening. It is made specially and serves to compensate for the shrinkage of the bath. Now you can begin installing the door to enter the steam room.
Return to content
Leaving the log house open is important
What does this phrase mean? But here's the thing - after the construction is completed, the most intense moment of shrinkage begins, which will last at least a year. During this time, if the doors and windows are already installed, they will simply be crushed.
Moreover, wood is much stronger than metal and can bend even seemingly reliable structures. To prevent something irreparable from happening, you should carefully consider what is described below.
Before starting work, you should know in advance what size the entrance and swing structures will be. Usually, if the project is standard, then all measurements are put aside on drawings and diagrams and there is no need to bother. But if the log house is installed independently, then there is something to think about and decide quickly, since it is necessary that the cut opening fits together with the entire structure.
So, the installation stages:
- Before the log house has to be left to shrink, it is recommended to make the necessary openings. How to saw through a door in a log house? Actually this is not the most difficult question.
The required size is determined, and the diagonals must be taken into account, and the outline is drawn on the log house. You need to make sure that the bottom log is divided in half, and the top one too. Then 7 to 10 cm is added to these sides for shrinkage.
The thickness of the door frame ± 2-3 cm is added to the side ones. It is necessary to fill the edges of the future opening with boards to protect the short crowns from falling out. Thus, when the contours are ready, the desired size is selected with a saw.
- If the log house assumes the presence of several entrances, one of which must be the front entrance, then the question of how to cut a door in the log house, when a greater distance is required, must be resolved more scrupulously. Board protection must be present on both sides - external and internal.
Also, after making the cut, it is recommended to place logs in the opening for a couple of weeks - during this time the log house will get used to the emptiness. Well, other aspects will no longer differ from an ordinary opening.
Moment of sawing
To avoid any difficulties with the question of how to cut a door in a log house, you must first determine the middle log of the opening and make slits on it. After that it is easy to knock it inside. Well, then working with a saw will no longer be difficult.
Let's move on. After the time allotted for shrinkage has passed, before installing the door, you need to measure the opening of the shrinking frame and determine the changes.
If everything was done correctly and the soil did not fail, then you can begin the next stage - how to insert a door into a log house when the structure is already ready. If the opening does not meet the requirements, it is adjusted to the required size.
How to make and why you need a pigtail
The edge is made so that during the use of the bathhouse, as well as during shrinkage, there is no distortion of the doors.
When building a bathhouse from a log house, a gap of 10 cm remains between the lintel and the opening, and 6 cm on the sides.
To create a frame, you need to make holes for self-tapping screws. Two on the ceiling and on the threshold, 3 on the sides. Use timber. Holes are made in it for the same screws. The beam should be adjacent to the walls and ceiling. There should be a gap of 10 and, accordingly, 6 cm between the timber and the frame.
After fixing the timber to the walls, the remaining gaps are covered with tow. It will last at least three years. After this, it is removed and the places are filled with foam.