Choosing insulation for a pitched roof
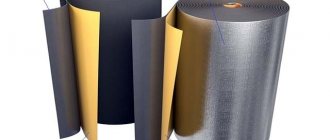
The market for modern building materials offers a huge number of all kinds of thermal insulation materials of various origins, manufactured using a variety of technologies.
To determine the appropriate insulation for a pitched roof, it is worth considering the following indicators:
- Low thermal conductivity, no more than 0.05 W/m×K.
- Minimum weight so as not to overload the roof. To determine the mass of a heat-insulating material, it is enough to know its density. For insulation based on mineral wool, 45-50 kg/m3 is sufficient, and for fiberglass - 14 kg/m3.
- The material must have water-repellent properties. If it gets wet, it will lose up to 60% of its beneficial qualities.
- Resistance to sudden temperature fluctuations, including severe frosts and various natural influences, which seriously affects the durability of the material.
- Environmental cleanliness - namely, the release of harmful substances into space during operation.
- Fire safety. It is very good if such material does not burn and does not support combustion.
- The ability to retain its shape for a long time, which affects the quality indicators of the thermal insulation layer.
- Durability. Modern thermal insulation materials are distinguished by enviable durability. Insulation for a pitched roof must have a service life of at least 50 years.
The following modern insulation materials satisfy similar requirements:
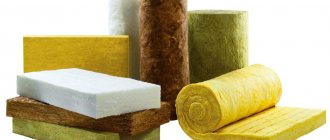
- Mineral wool produced on the basis of basalt rocks: PAROC, eXtra, ROCKWOOL Light BUTTS, ROCKWOOL Light BATTS SCANDIC, ISOROC ISOLIGHT, TECHNOLIGHT Extra, TECHNO Rocklight.
- Mineral wool produced on the basis of fiberglass: URSA Pitched roof, ISOVER Pitched roof, ISOVER Roll frame - M40-TWIN-50, KNAUF Pitched roof Thermo Roll-037, KNAUF COTTAGE Thermo Roll-037, KNAUF COTTAGE Thermo Plate-037.
- Expanded polystyrene (foam plastic) is suitable for insulating non-residential attic spaces. It is laid on the floor and then filled with cement-sand screed. This is due to the fact that the material burns and releases a whole list of harmful substances.
- Extruded polystyrene foam, like PENOPLEX, is also used in conditions where there is no contact with fire (presumably).
- Polyurethane foam is insulation in liquid form. It is used by spraying or filling free space.
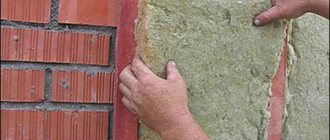
It is worth noting that almost all cotton wool, of any origin, absorbs moist air. In this regard, the installation of such insulation is accompanied by the installation of special waterproofing films. Regular polystyrene or extruded polystyrene foam is also used as insulation for pitched roofs, although many experts do not recommend this.
This list includes some of the most popular insulation materials of our time. At the same time, one should not discount environmentally friendly insulation based on natural materials, such as seaweed, roof insulation based on flax, straw, hemp, as well as cork. Practically, all of them are flammable, although there is one advantage - they do not emit toxic substances when burning.
Therefore, it makes sense to consider the most well-known and affordable methods of insulating pitched roofs based on modern insulation materials.
Roof insulation based on "Ursa - pitched roof"
Thermal insulation for pitched roofs, produced by a German company using URSA Spannfilz technology, is widely used in the construction of all kinds of construction, both residential and non-residential buildings.
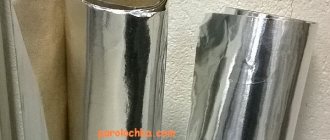
Insulation URSAGlasswool Pitched roof
Advantages of this insulation:
- the elasticity of this insulation allows it to be held in the spaces between the beams without sagging and the formation of cracks;
- lightness of insulation;
- presence of soundproofing characteristics;
- low thermal conductivity – 0.036 W/m×K;
- excellent flexibility of the insulation, which allows you to fill difficult spaces;
- there is no need for additional fastening elements, it is held in the openings by itself;
- under the packaging the insulation is compressed 5 times, and after unpacking it quickly returns to its volume;
- the material practically does not burn.
Prices for URSA Pitched Roof insulation depend on the size of the mats and start at 50 USD. for 1 cubic meter. The thickness of the material is 150 and 200 mm, but the most popular are mats with a thickness of 150 mm. As a rule, this thickness is always enough to insulate pitched roofs in most cases. When calculating the thickness of insulation for a specific climate zone, you will have to use the SNiP 11-3-79 guide. The material is produced with a width of 1200 mm, with a length from 3900 to 4200 mm. It fits seamlessly between the roof rafter system without joints or gaps.
Algorithm for roof insulation, how to lay thermal insulation
Installation of a roof with insulation comes down to the following sequence of actions:
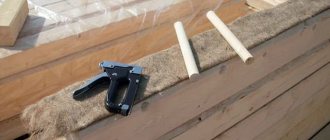
First, the installation step of the rafter legs is measured. The heat-insulating material slabs are cut in accordance with the obtained dimensions, but 1 cm is added to them - this will allow the insulation to stay in place on its own. You can simplify this stage of work when installing a new roof by calculating it so that the distance between the rafters corresponds to the width of the insulation boards. A waterproofing layer must be installed in the space between the rafters and the finishing coating. The membrane must be attached to the rafters so that it envelops them. For fixation, you can use a construction stapler, which attaches the waterproofing to the rafters and sheathing. Waterproofing material must be applied to the eaves so that the collected moisture escapes beyond the roof. The described method of fastening does not allow for proper ventilation, so only a special waterproofing membrane should be used as a material. If waterproofing is already installed under the upper part of the roof, then nails are driven into the rafters every 10 cm so that the distance between them and the membrane is at least 3-5 cm. The driven nails allow you to stretch a cord along the line of which the air gap will pass in the space between waterproofing and thermal insulation material. If the insulation itself is attached using a cord, then the nails will also need to be hammered along the outside of the rafters. When using insulation materials produced in the form of slabs, installation is reduced to inserting them into the space between the rafters (naturally, they will have to be compressed a little so that they fit into the gap). Before properly insulating the roof, more rigid materials must be carefully adjusted to fit the gaps in the rafter system. For maximum efficiency, it is worth installing two-layer insulation. When installing narrow fragments that require joining along one of the planes, you need to make sure that the joints of the first and second layers of thermal insulation do not coincide with each other. The thermal insulation layer should not extend beyond the rafters, and if this happens, then additional timber will have to be placed on the rafters. To attach the insulation, a cord stretched between nails or a lath made of slats can be used. These slats need to be nailed to the rafters at a distance of 30-40 cm from each other. In this case, the vapor barrier layer must be attached before the sheathing is installed - due to the thickness of the slats, an air gap is provided. When installing a vapor barrier, you need to make sure that the material is installed hermetically. To do this, the joints need to be covered with two layers of adhesive tape.
Particular attention should be paid to the points where the material connects to the wall and chimney. When all structural elements are installed, you can proceed to the final stage - installation of the sheathing.
Conclusion
Roof insulation is a very important part of the structure, which allows you to increase the thermal efficiency of the roof. Knowing how to properly install insulation on a roof and high-quality performance of all work will allow you to create a reliable and high-quality structure that will perform its functions throughout the entire period of operation.
Ursoy roof insulation technology
Thermal insulation for pitched roofs requires a special installation technology due to the possibility of condensation penetrating into the material, as well as steam rising from the room. Basically, such insulation is used in conditions where it is necessary to insulate the roof in order to make part of the room under the roof residential.
To carry out the operation of insulating a roof slope with Ursa “Pitched Roof”, you will have to carry out some steps.
Before installing the roof itself, a waterproofing film is laid on top of the rafters. The type of film depends on many factors, such as the characteristics of the insulation, the roofing material and the film itself. The film is laid out across the rafter system with an overlap of 100 mm. The joints of the film are connected using special tape. The material is secured to the rafter system using a stapler or nails with a wide head.
It is worth noting that under no circumstances should waterproofing material be tightened. There must be some sagging, but no more than 2 cm per 1 meter. This is due to the fact that in subzero temperatures the film will stretch even more and may tear.
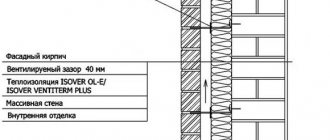
A sheathing of bars with a cross-section of 25x25 mm is mounted on top of the film, although it can be larger, depending on the calculated data. The thickness should be sufficient so that the under-roof space is ventilated very actively. It turns out that there are 2 ventilation gaps between the insulation and the film, as well as between the film and the roof, which prevents condensation from appearing. This means that the sheathing is also installed on the other side of the waterproofing film.
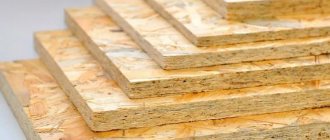
Before insulating the pitched roof, roofing material is laid. It is attached either directly to the sheathing, or to sheets of chipboard or OSB, which are previously mounted on the sheathing.
After this, you can begin laying the Ursa “Pitched Roof”. To begin with, the material is unpacked and left in this state for about 20 minutes so that it straightens out and returns to working condition. After this, the roof insulation is cut into separate sheets of the required size, adding 2-3 cm to the width. In this case, the material will fit tightly into the space between the rafters. To straighten the edges, press lightly on the canvas.
Good to know! In order not to cut the insulation and not waste precious time on this, the distance between the rafters is made slightly less than the width of the insulation by 2-3 cm.
A vapor barrier film is spread on top of the insulation (from inside the attic), which is attached directly to the rafters. After this, the attic space is finished (if necessary). Before finishing, another sheathing of wooden blocks or a classic metal frame for a plasterboard system is installed.
If the attic space is not intended to be used as a living space, then such an insulation scheme is not entirely suitable, since in this case it is necessary to insulate the attic space by laying insulation on the attic floor.
If you buy a finished house where the attic insulation has not been completed, you can resort to some work. Since there is a ready-made pitched roof, the waterproofing film is laid on top of the rafter system, so that it follows the topography of the structure. After this, the insulation is installed in the spaces between the rafters. It turns out that the wooden structure is not protected from leakage, but the insulation is protected.
There is another method, similar to the first, but better. The space between the rafters is not filled with insulation, but a waterproofing film is filled. Hanging elements used in plasterboard systems are attached to the rafters. The insulation is inserted into the hangers and secured. After this, the insulation is covered with a vapor barrier film.
A similar method of insulating pitched roofs is applicable for any type of mineral or glass wool insulation.
Video description
The video shows how, using ecowool, the attic roof of a private house is insulated:
As for the method of laying between the rafter legs, this process is carried out as follows:
- we will assume that the vapor barrier film is laid along the upper ends of the rafters, on top of which the roofing covering has already been installed;
- A waterproofing membrane is laid along the lower ends in overlapping strips, which are connected to each other with self-adhesive tape;
- then the rafters are sheathed from the inside with sheet or slab material (plywood, OSB, chipboard) or boards, leaving free space at the very top;
- in the upper part of the mounted membrane between the rafter legs, a hole is made for the hose, where it is inserted;
- they turn on the equipment that drives ecowool through a hose, the insulation begins to fill the space between the rafters;
- as soon as one section is filled, turn off the equipment, pull out the hose from the hole, which is sealed with adhesive tape;
- move to another area and carry out the same operations.
Installation of Penoplex slabs on top of rafters
As a rule, it is used in cases where it is not possible to use other insulation. This is possible if a residential building is built from scratch. Penoplex slabs can have a thickness from 60 to 120 mm.
Stages of work:
- After installing the rafters, a batten is attached to the bottom, the width of the insulation being thick. This will prevent the slabs from sliding down.
- Then the insulation is laid out in a checkerboard pattern.
- A vapor-permeable waterproofing film is laid on top.
- A sheathing of wooden blocks with a cross-section of 40×40 mm is installed to provide an air gap. The beams are fastened with self-tapping screws, but before fastening you should drill holes in the “penoplex”.
- Roofing material is mounted on top of the sheathing.
Penoplex does not require additional protection.
Methods for insulating a roof from the inside
To ensure that your efforts and time are not wasted, you need to know how to properly insulate the roof of a house from the inside. Note that this process is somewhat more complicated than external roof insulation. However, if there is still no other choice, you need to purchase insulating material, a vapor barrier membrane, and consumables (screws and wooden planks). You will also need to prepare a marker, a sharp knife, a stapler and a screwdriver.
Two methods are usually used for internal roof insulation:
- Laying in spaces between rafters. If the thickness of the insulation layer is less than the cross-section of the rafters, the material is laid in the space between them. First, the rolled insulation is cut into pieces that are 2-3 cm wider than the gap between the rafters. The material is placed in the formed niches. The disadvantage of this method is the possibility of cold penetration into the attic through small cracks in the frame.
- Flooring over rafter legs. This method is used in cases where the cross-section of the rafters is not enough to lay insulation of the required thickness. In this case, 2 layers of insulation are installed. The first is mounted in the niches between the rafters, and the second is laid on top of the rafter frame. After this, the double layer of insulation is fixed by stuffing wooden slats or a metal profile perpendicular to the frame. In this case, the effectiveness of roof thermal insulation increases significantly.
Insulation for pitched roofs in the form of polystyrene foam
Since this material is cheap compared to other types of insulation, it is used quite often.
When working with it, you should consider the following nuances:
- polystyrene foam does not cut well, so working with it is not very convenient;
- it burns and releases harmful substances when burned.
Naturally, the technology for laying it is the same as laying Penoplex, with the only difference being that after laying the foam, many cracks form, which then have to be foamed, for example. It is advisable to protect the foam from direct sunlight.
In conclusion, it should be noted that insulating a pitched roof is a serious process that takes a lot of effort and money. Before starting work, it is better to consult which material is better or more economical.