How to choose?
To begin with, you need to decide where the tank will be located - directly above the pipe, or it will be a remote structure located in the attic.
Installing a container in the attic is convenient, but not always possible - it all depends on the design of the roof and the possibility of supplying and discharging water.
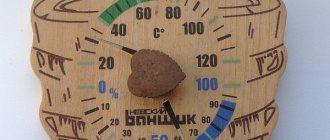
Calculating the volume
The required volume of liquid is calculated from the norm of 15-20 liters per person plus 10-15 liters in reserve. For example, if a family of 2 people periodically washes in a bathhouse, then a tank of 50 liters will be enough. A family of 4 people will need a capacity of 80-100 liters.
Type of material
Pros and cons of steel, cast iron, stainless steel:
Cast iron
Cast iron containers are heavy, they are inconvenient to install, the water in them heats up slowly, but remains hot for a long time;
Galvanized iron
Containers made from it last longer than steel ones, but over time they rust and burn out;
Steel
Due to their high thermal conductivity, steel tanks heat up quickly and cool down just as quickly. The main advantage is the price, the main disadvantage is the low service life;
Stainless steel
They combine all the advantages of iron products with high corrosion resistance.
Enameled products are found in stores. They are more durable than uncoated steel tanks, but are susceptible to chips, in place of which pockets of corrosion form.
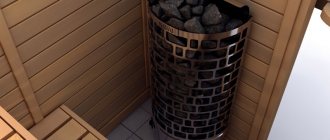
Types of heat exchangers for sauna stoves
Structurally, the heat exchanger can be a coil or a tank with a maximum volume of 5 liters and two pipes for connecting a water tank/radiator.
According to the mounting method, heat exchangers are divided into two types:
- internal. Such products are fixed on one of the side walls of the furnace or mounted on its bottom. It is also possible to install a water jacket, which literally encircles the fuel chamber from the inside or is located in the space between the stove casing and the walls of the firebox;
Heat exchanger for furnace
- external.
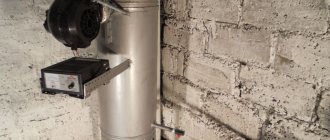
Heat exchangers of this type are fixed to the chimney or attached to the wall of the furnace. External heat exchanger on pipe
Internal type heat exchangers have the best heat saving indicators. The water in them will heat up until the stove cools down completely down to its last brick or stone.
The fastest heating of water is provided by internal heat exchangers and external ones installed on the chimney. At the same time, the first products often imply the need to make design changes/additions to the sauna stove, while the second cannot be called a decoration for the steam room (a wide tank does not fit well into the interior).
Example of an internal steel heat exchanger in a brick kiln
If we compare products in terms of ease of installation, the palm is occupied by heat exchangers that are hung on the outer walls of the furnace. Such products have a long service life and do not spoil the appearance of the stove, but the water in them takes longer to heat up and cools much faster.
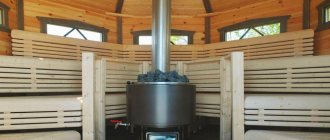
Sauna stoves equipped with a remote tank
One of the most convenient options for heating water is to install remote tanks. Such a tank can simultaneously cope with two tasks:
- supply of hot water to the washing compartment of the bathhouse;
- provision of hot water to sinks located in other rooms.
The great advantage of the installed remote tank is that its presence permanently eliminates such an unpleasant situation when the firebox brings the water to a boil without having time to completely warm up the entire volume of the steam room, which results in the room being filled with clouds of moist steam.
In addition, a remote tank is the only correct solution for those who want to acquire not a Russian bathhouse, but a sauna, the air of which must be extremely dry.
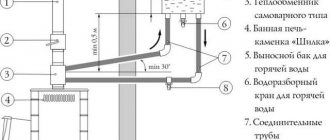
Typically, a remote tank made of stainless steel should be installed in a room located next to the steam room. Heating of the water poured into it is ensured using a heat exchanger mounted in a sauna stove and connected to the tank using pipes.
To circulate water without the use of pumps, the bottom of the tank must rise above the heat exchanger, sometimes called a register, by half a meter or a little more. To ensure that water circulation never occurs, it is necessary to:
- install connecting pipes not exceeding 3 m in length;
- for installation, choose pipes with a diameter of one inch or more;
- ensure that there is no sagging of the pipes and their slope is about 2-5°.
If one of the above conditions is not met, a pump may need to be installed.
Speaking about heat exchangers, it should be noted that for stoves of the “Zhara” brand, for example, they are given a cylindrical shape, and for their manufacture, stainless steel is used, the thickness of which is as much as 5 mm.
Easy-to-use and practical remote tanks, however, also have disadvantages, namely the complexity of their installation and connection. In addition, we should not forget about the significant costs associated with the purchase of rather expensive water heating registers-heat exchangers, pipes, taps, and connecting hoses.
The listed disadvantages of remote-type tanks are largely compensated by the convenient opportunity to equip a shower or connect a battery to the tank that can heat a locker room or shower in the winter cold.
How does a heat exchanger installed in a sauna stove work?
The design of a furnace with a heat exchanger has proven itself so well that various heat removal design options have emerged, with varying degrees of efficiency. The most common:
- Classic coil.
- Built-in flat-plate heat exchanger (similar to two hollow plates connected to each other).
- Samovar heat exchanger installed on a chimney.
A water jacket surrounding the combustion chamber is used extremely rarely and is found in only 1-2 models of factory-made stoves.
Meanwhile, sauna stoves with a heat exchanger have become the subject of consumer debate. Some argue that the use is not practical, others, on the contrary, point to convenience and comfort during operation.
What does a built-in or samovar heat removal device provide?
- A heat exchanger in a sauna stove is needed to produce hot water for washing. This task was the main one when designing the structure.
- The possibility of heating the bathhouse from a stove with a water circuit - in fact, a metal stove becomes a kind of heating boiler. During combustion, enough heat is released to warm up the coolant and heat the required volume of hot water.
The operating principle depends on the device used. Efficiency is determined by several parameters:
- Reliability.
- Sufficient heat dissipation.
- Possibility of operation without the use of a heat exchanger.
According to their design, all water heating devices can be divided into built-in and built-on (samovar type).
Built-in heat exchanger
Stoves for baths with a water circuit for heating and DHW needs began to appear after conventional water heat generators received good reviews. According to their design, furnace equipment with an integrated water heating circuit is divided into several classes:
- The coil is the simplest device used in classic solid fuel boilers. Inside the structure there is a bent metal tube. The shape is different and depends on the internal design of the furnace. The coil is positioned so that the flame does not directly affect it, and heating is carried out through flue gases.
- A flat heat exchanger is a more complex device compared to the previous one. A flat heat exchanger for a sauna stove looks like two hollow plates connected to each other. In terms of thermal efficiency, the design is superior to the coil and is used in modern models of furnace equipment.
- Built-in tank - a separate container is made in the furnace and installed on top of the combustion chamber. The built-in horizontal heat exchanger heats up quickly and maintains temperature while the oven remains hot.
- Water jacket - represents the cavity surrounding the entire combustion chamber and smoke channels. The design is often used in the production of solid fuel boilers, but is not widely used in the manufacture of sauna stoves.
The operating principle of the integrated heat exchanger in a sauna stove is as follows. The spiral or plate is heated by flue gases, the temperature of which reaches 450-500°C. When heated, pressure arises, forcing the coolant to circulate in the heating system. In schemes where an indirect heating boiler is used, the hot water supply is heated using heating heat.
Samovar type
Installing a heat exchanger on a sauna stove is a budget solution to the problem of hot water supply and heating. The water heating device is manufactured in two ways:
- Coil - a coil made of aluminum or copper is installed on the chimney pipe. For systems with natural circulation, up to a storage tank or water distribution taps, the dimensions of the coil should not exceed 3 m. The optimal dimensions of a heat exchanger with forced circulation are 5 m.
- The design of a samovar-type heat exchanger - experts agree that this particular design is optimally suited for a bathhouse. Hot water for showering is prepared gradually, preventing the liquid from boiling.
The movement of water in a samovar-type heat exchanger occurs according to natural physical laws. The heated liquid rises, creating pressure in the container.
The optimal volume of a samovar-type heat exchanger is selected so that the water reaches the required temperature after 2-3 hours of intense combustion. The design is optimal for providing hot water supply.
Installation and connection of the water tank to the heat exchanger in the bathhouse
The nature of the installation of the tank in the bathhouse depends on how the water will be heated - from stove heat or through a tubular electric heater. If the building has running water, a closed water supply is used. In this case, a stove equipped with a serpentine element is better suited. The latter is connected to the tank and heats the water. If the tank is small and light, it can be hung on the wall or directly above the stove. The easiest way to install is an attached container.
When using a stove unit with a coil, the diagram for connecting the heat exchanger in the bath to the tank will look like this:
- The container is installed in the planned location and connected to the pipes via a serpentine element.
- The upper and lower parts of the reservoir must be connected to the corresponding outlets of the element - then the cold liquid comes from below, and the heated liquid leaves from above.
- In the area where water enters for heating, valves are installed - return and safety. For them, it is necessary to determine the pressure indicators that initiate operation.
- An explosive device must be mounted on the tank to release excess pressure that occurs when heated water remains in the tank for a long time.
To prevent the tank walls from being unduly exposed to high temperatures from the furnace, it is recommended to insulate them. This will help the hot water tank last longer. You can put a gasket made of sheet asbestos between the unit and the tank.
https://youtube.com/watch?v=YV6snUTxG9M
Bath stove with heat exchanger: operating principle and installation
Principle of operation
Let’s make a reservation right away: any calculations of the required dimensions of a heat exchanger for a sauna stove will always be approximate. For example, heating a standard sauna room will require approximately 5 kW of electricity. This means that this is exactly the amount of energy we should get from a furnace with a heat exchanger.
On the question of the shape of the heat exchanger for a sauna stove - it all depends on your imagination. The simplest, cheapest and therefore most common option is a stainless steel pipe system. An equivalent replacement can be considered units welded from several channels.
We will take sheet metal as a basis, the thickness of which is at least 2 mm. From it you will need to build a cylindrical (later upper) and rectangular (lower) tank, and connect them with pipes. The size (or rather the area) should be calculated in accordance with the dimensions of the intended room.
Before final installation, it would be a good idea to evaluate the accuracy of the calculations made. To do this, the cut parts are secured by welding. After checking, you can begin assembly. Next is the strength assessment: we weld the lower pipe, and fill the heat exchanger itself with water, while connecting the outlet hole to the main tank.
If a pump is not provided in the system, then the following device and relative arrangement of pipes is recommended: cold water from the tank flows by gravity through the pipe to the stove, and hot water returns to the tank. The main condition: the pipes must be installed at an angle of 2-5 degrees.
The need for thermal insulation of the tank is determined by the possibility of its multi-purpose use, including for heating adjacent rooms.
Regardless of the form and method of self-production, the weak point of any heat exchanger is metal corrosion. Metal surfaces, by definition, have low resistance to aggressive environments, including water. This is why there is a need for internal surface protection.
Experts in this field recommend taking a responsible approach to choosing a heat exchanger for a bath and not skimping on materials and proper installation. Proper operation is also important. Here are the basic rules you should know:
- The main property of pipes when heating a heat exchanger is expansion. As a result, there is a possibility of their length increasing. Therefore, it is prohibited to use fixed connections when attaching pipes to walls.
- Choose the heat exchanger wisely in terms of power (size). This should not negatively affect the performance of the oven. Ten percent heat extraction is the limit. And if the already designed sauna stove is not powerful enough, opt for a more modest heat exchanger.
- The external water tank should be selected based on the following condition: the water in the system should heat up only two hours after the start of the fire. Not before! Otherwise, boiling water will quickly fill the steam room with wet steam. I don't think this is of any use to you.
- It is better to fill the tank with water in advance. It is not recommended to do this when the sauna stove is already at a high temperature.
- It is recommended to use a material that can withstand high temperatures as a sealant for threaded connections. It seems to be an obvious fact, but it is often forgotten.
Nowadays, the construction market is flooded with offers of all kinds of bathhouse units. Starting from a massive cast iron stove, and ending with simple and cheap options for wood stoves with a heat exchanger, where the price of the latter has little effect on the overall cost of the system. The choice is yours! Let us just give you a little advice: the heat exchanger must be made of high-quality steel with a good level of heat resistance and heat resistance.
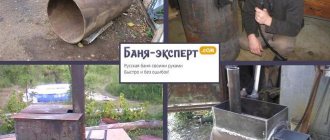
Heater stove - manufacturing guide
We bring to your attention 3 common designs of metal stoves for baths:
- a simple horizontal stove made from a cylinder, heated inside the steam room;
- heater made of 530 mm pipe with remote firebox;
- vertical sauna boiler “three in one”.
The first option is attractive due to its ease of manufacture, small size and mobility. For homemade products, you will need an old propane cylinder with a diameter of 300 or 500 mm and scrap metal. The second heater is distinguished by an additional section with a door built into the opening of the steam room wall, and an open heater. The third model is a whole boiler, consisting of three compartments - a firebox, a closed heater and a tank for heating water.
Advice. If you cannot find a good pipe or cylinder, cook the stove according to the drawing from sheet steel with a thickness of at least 3 mm (preferably 5 mm). First, you will have to perform a number of operations to assemble the firebox - cutting the workpieces and welding them together with strict observance of 90° angles.
The drawings show options for heating units made of sheet iron
We weld a simple stove
The first thing to do is to correctly cut the cylinder cap along the factory seam. To do this, unscrew the gas valve with an open-end wrench and fill the container with water, after which you can use the grinder.
Reference. Propane is heavier than air and therefore reluctant to leave closed containers. To avoid an explosion when cutting metal, it is customary to force it out with water.
Assemble the heater according to the presented drawing, observing the following order:
- Cut openings at the end of the lid for mounting doors and in the housing for the chimney pipe. Make frames for the loading and ash doors from metal strips, and weld them to the openings.
- Assemble the grate by welding and place it on the corners fixed inside the cylinder. Weld the cut cover back into place.
- Make the sashes as shown in the photo. Place them on the hinges and attach the latches.
- Attach legs and a chimney pipe to the body.
After assembly, the gas cylinder sauna stove is melted outside in order to burn off all the old paint. Then it can be degreased and repainted using the heat-resistant composition of the KO series.
Manufacturing a unit with an external firebox
To make such a stove, you need to prepare metal parts and cut the pipe to size, following the drawing:
Advice. When preparing the metal for the additional heater section, measure the thickness of the wall between the steam room and the dressing room. This way you will know the width of the extension part that will fit into the partition opening.
Perform further work according to the instructions:
- Cut a hole in the top of the pipe, weld the chimney pipe to it, and weld the legs at the bottom of the firebox. Install the grates as described in the previous section.
- Make the front section and weld it to the firebox. Weld a blank metal disk to the rear end of the housing.
- Make doors with handles insulated with basalt wool and install them in place.
Important point. The lower plane of the remote firebox should be flush with the pipe wall for easy cleaning of the ash pan.
All that remains to do on top of the finished stove is to weld a frame for the heater from corners covered with a coarse metal mesh. After firing, staining and installation in the bathhouse on site, fill the mesh with special stones from the list:
- basalt;
- river pebbles;
- gabbro-diabase;
- Soapstone chlorite
Making a vertical boiler
The peculiarity of the round unit shown in the drawing is the presence of 3 chambers - fuel, heater and water tank. Their size can vary according to your wishes, for example, the larger the size of the firebox you make, the longer 1 stack of firewood will burn. Enlarging the heater will allow you to accumulate more heat, which is released for a long time after the fuel burns out.
Advice. You should not greatly increase the volume of the water tank, otherwise it will not have time to warm up by the time of washing.
The boiler assembly procedure looks like this:
- Cut blanks for partitions, bottom and lid from metal with a thickness of at least 5 mm. Prepare the ends of the pipe and weld the round grate bars.
- Make openings in the body for the doors and hatch for loading stones.
- Make holes in the partitions for the chimney and install them inside the pipe. Secure the tank lid to the hinges.
- Make doors from semi-circular cut out pieces and place them on the awnings.
- Install a flue duct and a water drain valve at the bottom of the tank.
Coil for furnaces
One of the easiest heat exchangers to manufacture is a coil.
All you need is to find a pipe made of a sufficiently ductile metal. Copper or aluminum are most often used, as both metals are resistant to corrosion and bend easily. Then the pipe is bent, and in principle it can be any shape. In order for the water to actively move by gravity (without a pump), the total length of the coil should not exceed 3 meters (this includes the connection to the remote tank). When creating your own heat exchanger, “try” it on the stove: it should not come into contact with an open flame, but should be heated by hot air. An external thread is cut at the ends, to which a remote tank is then connected through fittings.
The coil can be located not only inside the firebox, but also outside. It is hardly worth wrapping the stove, but a metal chimney will heat water quite effectively. After all, if the furnace does not have an afterburner, then the temperature at the furnace outlet can be up to 500 o C. For an example of such a heat exchanger on a pipe, see the photo.
In the simplest version, the heat exchanger can have the shape of a horseshoe. Then you can use stainless steel - this way you can bend it. For example, the video clearly shows a similar shape that was used in the Vitra sauna stove (for a video on how to move the heat exchanger in a Vitra stove from the left side panel to the right, look at the end of the article).
The simplest type of heat exchanger for a sauna network is a curved tube with threaded ends
One type of coil is a register. This is, as a rule, a welded structure made of pipes, which is often somewhat reminiscent of heating ones. The register for a sauna stove is most often made of stainless steel, since only it can withstand harsh operating conditions for a long time. Welded structures are large in size and weight, and therefore they are more often installed in brick kilns.
Sometimes the heat exchanger is made in the form of a small container with water (volume up to 3 liters), which is also located inside the firebox without direct contact with the fire. The principle of its operation is no different from others. To make such a heat exchanger tank last longer, when making it yourself, try to make the structure so that there are as few welds as possible.
Heat exchanger for sauna stove - unique design
When making any of the heat exchangers located inside the furnace, you need to remember that they can take no more than 10% of the furnace power without damaging the heating of the room. So it is irrational to make registers that are too large. It is difficult to place them and they will negatively affect the air temperature in the steam room.
It’s better to design the system so that you can heat the water several times during your visit to the bathhouse: you don’t need 150 liters of boiling water at once, do you? First you need a little hot water to steam the brooms, then a little more to wash yourself before the steam room, and then some more to rinse.
A huge selection of metal structures, their quality and price, as well as aesthetic appearance and compact sizes are leading to the displacement of traditional bathhouse modifications made of brick. Their place is taken by new metal models. Let's conduct a comparative analysis of some samples.
Stove "Vesuvius" Skif
Having determined the volume of the steam room, calculating the power of the stove and the volume of the tank, the buyer chooses the system he needs. A good option would be the Vesuvius stove model Skif 16 VChT. Its power allows you to maintain a fairly high temperature in a steam room with a volume of up to 18 m³, and the heat exchanger body, located in one of the side pockets, is designed to quickly heat a hanging tank located in another room. The position of the heat exchanger specifically on the desired left or right side is chosen by the buyer. It depends on the installation location and ease of installation.
The important advantages of the model are the achievement of the effect of a brick oven due to the arrangement of stones in a casing surrounding the entire oven. For most models, the heater compartment is located in the upper part of the body.
High-quality steel, 8 mm thick, is used to make the firebox; it retains its proportions at high temperatures.
Oven "Tornado"
The Tornado stove model 20 M², LK cast iron door provides significant power, it is designed to heat a steam room with a volume of up to 20 m³. This model has a large mass, it is equipped with a built-in heat exchanger, and a capacious side casing makes it possible to lay a significant volume of stones up to 240 kg. An additional plus is a powerful cast-iron firebox and a casing that protects the air from overheating, but warms up the stones in the side heater as much as possible.
The weight of the stove is 125 kg, which is a solid indicator. Before installing it, you need to correctly calculate the strength of the foundation.
Both models considered are domestically produced. Finnish brands provide competition to our stoves. Models of sauna stoves using heat exchangers are used both for Russian baths and for saunas and Finnish baths.
The positive properties of stoves with a heat exchanger make it possible to eliminate the use of additional boilers or the use of other methods of heating water. New technologies on which their production is based extend the service life of such furnaces. The main condition is proper operation and high-quality installation of the system. It is important to observe safety precautions when operating the equipment.
The most practical way to heat water in a bathhouse is to use heat from the stove. There are several ways to do this. One of the most obvious and simplest is to install a water tank on or inside the stove. Such tanks are called mounted and built-in. There are also set-up tanks - these are some kind of containers that are placed on top of a heated oven.
All these methods are good, but they do not provide the ability to supply hot water to the shower. And today, few people imagine a bathhouse without a shower. Remote water tanks provide this opportunity. A heat exchanger is installed in the stove, the tank is hung next to the stove or in another room (in the attic, for example), they are connected to each other by pipes through which water circulates. Passing through the heat exchanger, the water heats up and enters the tank, from where it can be distributed to the shower or tap. The system is simple and effective.
Built-in tanks were the first to appear. These containers are installed either above the firebox or on the side of it; they can be of any shape, but rectangular ones are more common. The thickness of the walls (made of stainless steel - it is irrational to use others in the oven) in containers up to 50 liters is 0.8-1 mm, in larger ones up to 1.5 mm. To drain the water, taps are provided (usually ball valves), and water is poured into a special hole.
But built-in tanks are not always convenient - you can’t leave them empty, and boiling water is a source of “heavy” wet steam, which is not the best for a steam room. Therefore, you have to constantly drain hot water and add cold water in its place. Troublesome. The same thing can happen with mounted tanks, but here the situation is somewhat different: hanging or removing such a tank is quite easy. In any case, you can install the stove so that you can do this without much inconvenience.
Built-in water tanks are not the best solution
Installing a heat exchanger tank on a chimney involves welding work, which not everyone can do. A simpler design is a coil wrapped in a spiral around the chimney. The coil can be made from a copper or aluminum tube - these metals are easy to bend, have high thermal conductivity and are not subject to corrosion.
The diameter of the tube is chosen so that it is convenient to connect it to the fittings of the water storage tank. For bending, pipes with a diameter of no more than 28 mm are more convenient. In any case, the length should not exceed 3 meters - this is a prerequisite for natural coolant circulation. To connect the heating coil to the tank, use a flexible hot water line.
This heat exchanger design can be used to produce hot water, or less often for heating small rooms. Maximum heating efficiency is achieved if the coil is installed on the chimney of a simple stove such as a potbelly stove with a high temperature of the flue gases.
A pipe heat exchanger is usually installed on the chimney of a metal stove installed in a garage or workshop to produce warm water or heating. It is also possible to install a coil on a sauna stove.
Necessary materials:
- pipe made of copper, aluminum or steel - about 3 meters;
- flexible hose for hot water supply with a diameter of ¾ inches - 2 pieces of the required length;
- a storage tank equipped with a float valve for water supply and a drain valve for its consumption;
- ball valve for draining the system.
Sequence of work:
- The most difficult thing when making such a heat exchanger is to bend the pipe into a spiral without reducing its cross-section. Copper pipes with a diameter less than 28 mm can be bent using a pipe bender without heating. Steel and aluminum, as well as larger diameter pipes, must be heated with a blowtorch before forming.
- You can also use this method: fill the pipe with dry sand and tightly plug its ends with wooden plugs. The pipe is bent according to the template - a pipe having the diameter of the chimney, after which the plugs are removed and sand is poured out, the pipe is washed under high pressure of water.
- Threads are cut at the ends of the pipe and adapters are installed for connection to the system.
- The pipe is installed on the chimney. To improve heat transfer, you can solder the coil onto the chimney with tin, having previously degreased the soldering areas and removed oxides with phosphoric acid.
- The tank is hung on the wall or placed on a support above the level of the coil. Connect the heater to the tank using flexible hoses. A drain valve is installed at the lowest point of the system.
- Initially, a tank for heating water in a bathhouse was equipped with a heat exchanger - the design is quite simple. A special heating metal tank with a capacity of no more than 5 liters is built into the heart of the furnace, the firebox, or in an area with high temperatures. Which in turn is connected by pipes to the main tank in the next room; the tank can reach a volume of 120 liters.
- The principle of operation is that from a large tank to a small one, cold water flows through the drive pipe, is heated in the small tank, which is called a heat exchanger, and returns through the outlet pipe to the main tank, already heated.
- If the drive and outlet pipes are positioned at the correct angle, then the water will successfully circulate by gravity thanks to natural physical laws. But in order to avoid the formation of air pockets in the system and ensure faster and more uniform heating of the water, the tank for the heat exchanger in the bathhouse is equipped with an electric pump for forced circulation of liquid in the system.
- The heat exchanger can be located directly next to the firebox itself, in which case it is installed at the stage of construction of the furnace inside the structure. Or it may have the so-called samovar operating principle, when a small tank is mounted around a metal chimney for a bathhouse directly next to the firebox.
- But regardless of the location of the tank, professionals prefer systems in which the liquid circulates freely, without additional pressure.
Schematic diagram of a samovar-type system.
Why do you need a sauna stove with a water tank?
The main function of a sauna stove is to warm up the steam room. If wet steam is needed, then a heater is additionally equipped. Stones are heated in it, which produce hot steam after dousing with water. A separate room is made for bathing - a washing room. Here you need hot water so that you can wash off the sweat and swim in comfortable conditions.
If the bathhouse is connected to the hot water supply of the house, a water tank is not required. But if it must be supplied separately, then a tank is very desirable, otherwise you will have to heat the water for bathing. These are additional fuel costs. They can be easily avoided by immediately installing a model with a tank.
Any stove can be equipped with a tank - gas, wood or electric. It can be made of steel, cast iron, brick or combined materials. The tank itself can be built-in, remote or mounted. For small baths, compact models with heaters and tanks are usually chosen or manufactured.
Bronze model
Bronze bath taps are controlled using valves, spindles, disks and plugs. Hence their classification. They also differ in the type of mixer head. The housings are made of metal with double-sided threads and a supply pipe. In addition to a replaceable fitting element with a head, the faucet has a nose that determines the direction of the water jet
When purchasing, you need to pay attention to the material from which the faucet is made, its characteristics, spout, design, price and functionality. For example, one made of brass is more expensive than models made of stainless steel, but is stronger and more functional in operation.
Making a metal stove with your own hands
When choosing a drawing for making a stove with your own hands, a number of factors are taken into account:
- area of the room - the dimensions of the device depend on it;
- presence of the desired functions - heating of air, water;
- the presence of an open or closed heater;
- heat capacity - protective shielding.
The location of the device in the room also plays a significant role. If you need a compact stove for a small steam room, a location in the corner is suitable. In this case, it is better to choose a model with an external firebox or a vertical one. When located in the center of a large steam oven, it can be horizontal and massive for high-quality heating of the room.
When making the stove itself, preference is given to sheet steel. It is convenient to cut and bend, and the material itself is resistant to burning.
For the longevity of a homemade stove, a fairly thick layer of steel is required, but too large a layer width (for example, 1 cm) can lead to prolonged heating of the device and a decrease in its efficiency.
Therefore, the optimal choice would be steel with a thickness of 5-7 mm for the firebox and 3-4 mm for the body.
It is recommended to buy the remaining parts - doors, hinges for them, valves, a tap for a water tank, grates for an ash pan and a heater - in specialized hardware stores. The chimney is made from pieces of pipe of suitable diameter (at least 10 cm), the legs are made from metal scraps of sufficient thickness to support the weight of the stove, as well as a mesh with stones. To fill the heater, river boulders of a round shape and suitable size are suitable.
Tools
To complete all stages of the work you will need the following tools:
- welding machine;
- grinder with cutting disc for iron;
- container for mixing the solution;
- furnace hammer-pick;
- Master OK;
- rule.
To work safely, you need to purchase protective equipment: a special mask and gloves. You will need various measuring instruments: tape measure, building level.
Construction stages. How to weld a structure correctly?
First of all, a place is prepared for the stove and the foundation is laid. Most metal devices are compact, so they do not require pouring concrete; it is enough to lay out the base from two rows of bricks. If you decide to lay out a heavy brick screen, it is more advisable to take care of a full-fledged foundation:
- The floor where the stove is installed is dismantled and a pit half a meter deep is dug.
- A drainage cushion is poured onto the bottom: a layer of wet sand, a second layer of broken crushed stone or special granulated expanded clay.
- Wooden formwork is placed on the drainage and filled with concrete mixture.
- After drying the foundation, a two-layer waterproofing (roofing material) is placed on it.
After preparing the foundation, thermal insulation of the future location for the device is ensured. The walls and ceiling are covered with fire-resistant material, the device itself is installed so that there is a gap of at least 30 cm to the walls.
Then begin welding the structural parts:
- According to the drawing, using a grinder, cut pieces of sheet steel for the body and internal chambers.
- The side walls and the bottom of the body are welded. Holes for the combustion chamber and ash pan are cut in the front part. Inside, metal corners are welded to the walls of the housing to secure the compartments.
- The combustion chamber and ash pan with a grate separating them are welded and installed.
- Welding and subsequent placement of the internal heater and water tank (if present in the project) are carried out.
- The chimney pipe and body legs are welded.
After installing the stove, lay out a brick screen with a distance of 3-5 cm from the walls of the device. The width of the masonry is usually taken to be half a brick; small windows are left in the lower part for air circulation.
Possible installation difficulties
When working independently on the manufacture of a device, the following errors occur:
- discrepancy between the dimensions of the device and the steam room - leads either to rapid overheating of the air or to the inability to create a comfortable temperature;
- insufficient insulation of the chimney - due to constant contact with hot air, the chimney most often becomes the cause of fire hazards;
- Incorrect location of the furnace screen, too close to the walls of the housing - this leads to overheating of the steel, shortening its service life.
Attention! In order to avoid basic mistakes, you should create an accurate drawing of the device before starting work and consult with an experienced craftsman
Heat exchanger installation
If you want to avoid time-consuming installation work, then you should purchase a metal stove equipped with a heat exchanger. Carrying out this work is quite simple - you just need to carefully read the operating instructions and assemble it exactly according to the diagram. Finally, all you have to do is connect it to the system.
The situation is completely different if you need to connect the water circuit to the gas duct or firebox of a brick kiln. In this case, you will need to make a register , for which you can use black thick-walled pipe or stainless steel. After this, all you have to do is build it in, focusing on the pre-developed stove design.
By studying reviews about making and installing stoves with your own hands, you can find recommendations from individual users that the optimal surface area for a heat exchanger is 1 m2. However, this may not be a universal guide due to differences in oven design. In addition, it is not easy for an ordinary user to calculate this indicator. Therefore, it is better to make a homemade coil, similar to the one that comes with ready-made sauna stoves. In other words, you first need to find out the technical characteristics of a product from any manufacturer of the same power as yours, not forgetting to take into account the heat transfer surface area.
If you are interested in models of chimney heat exchangers operating on the principle of a water economizer, then you have two options - buy from the manufacturer or make it yourself by assembling a structure from two pipes of different diameters. But here you need to remember the following: by making a long circuit, you thereby increase its efficiency of heat exchange with the chimney.
Review of furnaces with heat exchanger
There are built-in models of heat exchangers. Below we will look at the popular ones.
Sauna stove with boiler
Let's start with how justified such a decision is from an economic point of view. Installation of this device increases the efficiency of the equipment used. With it, exhaust gases not only fly away uselessly into the atmosphere, but also simultaneously heats water, which can then be used for bathing or other household needs. Therefore, it repeatedly justifies the fact of its installation in the long term.
Vesuvius Skif 16 VChT
Powerful and fast, with a right- or left-side location of the water heater, equipped with a mesh. It boasts a steel firebox with thick walls (8 mm), thanks to which it is not afraid of even constant exposure to high temperatures.
Tornado 20M2
Productive, heavy (125 kg). Equipped with a cast iron door, built-in heat exchanger and a spacious side casing designed for 240 kg of stones. Must be installed on a reinforced foundation. But the efficiency is impressive.
Harvia 20SL Boiler
A heater from a Finnish manufacturer, weighing 75 kg, with 40 kg of stones. Modern, with a recuperator in the form of a tank, with a remote structure and a built-in condenser, designed for a steam room with an area of up to 20 m3. It has stable legs and a stainless frame, has smooth shapes and an attractive design.
Types of tanks
All tanks are divided into types according to two criteria: installation method and material of manufacture. According to the installation method, tanks are:
- built-in;
- remote;
- samovar type (mounted on a chimney).
According to the material of manufacture:
- cast iron;
- stainless steel;
- made of enameled steel.
Each type has models that differ in shape, volume, and wall thickness. Most containers are equipped with standard taps and have shower outlets, but there are also those from which water is drawn through the top using a ladle. In order not to make a mistake when choosing, you should familiarize yourself in detail with the advantages and disadvantages of all these types.
Built-in tanks
Built-in tanks
The most economical and convenient option. The tank is installed during the laying of the furnace. Its lower part is located inside the firebox, due to which the water is heated directly by the flame. Hot water is drawn through the top using a ladle or using a built-in tap.
Brick oven with water tank
Due to direct contact with fire, the walls and bottom of the container must be as thick as possible, therefore the most preferred material for such a tank is cast iron with a thickness of 5 mm. Stainless steel tanks with wall thicknesses of 1 and 1.5 mm are considered no less popular. Enameled steel containers are not suitable for this installation method. Cast iron tanks are bowl shaped, stainless steel tanks are usually cube or cylinder shaped.
Cast iron water tanks
Advantages of built-in tanks:
- water heats up quickly;
- the water temperature is maintained for a long time;
- free space is saved since the tank does not protrude beyond the stove;
- easy installation.
Flaws:
- the heat transfer of the furnace decreases, since the main part of the heat is spent on heating water;
- the dimensions of the tank are limited by the size of the furnace;
- the tank must have thick walls, which increases its weight and cost.
Metal tanks for sauna stoves
This method is convenient in cases where no more than 4 people are steaming in the bathhouse at the same time, or people wash separately. For example, if 3-4 people take turns steaming in a bathhouse, this takes quite a lot of time, and accordingly, it will take longer to maintain the water temperature by adding firewood. The built-in tank allows you to save on fuel while remaining hot for a very long time. But for large companies, this option is not the most optimal, since it does not provide the required amount of water.
Remote tanks
Remote tanks
The remote tank is located at a distance from the firebox and is connected by pipes to a heat exchanger built into the furnace. Without this, its operation is impossible. Most often, such a tank is installed in a washing room or mounted on the wall of a steam room next to the stove, if its dimensions are larger than the area of the firebox. When choosing a location for a container, it is necessary to take into account that the length of the pipes should not exceed 2.5-3 m. Remote tanks can be made of stainless steel or enameled, cylindrical, rectangular or even triangular in shape - for installation in the corner of the room.
Triangular shaped water tank
Advantages:
- the tank is installed where it is more convenient;
- Large containers can be used;
- there is no direct contact with fire, so the tank can be enameled and with thinner walls.
If 6-8 people regularly steam in a sauna, a remote tank is an excellent option.
Flaws:
- without maintaining a fire in the firebox, the water quickly cools;
- the oven cannot be used without water in the circuit;
- more complex installation compared to a built-in tank.
Remote tank connection diagram
Tank on a pipe or “Samovar” design
This option involves installing a tank around a chimney, and in some models the pipe is located outside the tank, in others - inside.
Hot water tank on a pipe
Design option for a water tank on a pipe
In height, the tank can occupy the space from the stove to the ceiling, partially extend into the attic, or be attached only to a small section of the chimney above the stove. The most convenient container shape is cylindrical, but there are many models with rectangular, triangular and oval sections. Heating of water is carried out using smoke passing through a pipe, which has a very high temperature.
Oval shaped water tank
Advantages:
- fast and uniform heating of water;
- does not reduce the heat output of the furnace;
- space saving;
- you can install a container of any volume;
- the water stays hot for a long time.
This tank is suitable for any bathhouse and any number of people. It all depends on the size of the container.
Stoves with water tanks on a pipe
Flaws:
- installation complexity;
- increased soot deposition on the walls of the chimney.
When installing the tank, it is necessary to select the correct fastening elements in order to securely fix the tank in a vertical position. In addition, you will need to install pipes for supplying cold water and discharging hot water, and install a faucet.
Samovar type tank
Tank on the chimney
Principle of operation
Modern heat exchangers may differ from each other in the principle of heating water, on the basis of which they can be divided into several types:
- Coil installed inside the heater;
- An external heat exchanger, made in the form of a rectangular tank, the heating of which is ensured by contact with the walls of the furnace;
- An external water circuit whose high heating temperature is maintained by flue gases.
You can also find models on sale in which a stainless steel water tank is already installed in the design. However, this type of heat exchanger works in the same way as a coil.
Coil
The first type of air heat exchanger for the chimney is a steel coil , which is installed directly in the firebox. It is positioned in such a way as to avoid direct contact of the pipe with the flame. In other words, it is installed at some distance from the highest temperature zone. It is best when this element is located in the path of waste products of fuel combustion. In this case, you won’t have to worry about its possible burnout, and this is a guarantee of its long service life. The built-in coil has connections at the outlet that allow you to connect pipes leading to an external storage tank.
The advantage of heat exchangers of this type is the minimum time for heating water . However, their performance is not impressive.
- For heating, heat taken from the firebox is used, and this leads to a decrease in the heater power. As a result, the heating time of the steam room increases, and this increases fuel consumption.
- The main problem remains unresolved - the hot flue gases will continue to fly out into the chimney in the same way, without bringing any benefit. Because of this, the efficiency of the unit is at a rather low level, which does not exceed 50%.
True, all of the above does not apply to brick sauna stoves equipped with a heat exchanger and several flue gas passages , which serve to maintain a comfortable temperature in the dressing room and washing room.
Outdoor heat exchanger
Another type of chimney heat exchanger, which allows the heat of the stove to be transferred to water, is an external hanging tank made of stainless steel. As a rule, it is installed on one of the side walls of the firebox, and heating is provided by the infrared radiation emitted by it. The advantage of this option is ease of installation, but using such a heat exchanger is not very convenient. Here the disadvantage inherent in the first type of heat exchanger manifests itself, namely, straight-line heat extraction, and in addition to this, cold water has to be constantly added to the hanging tank.
Electric heater
Special electric heaters for bath needs are traditionally divided into two classes: storage-type boilers and units with flow-through action. When choosing a type suitable for given conditions, it is recommended to proceed from the following considerations.
In areas where there are frequent power outages, a storage tank is more suitable for installation in a bathhouse; in the simplest case, it is a container with a useful volume of 30 to 200 liters. A heating element and a special heat-sensitive sensor are installed in its internal space, which is responsible for maintaining the water temperature at a given level.
Among the advantages of such heaters it should be noted:
- increased level of electrical protection;
- the ability to use heated water for some time even in the absence of electricity;
- availability of several designs (vertical and horizontal);
- efficiency.
For areas with a reliable power supply, less common flow-through heaters that operate on approximately the same principle as a gas water heater may also be suitable.
The disadvantages of units of this type include significant energy consumption and the need for equipment in a bath with powerful electrical wiring. In addition, in order to maintain a fixed level of water heating in this case, it will be necessary to ensure the stability of its supply.
Types of water tanks
Sauna stove with built-in tank
When taking bath procedures, there is a constant need for water. It is needed for watering stones in the stove, processing brooms, washing the body after being in the steam room, and maintaining cleanliness in the room. Therefore, it is necessary to always have a heated liquid nearby. In summer cottages, where bathhouses are often built, it is often not possible to use the main hot water supply. To solve the problem, a hot water tank is connected to the heat exchange element.
Tanks differ in design, materials used, dimensions and shape. There are models on sale that are specially designed for use in a sauna. Tanks with a water circuit are usually made of stainless steel or galvanized sheet.
Built-in
In the past, such hot water tanks were installed in bathhouses during the construction process. When the lower part of the tank was connected to the firebox, the liquid was heated from the heat of the stove. The advantage of this design is the high heating rate. The downside is a decrease in the heat transfer of the furnace unit to the air masses (since most of it is used to prepare the liquid). Water is taken from the container with a scoop or a tap is installed. The capacity of the resulting tank is determined by the size of the furnace.
Remote
The convenience of connecting an external tank to a sauna stove is the ability to choose from several locations for placing the tank. Usually it is placed in the shower room next to the steam room. A heat exchange element mounted in the furnace is responsible for heating the liquid. It is connected to the tank via brass or copper pipes. Cold liquid flows through the heat exchanger, and already heated liquid returns.
On the pipe
Here the water is heated by the heat of gases moving through the chimney. Installing such a tank is more difficult than other types, but its use has a number of advantages. The liquid heats up very quickly, and the large capacity will allow you to serve a company of 5 or more people. Water retains heat for a long time even after the stove has finished firing. Often tanks are installed in the attic. This placement is advantageous in that it allows you to leave more free space inside the room. The material for the tank body is most often stainless steel, which also contributes to the rapid heating of water. But at the same time, you need to make sure that the liquid does not start to boil (this applies to tanks of any type).
Why do you need a heat exchanger?
The vast majority of sauna stove designs do not contribute to saving wood fuel. This is due to the specific requirements for them, namely:
- the steam room should be heated in the shortest possible time to a high temperature;
- the stove cannot take up much space;
- the presence of a heater is mandatory;
- The heater operating mode is periodic.
Based on the listed requirements, sauna stoves are designed in such a way as to quickly reach a high temperature in the firebox and maintain it for a certain period of time. In this case, a lot of unused heat simply escapes into the atmosphere through the chimney. It would be a sin not to use this thermal energy to heat water for washing or even heating the rooms adjacent to the steam room.
Note. An exception is Kuznetsov's brick bell-type stoves intended for baths. A well-thought-out design allows you to significantly save firewood, the stove retains heat for a long time and also heats neighboring rooms. There are also modifications using a water heat exchanger.
One of the simplest solutions is to use the heat generated by burning wood. Currently, there are many models of stoves with a built-in coil on the market. If a heater without a water circuit is already installed and functioning, nothing prevents it from being equipped with a homemade or factory-made heat exchanger. Then you won’t have to spend money on a boiler and then pay for electricity.