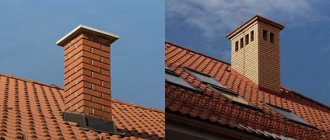
A chimney deflector is a simple cone-shaped structure that covers the chimney pipe on the roof of the house. This device creates good draft inside the chimney, prevents it from becoming dirty and protects it from precipitation and gusts of wind.
Many owners of private houses do not know how to increase the efficiency of a chimney using a cone or weather vane, and some even install this structure for aesthetic purposes. In this material we will try to understand what the principle of operation of the deflector is and which models are most applicable in everyday life.
Important points in preparation for assembly ↑
There are many types of devices that increase chimney draft. There are quite easy-to-manufacture options that are popular - TsAGI, Grigorovich deflectors, chimneys mounted on brick pipes. Although such complex structures as weather vane deflectors have an advantage due to which they are also successful - these devices provide decent traction in any wind direction.
Chimney deflector
What is needed from materials and tools ↑
When creating any of these pipe nozzles to remove combustion products, you can use materials and tools that do not require such special skills as, say, the ability to work with a welding machine. To make a chimney deflector with your own hands, just use:
- a wooden or rubber mallet;
- metal scissors;
- roulette;
- ruler;
- special chalk for metal;
- electric drill;
- manual riveter;
- metal drills;
- hacksaw for metal;
- regular scissors;
- simple pencil.
Types of deflectors
It’s easy to make a device if you have:
- sheet metal, for example, galvanized iron;
- a metal strip or a small steel corner;
- aluminum rivets (drills are selected according to the diameter of the rivets);
- for fastening the product to the chimney, bolts and nuts;
- cardboard for preparing patterns.
Deflector diagram
The first stage of work is drawing up drawings and patterns ↑
Before you start making a chimney deflector with your own hands, prepare drawings on plain paper. For each option, there is a certain ratio that affects the efficiency of the device when removing gases. Therefore, a product diagram is created indicating the dimensions, according to which the required amount of materials will be calculated and patterns will be created for cutting sheet metal.
After preparing the drawings, patterns are made that are subsequently used to construct the elements of a particular device. Having made the necessary patterns, we begin to create a metal structure.
Grigorovich deflector
Grigorovich deflector - manufacturing stages ↑
The simplest product is the Grigorovich device, which is easy for most people to make.
Calculations and preparation of drawings ↑
When drawing drawings and sizing this product, the following ratio applies:
- the height of the structure is approximately 1.7d;
- the cap must be made with a width of 2d;
- The diffuser width should be about 1.3d.
Grigorovich's homemade deflector
The symbol d refers to the diameter of the smoke channel. If a different size ratio is used during manufacturing, this will negatively affect the efficiency of the created device.
Based on the drawn drawings, patterns are prepared that are used when cutting galvanized iron into elements, from which the product is then assembled. To do this, transfer the outline of the elements in expanded form and in full size onto the cardboard, using a ruler, tape measure and pencil. When making a deflector for a chimney pipe designed by Grigorovich, prepare patterns for the outer cylinder, diffuser and cap.
Diffuser calculation
Stages and nuances of making a deflector ↑
Next, the following work with metal is performed:
- Using prepared patterns, outlines of the necessary parts are applied to sheets of metal, outlining cardboard figures with special chalk. If special chalk is not available, you can use a simple pencil. Add 20 mm to the contour of the parts in places where they overlap, which will allow you to maintain the required configuration of the finished elements during assembly.
- Using metal shears, the elements necessary for assembly are cut out of galvanized metal, thereby preparing the expanded outer cylinder, diffuser, and both parts of the cap - the umbrella cap along with the reverse cone.
- Then, using a hacksaw, metal strips or a corner are cut into pieces of the required length, through which all the elements will be connected into the finished product.
- The parts are given the required shape by folding and bending them in a certain way.
- The next operation is assembling the product. The elements are placed on top of each other and, using an electric drill, the necessary holes are drilled. Using rivets placed in prepared holes, the parts are fastened together.
- To install the Grigorovich device on a chimney, you can use two options - in the first case, through holes are drilled at the mounting location, through which the structure is fixed with fasteners on the chimney, and in the second option, a clamp is made from a strip, through which the deflector is fixed to the pipe.
TsAGI chimney nozzle
How does a deflector work?
Let's look at the operating principle of the described structure using a simple example. This deflector has an outer (upper) cylinder and an umbrella.
The simplest deflector consists of a body (deflector) and an umbrella
During its operation the following processes occur:
- The wind carries air masses. They hit the outer cylinder.
- Then the flows swirl along its surface.
- Some of them, rising after swirling above the outer cylinder, pick up smoke from the stove. Traction increases.
- The umbrella, in turn, prevents precipitation and dirt from penetrating the heat generator.
People came up with this arrangement a long time ago, so its effectiveness has been tested for years.
This umbrella design has one drawback. If the wind blows from below, it hits the inner surfaces of the umbrella. By being reflected, air masses prevent smoke from escaping. But such a phenomenon is possible only with a rare low wind. Although there is a solution to eliminate this shortcoming. It is like this - they use a secondary umbrella with reverse surfaces, that is, not convex, but concave.
Manufacturing procedure for the TsAGI deflector ↑
No less common is the device developed at the Central Aerohydrodynamic Institute (TsAGI). Thanks to its simple design, it will not be difficult to make such a deflector with your own hands.
Preparation of drawings and patterns ↑
Initially, drawings are prepared, during the preparation of which the dimensions of the product are calculated. The diameter of the chimney, indicated by the symbol d, is taken as a basis. When designing a product, use the following size ratio:
- the size of the wide part of the diffuser is 1.25d;
- ring diameter – 2d;
- ring height – 1.2d;
- distance from the lower edge of the ring to the narrow part of the diffuser – d/2;
- diffuser height – d/2 + 1.2d;
- umbrella width – 1.7d.
TsAGI nozzle size ratio
The ease of assembling the product from elements created using such templates depends on how correctly the patterns are made, and in the future this will affect the efficiency of the design. It is necessary to prepare patterns for the following parts:
- diffuser;
- inlet pipe;
- ring;
- umbrella.
Features of creating diffuser and umbrella templates ↑
To make a diffuser pattern, it is necessary to make the correct calculation, which will result in a figure with the required contour. To do this, you need to use the option of creating a truncated cone. The following is taken as the data on which the calculation will be based:
- chimney diameter – d1;
- diameter of the circle by the amount by which the diffuser increases in the wide part – d2;
- diffuser height – H.
Preparing the Umbrella Template
It’s easier with an umbrella pattern. It is necessary to draw a circle whose diameter will be equal to 1.7d. Next - two radius lines so that the angle between them is 30°. Then cut out a pattern from cardboard, not forgetting to cut out the area located between the two radius lines.
The templates for the outer ring and inlet pipe are rectangular in shape, so making them will not be difficult.
Procedure for manufacturing the TsAGI deflector ↑
After preparing the templates, work with metal begins. When making a deflector for a pipe with your own hands, do the following:
- Using patterns, the necessary contours of parts are drawn on the metal. At the same time, 20 mm are added in places of overlap. The lines are drawn with special chalk or a simple pencil.
- Using metal scissors, cut out the parts along the drawn contour in expanded form.
- Using a hacksaw, metal strips or a metal corner are cut into pieces of the required length - these pieces will be used to fasten structural parts made of galvanized iron.
- The cut out elements are bent properly, holes are made in the overlapping areas, and the edges are fixed with rivets.
- Next, the product is assembled - the elements are drilled in places where they overlap each other, and through the resulting holes the parts are secured relative to each other with rivets.
- The structure can be attached to the chimney in two ways: make holes for fastening in the inlet pipe, or additionally make a clamp from a metal strip, for which you will need a bolt and nut.
Adapter option for rectangular chimney
Design and types of deflectors
Despite the existence of many models of deflectors, they are basically built using the following structural elements:
- inlet pipe with nipple or flange connection;
- an outer cylinder, which is called a diffuser;
- housings;
- a cone-shaped cap called an umbrella;
- brackets for attaching an umbrella.
Some deflector designs may use two cones—direct and reverse. The first serves as protection against precipitation, and the second serves to redistribute the flow of combustion products.
Various deflectors have common structural elements
For making deflectors with your own hands, galvanized sheet or stainless steel is best suited. In addition to these materials, the industry has mastered the production of devices with a protective enamel layer or a coating of heat-resistant plastic.
Among the many deflectors that you can make with your own hands, there are several of the most popular designs.
TsAGI deflector
The TsAGI deflector is a universal device that can be installed on any pipe - stove, exhaust or ventilation. Developed at the Central Aerohydrodynamic Institute named after. Zhukovsky device has a simple design with an open flow path and protection against reverse draft. There are two types of TsAGI reflectors, designed for external or internal installation. Thanks to its many advantages, this type of deflector has gained wide popularity among home craftsmen. However, the design is not without its drawbacks. The “weak link” is the narrow passage section, which can be blocked by a layer of ice on the inner cylinder. In addition, the TsAGI deflector is not effective enough in low winds and calm conditions - in these conditions its design creates little resistance to natural draft.
The TsAGI delector has a simple design and excellent performance characteristics
Disc-shaped
This deflector got its name because of several cones (plates) in its composition and refers to devices with an open flow path. The reflector has a protective umbrella combined with a cone and a lower part in the form of a cap with a hole for smoke exit. The vacuum occurs due to the plates directed towards each other, which form a narrowing channel for incoming air flows.
In a disc-shaped deflector, vacuum occurs in the gap between the cones directed towards each other
Round "Volper"
The device has a design similar to the TsAGI reflector. The differences concern only the upper part of the deflector. A cap that protects the inside of the chimney from debris and precipitation is installed on top of the diffuser, which eliminates some of the shortcomings of the device developed at TsAGI. Zhukovsky.
"Volper" has minimal differences from the TsAGI traction amplifier, which provide it with advantages in the absence of wind
Grigorovich deflector
One of the most repeatable designs is the improved TsAGI deflector. The smoke that comes from the chimney passes through the narrowing channel of the diffuser, thereby increasing its flow rate. The Grigorovich deflector is best suited for chimneys installed in lowlands and areas with weak air flow, since it is able to provide good draft even in complete calm.
The Grigorovich deflector is an ideal solution for areas with weak air currents
H-shaped
Deflectors, the silhouette of which resembles the letter “H”, are designed to equip chimneys of powerful stoves and boiler plants. In such devices, the exhaust gas flow is divided into two parts and accelerated out through two side diffusers. The advantages of the design include a significant improvement in traction when air masses move in any direction. In addition, the H-shaped deflector does not require the installation of a canopy, since the mouth of the chimney is protected by the transverse pipe of the device.
H-shaped draft amplifiers are designed for installation on chimneys of powerful heating units
Rotating
The device is made in the form of a sphere with many curved side blades. The presence of blades allows the device to rotate in a certain direction and work like a turbine. Rotary deflectors are best suited for gas boilers and do an excellent job of protecting the chimney from debris and precipitation. The disadvantages of devices of this type are their low efficiency in icing conditions and lack of wind.
Numerous rotating deflector blades create thrust like a turbine
Deflector-vane
This reflector has a rotating part (wind vane), which rotates when the wind direction changes. In this case, the deflector curtain shields the chimney from incoming air masses and contributes to the appearance of vacuum on the leeward side. Thanks to this, active suction of combustion products is carried out, which eliminates backdraft and the formation of sparks.
The deflector with a wind vane can be rotated, orienting the reflector exactly across the direction of the wind
Making a chimney nozzle with a square or rectangular cross-section ↑
When creating a chimney deflector with a square or rectangular cross-section, you can use two design options.
Use of an adapter in the design ↑
Initially, a drawing and a template are prepared, according to which the adapter will be cut out of galvanized steel in expanded form.
Drawing of an adapter for a deflector on a chimney with a rectangular cross-section
After preparing the patterns, they move on to working with metal:
- Using a pattern, apply the outline of the adapter to galvanized metal. It is necessary not to forget about the overlap area, adding 20 mm to the contour.
- Use metal scissors to cut out the product.
- Then the flat element is bent in such a way as to obtain a product of the desired shape.
- In the place of overlap, holes for rivets are made using an electric drill.
- Use a hand riveter to secure the overlapping edges of the adapter.
- To attach to the chimney, holes are made through which the adapter will be fixed to the pipe using fasteners.
- At the junction of the device and the adapter, holes are also made for the coupling bolts.
Chimney for a rectangular chimney
Technology for creating a simple chimney ↑
The second option is to make a canopy attached to a rectangular chimney. Anyone can figure out the task of how to make a chimney on a pipe with their own hands, since the design is extremely simple and the calculations are simple.
The drawing is prepared on the basis of calculations, thanks to which the required dimensions of the product are determined. Then, based on the drawing, patterns are created that are used to draw the contours of parts onto a sheet of galvanized iron.
Drawing of a chimney for a rectangular chimney
After preparing the template, we begin to manufacture the product itself:
- Using patterns, with special chalk the contours of an unfolded smoke umbrella are applied to a sheet of galvanized iron. It is necessary not to forget about the overlap areas, adding 20 mm to the connection of the edges of the part.
- Using metal scissors, cut out the parts according to the drawn outline.
- Using a hacksaw, cut a metal strip or corner into pieces of the required length. To fix the deflector on the chimney, it is most convenient to use a corner.
- The parts cut from the sheet are bent so that the smoke umbrella takes the required shape.
- Next, the product is assembled by drilling holes in the right places and fixing the parts with rivets.
Option for manufacturing a weather vane deflector
Deflector size calculations
Before you begin making a chimney deflector, you need to create a working drawing that will indicate all the dimensions of the device. And for this it is necessary to correctly calculate the height of the deflector, the diameter of the inlet pipe and the cap.
Special tables contain information on the dimensions of devices for standard chimneys.
size table
| Channel diameter (internal), mm d | Deflector height, mm N | Diffuser width, mm D |
| 120 | 145 | 241 |
| 140 | 167 | 280 |
| 200 | 241 | 400 |
| 400 | 481 | 800 |
| 500 | 600 | 1000 |
If you need to calculate the size of the device for a non-standard chimney structure, then you can use the generally accepted formula:
- Deflector height = 1.6 (1.7)×d.
- Cap width = 1.7 (1.8)×d;
- Diffuser width = 1.2 (1.3)×d.
d – internal diameter of the smoke exhaust channel.
Important! To obtain the required values, preliminary measurements of the internal diameter of the chimney pipe will be required.
Self-production of a weather vane deflector ↑
The weather vane allows you to reduce the height of the pipe by increasing traction, since it is always in the right relationship with respect to the wind, prevents precipitation from entering the pipe and decorates the roof.
Tools and consumables for work ↑
To make one of the options for a weather vane on a chimney pipe with your own hands, you need to add to the above tools and materials:
- set of wrenches;
- pipe section;
- a metal (preferably stainless steel) rod or a ready-made pin;
- die for cutting threads on the rod;
- tap for cutting threads for fixing bolts;
- bolts for fixing bearings in the pipe;
- 8 nuts that will need to be screwed onto the rod to secure the bearings and secure the deflector housing.
- two bearings, the size of which is selected according to the diameter of the rod and the internal diameter of the pipe.
Drawing of a deflector in the form of a weather vane
Step-by-step instructions and important notes ↑
Operating procedure:
- Initially, a drawing is made, according to which patterns for parts are then made from a sheet of galvanized steel.
- Using patterns, apply the contours of the deflector elements onto a steel sheet with a special chalk or marker.
- Metal scissors are used to cut out parts from a metal sheet.
- The deflector body is assembled from the prepared elements by drilling holes and fastening them with rivets. You must remember to make brackets with which the body will be mounted on the rod.
- Cut off a rod or pin of the required length so that it is enough to secure the bearings and fix the deflector body.
- If a rod is used, the thread is cut using a die.
- Next, two bearings are attached to the stud with the distance between them necessary to create sufficient support when the deflector-vane rotates. To secure each bearing, first screw on the first nut, then put the bearing on the axle, then screw on the second nut and tighten the nuts until the bearing is well secured.
- Cut the pipe to the required length.
- Holes are made in the pipe where the bearings are located. Use a tap to cut the threads for the bolts that will secure the bearings in the pipe. Holes are also prepared for attaching supports that secure the entire device.
- A ring is made from a steel strip to secure the deflector to the chimney.
- Cut sections used as supports for attaching the block with bearings to the ring securing the product to the chimney.
- The final assembly of the product is carried out using rivets and fixing bolts.
Decorative weather vane
There are many options on how to make a deflector for a pipe with your own hands. Everyone chooses for themselves what type of device is best suited. It is only necessary to note that such a design, placed on a pipe to remove combustion products, performs several useful functions - it increases draft when removing gases, protects the chimney from debris and precipitation getting inside. After installing the deflector on the chimney, the heating efficiency in the house increases significantly.