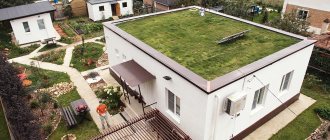
Properties
This coating has gained its popularity due to its positive properties, which include:
- strength;
- high resistance to negative weather influences. This results in high corrosion resistance and long service life;
- attractive appearance.
Experts attribute low noise insulation to the negative qualities of this roofing covering. In heavy rain, residents of a house covered with metal tiles may experience serious discomfort. But this negative feature can be eliminated with proper installation work. The second negative feature is the relatively high cost of a metal roof.
Installation of snow guards on metal tiles: instructions and their varieties
A high level of safety is one of the main requirements for roofing made of any material, including metal tiles. For this purpose, special structures are used, which are called snow retainers. And the main goal is to ensure safe snow removal from the roof and prevent possible dangerous situations. In addition, they help maintain the original shape of the structure and prevent it from deforming under the weight of icy snow. And considering that its weight in some cases can exceed the weight of the roof itself, this problem is quite relevant.
It is almost impossible to predict exactly how snow will be distributed on the roof surface. This depends on many factors, including the angle of the roof, wind direction, etc. Therefore, in order to make calculations, a special formula is used:
Q = G×s
In this case, Q is the load exerted by the snow, G is the mass of snow on the flat surface of the roof, which can be found from a special table, and S is the correction factor, which depends on the angle of the roof: > 25° - 1, if 25- 60° - 0.7. If the degree of inclination is more than 60, then this is not taken into account, since in this case precipitation will definitely not linger on the surface.
An important step when finishing a roof using metal tiles is the installation of all additional elements that not only protect the coating, but also allow you to hide unsightly joints and edges
In order to determine the G index, you need to refer to a special table that provides information regarding snow cover for each region of the country.
Installation of tubular snow guards on metal tiles: installation rules
As a rule, a pipe is used as a basis for snow retention, which is laid along the roof. In the case of using metal tiles as a roofing material, fixation is made in the places where the roof and load-bearing wall connect.
It is strictly forbidden to fix these elements on the eaves strip for metal tiles, as this may lead to the destruction of the entire system. Moreover, if you have to deal with a slope whose length is quite large, then the installation of snow retainers on metal tiles must be done in several rows at once to ensure a more reliable fixation.
The process of installing tubular snow guards on metal tiles
The tubes themselves are mounted on the roof either end-to-end or in a checkerboard pattern. Special attention should be paid to installing such a system if the house has an attic. In this case, the installation must be carried out in such a way that a snow guard is located above each window opening. As for the distance from the edge of the roof to the elements, 40-50 cm is quite enough.
Lattice snow guards for metal roofing: how to attach correctly
Lattice snow retainers are considered the most effective, so those users who are interested in the quality of the installed systems preferentially choose this option. There are two types of such structures - ordinary and “royal”, although it is worth recognizing that there is not much difference between them, with the exception of the supports and the complexity of the lattice.
The high level of efficiency and safety of this type of snow retainer is due to their considerable height, due to which they may not be useful not only in winter when it comes to retaining snow, but also in summer. After all, it is during the warm season that all kinds of repair work are most often carried out.
Lattice snow retainers are considered one of the best options for metal roofing
Corner snow retainers for metal tiles
Corner snow guards are thin steel sheets that are coated with a polymer coating that protects them from corrosion. This is one of the most budget-friendly options, which at the same time allows you to effectively prevent snow from rolling off the roof. It is very easy to choose a model that will suit your existing metal tiles, since the range of color options is extremely large.
To fix the corner snow guards on the roof of a metal roof, screws and ordinary metal corners are used. Fastening is carried out on the upper wave of the sheet.
These are not all design options that can be used to prevent snow from rolling off the roof. Metal tiles are perfectly combined with many models and varieties of these elements, so there will definitely not be any problems with selection and fixation.
An example of the location of corner snow guards on a roof covered with metal tiles
Calculation of metal roof tiles
Before starting construction work, you need to calculate the material consumption. In order to find out the approximate number of metal tile sheets required for the roof, you need to do the following:
- determine the effective sheet size. To do this, it is necessary to subtract 15-20 centimeters for overlap from its nominal length;
- count the number of rows on the roof slope. To get the correct result, you need to divide the working length of the slope by the width of the sheet;
- count the number of sheets in a row;
- multiply the number of rows and sheets in a row;
- make similar calculations for each roof slope and add up the results.
It is important to remember that it is better to round the resulting values up. During construction work, no one is immune from mistakes and therefore a little extra material will not harm.
Based on the data obtained, you can get an idea of the financial costs. The price of metal roofing tiles is higher than most other types of roofing.
Installation of sheathing
Since metal tiles do not have an impressive mass, they do not require a powerful foundation.
The sheathing is nailed to the rafters. The distance between the initial and subsequent boards is 35-40 cm between the centers of the boards. The curves of the sheet matter here. This indicator varies for different models of metal tiles.
It is worth knowing that you cannot install rafters above the windows themselves!
The following is a proposed installation diagram for the sheathing using the example of three brands of metal tiles:
In areas where there are valleys and metal tiles are adjacent to the pipe, as well as near the windows, a continuous sheathing is created.
Installation of curtain rod
This component is attached after creating the front board, which is held at the ends of the rafters with galvanized nails.
The fastening goes in this order:
- Hemming the veneer board to the front section of the base.
- Attaching the support beam to the wall. It becomes a support when installing the overhang of the curtain rod system.
- Installation of brackets on the drain. Places for their attachment: rafter legs or cornice board.
- Assembling the bar itself. The areas where it is placed are those areas where the drain connects to the cornice or front board. The screws are spaced at least 30-35 cm apart from each other.
Next, the roof is tiled and other elements are assembled.
Installation of the valley
In this work, for each such component it is necessary to attach an additional board. The process starts from the bottom and gradually moves up. An overlap of 25-30 cm must be maintained.
Below the eaves line, the bottom strip is cut. After which a flange is arranged, and a sealant is placed under it.
The sheets of material and the axle are separated by a gap of 8-10 cm.
Screws are screwed into the cut material 1.5 cm from the stamping line. The fastener is 25 cm away from the axis. So the sheet at the fastening point is joined to the board on which the valley is concentrated.
The valley below is installed before the roof is laid. Thanks to this, the water will flow directly into the additional component.
Installation of a metal tile roof according to the valley arrangement scheme looks like this:
To cover areas where cut material is visible, use decorative overlays.
Valley design diagram
If the beginning or end of the valley is located directly on the slope, a separate board is placed, a hole is created in the tile sheet for the window, and a ceiling in the form of a plank is made for the eaves cut. In this situation, a sealant is laid along the walls.
Laying and fastening metal tile sheets
This work begins on a rectangular slope, or rather on its right extreme side. In the reverse direction, each new sheet is placed under the previous one.
The technology for installing a metal tile roof on a triangle slope is based on the following criteria: the initial sheet is placed in the middle of the slope. Other sheets are mounted to it on both sides.
The procedure for laying metal tiles is as follows :
- Laying the initial row. The sheets are not firmly fixed, but are grabbed at one point and then aligned with each other at the edge of the slope. Their first line hangs from the cornice by about 4-6 cm. The process begins on either side: right or left.
- Fixation with self-tapping screws through the wave. They are screwed tightly, but their sealing ring is not pinched.
- At the joint section, the corner is cut, this eliminates the seal. You can straighten the capillary pit under the stamping.
- The process is duplicated for the second and subsequent lines.
- Fixing the end strips. They are laid with an overlap of 2 cm.
Installation of the ridge, the end strip of the metal tile and the connection to the wall
The ridge is mounted in the following sequence:
- A special sealing tape (aeroroller) is laid along its strip. Its ends are pressed against the metal tile, and it is glued. This measure protects the space under the ridge from precipitation. And its strip and this tape should be separated by a gap for ventilation. Its parameter is 5 mm.
- Fixing the ridge on strips located on the end parts of the metal tiles. Here it should have a protrusion of 2-3 cm. When working with a flat ridge, it is laid with an overlap.
How to lay metal tiles on the roof? Aprons are installed on sections of heating or ventilation pipes. The work goes like this :
- A groove is created in the pipe. Its depth: 1-1.5 cm.
- The apron strip 1 (internal) is placed in it. The junction area is covered with sealant.
- The tiles are placed on the apron and secured with self-tapping screws.
- The elements of apron 2 (upper) are mounted on the material.
The end strips are fixed with an overlap of 2 cm. The wave parameter and the width of the slope must be identical. Otherwise, the ridge will be placed on the pediment.
Video: Installation of metal tiles - video instructions.
The necessary conditions
If the coating is installed on the roof of a residential attic or attic, it must be pre-insulated. Its scheme is standard:
- an insulating film is attached to the bottom of the rafters;
- insulation is laid between the rafters;
- A hydro and windproof membrane is attached on top.
If these steps are not followed, the service life of the metal tile coating will be sharply reduced.
If the attic is uninhabited, the roof may not be insulated.
Selection and purchase of metal tiles
In order to purchase a sufficient amount of material for arranging a roof, it is necessary to draw up a detailed plan for the future structure - and for this you need to take measurements of the roof and display the obtained data on a sketch.
The parameters that determine the amount of metal tiles include the following:
- Roof slope length. Measurements are taken from the ridge to the outer part of the cornice, but for extreme accuracy it is worth measuring three indicators - the distance between the overhangs and along the center line of the ridge. The outer part of the wind board and the center line of the ridge are taken as reference points.
- Length of cornices and ridges. These indicators must be measured along the entire perimeter of the building, taking into account the design of the future roof.
- Length of internal corners (valleys) and external corners (ridges).
- The diagram should also show the dimensions of all ventilation shafts, dormer windows, chimneys and antennas present on the roof.
The calculation of the required amount of metal tiles is carried out by sellers based on a previously drawn up roofing plan, so it must be described in all details. In addition to the metal tile sheets themselves, the kit should include a full set of fasteners and accessories.
Countergrid
First, the counter-lattice is installed. Structurally, it is a system of bars attached along the rafters. The main purpose of this system is to provide a ventilation gap between the roofing and the insulation.
The width of the ventilation gap also depends on the thickness of the bar used to make the counter-lattice. It should be sufficient to remove excess moisture. If the roof is located above a non-residential attic, then there is no need to make a counter-lattice.
Some subtleties of installing metal tiles
The installation of sheets should be carried out by at least two people in compliance with the following recommendations:
- The capillary grooves must be completely covered by the next sheets in the row;
- All sheets must be carefully aligned parallel to the cornice.
We cover the roof: how to get around the chimney
The construction of a metal tile roof must be such that in the area where the material adjoins the chimney pipe, water does not leak into the under-roof space. To solve this problem, special aprons are used. The instructions for installing them are as follows:
- Before laying the metal tiles, a continuous sheathing is packed around the pipe. A waterproofing material is glued onto it with an overlap of 15–20 cm over the pipe walls. A groove is made in the chimney itself around the entire perimeter.
- After laying the metal tiles, the lower apron is installed first, and then the upper one. The bent edges of their vertical parts are inserted into the groove.
Subtleties of installing curtain rods
The cornice and end strips must be fixed to the wood of the frame in increments of approximately 30 cm. If this condition is not met, they may subsequently move away, and unnecessary repairs will have to be made. It is highly not recommended to mount them end-to-end. Each subsequent plank must overlap the previous one by at least 1 cm.
These elements are fastened with galvanized nails or self-tapping screws in a checkerboard pattern.
Installation of valleys: features
The lower valley should be secured with self-tapping screws into each purlin. Its overlap on the slopes should be at least 25 cm. In this case, there will be no need to repair the roof due to a rotten frame. The upper valley is mounted in such a way as not to damage the lower one. They attach it to the metal tiles either with special corners or with self-tapping screws at the top of the wave (in each).
Fastening sheets to roof breaks
As already mentioned, on attic sloping roofs, metal tiles are laid on the break with an overhang. Before installation, a drip strip (in increments of 30 cm) is usually mounted on the edges of the slopes of such a rafter system for reliability.
Sometimes there is another type of break in the roof configuration - with a negative angle. They close it in much the same way as valleys. In this case, the carpet is laid in such a width that it extends at least 35 cm onto the upper part of the slope, and 15 cm onto the lower part. The sheathing under it should also be continuous.
Installation of snow guards
This additional element is mounted on flat roofs to avoid snow avalanches. The instructions for installing snow guards include the following steps:
- Fastening is done with long self-tapping screws into the sheathing;
- You need to make holes in the metal tiles and line them with rubber seals;
- The brackets must be screwed correctly at a distance of at least 35 cm from the cornice.
Installation of lightning protection
This system must be assembled. If the lightning is attracted by the metal covering, you will have to carry out expensive roof repairs.
And of course, natural electrical discharge is a very dangerous phenomenon for those living in the house. Lightning protection is assembled from the following elements:
- Lightning rod, which is a rod with a length of 5 m;
- Down conductor (circular wire);
- Grounding conductor made of a metal strip with a thickness of at least 150 mm.
The lightning rod is fixed to the roof ridge. A wire is wrapped around the chimney and connected to the middle of the rod. The ground electrode is dug into the ground to a depth of at least 80 cm and connected to the lightning rod via a down conductor.
Lathing
This design is the basis for installing the roof covering. It is a set of boards fixed perpendicular to the rafters and counter-lattice bars. Usually a board with a cross section of at least 100X25 is used.
The sheathing can be continuous or sparse. The pitch of the sparse sheathing is determined based on the size of the lower wave of the metal tile sheet, since it is in this place that it has the greatest strength.
It is better to use roofing nails to install counter-lattice and sheathing. It is better not to use black self-tapping screws, popular in Russia, as they are short-lived.
Typical mistakes of inexperienced roofers and measures to eliminate them
- Wear proper shoes . In order not to damage the coating, when installing a metal tile roof, you should use only shoes with soft rubber soles;
- Work only with special roofing tools . These are metal scissors, a drill, a hand saw, as well as a circular electric saw with solid teeth. To cut metal tiles, you cannot use angle grinders with cutting abrasive wheels: friction cutting creates high temperatures at the cutting site, which leads to evaporation of the zinc/alumina layer. As a result, the cut site loses its corrosion resistance, and such a roof will soon begin to rust and corrode;
- Try not to bend the sheets . Metal tile sheets can be fed onto the roof individually or in stacks along special guides. This will prevent bending and breaking of the roofing sheets;
- Incorrect installation of the sheathing, too large spacing of the planks . Due to too large a pitch, the sheets of tiles may begin to sag, and due to improper installation of the sheathing, the sheets of tiles may not be joined tightly enough, and the sheets may also not fit tightly to the rafters. In this case, the roof will make a lot of noise in the wind, the fastening with self-tapping screws to the sheathing strips will gradually “loose”;
- Using non-galvanized self-tapping screws without a rubber seal . Lack of sealing makes the roof vulnerable to moisture. Plus, you need to take into account that self-tapping screws without a zinc coating quickly rust, “rusty” stains appear on the roof, and corrosion gradually spreads to the roofing material;
- Incorrect installation of screws . Sheets of metal tile roofing should be attached to the sheathing at the bottom of the wave, that is, the roofing sheet with the bottom of the wave should fit as tightly as possible to the sheathing. When installing screws in the upper part of the wave, the metal of the tile gradually “gets tired” and its fastening begins to loosen;
- Do not use bitumen or roofing felt as waterproofing . The thing is that bitumen materials under a metal roof get very hot. This creates several problems at once: a high fire hazard, leakage of waterproofing, and an unpleasant odor in the rooms located under the roof.
Laying sheets
During this operation, the following basic rules must be observed:
- you need to align all the sheets horizontally so that they hang 5 centimeters over the edge of the cornice;
- The screws need to be screwed into the deflection of the wave. It is in these places that the sheet is adjacent to the sheathing, which ensures reliable fastening;
- at the edge of the slope, the fastening elements are twisted into each wave;
- The sheet is fixed to the bottom board of the sheathing above the step through the wave.
Laying roofing material
The first sheet of metal tiles should be aligned with the end of the roof using one self-tapping screw screwed at the top of the material. You will need to make sure that the sheet is placed approximately 40 mm beyond the cornice. The second sheet must be laid overlapping, while laying it on top of the first. This scheme should be used if installation is done from right to left. Otherwise, everything should be the other way around. The third sheet will need to be laid in exactly the same way as the second. All material must be aligned parallel to the cornice. In this case, the sheets must be fastened to each other. For ease of alignment, the metal tiles should be screwed on with only one self-tapping screw. During installation, do not forget to remove the protective film, if any. All other sheets are laid in exactly the same way as the first three.
Fastening the end parts and ridge
The end elements are installed starting from the eaves overhang and further to the roof ridge. Fasteners are screwed in increments of 35 centimeters.
The recommended overlap size is 10 centimeters. Before installing the ridge, sealing tape is glued along its entire length. Ridge elements are attached to the crest of every second wave.
Metal tiles are a modern roofing material. If installed correctly, the roof will delight its owners for a long time.
Necessary conditions for high-quality installation
- Let's start solving the question of how to lay metal tiles by taking into account the optimal slope for such a roof - no less than 12º.
- Antiseptic boards will be required for the rafters. They are installed in increments of 60 to 100 cm with a minimum cross-section of 150x50 mm.
- It is better to make the lathing from boards with a cross-section of at least 25x100 mm and a pitch of 350-500 mm. It must correspond to the pitch of the metal tile wave and be without deflections so that snow or water does not get into them.
- It is necessary to make a gap between the metal tile and the layer of thermal and waterproofing for ventilation in the roofing pie. Antioxidant films are used for waterproofing.
Laying: metal tiles are the top layer of the roofing pie.
Photo of metal roofing
0
Installation of other types of metal tiles
The general procedure for constructing a metal tile roof was discussed above; we will consider the main nuances when installing certain types of material.
Different types of metal tiles
The figure shows that the pitch of the sheathing when installing metal tiles of the “Cascade” brand differs from the pitch for the “Elite” and “Monterrey” brands. These differences are due to differences in the dimensions of the material profile.
Fastening metal tiles of the Andalusia brand
When installing metal tiles of the Andalusia brand, which has a Z-shaped lock, you should also take into account its nuances. The locking part of this brand has perforations, which simplifies the positioning of the sheet on the roof and its fastening.
We advise you to study - Stretch ceilings - the pros and cons of fabric and PVC canvases
In this case, the fasteners are hidden, which allows you to make the joints of the sheets almost invisible.
When purchasing metal tiles, you should find out various details about a specific type of material, and when performing installation, it is important to follow the rules and requirements described in this manual. This will allow you to build a reliable and durable metal tile roof
Maintenance and care measures
After the installation of metal tiles is completed, maintenance and care activities are periodically carried out in order to maintain the roof in good condition for a long time. Damage and scratches appear not only during installation, but also during operation, so they need to be painted over in a timely manner. Then corrosion will not be so bad.
Finished metal roofing
The roof is inspected from the ground at least once a month and annually, rising to the eaves level. In case of deterioration of atmospheric precipitation at the junctions of the slopes, the upper valleys are removed and cleaned of dirt (fallen leaves, accumulated dust and other debris).
What not to do in winter? It is strictly forbidden to clear snow from the surface of the metal tile, as this can cause damage to the protective coating. If the snow guards are positioned correctly, such measures are not necessary.