What is liquid wallpaper
In its modern interpretation, this material differs from its distant predecessor, invented by French masters. The very word “wallpaper” in the name does not strongly correspond to our idea of paper, vinyl or other types of rolled wallpaper.
Wallpapers that always look chic
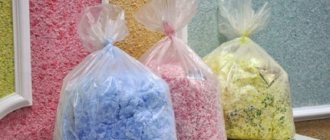
The material for work is a dry powder mixture, packaged in bags, which may contain:
- wool;
- glitters;
- synthetic fibers;
- acrylic;
- cellulose;
- silk;
- cotton.
Initial view before choosing
This finishing method can be used in almost any room where there is no high humidity. We conclude that this option is not suitable for the bathroom.
The surface after application is smooth and without nicks
The texture of the wall treatment is created by diluting the dry component with water. The resulting adhesive mass has the ability to be well distributed over the surfaces of walls or ceilings. In this case, the coating layer turns out to be quite thin, about 0.2-0.3 cm. Externally, the surface looks solid, without visible joints or seams.
Exquisite wet wallpaper: application technology
Wet wallpaper, which consists almost entirely of a certain silk fiber, is considered the most durable and durable. They are quite resistant to various kinds of external influences, and also have a significant service life. Wet wallpaper is considered simply an excellent finishing material that allows for complete or partial repairs. When applying wet wallpaper to walls, there are absolutely no seams left. In addition, wet wallpaper is very convenient to use in rooms where there are many corners and various kinds of protrusions. The technology for high-quality application of liquid wallpaper is quite simple, so you can do it yourself.
Wet wallpaper is quite resistant to external damage
Application of liquid wallpaper consists of several different stages, such as:
- Wall preparation;
- Preparing the mixture;
- Applying the mixture.
Before applying wet wallpaper, you must carefully prepare the wall, because it must be even. In addition, it is imperative to clean the walls of unnecessary substances, because there may be dust and cobwebs on it.
Metal elements present on the wall must be painted with special enamel paint, because this will help prevent rust stains from occurring. The surface of the wall must be carefully treated with a primer. The next step is to prepare a special mixture for wet wallpaper. To prepare the mixture, you need to take warm water and, stirring thoroughly, gradually add the mixture to it. This entire mixture must be mixed with a spatula, but no kneading technique should be used. Water must be added until the mixture has the consistency of thick sour cream.
Related article: Do-it-yourself bricklaying
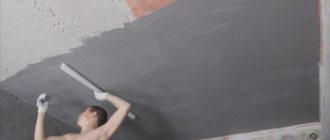
Liquid wallpaper must be applied using an ordinary spatula. This process is quite simple, so it can be done very easily, even without special skills. When applying to the wall, you need to remember that you should not press too hard on the spatula, because the wallpaper will not have the required decorative appearance. Liquid wallpaper is applied from one corner to another. This will help avoid the formation of joints. When the wallpaper is completely applied, you need to leave it for several days until completely dry.
Important! If the size of the irregularities is no more than 5 mm, then pre-treatment of the walls is not required.
Advantages of using the material
The type of design must take into account the coverage. It is tactilely pleasant, creates a cozy homely atmosphere, looks warm and pleasing to the eye.
Atmosphere of comfort and beauty
Breathability and sound insulation
This type of coating is not airtight. The mixture distributed over the surface allows the walls to “breathe”. This creates good air exchange.
Liquid ones contain various fibers. This allows you to maintain good sound insulation, dampening sounds, creating comfort.
Good sound insulation due to fibers in the composition
Safety and use in children's
The composition of the dry mixture is safe. It does not release harmful compounds into the air. In this regard, such a coating can even be used to decorate a children's room.
Liquid wallpaper is safe for children
Ease of application and care
Covering a wall with liquid wallpaper is not a difficult task. Even an inexperienced person without special skills can handle it.
To apply liquid wallpaper to the wall, it is not at all necessary to free up a large space - you do not need to roll out a roll of wallpaper on the floor, measure the dimensions and coat the panels with glue. Everything is much simpler here.
Wide choice of colors
If, after decorating the wall with the mixture, varnish is applied, then the surface can be washed. This is convenient to do, for example, in the hallway. But even without additional coating, wallpaper of this type does not attract dust and therefore does not require complex care.
Camouflaging minor wall imperfections
The texture of the material, which is created when it hardens, masks minor flaws in the walls. Significant irregularities cannot be hidden. After application, no joints will be visible, the coating will be uniform.
Rich look thanks to rich colors
Possibility of restoration work
If necessary, the wall can be repainted. This can be done at any time, even immediately after the mixture has hardened on the surface.
Very easy to correct if necessary
Are there animals or small children in the house who often damage the walls? In this case, liquid is one of the best options for covering walls, because the damaged fragment is so easy to restore. The same composition is used for this. When it dries well, no traces of repair will be visible at all.
Long service life
Liquid wallpaper contains selected components, for example, silk fibers, which impart strength and make the coating resistant to fading. The service life of liquid wallpaper is more than 10 years.
Due to their composition, they last a very long time
Versatility of coverage
You have a chance:
- choose the option of applying to the walls;
- choose a color scheme;
- use stencils.
This provides opportunities for creativity. Liquid ones can be selected for rooms:
- halls;
- bedrooms;
- children's;
- living rooms, etc.
Universal, suitable for any interior
Application technique
Although manufacturers say that liquid wallpaper can be applied to curved walls, it is better not to do this. There are two points. The first is increased material consumption. Considering that the cost of liquid wallpaper is not too low (one package per 4-5 m² is required, and it costs from 5 to 18 $, although there are also 40 $), it is cheaper to prepare the surface. The second point is that if there are significant differences, pronounced “spotting” may result. Darker areas will be where liquid wallpaper is applied in a thick layer, and lighter areas where the layer is thin (due to the wall being translucent). This again leads to an increase in consumption - to even out the color.
It's better to level the wall
Surface preparation
First of all, you need to remove the old decorative coating. We peel off the wallpaper to the bare wall, and remove the paint if it bubbles and peels off. Then we smooth out the unevenness. As has already been said, it is better to make the wall at least more or less even.
A flat (or relatively flat) wall must be coated with primer several times. This will reduce the absorbency of the surface, making it easier to work.
The difference in color between the dried and freshly applied mass is large
Based on experience, liquid wallpaper is best applied to rough walls, such as plaster. So, it is desirable that the primer gives a similar effect. Of the ready-made compositions, this is “Betonokontakt”. After applying it, the wall becomes a little “sticky” in feel; grains of sand stuck to the surface make it rough. Any composition fits perfectly on such a base. There is also a cheaper option for priming walls for liquid wallpaper - the most inexpensive white water-based emulsion (2 parts) with PVA glue (1 part). It is necessary to cover with primer (any kind) at least twice.
If the wall has an uneven color, and the primer did not hide it, you will also have to paint it. Because when applying a thin layer, darker and lighter areas will show through. You can take the most inexpensive water-based paint and paint the wall with it. A perfectly even color is not needed; there should be no sharp transitions.
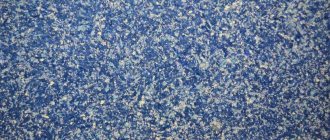
Several types of liquid wallpaper. It is high in silk fibers
One more thing. If there are metal fragments in the wall - nails, screws, etc., it is advisable to remove them. If you can't remove it, paint the area with some kind of water-repellent paint in the same color as the base. If this is not done while the liquid wallpaper is drying, the metal will rust, and the rust will “come out” as an unsightly yellow spot. It will have to be repaired immediately. So it is better to insulate all metal objects in advance.
Preparation of the composition
Liquid wallpaper is sold dry in bags. Before use, add water to the composition and mix everything well. The amount of water depends on the volume of the bag, the type of composition, and the manufacturer. The specific quantity is written on the package.
It is more convenient for this work to have a large plastic bucket - 12 liters or more. Pour the contents of the bag into it and add water. The mixture must be stirred until smooth. It turns out something similar to minced meat.
Add water to the dry mixture of liquid wallpaper and mix everything well
Since liquid wallpaper does not contain harmful chemical additives, you can mix it with your hands. If the mass is unpleasant to you, you can wear gloves. The finished mass is usually transferred back into the bag, screwed on the “neck” and left for several hours (at least 4-5 hours, but better 10-12) - for uniform swelling. Please note that the dried composition will be noticeably lighter than the wet one.
Even the sulfur color is not boring at all
It is better to mix at once the entire amount needed to finish a room or at least one wall. If you put it in “pieces,” the borders may be visible. They are almost invisible in light shades, but can ruin the picture if the color is bright. If the boundaries are still visible until the wall is completely dry, you should not take any action. It is possible that the borders will disappear when completely dry. If the liquid wallpaper has dried, but transitions are visible, the composition can be removed with a spatula, soaked again for several hours, mixed and applied again.
Application to wall or ceiling
Take a new trowel for the job. To make it easier to monitor the process, there is a trowel with a transparent plastic working surface. This trowel makes it easier for beginners to work with. The process itself is simple:
- The soaked composition is applied in a small amount to the surface.
- Rub it on the wall in a circular motion.
- They put in a new batch of material and continue from the previous place.
It's better to start from the top and work your way down
It is advisable to process the entire wall at once, otherwise the junction lines of the two “pieces” may be visible. If you still weren’t able to treat the entire wall at once, spray the joint well with water, wait 20-25 minutes, and you can continue finishing. Most likely, the joint will be subtle or almost invisible.
In the corners you can use a regular spatula, but it is easier to make even corners using special corner spatula. First, apply the mixture on both sides of the corner, apply it with a corner spatula, and rub the excess squeezed out from the corner onto the wall, leveling the surface.
Liquid wallpaper takes a long time to dry - about 48 hours. The composition contains a significant amount of water, so when it dries in the room there is high humidity, which inevitably gets into other rooms. But in the process you can turn on the heating, open the windows, create a draft. There are no restrictions.
Application by roller
Applying liquid wallpaper using a trowel or spatula is good for everyone, except that the process takes a lot of time. To speed up the process, you can try applying liquid wallpaper with a roller. Only the roller must be special: with hard short hairs collected in groups. The width is about 15 cm. If you can’t find one, you can use fur with hard short pile or foam rubber, but hard.
Tool for applying liquid wallpaper
Before starting work, dilute liquid wallpaper according to the instructions and prepare the wall. Then try working with the resulting composition. If the mass is poorly distributed on the wall, add a little water. But add a little at a time, because too liquid will “slip.” The technique is slightly different:
- Apply a certain amount of mass to the wall with a spatula, without worrying too much about the thickness of the layer. Just make a “blunder”.
- Roll out using a roller.
- Apply the next batch of solution and roll out.
Using a roller makes it easier to maintain the same thickness of the material. This works well on flat walls. Moreover, the finishing speed is 6-8 m².
Different application techniques give different effects
When applying liquid wallpaper with a roller, the surface becomes rougher and more textured. If you don’t like this effect, after the wall is finished, moisten it with a spray bottle, wait about 15 minutes, go over the surface with a clean trowel soaked in water, smoothing out the relief.
How to make patterns with liquid wallpaper
Beginners are unlikely to be able to make complex patterns on walls with liquid wallpaper, but it’s quite possible to try something simple. The easiest way to make two-color patterns, and simpler ones are geometric ones.
Any image can be found. But then you need to transfer the outline of the drawing to the wall. If you have artistic abilities, you can try to do it by hand. If that doesn’t work, you can enlarge it to the required size, print it on paper, but preferably on cardboard, cut it out and attach it to the wall. Fill around with one color of wallpaper. When the liquid wallpaper has dried, remove the paper/cardboard, using the second one to fill the empty area. But you need to work carefully, without dirtying the finished part.
After removing the paper or cardboard template, a depression remains, which is filled with material of a different color
If the design is simple - geometric shapes, for example, you can install some kind of rigid barrier to separate the colors. For example, beacons for plaster. They are fixed and filled with liquid wallpaper of the same color. After drying, you can remove the beacons and carefully, without crawling onto the finished part, use the second color.
There is also a way to transfer complex drawings without printing. You will need glass, a black marker, and a lamp. Draw an outline on the glass with a black felt-tip pen and highlight it with a lamp. A clear outline appears on the wall, which we simply draw. We fill it in the way that is most convenient, but usually first large areas, then smaller ones.
Disadvantages of use
In addition to its advantages, this finishing material also has some disadvantages. It has a significant cost. It is higher, for example, than that of paper and vinyl wallpaper.
Despite their practicality and beauty, they are very expensive
This wallpaper is highly hygroscopic, which is good when removing coverings from walls, but is not at all suitable for decorating wet rooms in the house. There are also limitations in the flight of design ideas regarding the choice of shades.
Affordable luxury design
You can create a beautiful, and even luxurious, interior using this type of finishing. To do this, warm shades of classic colors are selected with spectacular golden components as a filler. Shimmering particles add warmth and exclusivity to the interior, especially if their beauty is highlighted by good lighting.
Luxurious living room interior
Golden and shimmering particles in the design are an effective technique. The main thing is only to observe the measure regarding their quantity.
The original porous texture has good breathability, which allows you to retain heat and prevent fogging. In this case, the surfaces take on an unusual appearance.
Decorating a corridor with liquid wallpaper
It may seem that such a covering would not be the best option for a corridor or hallway. But it is not so. When a transparent varnish is applied on top, the walls receive the necessary coating strength.
For the corridor and hall, a design should be selected that will organically combine with the design of the rest of the premises.
An excellent solution to use such wallpaper in the hallway
Liquid wallpaper creates all the conditions for combination and goes well with various finishing materials:
- brickwork;
- wild stone;
- plaster stucco;
- textured plaster, etc.
Easy combination with many types of finishes
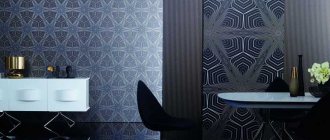
Monochromatic wall decoration is the epitome of elegance and a sense of proportion. But in some rooms this approach may seem boring and uninteresting.
To liven up the interior, you can add stripes or more complex patterns. In the embodiment of your imagination, you can easily combine different colors of liquid wallpaper with each other, combine it with other finishing materials, or use it only to create drawings.
Create complex designs for a more dramatic look
These can be either individual lines or entire patterned fragments that can be arranged:
- vertical;
- horizontally; inclined;
- waves;
- abstract patterns;
- spirals, etc.
Do you have a small hallway? Then pay attention to the light shades of liquid wallpaper. Dark ones may seem more practical, but they have the ability to influence the perception of the room. It will seem smaller, darker and more uncomfortable, which is not at all desirable.
Universal shades in design are:
- beige;
- golden;
- gray tones;
- peach.
Universal beige shade for finishing
If possible, it is advisable to equip the corridor and hallway, which in most cases lack natural light, with sources of additional lighting.
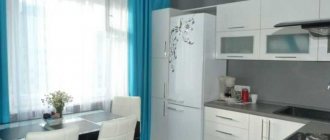
Kitchen: appropriate or not
For the kitchen, many people prefer combining vinyl wallpaper with tiles to decorate the apron. Very often, wallpapers are selected that contain designs depicting fruits, flowers or kitchen utensils. This design is not to everyone's taste. As well as monochromatic coloring.
Design in cool colors for the kitchen
An alternative option would be to paint with liquid wallpaper. They allow you to highlight the kitchen walls with a suitable shade that would harmonize with the furniture and decor. The color scheme allows this.
An unusual texture can become a real highlight of the interior. What to do with the kitchen apron area, because liquid ones will not withstand aggressive cleaning?
The solution may be to install glass only in the kitchen apron area. This technique will preserve the integrity of the design and prevent excessive contamination of the surface of the walls near the stove and sink.
For the kitchen you need to choose the color of the wallpaper. It is necessary to take into account the colors of furniture facades and tabletops, the type of curtains on the windows and the style of the room itself.
Be sure to combine wallpaper with the entire kitchen style
Stylish wet wallpaper: photo
Modern wet wallpapers are presented in a wide range, so everyone can easily choose the desired option.
Modern manufacturers present many different options for wet wallpaper
In particular, it is worth highlighting the wallpaper:
- French;
- Turkish;
- Russian;
- Danish made.
Related article: Installation of a partition on a loggia and balcony
Wet wallpaper produced in France is characterized by quite rich colors and contains only natural ingredients and high-quality bright dyes. It is quite possible to apply such wallpaper on almost any surface, and in order to increase its moisture resistance, it is advisable to additionally cover it with a layer of varnish. Turkish liquid wallpaper is in no way inferior in quality to French products, but has a much lower cost. Russian wet wallpaper is more viscous in its consistency, which allows it to be used not only as a decorative covering, but also as a means for leveling walls.
Wet wallpaper produced in Denmark is characterized by the fact that the mixture, already diluted with water, is uniformly white in color. It is quite possible to add various coloring components and decorative elements to it, thereby creating an excellent color scheme. Caring for such coatings is quite simple; they can be easily wiped with a damp cloth, as well as cleaned with a vacuum cleaner. If stains form on the surface, it is quite possible to remove them using any stain remover.
Living room: bright accents
For the living room, you can choose not only bright shades, but also muted ones. Liquid wallpaper can be combined here with other finishing materials. This finish makes it possible to decorate the entire wall, highlight only a fragment in the recreation area, or use it for all surfaces.
You can mix several shades to achieve unexpected creative effects.
Bright finish by combining several colors
It is not advisable to combine liquid wallpaper with regular wallpaper. Because of this, they can lose all their individuality and “get lost” against the background of other finishes.
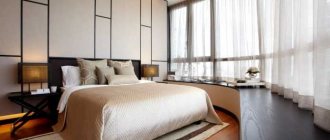
Bedroom: severity or boudoir bliss
For this room, calm shades interspersed with silver and gold will highlight part of the wall, for example, the headboard. This creates an original accent in the design.
Choosing to match the main style
Some types of liquid wallpaper contain natural silk. Its noble shine creates the impression of textiles on the walls and gives a feeling of royal luxury. In addition to a single-color finish, liquid wallpaper makes it possible to create entire landscapes, for example, with a sunset and sea surf.
Good mood with bright moments
In addition to similar effects, liquid ones can serve as a room zoning tool. This technique will be good not only for the bedroom, but also for the living room and for the nursery.
How to apply wet wallpaper: application technology
Wet wallpapers are in demand because they are characterized by particular ease of application and particularly environmentally friendly material.
The technology for applying wet wallpaper is simple
Before applying wet wallpaper to the wall, you must first:
- Thoroughly clean the wall from dust and dirt;
- Apply putty;
- Apply primer.
After the wall surface is well prepared, you need to leave it for a certain time to dry, and then you can start applying liquid wallpaper. When applying the material, the spatula must be held at an angle, and also not pressed very hard against the wall, so that the fit of the finished material is very good.
When the wet wallpaper is completely applied to the wall, you need to leave it until it dries completely.
Wallpaper on the ceiling
The ceiling is a complex plane from the point of view of ease of design. Making it look decent, or better yet, beautiful, can be a difficult task.
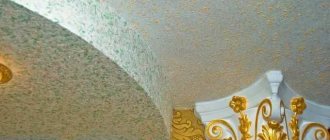
Liquid ones can be used both on a flat ceiling surface and on a multi-tiered one formed using plasterboard. The use of plaster stucco molding will create an additional decorative effect, as will the patina of the relief parts of the decor.
Ceiling decoration with liquid wallpaper
VIDEO: How to apply liquid wallpaper to a wall
How to apply liquid wallpaper to a wall
Liquid wallpaper for walls (+150 Photos). How to apply, advantages and disadvantages of the material
Applying liquid wallpaper to the wall
The process of applying liquid wallpaper is done using a spatula. The applied elements of the layer are evenly distributed over the surface area with a special roller or grater. Some types of liquid wallpaper can be applied using a Hopper gun.
The surface covering should be done from the corner or any edge of the wall. Regardless of the thickness of the applied layer, the decorative characteristics of the wallpaper remain unchanged. For the optimal amount of material consumed and drying period, the recommended thickness of the finishing layer is no more than 2 mm. At the same time, it must remain unchanged over the entire area of the walls of the room.
An important point when applying liquid wallpaper is to regulate the pressure on the spatula or grater. Excessive pressing of it against the wall will result in pressing of the elements and distortion of the textured layer. And insufficient pressing will cause uneven distribution of the thick layer.
When working with a spatula or grater, you only need to make reciprocating movements, not circular ones. The entire surface of the wall should be a layer of one batch. If there is any doubt about the lack of the required amount of the mixture, it is better to prepare a new one in sufficient quantity.
The remains of the diluted mixtures of liquid wallpaper can be dried and kept in reserve. If the need arises, they can be reused without loss of quality.
Depending on the individual composition and thickness of the applied liquid wallpaper layer, as well as certain conditions of temperature and humidity of the room, the required drying time is 12-72 hours. In addition, it is influenced by the method and technology of application.
Let's prepare the surface:
1. Clean and level the surface to hang wet wallpaper on the walls, the video shows how to do this.
2. Apply two layers of primer, first one layer, after four hours the second. 3. Apply two layers of water-based paint to ensure a white background. It is important that before applying wallpaper the surface is uniform.
If there are any stains, you need to remove them.
Before using any objects (nails, screws, plywood, screws), we will treat them with oil paint to prevent stains from appearing.
Applying wet wallpaper for walls:
1. Prepare warm water for the bag of material. For the number of liters, see the instructions on the packaging (depending on the type of wet wallpaper, it may vary).
We mix the wet wallpaper after calculating its consumption on all surfaces.
You cannot use the contents of the package partially; this may result in an uneven tone.
2. First of all, without opening the package, shake and shake it to evenly distribute the components.
Next, pour the entire contents of the bag into the water. If there is glitter, pour it out first.
Mix it all by hand, carefully so as not to damage the structure of the wallpaper.
3. After twelve hours, mix the material again, as shown in the wet wallpaper for walls photo.
When you apply the solution, keep in mind that its consistency can be changed by adding water - this will make application more convenient. But you cannot add a large amount of water; in this case, the properties of the glue will deteriorate.
4. Apply wet wallpaper using a plastic trowel from one corner to the other.
It is important that the trowel touches the solution at an angle, and not tightly. It is desirable to have additional lighting, the angle of which could be changed.
To ensure perfect application of wet wallpaper, after two hours smooth the surface again using a trowel dipped in water.
You can also watch a video on how to apply liquid wallpaper
Selected for you:
Among the existing types of wall coverings made from various materials, wallpaper in unusual powder form, which needs to be diluted with water, attracts attention.
Read more about such non-standard finishing materials in our article.