Recently, wooden paths have become very popular. This is due to the availability of building materials and the ease of erection of such structures. Using wood as a base makes it possible to create paths of different shapes and configurations. However, this material has its advantages and disadvantages. Therefore, it is necessary to build wooden paths at the dacha, strictly adhering to the recommendations.
Wooden garden paths - pros and cons
If you are considering wood as the main material for creating a wooden walkway, then you should learn about its advantages and disadvantages.
Pros:
- Wood is an environmentally friendly building material. Therefore, if security is important to you, then you should definitely choose this option.
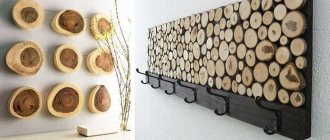
- However, a beautiful visual appearance is also a clear advantage of garden paths made of wood. The natural texture goes well with almost all styles. A large number of species, shades and the uniqueness of each cut will provide a unique design.
- Ease and simplicity of laying the path. Paths from boards can be erected without a deep foundation, preparation of mortar and other complex processes.
- Wooden paths are easy to maintain.
- Wood is the most affordable building material in terms of cost; in addition, at the dacha you can find sawn trunks, old boards, and trimmings from previous construction work.
Minuses:
- The main problem with wood is that when it comes into contact with the ground, it quickly collapses, rots, and is inferior in service life to other materials. However, this can be easily corrected using various wood treatment products.
- Wood is also flammable - you need to remember this and be careful.
- After rain, wooden paths become slippery, so you need to move along them carefully.
There are many more advantages than disadvantages, which is perhaps why summer residents prefer to make paths from wood.
Manufacturing technology
Before starting any work, you need to decide where the path will be located. Next, its width, shape, and the route along which it will pass are calculated. After this, the outline of the future path is marked. The marking is done as follows: pegs are driven in on both sides of the proposed structure. The width of the path should remain the same, it is not difficult to control this - just use a tape measure.
If the path is straight, then it is enough to drive pegs at a distance of two to three meters, but if it has a complex geometric shape, then you will need to place each new peg where the direction changes.
Next, a string is stretched along each side of the path. Once the outline is outlined, all the space that will be occupied by the path must be carefully cleared: from leaves, debris, plants, etc.
Laying the foundation is the first work on arranging the paths. This, of course, is not the kind of foundation that is needed for a house or gazebo, but the path must be supported by something. For the base you will need a trench, which is dug along the entire length of the future path. Its depth is about 0.2 m, no more.
To prevent weeds from breaking through the boards, a layer of geotextile is laid at the bottom of the trench.
A cushion of crushed stone or gravel is poured on top. The thickness of the pillow is about 0.1 m.
For the most primitive version of a wooden sidewalk, it is enough to drown the boards in a cushion of crushed stone or gravel. However, it is better to make a slightly more complex (but much more durable) option by raising the path above the ground. This is what the bars are for. They are placed in the direction of movement while the pillow is falling asleep. To make the path even stronger, you can lay bars in the center of the trench.
You can put not bars, but longitudinal logs, fastening them together with a transverse bar in increments of 0.5 m.
Next, use nails to secure the board. The distance between the bars should be about 5 mm, then rain and moisture will drain freely, and deformation will not affect the boards.
To lay out a path from round cuts of wood or logs, you will need both the wood blanks themselves and a certain amount of sand.
You can choose saw cuts with the same diameter or, on the contrary, make them distinctly different.
Before being used in laying out the path, each block must be cleared of bark and treated with an antiseptic. If possible, you should cover the bottom of each cut with bitumen mastic. The upper parts of the cuts can be coated with varnish, paint or copper sulfate. In the latter case, the tree will look artificially aged. As soon as all layers of coating are dry, you can begin laying out the path.
The base is laid out in the same way as for a boardwalk. Geotextiles, polyethylene or waterproof film are placed in the dug trench. Next comes a turn of two drainage layers, after which a cushion of fine crushed stone or gravel is poured. The pillow should be narrower than for a boardwalk - 4 cm. The pillow must be carefully compacted.
Types of garden paths made of wood with your own hands
Path made from pallets
Wood is considered multifunctional, so it can be used in different variations. Craftsmen value this material, first of all, for its environmental friendliness and low cost. So, there are the following types of wooden paths:
- wooden sidewalk;
- pallet construction;
- terrace type parquet (decking);
- path made from sawn logs;
- construction from sawed beams;
- path made of wood shavings;
- log and gravel construction;
- path made of boards.
You can choose any option from the list that suits your garden plot in terms of design and complexity of creation for you. All paths can be made with your own hands in a day or even less.
Preparation of boards and necessary tools
Boards for garden paths are made from wood in the same way as saw cuts, treated with an antiseptic or hot drying oil. At the end, after the work has been done, they can be treated with varnish or a coloring agent - for decoration and more. protection. The boards must be cut into equal pieces. To work with wood, you need to prepare the following tools:
- plane;
- Bulgarian;
- nails or self-tapping screws;
- construction level;
- drill;
- screwdriver;
- hacksaw.
Important! It is not a fact that you will have to use all the devices on the list, this is just a general list of the necessary tools for the job.
Technology for constructing paths and platforms made of wood
More information about the construction of wooden paths and platforms:
- Path markings. Using a tape measure and string with pegs, mark the trajectory (the width can be chosen arbitrarily, for example, 0.5-1 m).
- Preparing the base (on the marked strip it is necessary to remove the top part of the turf). The depth of the recess depends on the chosen building material for the path. (20-40 centimeters will be enough for you).
- Installing a cushion of sand and gravel (cover the bottom of the pit with a layer of rolled moisture insulation or a simple film. Pour sand or gravel on top of this, these additives will serve as the basis for laying and will act as drainage.
- Next, comes the installation of the curb (if the plan includes sides, then they are mounted along the edge of the trench).
- Laying road material (boards, bars, panels, sections) Everything must be cut in advance (by choosing the appropriate length) and processed: the surface of the boards and bars can be processed with an electric planer. Then it is necessary to cover it with drying oil and treat it with bitumen.
- The material is laid out on the pillow taking into account the selected location. The distance between the boards and bars is selected within 5-8 cm.
- The laid lumber must be leveled (compacted), for this you will need to take a mallet.
- The space between the material (gaps) must be filled with pebbles or gravel.
Making a plank walkway
Path from boards
Stitches from boards are made in several versions. The slats can lie lengthwise, across or obliquely. On one route, you can alternate different laying options, changing the color of the coating. The boards are laid in the ground, placed on its surface or placed on supports.
Let's look at how the most complex structure is made - a path raised above the ground.
It is made in the following sequence:
- On-site tracing is being carried out. To do this, use a tape measure, a level, stakes and a cord. Places for installing steps should be marked separately. On straight sections, 2 m between stakes is sufficient. In places of bending, the distance should be reduced to 30-50 cm.
- The top layer of soil is removed along the drawn contour, a trench 20 cm deep is dug. The bottom of the trench is cleared of plant roots, and it is leveled and compacted. Steps are being dug.
- A strip of geotextile fabric is laid in the trench. 10 cm of crushed stone and sand are poured on top of it. The shock-absorbing cushion is wetted, leveled and compacted. This technique will prevent erosion of the base and germination of plants under the boards.
- Laying the supporting beam on top of the cushion. Depending on the curvature of the route, assembly is carried out from blanks of different lengths. The beams are fastened together with strips of metal or slats screwed on the inside. The number of guide lines is determined by the width of the path. If it is up to 50 cm wide, then two support lines along the edges are sufficient. As the width increases, another reference line is added for every 50 cm.
- Fastening planks to timber. A distance of 5-8 mm should be left between them. Slots are necessary for water drainage, ventilation and expansion of wood when moisture is collected. It is better to fix the boards with screw nails. These products are much stronger and more reliable than hardened screws. The edges of the boards can be left untreated, or they can be adjusted to fit the cut of the timber. It depends on the preferences of the owners of the site.
The completed structure must be coated with paint or varnish immediately after assembly is completed. Periodically you should walk along the path and recess the nail heads that have come out.
Caring for wooden paths
Any path needs to be looked after, let alone wooden paths. The saw cuts and boards will have to be cleaned with a metal scraper and treated with an antiseptic. It is very good if you leave a few bars or boards for the future for later replacement of unusable elements.
Paths in the garden made of wood, made by yourself, look beautiful and help to properly organize the space. You can also happily walk on them barefoot. With proper care, they will last you quite a long time.
Design
You can arrange paths in the garden in different ways:
That is why any flooring of this type is placed at some level above the ground.
It is not necessary to make the path straight - you can give it the shape of a zigzag, a winding curve, a semicircle (depending on the landscape in the garden).
Of course, one cannot ignore the topography of a summer cottage. If you do not pay attention to it during the development of the track project, then they may turn out completely different from what was planned and will not last long at all.
It is highly not recommended to install wooden passages where watering is carried out, as well as where water rolls off after irrigation or precipitation and where it remains for some time.
Since a rare area has an immaculately flat topography without hills or depressions, there are such places in almost every dacha.
In addition, the dimensions of the paths, especially their width, must be calculated taking into account the size of the site.
There is no need to lay an “avenue” on the standard six hundred square meters - an ordinary path 0.4-0.45 m wide is quite enough. This is enough for one person to pass through. If the site is large, with gazebos, a swimming pool, and a recreation area, it is better to make the paths wider by laying beautiful borders along the edges.