Home Information Blog Decorating a painting by numbers in a frame
How fun it is to paint pictures by numbers! You can feel like a real artist, even if you don’t know how to draw at all. Therefore, others will surely follow the first one. But paintings lying on a shelf, rolled into a tube, cannot become either a home decoration or an object of joy. You need to frame them and hang them on the wall.
How can you frame a painting?
In general, there are three types of design for paintings:
- simply attach it to a stretcher without any frame;
- can be arranged in a baguette;
- can be issued in a passe-partout.
A painting on a stretcher without a frame looks good only if it is hung in a modern interior. Frankly speaking, without a frame the picture turns out to be a little under-formed. But some people like it - we have to admit it.
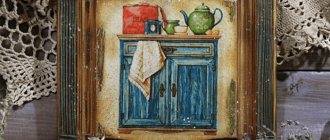
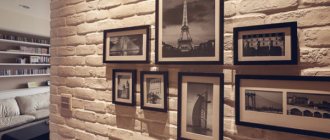
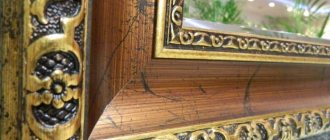
Baguette is a classic design for a picture. These frames are made of wood or plastic and can sound both modern and vintage, depending on the type of frame.
A passe-partout is a wide frame made of cardboard, white or colored. It can give a painting one or another mood, depending on the color and width.
Often the frame combines both a baguette and a passe-partout . This looks very interesting:
Where to choose a frame so that it fits in size and at the same time elegantly complements the picture? The ideal option is a custom frame.
How to assemble a picture frame from wood
In order to fasten a picture frame, you will need tools and materials - special glue, a hacksaw, a miter box, brushes, a measuring tape, and, if necessary, glass. Work on assembling the frame structure is carried out in the following order:
- measure the canvas and put the resulting indicators on the bar. It is important to clarify the following here: the frame is ALWAYS measured by the internal dimension, which is the external dimensions of the product! Each baguette has its own overall dimensions and sections, and when you set aside the size of one of the sides of the frame in order to then cut it down, you need to add a few more mm to the length. Each plank has a “quarter” (a groove into which the product is inserted) and it is along this “quarter” that the internal size of the frame is laid out. Therefore, before cutting a corner, make a test cut several times and measure the result. It is better to ALWAYS make a larger cut by the amount of W x 2 mm, where W is the width of the baguette used. And only when you are sure that you have chosen the right size supplement, you can proceed to the next step.
- using a miter box (a hand saw that allows you to cut corners at different degrees), make cuts at an angle of forty-five degrees, and you must not forget to file the corner at both ends of the plank;
- to fasten the corners of the frame, apply glue to each of them and tightly connect all the elements, then it is very desirable to strengthen each corner with a stapler or special staples, but they, as a rule, are used only on professional framing machines. And one more addition: be sure to use PVA glue or its analogues, but in no case the usual ones!
- the structure is left to dry in a warm, dry room without drafts.
If necessary, the wooden surface can be painted, varnished or artificially aged. Work embroidered with threads can be covered with glass, but items made of beads or crystals cannot be covered, since additional shine can worsen their appearance.
How to fix a picture in a frame?
Once the frame is ready, you will need to insert and attach the picture to the frame. If the canvas is not fixed to the base, before you arrange it into a finished baguette, you will need to stretch and fix the canvas on a stretcher. To do this, you must perform the following procedures:
- spread and carefully smooth the canvas on a flat surface;
- place a subframe on it in the central part so that the threads are in a longitudinal and transverse position relative to the slats;
- tuck, stretch and secure the canvas to the frame on the long side;
- do the same with the other sides, check the quality of the canvas tension and add fasteners, if necessary.
The next stage is the connection of the subframe and frame, which is carried out as follows:
- clean all edges from small particles and contaminants that may get between the contacting planes;
- Carefully place the structure with the canvas into the baguette, making sure that the contact is not too tight and there is free space between the structural elements;
- on the reverse side, bend special fastening plates (or, you can use the “old-fashioned” method: small window nails are driven halfway along the plane of the frame into the subframe, and then using a regular stapler they are sewn to the surface of the frame, but it is better to use special corners), which I will hold the structure securely.
In order to hang such a decorative element on the wall, one or two loops are additionally attached to the top crossbar, depending on the size of the canvas.
In a similar way, you can attach a puzzle picture to a frame by first assembling the picture and treating it with adhesive.
We stretch the painting onto a stretcher
Suppose you decide to take the simple route and stretch the painting onto a stretcher, leaving it without a frame. How to do it?
Prepare materials:
- stretcher;
- spray;
- hammer;
- stapler for furniture;
- staples.
Lay the picture face down, let it lie down and straighten out. If it does not want to straighten, you can lightly moisten it with a spray bottle.
Once the canvas has straightened, place it on a stretcher. Align. Start fastening from the middle of either side.
Having secured one side, stretch the canvas and tack the opposite side. Carefully secure both sides, being careful not to distort the canvas.
Now secure the other two sides.
What's next? You still have some corners sticking out. Carefully roll them up, fold them, and secure them.
That's all.
Subframes
The stretcher serves as the basis for stretching the canvas. There are 2 types of stretchers: modular (prefabricated, wedge) and deaf. Modular (prefabricated, wedge) stretchers can be bought in almost all art stores. They are sold in slats of 2 pieces (in increments of 5 cm in length) and are slightly more expensive than blind stretchers. Modular stretchers have a huge advantage - their corners are not rigidly fastened and if the picture sag, the problem can be easily and quickly corrected at home - you just need to knock down the wedges (Figure No. 6). This must be done very carefully so as not to damage the canvas with a hammer or overtighten it. In blind stretchers, the corners are rigidly connected and if the canvas sag, it will have to be re-stretched. Canvas reupholstery should only be done by a specialist! As a rule, for a medium-sized painting, a stretcher with a thickness of 1.8 cm is used, and for a gallery stretch - 3 cm.
We frame the picture in a baguette
Maybe you like the classic version better - it fits most interiors of modern apartments and houses. How to frame a painting by numbers in this case?
You will need:
- frame;
- canvas staples.
- First, stretch the canvas onto a stretcher as you already know how to do.
- Turn the frame face down. Find out where the frame is top and bottom. Place the painting on a stretcher in it, also face down.
- Connect the frame and subframe using brackets.
If your baguette is not a classic one, but the simplest one (a frame imitating a baguette), the technology is a little different. How to arrange a painting by numbers in a frame with a backing and glass? Not difficult at all!
- Turn the frame over and remove the backing.
- Place the picture on the glass and align it. If necessary, trim the edges slightly.
- Cover with a backing and secure the fasteners.
That's all!
Inserting watercolors into a baguette frame
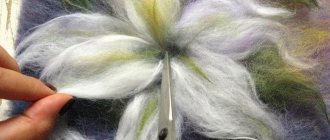
Watercolor is painted on paper or cardboard, that is, it is fixed differently than a painting. Paintings made using this technique require additional fixation. Provide it:
Important! If you ordered a frame from a framing workshop, you should have been given all the necessary components, as well as fasteners - special nails.
- Place the frame face down.
- Place glass on top.
- Place the picture on the glass.
- Smooth out the sheet and make sure its edges match the edges of the glass.
- Cover the whole thing with a cardboard backdrop.
- Drive the nails parallel to the edges.
We prepare the picture in a passe-partout
The design of a painting in a passe-partout is no different from the design in a baguette. Except one. If you have the desire and skill, you can make a passe-partout with your own hands!
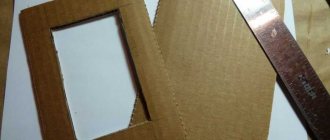
How to make a picture frame by numbers? For this you will need:
- thick cardboard, thin plywood or a piece of hardboard;
- construction gun;
- scrapbooking paper or colored cardboard.
We will make a backing from cardboard, hardboard or plywood. The format of the backing should be larger than the painting in order to create a wide border.
We will fix the picture on it using a construction gun.
On top of the picture on the backing we place a wide frame made of scrapbooking paper or colored cardboard.
Now just wait until it dries and you will have a wonderfully decorated painting.
How to carefully stretch embroidery onto a stretcher
Any decoration of embroidery in a frame with your own hands begins with stretching the fabric onto a stretcher. The latter can be bought with a frame (usually included in the kit) or made independently.
The easiest and fastest way is to make a stretcher from thick cardboard. The cardboard does not bend and does not spoil the embroidery, but it is quite durable and easy to attach fabric to. You can also use a thin piece of foam of the appropriate size, but this material is easier to break. Third option: thin plywood or chipboard.
Before starting embroidery you need to prepare:
- Wash, preferably by hand, using a mild detergent for colored items. This will help get rid of the remaining markings, eliminate particles of dirt and dust;
Must be washed by hand
- Dry on a flat horizontal surface;
- Iron at minimum temperature, selecting “steam”. The embroidery must be placed with the pattern down on a towel or soft cloth and ironed from behind through a damp cloth. This way it will be possible to preserve the relief of the stitches;
- If desired, you can also starch the work: sprinkle it with water and starch or a special product from the inside. This will make the fabric stiffer, which will simplify further work.
Important! Embroidery made from ribbons, beads, rhinestones, sequins or diamond embroidery cannot be washed.
The tensioning process itself occurs in several steps:
- It is necessary to determine the center of the subframe. To do this, you need to draw horizontal and vertical lines along the middle of the substrate and find the center. You also need to determine the center of the embroidery;
- Next, you need to connect both centers, securing them with a pin. This will avoid displacement when pulling;
- It is important to check that the embroidery is positioned evenly, without creases, is not displaced, and fits completely in the frame. In this case, there should be 3-4 cm on all sides, which will be covered by the frame itself.
It is necessary to leave a little “extra” fabric on all sides.
You can finally secure the fabric in several ways.
The canvas is stretched and fixed with threads
After stretching, the canvas should protrude a few centimeters beyond the edge on all sides. The edges of the fabric are folded and sewn together at the corners.
Corners should be sewn neatly
Then you need to stretch the threads crosswise between the opposite sides, which will hold the embroidery in place.
The canvas is cut to fit the baguette and is not fixed
This is not the best option as the fabric may slip off. This option is suitable if the glass fits very tightly, and between it and the backing there is only room for the embroidery itself. In this case, you need to carefully trim the fabric around the edges. For additional fixation, you can secure them with buttons, a stapler or tape.
The disadvantages of this method include the inability to design the work differently in the future, since the edges will be cut off.
Corners can also be secured with a stapler
Method of stretching embroidery using double-sided tape
First you need to glue the tape around the perimeter of the stretcher so that the edges of the embroidery when folded do not go beyond the edge of the tape. Then, one by one, peel off the protection and glue the canvas, pressing it carefully.
You may be interested in this Review of easy but beautiful patterns for cross stitch
Important! Using the same method, you can additionally secure the fabric by sewing the edges together with thread.
You can also stick tape on the front side, then stretch the fabric over it and press it. This is a simple method in which you can immediately notice and correct the problem that has arisen (a fold or too much tension). For better fixation, the tape can be applied not only along the edges, but also in the center.
Stretching and securing embroidery with push pins
This is not the best option, since over time the buttons may become loose and the embroidery will move away. It is best to use buttons on a stretcher made of plywood or chipboard and squeeze tightly, bending the ends of the buttons if necessary.
You need to work carefully, otherwise the edges will be visible
The canvas is attached to the stretcher with a stapler
Usually, embroidery is attached to a wooden stretcher with a stapler: the embroidery is folded and secured.
Important! We are talking about a large construction stapler, not a stationery stapler.
It is noted that this method is more suitable for fastening large-sized fabrics, as well as tapestries, batiks, and hand-drawn paintings.
Protecting paintings by numbers
Paintings by numbers are painted with paints that can flow if water gets on them. To prevent your creation from deteriorating, it can be protected. But how can you protect painted paintings by numbers?
One of the methods we have already mentioned in passing is glass on a frame. The glass provides reliable protection during normal use, and even during cleaning. The only way to damage a painting under glass is to dip it in water.
If you do not rule out this option, there is another way to protect the painting - varnish. The painting is covered with varnish after it is all painted and has already dried.
It can be scary to apply varnish for the first time - what if everything gets smeared? We will tell you how to apply varnish to a painting by numbers correctly so as not to damage it. You will need:
- fluted brush (wide, like for painting);
- acrylic lacquer.
Thoroughly clean the painting from dust, if any.
Heat the varnish in a water bath to a temperature of 45 degrees - this way it will lie more evenly.
Apply the varnish using wide, parallel strokes. Try to put a little varnish on the brush so that drips do not form. The varnish is placed parallel to the lower border - that is, horizontally relative to the painting.
When the entire painting is covered with varnish, rinse the brush thoroughly and wipe dry. Using a dry brush, go over the varnish again, distributing it evenly. This must be done quickly, since acrylic varnish dries quickly. If the brush sticks, it's time to finish the job.
After 2-3 hours, when the varnish has dried, you can begin framing the painting.
How to paint pictures by numbers, read our article on the website.
We give blog visitors a 5% discount
When placing an order, enter the promo code
BLOG
Classic baguette
Before you frame your canvas, it is important to decide on the dimensions. It is better to order the frame itself from a framing workshop.
The width of the slats depends on the size of the painting - the larger the canvas, the more massive the frame should be. For fastening, a stretcher is used, which is a structure made of wooden slats onto which the canvas is stretched.
This frame does not allow the canvas to deform. It can be secured in three ways:
- using D-shaped plates;
- using Z-shaped plates;
- using tapes.
D-plates
If the subframe protrudes beyond the boundaries of the baguette, use D-shaped brass plates.
Important! Brass is used because the plates must be flexible.
- 3 holes are made in each of them.
- They are attached to the frame with two screws.
- If there is nothing of the kind within reach, you can make fastening elements from other materials (for example, tin).
Important! Small nails will work as fasteners in an emergency, but it is better to buy the necessary parts at an art supply store or a framing shop.
Z-brackets
They apply in the following cases:
- for attaching a subframe that does not protrude beyond the boundaries of the baguette to the frame;
- for connecting double frames.
Important! The size of the brackets is selected based on the height difference between the elements. This bracket is screwed in with screws.
Planks
Quite often thin wooden, cardboard or plastic strips are inserted into the gaps to prevent the painting from dangling:
- The best option is wood, it provides the most durable fixation.
- But if you don’t have anything suitable at hand, strips can be made from large plastic bottles. In this case, it does not matter at all whether they are equal in length to the gap or not.
Important! The main task of these elements is to prevent the picture from shaking, and even short pieces of material can ensure this.
Manufacturing method No. 2 (popular)
To make a passe-partout using this method you will need:
- picture frame;
- a sheet of cardboard, whatman paper, wallpaper or watercolor paper;
- scissors and stationery knife;
- glue;
- ruler.
The article is almost on topic: How to make a bookmark for a book with your own hands - a huge number of ideas and options.
1. Each photo (picture) frame is accompanied by a piece of cardboard, the one that fixes the image on the back. And if it fits tightly, then we will take it as the basis for our passe-partout. To do this, take a piece of cardboard, place it on a sheet of Whatman paper or watercolor paper, trace and cut out a rectangle of the desired size.
2. Next, you need to find the middle on it. And from it set aside half the size of the photo (painting) in height and width. This is done to ensure that the drawing is centered.
3. Then, in accordance with the calculations, we draw a frame - a passe-partout cutout. Then we retreat 2 mm inward from it and draw another frame.
4. Next we need to measure the smallest width of the mat (we take measurements from the edge of the Whatman paper). And from the first frame (the one closest to the edge), draw another one, the width coinciding with the smallest width of the print (in the example in the video, a little smaller is taken, this is acceptable). Immediately draw the lines of future cuts in the corners.
5. Now we need to make the depth of the print. To do this, take a spoon or fork, and with its back side, using a ruler, press the passe-partout along a narrow edge (these are the 2 mm that we outlined between the first and last frames).
6. Then cut out the inside of a sheet of whatman paper (watercolor paper). You can use scissors, you can use a stationery knife or a scalpel, whichever is more convenient for you.
7. Then you need to make corner cuts. Attention! They should be done up to the frame, which is closer to the edge.
8. We bend the resulting “petals” inward along the ruler, along the line that is closer to the center.
9. Using glue, at one point, we fix our photo / drawing from the inside on the mat. It's better to use PVA - it doesn't leave marks. And put it in a frame under glass.
Step by step video
Everything is described and clearly shown in the video.