Calculation of basic parameters
At the design stage, it is necessary to determine the height of the chimney and the cross-sectional dimensions of the smoke exhaust duct. The task of the calculation is to ensure optimal traction force. It must be sufficient to ensure that the required amount of air enters the firebox and all combustion products are removed in full, and at the same time not too large so that hot gases have time to give up their heat.
Height
The height of the chimney must be selected taking into account the following requirements:
- The minimum height difference between the grate and the top of the head is 5 m.
- If the roof is covered with flammable material, for example, bitumen shingles, the chimney head should rise above it by at least 1.5 m.
- For roofs with non-combustible coating, the minimum distance to the top is 0.5 m.
The ridge of a pitched roof or a flat parapet in windy weather should not create support above the chimney. To do this you need to adhere to the following rules:
- if the pipe is located closer than 1.5 m in relation to the ridge or parapet, then it should rise above this element by at least 0.5 m;
- when removed from the ridge or parapet at a distance of 1.5 to 3 m, the head of the pipe can be at the same height as this element;
- at a distance of more than 3 m, the top of the head can be placed below the ridge, at the height of an inclined line drawn through it with an angle of 10 degrees relative to the horizontal.
If there is a higher building near the house, then the chimney should be erected 0.5 m above its roof.
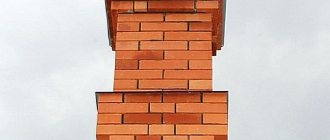
The brick chimney is very neat and fits into any exterior
Section dimensions
If a stove or boiler is connected to the chimney, then the cross-sectional dimensions should be determined depending on the power of the heat generator:
- up to 3.5 kW: the channel is made the size of half a brick - 140x140 mm;
- from 3.5 to 5.2 kW: 140x200 mm;
- from 5.2 to 7 kW: 200x270 mm;
- over 7 kW: in two bricks - 270x270 mm.
The power of factory-made heat generators is indicated in the passport. If the stove or boiler is homemade, you have to determine this parameter yourself. The calculation is carried out according to the formula:
W = Vt * 0.63 * * 0.8 * E / t,
Where:
- W—heat generator power, kW;
- Vt—furnace volume, m3;
- 0.63 - average furnace load factor;
- 0.8 - average coefficient showing what part of the fuel burns completely;
- E is the calorific value of the fuel, kW*h/m3;
- T is the burning time of one fuel load, hours.
The chimney can always be decorated if desired
The calorific value E depends on the type of wood and its moisture content. The average values are:
- for poplar: at a humidity of 12% E - 1856 kWh/cubic meter. m, with humidity 25 and 50% - 1448 and 636 kWh/m3, respectively;
- for spruce: at humidity 12, 25 and 50%, respectively, 2088, 1629 and 715 kWh/m3;
- for pine: respectively, 2413, 1882 and 826 kW*h/m3;
- for birch: respectively, 3016, 2352 and 1033 kW*h/m3;
- for oak: respectively, 3758, 2932 and 1287 kW*h/m3.
For fireplaces, the calculation is slightly different. Here the cross-sectional area of the chimney depends on the size of the firebox window: F = k * A.
Where:
- F is the cross-sectional area of the smoke exhaust channel, cm2;
- K is the proportionality coefficient, depending on the height of the chimney and the shape of its cross-section;
- A is the area of the firebox window, cm2.
The coefficient K is equal to the following values:
- with a chimney height of 5 m: for a round section - 0.112, for a square section - 0.124, for a rectangular section - 0.132;
- 6 m: 0.105, 0.116, 0.123;
- 7 m: 0.1, 0.11, 0.117;
- 8 m: 0.095, 0.105, 0.112;
- 9 m: 0.091, 0.101, 0.106;
- 10 m: 0.087, 0.097, 0.102;
- 11 m: 0.089, 0.094, 0.098.
For intermediate height values, the K coefficient can be determined using a special graph.
This graph allows you to determine the K coefficient for intermediate values of pipe height
They tend to make the actual dimensions of the smoke exhaust duct close to the calculated ones. But they are selected taking into account the standard sizes of bricks, blocks or cylindrical parts.
How to make a chimney with your own hands
Before starting to build a brick chimney, you need to carry out various calculations to find out what the cross-section of the pipe should be, how high above the roof it should rise, and so on.
This is necessary to ensure sufficient thrust to fully remove the products of fuel combustion, but it is important to make the correct calculations so that the heat does not literally “fly out the chimney.”
Calculation of the height of a brick pipe
When building a chimney with your own hands, the question arises of how high the pipe should be.
The ideal option is the length from the grate to the pipe head - at least 5 m, but this parameter can be changed by increasing or decreasing the cross-section of the brick pipe. Such freedom is allowed so that the chimney not only fulfills its cleaning function, but also looks harmonious with the entire structure.
Note! The recommended minimum height of the roof pipe made of combustible materials is 150 cm, for non-combustible materials - 50 cm.
Another method of calculating the height of the pipe is based on the height of the ridge of a pitched roof or a flat parapet, and is designed to reduce the influence of wind in bad weather:
- a pipe located at a distance of up to 1.5 m from the ridge (parapet) must rise at least 0.5 m above it;
- a pipe located at a distance of 1.5-3 m from a structural element can be at the same height or higher;
- the height of a pipe extending at a distance of more than 3 m is calculated according to the following principle: a conditional inclined line is drawn from the ridge along the roof slope with a slope of 10 ° down relative to the horizontal (these calculations can only be made on the drawing).\
We recommend that you read: How to properly install a ceiling-passage assembly for a chimney in a bathhouse
Calculation of the chimney cross-section
The cross-sectional size of the pipe depends on the power of the installed heat generator (indicated in the technical data sheet of the device).
| Heat generator power (kW) | Pipe cross-section dimensions (mm) |
| 140x140 | |
| 3,5-5,2 | 140x200 |
| 5,2-7 | 200x270 |
| >7 | 270x270 |
If the stove is completely homemade, and the power of the generator is unknown, it can be approximately calculated using the following formula:
Important! This formula only applies to stoves and does not apply to fireplaces.
Selecting bricks and preparing mortar for masonry
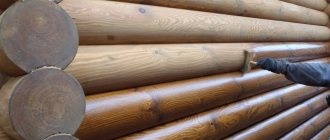
There are several types of brick, but only red burnt brick is suitable for laying a chimney; the use of sand-lime brick is strictly prohibited. This is due to the fact that the material has to withstand high temperature loads (up to +400 °C).
In no case should you save on brick, since in addition to internal heat, the material has to withstand the influence of sunlight, rain, wind, frost, and so on.
Burnt brick comes in three grades, each with its own characteristics and to varying degrees suitable for chimney installation:
- The first grade is ideal for a chimney. First grade baked brick has the highest clay density, i.e. It has practically no pores, but has smooth edges without cracks and smooth edges without chips. It has excellent frost-resistant qualities and relatively low thermal conductivity. When tapped, it produces a moderate ringing sound. The color is bright red or orange. Ideal for laying chimneys.
- The second grade is acceptable. The second grade brick is called unfired. It has a pale red color and produces a dull sound when tapped. The brick is quite porous, the ribs are often crumbled. This type of brick, in principle, is acceptable for installing a chimney, but requires additional work to align the ribs, and the outer section of the pipe requires additional plastering.
- The third grade is unsatisfactory. Burnt bricks of the third grade are not suitable for laying chimneys! You can recognize it by its rich red or red-brown color. When tapped, it rings very loudly. Its main disadvantage is increased fragility, so in aggressive conditions (heat inside the pipe and frost outside), the brick can simply crack.
As for the mortar for laying bricks, many stove makers have their own recipes for its preparation and use mixtures with different proportions of cement, sand, clay and even lime on different sections of the chimney. If you are going to have a one-time construction of a brick chimney, it is best to buy a ready-made mixture for stoves and fireplaces.
Instructions for laying a chimney
The most popular chimney system design is the mounted chimney. This option is the easiest to install, and also does not require additional space (it is built on top of a brick oven).
- The first row of the chimney is laid out on the top row of the stove, around the chimney opening, according to the calculated cross-sectional size.
- Next, row by row, bricks strictly one above the other, the pipe riser is laid out.
Healthy! The thickness of the cement mortar layer on the brick should be about 10 mm, and after pressing the top brick, it should decrease to 6-7 mm.
- 2 - 3 rows before the attic floor, the formation of fluff begins. To do this, a new row of bricks is extended 30 mm beyond the outer perimeter of the chimney. The internal perimeter must remain unchanged, so it is necessary to lay out fragments of brick from the inside to maintain the given section.
- Then each next row extends another 30 mm beyond the outer perimeter. The internal cross-section remains unchanged.
- Typically, the expansion of the fluff ends when the new perimeter extends beyond the original by a whole brick. Next, laying continues in the new perimeter until the top of the pipe is level with the attic floor or slightly higher. The number of rows of fluff is individual in each individual case.
We recommend that you read: Instructions for connecting a toilet to the sewerage system
Healthy! It is better to lay a sealant made of non-combustible material, such as asbestos, between the brickwork of the fluff and the attic floor to further increase fire safety.
- As soon as the attic floor is overcome, the chimney returns to its original perimeter and is laid out row by row to the roof. The hole in the roof for the pipe must be prepared in advance.
- Once the riser reaches the bottom edge of the roof, the formation of the otter begins. To do this, the row of bricks located towards the roof slope must be moved ⅓ outwards. The inner perimeter is permanently preserved using brick fragments.
- The second row is laid out along the new perimeter, however, the side facing the roof slope now also extends to the sides beyond the old perimeter, by about ¼ of a brick (60-65 mm). The width of the otter's overhanging row is half a brick.
- The third row repeats the masonry of the second row, but the width of the overhanging row is now a whole brick.
- In the same way, the laying out of the otter continues until it goes beyond the roof from the ridge side.
- Next, a completely overhanging row is laid out: the protrusions towards the slope and the side of the ridge make up ⅓ bricks, to the sides - ¼ bricks. This creates a canopy with a diagonal bottom edge that prevents precipitation from entering the attic. It is advisable to lay a waterproofing apron between the otter and the roof to completely close the hole in the roof through which the chimney passed.
- Once the otter is completed, the pipe returns to its original perimeter and the laying of the pipe neck continues to the calculated height.
- The last 1-2 rows can be laid out with the bricks shifted 30 mm outward, forming the head of the pipe.
- An umbrella cap is mounted on top of the head, protecting the pipe from precipitation and debris. There should be 15-20 cm of free space between the cap and the top brick.
Attention! It is worth taking care of the smoothness of the seams not only outside, but also inside the pipe. This way the outside will look much neater, and less soot will accumulate on the inside surface.
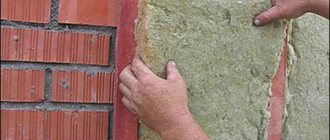
In some cases (for example, when using second-grade baked brick), additional insulation of the chimney is desirable. Usually the pipe is insulated only in the open area. To do this, a metal mesh frame is attached to it, on which mineral wool is laid and covered with a vapor-permeable film on top. At the end, the entire structure is covered with plaster for exterior finishing.
Brick chimney: pros and cons
The traditional option remains in demand, despite the emergence of more modern models. The indisputable advantages of this design can be considered:
- Long service life. It will last at least 30 years.
- Relatively low cost, especially compared to steel or ceramic counterparts.
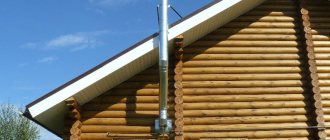
In addition, a brick chimney is a traditional architectural element of a home that is not only functional, but also beautiful. Some types of roofing, such as tiles, work well with it.
Instagram bannie_chertogi
A brick chimney can decorate a building
The system also has disadvantages, and significant ones. Its mass is very large, for this reason it is necessary to build a reliable foundation. It must withstand significant load. Construction is quite complex and time-consuming, while steel parts are much easier and faster to install. But this is not all the disadvantages. The internal cross-section of the pipe has the shape of a quadrangle.
1f8683af01cdd717f398a2a01b5a2186.jpe 896f92f17aeb360c36ec0a3fdc817c0f.jpe
This is not good, since the optimal option in this case would be a circle. In the corners of the quadrangular chimney, vortices are formed, which interfere with normal draft and impede the movement of gases. In addition, the inside of a brick chimney for a gas boiler, like any other, is always rough, even if it is plastered. Soot is easily deposited and accumulated on such a surface, which leads to a decrease in the cross-section of the passage and a deterioration in traction.
And one more significant minus. Ceramics are sensitive to acid condensate and are quickly destroyed under its influence. The aggressive substance is formed in flue gases whose temperature is below 90 C. For traditional furnaces and boilers, this is irrelevant because the flow does not have time to cool down enough. But for modern economical models with low-temperature smoke, this is significant. In such cases, it is necessary to line the chimney, otherwise it will quickly become unusable. Sometimes, to simplify the work, a steel pipe is lined with bricks.
Instagram dachazhuk_
The brick smoke duct is only good for stoves with high smoke temperatures. For low-temperature models, the chimney is lined
Methods for lining smoke exhaust ducts
The sleeve is a cylinder of a certain cross-section, made of fire-resistant material, which can be assembled into a pipe of any length.
Lining a brick chimney can be done in three ways, which differ from each other in the materials used, cost, and some installation features.
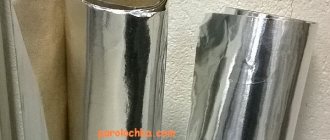
- Lining of smoke exhaust channels with polymer liners. A special pipe made of fiberglass-reinforced polymer is inserted into the chimney, which, when heated, becomes flexible and fills the smoke exhaust paths, no matter how tortuous they may be. After the polymer hardens, the inside of the chimney is a smooth pipe with a wall thickness of about 2 mm. But there are serious temperature restrictions in the use of this material: It can withstand temperatures up to 250C⁰, so it can be used to remove combustible gases only from boilers with liquid or gas fuel.
- Chimney lining using steel modules. Lining the canal using this method does not require its destruction. This material is durable and relatively inexpensive. One of the biggest advantages of using steel modules is the ease of execution. This material can be used for the reconstruction of smoke exhaust systems, heating and cooking stoves, heaters and fireplaces operating on any type of fuel. But there is also a drawback: in this way it is impossible to line winding smoke exhaust channels.
- The chimney liner is a corrugated stainless pipe. This material can be used for furnaces with a low temperature of combustion products, since this pipe has rather thin walls and will quickly burn out at high temperatures. In addition, soot will definitely be deposited on the inner surface. Due to the ribbing, corrugated surface.
Based on the above, it is not recommended to use a corrugated stainless pipe for lining the chimney of a bathhouse.
Materials
When facing a heater with brick, there is no point in saving on material - the health of the bathhouse and yours come first. Therefore, we take high-quality solid red ceramic bricks. No fireclay - it has less heat capacity and heat conductivity. Can be lined with slotted hollow bricks. But then the idea of a heat-capacity wall is lost.
We put all this on a complex solution of sand, clay and cement. It is possible without cement, but for a bathhouse with its high humidity, extra moisture resistance will not harm. We take red clay - fireclay will crack - the difference is in CTE with red clay.
First, the fat content of the clay and its need for thinning are determined. The best method for a non-professional, proposed by the stove maker Mikhailov. Its essence is simple.
Using a small container (for example, a tin can), we measure out several test batches of clay-sand mortar. Various ratios. 1:1, 1:2 and so on until 1:6. From each test batch we make a solution with the consistency of very thick sour cream. We make a small lump or ball from each sample. And from hand we throw this lump onto a metal surface: a sheet of iron, the side of a bucket, and so on, so that a cake comes out about 5 mm thick. And they let it dry in the shade until it becomes leathery.
The greasy solution will crack and may look like peeling scales. A normal one will stick firmly to the metal without cracks and will come off in large pieces. The skinny one won’t crack either, but it can be easily cleaned off like sand.
This is how the fat content of the solution and the correct ratio of sand and clay in it are determined. This is the proportion they deal with later. But it should be remembered that it is only true for a given batch of clay. Clay from another deposit has different characteristics. And then the procedure for determining the proportion of sand should be carried out again.
We invite you to familiarize yourself with Sandwich pipes for chimneys: design, dimensions, installation
Cement is added at the very last stage, just before you get ready to work with the brick. About two trowels per bucket. No more.
The laying is carried out on soaked brick. You can also apply it dry, but in this case the seams will be less durable.
A lined heater in a bathhouse does not require such thorough drying as a full-fledged stove structure. But it’s still worth saving it a little and not starting intensive use right away. First, natural drying, and then smooth and gradual heating in several stages.
The stove lining slightly increases the size of the structure, but its weight is small. And therefore, sometimes it doesn’t even require a specialized foundation. Enjoy your steam!
Before you line a metal stove with bricks, you need to put in front of you:
- a trowel so that you can apply mortar to the brick and collect its excess;
- a hammer and a pick to separate the required part from the whole material;
- stitching to refine the seams;
- mooring line to control masonry in rows and corners;
- a special strip with a holder for fixing the strip and a wedge for lifting a certain laying element;
- a plumb line that can provide control of the verticality of the structure;
- building level for calculating horizontal rows;
- a stand for a building level, a shovel and a container for mixing the solution.
Note! You may also need a construction mixer to mix the solution.
To line the stove with brick, in addition to the brick itself, you need to prepare:
- hammer-pick;
- Master OK;
- plumb line;
- metal corner;
- asbestos cardboard;
- clay;
- cement;
- sand;
- drill.
Elements of a brick chimney
The design of the chimney is very simple.
Schematic diagram of a brick pipe, which should be followed
The smoke exhaust channel is protected from above by a cone-shaped part - an umbrella or cap (1), which prevents precipitation, dust and small debris from entering. The upper element of the pipe - the head (2) - is wider than its main part. Thanks to this, it is possible to reduce the amount of moisture that gets into the lower area during rain - the neck (3).
Above the roof there is another widening - an otter (5). Thanks to it, atmospheric moisture does not enter the gap between the chimney and the roofing (6). A slope (4) is formed on the otter using cement mortar, along which the water that gets onto the pipe runs off. To prevent the rafters (7) and sheathing (8) from catching fire from contact with the hot surface of the chimney, they are wrapped in heat-insulating material.
The section of the chimney crossing the attic space is called the riser (9). In its lower part, just at the level of the attic floor, there is another widening - fluff (10).
A brick chimney is more reliable than a metal one
The thick walls of the fluff protect the wooden floor elements (11) from excessive heat, which can cause them to ignite.
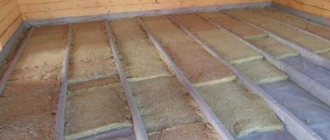
The chimney can be made without fluff. Then, in the area where the ceiling passes, a steel box is mounted around the pipe, which is subsequently filled with a bulk heat insulator - expanded clay, sand or vermiculite. The thickness of this layer should be 100–150 mm. But experienced users do not recommend using this cutting option: the insulating filler falls through the cracks.
The fluff is additionally lined with an effective non-flammable heat insulator (12). Previously, asbestos was used everywhere in this capacity, but after its carcinogenic properties were discovered, they are trying not to use this material. A harmless, but more expensive alternative is basalt cardboard.
The lowest section of the chimney is also called the neck (14). It has a valve (13), through which the draft can be adjusted.
Depending on the construction method, the chimney may be one of the following types:
- Mounted. The stove itself serves as the basis for this design. To support the impressive weight of the chimney, its walls must be two bricks thick.
- Root. Such a chimney stands on a separate foundation and is not part of any heat-generating installation. The smoke exhaust pipe of the stove or boiler is connected to it through a horizontal tunnel - a reversible sleeve.
- Wall. Chimneys of this type are channels in load-bearing walls. In order to save heat, internal walls are usually used, on both sides of which there are heated rooms.
In a vertical brick chimney, draft is formed naturally, that is, due to convection. A prerequisite for the formation of an upward flow is the temperature difference between the ambient air and the exhaust gases: the greater it is, the stronger the draft formed in the pipe
Therefore, for the normal functioning of the chimney, it is very important to take care of its insulation
Types of brick chimneys
There are 3 types of chimney designs. They differ in the way they exit the furnace, the number of heating devices connected, and so on.
Each type has its own pros and cons in application, as well as some installation features.
Mounted chimneys
Mounted chimneys are the most common type of construction. In this case, the pipe is simply a continuation of the stove, going up through the roof. The advantages of such a system:
- Compactness and rational use of space. In any case, the space above the stove would be empty (due to safety requirements), and the chimney is the only element allowed in this area.
- Ease of installation. The design of a brick chimney is very simple and does not require any skills (the skill of bricklaying has probably already been acquired when building a stove).
The disadvantage of a mounted chimney is that it is mounted for one specific device. If there are several stoves in the house, each will have to build its own chimney or use a different type of construction.
Root chimneys
In this case, the chimney is a common riser, to which several heating devices can be connected using metal pipes, and the stoves can be located in different rooms or on different floors.
The disadvantage is that additional space is required not only for installing the chimney, but also for supply pipes. Also quite complex calculations of sections for each element of such a structure to ensure normal traction.
Wall chimneys
The chimney received this name because it is always located near a main wall (internal or external). If the chimney is located near an external wall, then most of its structure ends up on the outside of the house and requires an additional foundation. When installed indoors, the chimney must pass inside the wall.
The advantage of a wall chimney is that several appliances on different floors can be connected to it, but they must be located strictly above each other.
Also, the internal wall chimney is a kind of additional source of heat, since the hot pipe gives off heat in all directions, including those adjacent to the main wall of the room. True, the efficiency of such heating is minimal and is simply an additional advantage of a wall chimney.
The main disadvantage is the high cost of materials and the need for additional space.
Calculation of brick chimney parameters
For high-quality installation of a smoke exhaust system, a preliminary calculation of the main parameters is required - the height of the pipe and the cross-section of the channel for gas removal. This will ensure excellent traction and safe operation of the structure.
41739bab2fc88093219e5365024510ae.jpe
Pipe height
This parameter is determined based on technical requirements:
- The minimum permissible height difference between the grate and the top is 5 meters.
- If the roof is made of flammable materials, the height of the chimney cap will be 150 cm; when laying a roof made of non-combustible material, the height will be 50 cm.
The presence of a parapet or ridge should not interfere with the safe operation of the chimney. To do this, the following rules are observed:
- When the pipe is located at a distance of 150 cm from the ridge or parapet, its elevation above them is 50 cm.
- When removing the chimney head from the parapet and ridge at a distance of 150 to 300 cm, no additional elevation is required.
- When the head is removed from the edge of the roof by 300 cm, it can be located below the ridge at a height along an inclined straight line with an angle of 12 degrees.
If there is a tall building on the site, the chimney should be 50 cm higher than its roof.
Channel cross section
If the chimney is installed for a metal stove or for a solid fuel boiler, then the calculation of the appropriate cross-section is carried out taking into account the operating power of the equipment:
- Power – up to 3.5 kW, cross-section – 14×14 cm.
- Power - from 3.6 to 5.1 kW, cross-section - 14x20 cm.
- Power - from 5.1 to 6.9 kW, cross-section - 20x27 cm.
- Power – from 7.1 kW, cross-section – 27×27 cm.
Data on the power of factory heating equipment are indicated in the technical data sheet. For homemade devices, a similar parameter is calculated using the formula:
W = V×0.63×0.8×E/t, where
W – power of heating equipment (kW).
V – volume of the combustion chamber (cubic m).
0.63 – average load factor of the combustion chamber.
0.8 is a coefficient that determines the part of the fuel material that burns completely.
E – thermal energy of the fuel material (kWh/cubic m).
T – duration of combustion of one load of fuel (hour).
Thermal energy depends on the type of wood and its moisture content.
Why do chimneys collapse?
During operation, even without errors, a constructed chimney is subjected to intense loads. The service life of a brick pipe is 20-30 years. For a steel chimney, the operating warranty is less and is 10-15 years. The given figures approximately show the service life without major repairs at an average load.
In real conditions, the integrity of the smoke exhaust duct depends on many factors, both natural and man-made. Natural causes of pipe destruction are aging and wear and tear of the material under the influence of external factors. Subject to the rules for chimney construction, natural factors act gently and over time. Errors, negligence or ignorance lead to rapid destruction of the chimney.
The following factors contribute to the destruction of chimneys:
- Errors at the design stage, when the constructed smoke exhaust duct initially works with the formation of a large amount of condensate and ash sediment on the inner surface.
- Stove-maker mistakes when laying a smoke exhaust duct or stove.
- Formation of chemically aggressive condensate on the inner surface of the channel. Occurs when construction technology is violated or when the stove is rarely used.
- Destruction of brickwork. The reason is poor-quality material, freezing of condensate in the pipe solution, frequent temperature changes with rare use of the furnace.
- Burnout of the steel inner pipe of a sandwich chimney. Occurs when low-quality steel is used in the manufacture of a pipe or when a chimney is installed on a boiler that does not comply with the recommendations of the manufacturer of this sandwich pipe.
- Violation of the chimney seal at the joints (for a steel pipe). Air leakage from the outside and burning of the brickwork or cracking of the bricks.
What is a brick chimney and where is it used?
Chimneys are used to remove gaseous combustion products in stoves, fireplaces and heating boilers. Under the influence of draft, smoke, carbon monoxide and soot are carried from the firebox into the chimney and discharged outside. As they move, they cool down, giving off heat to the walls of the chimney.
To remove combustion products from a brick stove, you need to build a chimney from the same material, i.e. brick
99c6a1d6ee350f78e3a76946a1d71ad4.jpeUnlike metal pipes, a brick chimney has:
- Higher heat capacity coefficient. Because of this, the efficiency of such chimneys is higher. By accumulating heat inside itself, the brick gradually releases it into the living space, thereby prolonging the heating time of the air.
- High thermal resistance. The temperature of gases as a result of fuel combustion reaches 800 ° C. Metal chimneys, when heated to such a temperature, “burn out” over time, become deformed, and water condensation forms on the walls. Mixing with soot, water turns into an aggressive chemical reagent.
- Variety of architectural forms. The brick pipe fits organically into the style of the building and gives it additional design. The massiveness of the chimney makes the pipe resistant to mechanical damage and little susceptible to the effects of natural atmospheric phenomena. Metal pipes, on the contrary, must be carefully secured, in some cases even braces must be used.
But a brick chimney also has a rather significant disadvantage. In country houses and country cottages it is not possible to fold cylindrical pipes, which are ideal for the passage of hot gases. The internal cross-section of a square or rectangular shape creates obstacles to the flow of smoke. As a result, a layer of soot quickly forms on the inner walls, which reduces traction. Accordingly, they have to be cleaned more often than metal ones.
How is a brick chimney constructed?
A brick chimney consists of several sections, some of which are located indoors, and some in the open air.
The design features are such that when passing through the attic floor, the walls of the pipes must be thickened as much as possible in order to reduce the risk of fire in the rafter system. At the same time, going beyond the roof, the chimney structure itself must cover the hole in the roof so that precipitation does not penetrate into it.
- In most cases, the chimney pipe is a continuation of the stove, i.e. on top of it the required number of rows of bricks are built up to the attic floor.
- The next element is fluff. When fluffed, the width of the pipe is 2-3 times greater than its normal size while maintaining a constant internal cross-section. The thick walls of the pipe are a kind of buffer that protects flammable elements of the attic system from contact with the heat passing through the pipe. At this level the air is still too hot due to the close proximity of the furnace.
- Next comes the riser - a section of pipe from the attic floor to the top of the roof. It is a brick pipe in its usual cross-section.
- According to technology, there should be an “otter” at the place where the pipe exits the roof, but it is often neglected. The element is similar to a fluff, but is installed in such a way that a brick canopy is formed above the roof, repeating the angle of inclination of the roof. The otter is needed to close the hole through which the pipe comes out from precipitation. Usually a special apron (metal or other material) is placed around the otter to provide better protection.
- Next, the neck of the pipe rises above the roof - the external analogue of the riser.
- The entire structure ends with a cap, which is a small visor. This is rather a decorative traditional element of the pipe, since its protective functions are minimal. For this reason, the head is also often neglected.
- A metal cap is installed on top of the head, which protects the chimney from precipitation and debris getting inside.
We recommend that you read: Where does reverse draft in a chimney come from, and what to do about it?
Important! The internal cross-section of the brick pipe remains the same throughout its entire length, only the wall thickness changes.
Step-by-step instructions on how to lay out a chimney
Construction of a brick chimney is a technically complex process that requires high-quality masonry to obtain an airtight, safe and durable structure.
First you need to select suitable installation schemes for the chimney system. They can be ordered from design bureaus or found ready-made on specialized resources. The dimensions of the future chimney design are determined at the planning stage and performing the necessary calculations.
Laying a brick chimney is done as follows:
- Construction of a superstructure pipe, the lower part of which is seated on a thin layer of mortar made of clay and sand. If the chimney has several channels, then a three-channel pipe can be used. But the masonry algorithm is preserved for any type of structure. The laying is carried out using the dressing method, when each subsequent row is shifted to the side by 0.5 bricks. On the 5th row, not reaching the floor beams, the installation of the pipe is completed.
- The fluff is being laid. The external expansion around the perimeter should be 590x450 mm, the internal expansion should be 140x270 mm. The expansion is carried out by shifting the edge bricks by 5 cm. After completion of the fluffing, the expansion must be thermally insulated with 10 mm sheets of asbestos or other selected material.
- Laying otter requires meticulousness and care as the rows are laid outward to create a special overhang. The first row is similar to the previous row of fluff expansion; then you need to lay out the second protrusion and subsequent ones.
- Installation of the riser. The masonry is carried out in the attic close to the roofing system of the building. It must be brought out through the roof with an elevation above the ridge of the building to a height of up to 100 cm. The brickwork is completed by organizing a chimney neck, at the end of which a head is erected and a protective cap is installed.
Brick pipe repair
To put the pipe in order, you can go in two ways: restore the masonry or perform lining - treat the channel inside with special means.
Reconstruction of masonry
In case of minor damage to the chimney masonry, they act quite predictably - instead of destroyed bricks, they install whole ones. To do this, the crumbled elements are carefully cleaned of the solution and removed. The empty cell is scraped out, after which a new element is placed in place of the taken brick, using a fresh mixture of clay and sand.
In case of minor damage to the masonry, it is restored by replacing individual bricks with new ones
Sometimes a situation arises when cracks appear in the pipe, through which moisture seeps in during heavy rains. In these cases, the outer surface of the pipe above the roof is primed and then plastered.
When the bricks in the masonry are damaged by more than 20%, partial repair of the chimney is out of the question. The smoke channel with severely damaged elements is completely dismantled to create a new masonry.
Malfunctions and their causes
All malfunctions that require stove repair in a country house are related to temperature conditions. Bricks and metal become larger when heated, and when the furnace cools, they return to their original position. If the stove is used daily or vice versa - it is used extremely rarely, the materials cannot withstand the loads. The presence of cracks or clogging of the chimney becomes inevitable.
In addition to temperature stress, there are other causes of problems:
1. Burning of coniferous trees. Spruce and pine leave a lot of sawdust that does not burn. They go up the chimney and clog it.
Conifers for use in the oven
2. Burning garbage. Since the oven is not designed for this purpose, plastics and other materials contribute to the formation of cracks.
Burning garbage in a furnace
3. Bad seal. If a low-quality mortar was used, over time it may simply fall off, opening cracks between the bricks.
Sealing joints with mortar
4. Huge amount of fuel. The desire to heat the stove as quickly as possible often leads to putting too much wood in it. The result is gaps of different sizes.
Loading the stove with wood
5. Brick in the chimney. Sometimes fragments or even whole bricks get into the chimney. If this happens, cravings are partially or completely lost.
Foreign objects in the chimney
6. Problems in brickwork. Perhaps the stove was originally assembled in a hurry. Then a major overhaul is needed.
Furnace brickwork
Malfunctions also occur due to external factors. Since the chimney is also located outside, it is affected by weather conditions. Birds occasionally fly into it. It is almost impossible to predict these moments.
3a797b2f047d6e38359a115fd7adae50.jpeRecommendations
Users recommend entrusting the lining of an iron stove in the absence of the proper experience and necessary knowledge to professionals, as well as the subsequent decoration of it with tiles. Before laying the furnace equipment, they talk about the need to choose a proven installation scheme. It is also better to entrust it to experienced stove makers and designers with an architectural education.
- It is necessary to retreat from the wall when laying at least ten centimeters on all sides;
- When finishing laying a row, you should check the structure with a level each time;
- The rows must be laid horizontally;
- Excess mortar for masonry must be removed using a round trowel both outside and inside;
- To keep the masonry neat, you should clean off any parts of the mortar that have not yet cooled down with a damp cloth;
- Do not use heat to quickly dry the solution as cracks may appear;
- Work using hand protection, as drops of the solution may get on the skin and then be difficult to wash off.
We suggest you familiarize yourself with how to treat lining in a bathhouse and the best way to do it
Note! Also, if the stove has a thin top sheet, it is covered so that there is access so that if it burns out, it can be replaced.
In general, lining a metal or cast iron stove is not difficult. The main thing is to choose the right laying brick and follow the instructions presented above.
How to lay brick pipes to metal sauna stoves will be discussed in this article. You will learn how to correctly lay out, with your own hands, a brick chimney in a bathhouse.
A chimney is a device designed to remove combustion products (smoke) from a stove or boiler to the street.
Chimneys are:
- Brick;
- Metal;
- Asbestos and so on.
- There are many designs for a chimney.
There are ready-made solutions, such as prefabricated chimneys (sandwiches), and homemade ones. You can build a chimney of anything, from any available and non-combustible material.
When designing a bathhouse, every owner thinks about what kind of stove to install and how to install a chimney. This is the most important question in the bath business.
Classic chimney
Let's look at the structural elements of a classic chimney.
Construction of a classic chimney
Bottom part
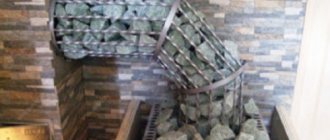
From the top of the stove to the smoke valve (damper). Accepts very hot gases; fireclay bricks can be used for the channel. It’s better to buy a gate valve ready-made in a store; if it’s not possible, do it yourself. Store structures are more reliable; they are made of malleable cast iron and do not deform during heating. Steel gates can become deformed as a result of steel tempering. The deformed gate jams in the grooves, making opening/closing difficult. For laying the lower part of the chimney, it is recommended to use a clay solution without adding cement.
Steel gate in a brick kiln
Fluff
Performs two tasks: it increases the resistance of the chimney to wind loads - it rests on the floor beams. In addition, the increased size of the fluff serves as fire protection for wooden structures.
Pipe fluffing
Riser
Part of the chimney from the fluff to the otter. The longest section, during laying it is necessary to maintain the vertical position of all rows.
Laying the chimney riser
Otter
Special thickening over the roof covering. Traditional chimneys are made without the use of modern methods of sealing the exit above the roof; the increased dimensions of the otter prevent natural precipitation from entering the attic of the bathhouse. To improve insulation, sheets of galvanized steel can be nailed around the perimeter of the otter.
Otter
Neck and head
The length of the neck depends on the angle of inclination and type of roof; specific dimensions take into account all the features of the structure. The height of the neck affects the stability of traction, regardless of wind strength.
After the neck is formed, you can lay out the head
The cap is a decorative element of the chimney.
Chimney head options
Protective cap
Prevents rain and snow from entering the smoke channel. The cap has one more function. If no one uses the sauna stove for a long time, then birds can build a nest in the channel - the chimney will have to be cleaned. To prevent such situations, it is recommended to cover the exit with a metal mesh.
Installation of a canopy on the chimney
We can only give approximate dimensions of each chimney element; more precise parameters must be calculated taking into account the architectural features of the stove and bathhouse.
Selecting materials
Only solid fire-resistant blocks are suitable for building a chimney. Recommended brands from M150 to M200. The material is available in three grades.
- 1st grade. With normal firing time. Even, smooth and dense. No crumbled areas. The color is bright red. When tapped, the sound is clear and clear.
- 2nd grade. Unburnt parts are pale orange. Porous, loose, with defects. They sound dull when tapped. They are characterized by weak frost resistance and heat capacity, low density.
- 3rd grade. Burnt bricks. They are distinguished by their dark red color. Pores, burrs and chips on the surface are visible. When tapped, the sound is excessively ringing. They are fragile, not frost-resistant, and do not retain heat well.
The chimney should be assembled only from first grade material. It is allowed to use the third, but only for arranging the foundation. The use of the second grade is excluded.
Instagram brigadir74
For the construction of the chimney, only high-quality first-class bricks are used