How to insulate the ceiling and attic floor
In a heated private house, a large amount of heat will escape through the roof if measures are not taken and the ceiling of the upper floor is not properly insulated. The physics of the process is known: heated and lighter air is forced into the upper zone of the room, bordering the cold attic, where it gives off heat to the uninsulated ceiling. To prevent this from happening, a barrier in the form of a layer of thermal insulation must be placed in the path of the heat flow. This material will discuss how to properly insulate a ceiling or attic floor with your own hands and the best way to insulate this horizontal structure.
Insulation of the second floor in a private house
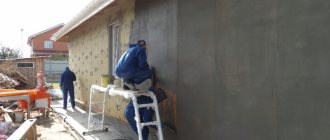
Before the onset of frost, every owner strives to prepare his home for winter. A well-caulked room will help reduce heating costs and maintain a comfortable microclimate inside for a long time. All thermal insulation actions can be done with your own hands; video instructions will be a good assistant in this matter.
Features of the work on insulating the second floor in a private wooden house depend on the design of the building, whether the building has an attic or whether the upper tier is located directly under the roof.
Types of insulation and calculation of materials for the second floor
Comparative characteristics of the thermal conductivity of various thermal insulation materials. Click on photo to enlarge.
The attic loses heat much more actively than the rooms on the lower floor. The reason is simple - the roof is located above it, so the contact area with the external environment is an order of magnitude larger. Thus, high-quality thermal insulation is required, but thermal insulation cannot be neglected, otherwise in hot weather hot air will penetrate inside.
Calculations can be made using the formula for the calculated heat transfer resistance of the wall - Rreq = (1/A1) + (L /k) + (1/A2). In this case:
A1 – heat transfer coefficient for the entire plane of the inner wall – 8.7 W/m C; A2 - a similar coefficient, but related to the outer wall - 23 W/m C; L – insulation thickness (in meters); k – thermal conductivity coefficient.
https://youtube.com/watch?v=6EWQh8Ct8rw
To determine the required thickness of the insulation layer for the second floor, you need to compare the thickness of the wall with the resulting calculations. It is also worth considering the type of material from which the building was erected. Next, it is recommended to immediately calculate the surface area to be insulated, excluding the parameters of window and door openings.
Then comes the turn of choosing insulation. Since the attic will be residential, the heat insulator must be environmentally friendly. To make sure of this, you need to get a hygiene certificate from the seller, which states the following points:
- environmental suitability of insulation;
- thermal conductivity class;
- suitability in terms of hygroscopicity.
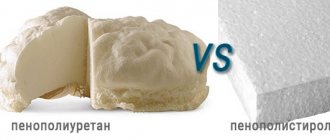
Styrofoam
In this case, polystyrene foam is not recommended due to its toxicity. Especially in cases where the attic of the house is located above the bathhouse - high humidity and easy flammability contradict safety requirements.
Fiberboards, which are often mounted under the roof, are excellent for the second floor. Insulation with them guarantees good sound insulation performance, as well as the absence of deformation during sudden temperature changes. Installation is convenient and does not take much time - you can cut out the pieces required by the configuration with a regular knife, and dowels are used for fixation. The front side of the fiberboard is smooth, which allows you to glue any wallpaper on it. The low price of insulation also plays an important role.
If fiberboard is used for floor insulation, then the old covering is first torn off, after which 2 layers of roofing material are laid, which are covered with fiberboard slabs. A new floor covering is already being installed on top of them.
Glass wool
This is the cheapest insulation, suitable for those whose budget is strictly limited. The material itself has excellent fire resistance and thermal conductivity. A serious disadvantage is the inconvenience of work, since glass chips and dust fall from the cotton wool, so you must wear protective clothing, goggles and gloves while working. It is worth remembering that it will be impossible to clean the clothes from glass crumbs, so they will have to be thrown away.
Minvata
Mineral wool as insulation. Click on photo to enlarge.
This wool, made on a basalt base, is considered the best option for a wooden house. It is made from synthetic fibers that are mixed with crushed stone chips. The density of the insulation should range from 18 to 45 kg/m³. It is environmentally friendly, not spoiled by pests and rodents, and also has excellent sound insulation properties.
Insulating the 2nd floor with mineral wool is absolutely safe. The downside is the higher cost compared to glass wool.
Regardless of the material used, in the process of insulating the second floor, a vapor barrier is required - a vapor barrier membrane or vapor barrier film. Its task is to prevent the formation of condensation inside the thermal insulation layer during the release of warm air from inside the room to the street. Otherwise, the characteristics of the heat insulator are sharply reduced.
When using fiber-type insulation, you will additionally need a windproof film, since in strong wind conditions the fibers are not able to effectively retain heat. If the insulation is installed in several layers, there is no need to glue the film between them.
FAQ
How to choose a layer of insulation?
It all depends on the thickness of the frame or rafter boards. Climatic conditions and temperature changes are also taken into account.
For example, when making interfloor insulation from basalt or mineral wool, you should take at least 18 cm in thickness, but to be sure you can round it up to 20-23 cm.
Taking into account the subsequent vapor barrier and the gap between it and the insulation, all 30 cm of space that we “steal” from the ceilings will be required.
Photo: types of insulation by type of material and thickness
What density should I choose for insulation?
The minimum indicator for working with pitched roofs is no less than 15 kg per square meter. Otherwise, voids may form over time.
To be more confident, let’s designate the range from 15 to 35 kg/cubic meter. Of course, the price will depend on the density, so calculate your budget by choosing the middle ground.
Should ceilings or windows always be insulated?
Many builders bypass the laying of material between the attic and the first floor, performing only soundproofing from sand. If the attic is not heated, it is necessary to install insulation, always with a vapor barrier.
But insulating plastic windows, or rather, their slopes, won’t hurt.
Insulation of slopes of plastic windows
Insulating the attic floor with foam plastic
The installation technology process is similar to insulating an attic floor with polystyrene foam.
The advantages of these materials:
- low cost;
- ease of operation;
- waterproof.
Among the disadvantages: flammability.
Technology for insulating attic floors with polystyrene foam or polystyrene foam
The process of installing rigid foam-based insulation is more than simple and can be done with your own hands. The work can be divided into two stages:
surface leveling. To ensure high-quality insulation, there should be no significant unevenness on the base floor. Such differences can be eliminated by screeding with sand-cement mortar.
The slabs are laid end-to-end or between beams. The presence of timber increases the strength of the floor.
Tip: carefully seal any seams, incl. joints with beams. When going around an obstacle, try to cut the holes as accurately as possible. A homogeneous thermal insulation layer retains heat better.
Insulation of the attic floor with polystyrene foam Rough coating
Polystyrene foam must be protected from destruction with film in an uninhabited attic. In a frequently used or residential attic, you need to move somehow, so it is better to install an OSB subfloor on top of polystyrene foam or expanded polystyrene or use a sand-cement screed.
How to insulate an attic
What insulation is suitable for the second floor and attic of a log house? Typically, in this case, standard materials are used, traditionally used for thermal insulation of the roof in a wooden house. This:
- mineral wool;
- expanded clay;
- ecowool;
- expanded polystyrene;
- polyurethane foam.
We talked in more detail about each material in the article about roof insulation in a wooden house.
If thermal insulation is carried out in the attic located above the bathhouse, then there are slightly different rules in choosing the material. Not every insulation can work effectively in conditions of high humidity and extreme temperatures.
For example, one of the best materials for insulation in a wooden house, mineral wool, will very quickly lose its consumer properties in a sauna. This material strongly absorbs moisture, which is abundant in the steam room. They can be used to decorate the walls, but it is best to insulate the attic floor of a bathhouse with moisture-resistant polystyrene foam.
invites residents of the Moscow region to take advantage of professional home insulation services. We guarantee high quality workmanship and quick results. To leave your request, go to the “Contacts” section. There you will find all our data.
Calculate the cost of painting and insulating your home right now
Insulation of the ceiling on the second floor of the house
After the ceiling of the second floor is insulated, care should be taken to prevent heat loss through the ceiling. The attic is located in close proximity to the roofing. The role of insulation is performed by mineral wool, which is recognized by experts as one of the best materials for attic insulation. Those who are concerned about environmental friendliness prefer ecowool. The selected type of wool is placed in the cells formed by the rafter structure.
Mineral wool is produced both in rolls and in slabs - its elastic elements are quickly and conveniently laid between the rafters. Placing slabs on the ceiling of the upper floor is carried out in several ways:
- by pressing mineral wool into the cells of the rafter structure. The thickness of the slabs must be at least 20 cm. This method is the most expensive, but is very popular among builders, as it is easy to implement;
- laying insulation boards only under the rafters, which requires additional sheathing. The consequence of such insulation will be a reduction in the volume of the attic. Homeowners rarely make such sacrifices;
- installation of mineral wool slabs under the rafters and between them, which requires the installation of additional frame elements. Considering the reasonableness of labor and material costs, this method has its adherents.
When the ceiling of the second floor is located under the attic, the ceiling should be insulated on both sides. That is, first there should be the floor of the second floor, then the ceiling, then the attic floor.
This approach is explained by the lack of heating in the upper level of the building. For this purpose, a vapor barrier is placed on the ceiling of the upper floor, which serves as a barrier to the leakage of warm air into the attic.
Interior work
Diagram of the structure of layered rafters
At the moment there are 3 most well-known methods.
The first is that thermal insulation is laid between the rafters. The material must fit fairly tightly to the chimney, windows and walls, and there must also be a 2-centimeter gap between the layers of hydro- and thermal insulation. It is also necessary to take into account the expansion of the material, which can reach 10-30 cm, like mineral wool, for which an appropriate gap must be left. If the width of the joists does not allow this, overlays are placed on them. The main thing is to prevent the insulation mats from sagging.
The second is complex work. They involve the use of materials that, in addition to the main property, have waterproofing properties. This necessitates a more careful installation of thermal insulation, as the question arises regarding air circulation. This approach will also “eat up” part of the room on the 2nd floor, because the heat insulator with other materials is mounted using seam connections either above or below the rafters.
The third is installing insulation above the rafters. It allows you to maintain the volume of the room and ensure reliable waterproofing.
Working with mineral wool
Insulation of the 2nd floor of any wooden house is possible using mineral wool.
First you need to purchase mineral wool, bring it to the work site and open the packaging – no comments. The material will take in air and noticeably increase in volume. Before work, you must put on protective clothing, and the room itself should be well ventilated.
Next, you need to check the location of the rafters of the 2nd floor with a long aluminum profile. You need to attach it to the outer ones and make sure that all the rafters touch the profile.
After this, the vapor barrier film is stretched with its obligatory alignment and fixation using a stapler. The overlap during installation should be 10 cm, and the joints must be taped with special adhesive tape (but not ordinary tape!).
To frame the window openings of the house, sheathing is installed in increments of 40-60 cm. The vertical bars are fixed with self-tapping screws, while a base beam is placed underneath them, where the joint between the drywall and the film will be. The entire frame is filled with a heat insulator.
The frame for filling plasterboard is created on the end side of the house in increments of 50 cm. The first slab of material is clamped with profiles. A vapor barrier film is glued on top of the thermal insulation. All joints and perimeter are taped with the same adhesive tape. Drywall is fixed with self-tapping screws. This is where the insulation ends.
Upon completion of this work, you can begin finishing the house and installing heating equipment.
Thermal insulation of the loggia and windows on the second floor
The “weak” point of any room and attic are glass surfaces, window and door openings. The lion's heat flows out of the rooms through them. Even if plastic double-glazed windows were initially installed in the window and doorway of the loggia, it is necessary to additionally insulate the slopes.
Any material can be chosen for insulating window and door slopes on the 2nd floor of a wooden building, but experts recommend using polystyrene foam, polystyrene foam or any other cellular product.
Thermal insulation of the loggia is carried out by analogy with the work aimed at insulating the pediment.
Thermal insulation of the walls of the second floor of a wooden house
To insulate the walls on the second floor of a wooden private house, two technologies are used at once:
- internal thermal insulation, which is produced in a ventilated way;
- external insulation, there are two options: dry and wet.
Internal thermal insulation is undertaken when it is not possible to carry out external work to preserve heat inside the building.
The popularity of interior work is low for a number of reasons:
- reduction of useful area of the second floor;
- freezing of the external walls of the house, leading to condensation and gradual destruction of the material;
- Condensation is the main “culprit” for the development of mold, which poses a danger to the cleanliness of the microclimate of any home.
Insulation of walls of the second floor in a wooden house
To insulate the inside of the second floor in a wooden house, two technologies can be used:
- internal thermal insulation carried out in a ventilated way;
- insulation from the outside, which is done wet or dry.
The low popularity of home interior decoration is due to a number of reasons:
- reducing the area of the upper floor;
- freezing of the outer side of the walls, which leads to the appearance of condensation and destruction of the material;
- Condensed moisture is the main cause of mold development, which poses a danger to the microclimate in the home.
When insulating walls from the inside, the following sequence and points should be observed to minimize the above disadvantages:
- preparation of walls, consisting of filling the cracks with tow and treating surfaces with antiseptic agents;
- fastening horizontal slats for the purpose of ventilation, which provides air access to the heat-insulating material;
- installation of a vapor barrier membrane;
- installation of vertically located racks for further fastening of mineral wool slabs;
- insulation should be laid between racks made of aluminum profiles or timber;
- installation of a vapor barrier;
- finishing with plasterboard, chipboard, clapboard, etc.
External wall insulation involves the same sequence of work, only without installing a ventilation sheathing. These methods of thermal insulation are carried out “dry”, but in practice “wet facade” insulation is more often used.
The facade of a wooden house is insulated using the wet method as follows:
- the walls are prepared and treated with an antiseptic;
- Mineral slabs are glued to a special composition and additionally secured with umbrella dowels;
- a reinforced mesh is glued to the insulation, the mixture is leveled with a wide spatula;
- a thin layer of glue is applied and finally leveled on the walls;
- The walls are plastered and the facade is painted (if necessary).
Exterior works
A prerequisite is that the house is insulated in warm and dry weather. It all starts with an inspection of the surface. Next, all wooden components need to be treated with an antiseptic, and metal ones with an anticorrosive agent. It is also necessary to thoroughly dry damp areas. If the tree is damaged by insects, it is replaced.
In a log house, the rafter system is made of wooden beams. So the waterproofing film is glued directly to these joists, after which the lathing is created and the roof is installed. Insulation from the inside occurs by laying the material between the rafters with its fixation on top of the vapor barrier, as well as finishing with plasterboard. There is no need to compact fiber-type insulation - you need to cut out pieces of material with a small allowance and insert them between the rafters. If a soft roof is to be installed, then OSB boards or moisture-resistant plywood are laid directly on the sheathing, after which the roof is created.
Insulation of the second floor ceiling
In a wooden house there must be an attic above the second floor. To prevent heat from penetrating upward from the first level, the ceiling must be well insulated. The thermal insulation layer must consist of several types of insulation materials, which should be laid in a given sequence.
Typically, the thermal insulation “pie” of the floor in a private wooden house consists of the following elements:
- first floor ceiling;
- vapor barrier;
- load-bearing beams made of high-quality timber;
- mineral wool laid in cells formed by beams;
- waterproofing;
- any floor covering.
This sequence must be strictly observed, otherwise the effectiveness of thermal and waterproofing of the second floor may suffer significantly. If the second floor will be occupied by a teenager who likes to listen to loud music, or the house is located near a roadway, you should take care of the issue of high-quality sound insulation of the floor and walls of the room.
In addition to the thermal insulation material, two layers of plywood are added to the “pie”, which create a sound barrier. When using expanded clay during insulation, a concrete screed should be made on top.
Algorithm for insulating the 2nd floor floor
Above the second floor in a wooden house there is always an attic space. To prevent heat from the first level from penetrating upward, it is important to insulate the ceiling well. The thermal insulation layer will consist of several materials laid in a certain sequence.
Traditionally, the “pie” for insulating the second floor of a wooden private house consists of the following elements:
- lower floor ceiling;
- a layer of construction paper;
- diagram of load-bearing beams made of high-quality timber;
- a layer of mineral wool placed in cells formed by beams;
- paper again;
- any flooring option.
The listed sequence should not be violated, otherwise the effectiveness of the hydro- and thermal insulation of the upper room may be greatly affected. If a teenage music lover lives on the second floor of the house or the house is located close to the roadway, you will have to take care of soundproofing the walls and floor of this room.
In addition to insulation, 2 layers of plywood are added to the multilayer “pie” to create a sound barrier. If expanded clay is used during the insulation process, a dry concrete screed is placed on top.
How and with what to insulate the ceiling on the second floor
When the ceiling on the 2nd floor is insulated, you can take care to prevent heat loss through the ceiling of the room. The attic is in contact with its ceiling and roofing. The insulation in this case is mineral wool, a material recognized by builders with many years of experience. Craftsmen who care about the ecology of the planet choose ecowool. The selected type of wool is placed in the cells formed by the roof truss structure.
Many mineral wool manufacturers have started producing products in slabs; laying elastic elements between rafters is faster and more comfortable. Plates can be placed on the ceiling of the second floor in several ways:
- pressing mineral wool into the cells of the rafter structure. In this case, the thickness of the slab should not be less than 20 cm. The method is the most expensive of all existing ones, but is very popular among master builders due to its ease of implementation;
- installation of mineral wool slabs under the rafters and between them, for which additional frame elements are installed. The described method has its fans, the costs of material and labor are reasonable;
- laying slab insulation only under the rafters, which requires additional lathing. The reduction in the volume of the attic is a consequence of such insulation; home owners rarely make such sacrifices.
If the ceiling of the 2nd floor is not directly under the roof, but under the attic, the ceiling is insulated on both sides. In other words, first the floor of the second floor is insulated, then the ceiling, then the attic floor. The reason for this approach lies in the lack of heating in the upper level of the building. To implement the plan, a film is laid on the ceiling of the second floor (a barrier for heat escaping into the attic).
Insulation of the second floor of a wooden house
If the house has an attic, then there must be a thermal insulation layer on the floor of the second floor. It will consist of several layers located one below the other. It is very important to follow the sequence of laying each layer. Otherwise, there is a high probability that a floor will be obtained that will not have sufficient thermal insulation and waterproofing. So, the floor covering will have the following sequential layers:
Scheme of insulation of wooden floors.
- flooring;
- paper;
- mineral wool, which will be laid between the wooden beams of the ceiling;
- load-bearing beams made of fairly strong and powerful timber;
- construction paper;
- ceiling of the lower floor.
It is in this sequence that all layers must be laid. Sometimes it may become necessary to install a soundproofing layer on the second floor. This should only be done if someone regularly stays in the attic or if the house is located very close to a road.
Soundproofing will get rid of all extraneous noise.
Here you will need to lay not only insulation, but also two layers of plywood, which will act as a sound insulator. If expanded clay is used, a dry floor screed may be necessary.
Basic requirements for thermal insulation material
How to choose insulation for a log house? To make the only right decision, you need to know the basic criteria. In particular, this group of materials must have the following properties:
Environmental Safety.
Obviously, if you choose toxic models, then one of the main advantages of wood (natural origin) will disappear. Therefore, it is necessary to use natural analogues, such as ecowool, penoplex, basalt wool, etc.
Thermal conductivity coefficient (the ability of a substance to pass warm air through itself).
This is a key characteristic of a thermal insulation material, on which its effectiveness directly depends (the lower it is, the better). However, all modern models meet the established requirements.
Unfortunately, most modern insulators are susceptible to combustion to one degree or another. Thus, penoplex, which is gaining great popularity, can smolder for several hours (along with it, the walls). The clear leader in this aspect is foam glass - it is a porous material sold in the form of slabs. However, it has two serious drawbacks - heavy weight and impressive cost. There are other solutions: before insulating a wooden house, treat all floors with protective compounds (they will prevent the wood from catching fire).
Resistance to organic influence.
If the house is old, then over time the walls will begin to become covered with fungus or mold. Therefore, it is necessary to choose insulators that are resistant to such consequences.
There is no ideal insulation that would more than meet all the requirements. For example, penoplex has better efficiency and lighter weight, but at the same time it burns well and releases toxic substances. Its counterparts, which are environmentally friendly and non-flammable, are characterized by less efficiency. Therefore, you will have to choose the “lesser of two evils” (safety or effectiveness).
Attic insulation
Unlike a cold attic, the thermal insulation of which is done solely to minimize heat loss through the roof, the attic is a full-fledged living room, so the task is to insulate the room so that it can be lived in.
How to properly insulate an attic floor
- A vapor barrier material is laid over the wooden beams, the canvases are laid overlapping each other with a margin of 20-25 cm.
- On the vapor barrier from the lower floor, boards are placed on the beams, which will serve as the subfloor of the attic and the base for the ceiling of the second floor.
- Fine expanded clay is poured between the ceilings, which will serve as insulation and at the same time soundproof the room.
- Another layer of vapor barrier is laid on top of the expanded clay, and the film is fixed to the beams using slats.
- The bars are mounted perpendicular to the beam floors; the distance between them should be equal to the width of the selected insulation.
- Plates of insulating material are laid between the bars, bringing them as close as possible to each other. A vapor barrier layer is laid on top.
- If ecowool is used as thermal insulation, instead of wooden blocks a truss is made from metal profiles. Installation of a metal frame and insulation with ecowool are jobs that are difficult to do yourself. To do this, you need to have professional equipment and devices, so such thermal insulation is usually not done independently, but is entrusted to specialists.
- Boards or thick plywood are laid on top of the insulating pie, which are attached to wooden blocks.
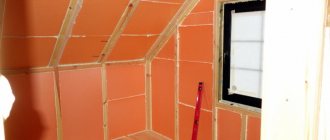
Insulation of the ceiling and walls of the attic floor
The method of insulating these elements depends on the design features of the room. If the attic roof reaches the floor, the ceiling is insulated as follows:
- Waterproofing is laid from the floor itself to the ridge. The film must cover the entire surface, so that no open spaces are formed, the sheets must be placed on top of each other. The material is secured to the rafters with a stapler.
- The sheathing is made from wooden slats, which are attached to the beams at a distance of 50-60 cm from each other.
- Insulation is laid between the lathing slats; its thickness should correspond to the width of the joists. The slabs are laid from the bottom of the room, moving towards the top.
- The top of the pie is covered with a vapor barrier film, which is attached to the sheathing with thin slats, and the joints between the sheets are additionally taped.
- Finishing finishing material, for example, lining or decorative panels, is mounted to the sheathing.
If the ceiling and walls of the attic are separate parts of the room, then insulation of the walls is carried out as follows:
- Lay a layer of waterproofing.
- They make wooden sheathing around the windows.
- A horizontal base beam is installed below along the entire length of the wall, and vertical racks are mounted from it in increments equal to the width of the insulation.
- A heat insulator is laid between the beams.
- Everything is covered with a vapor barrier film.
- A counter-lattice is made from thin slats to create a ventilation gap.
- Finishing is being installed.
Ways to insulate the attic
The attic is used as a full-fledged living space. They are insulated so that the comfort of living in it does not depend on the time of year.
Floors
Floor insulation consists of the following steps:
- The vapor barrier is laid overlapping the beams, leaving a margin of 20-25 cm.
- They fill the subfloor.
- Lay the insulation in 2 layers in a checkerboard pattern so that there are no gaps.
- Cover with a vapor barrier membrane.
- Sew across the beams with a board in 10 cm increments.
- Cover with thick plywood or OSB slabs.
Insulation is laid on the floor and covered with a board.
Ceilings and walls
Insulation of the attic when the roof is adjacent to the floor:
- Lay waterproofing on the rafters from the ridge to the floor with an allowance of at least 20 cm.
- Make a sheathing with a distance of 50-60 cm.
- The inside is filled with insulation from the bottom up.
- Cover with a vapor barrier using thin slats. The joints are sealed with tape.
- Install the interior trim.
When there are walls, the diagram looks like this:
- Attach waterproofing.
- Install sheathing around the windows.
- A base beam is laid along the floor along the wall. Vertical racks are mounted to it. The voids are filled with thermal material.
- Attach a layer of vapor barrier.
- The counter-lattice is nailed with thin slats for ventilation.
- Finishing is carried out.
Ceilings and walls are covered with vapor barrier.
Door and window openings
The attic window block is insulated during installation with expanded polystyrene, basalt or mineral wool. The entire perimeter of the slopes is filled with material. The top is covered with a vapor barrier. You cannot use polyurethane foam, otherwise the frame will become jammed over time due to shrinkage of the rafters.
The gaps between the wall and the door frame are sealed, paying attention to the upper part of the opening and the threshold.
Gable
The principle of thermal protection is similar to insulating a roof or walls:
- Along the gable, beams are installed with a gap equal to the thickness of the insulation layer.
- Attach waterproofing.
- Place the insulation between the frame posts.
- Make a layer of vapor barrier.
- Sheathed with finishing material.
Insulation of the second floor in a timber house
The work consists of three stages:
- Thermal insulation of interfloor ceilings.
- Thermal protection of walls.
- Insulating the attic of a house.
We insulate the ceiling between floors
It is more convenient to carry out the work from the upper floor; the material will be laid on boards, which are the ceiling of the first floor.
- In order for the insulation to be high-quality and effective, it is necessary to dismantle the floor of the second floor.
- The next stage is laying a vapor barrier layer. We wrote above that you don’t have to do a vapor barrier on the second floor, but to prevent the accumulation of condensation in the insulation and prolong its service, it is best to lay a vapor barrier film on the boards and beams.
- Next, the space between the beams is filled with thermal insulation, the material is laid very tightly so that there are no cracks or gaps between the slabs and the ceiling. If expanded clay is used, then all cavities are filled with granules, and then they are well leveled.
- Then the insulation is covered with a waterproof film, on which a wooden floor is laid.
If thermal insulation cannot be done from the second floor, then work is carried out from below in the following sequence:
- The ceiling of the first floor is being dismantled.
- Waterproofing is stapled to the ceilings.
- Insulation mats are laid between the beams and secured with wooden slats.
- The structure is covered with a vapor barrier film, which is secured with a stapler.
- The ceiling covering is mounted, it can be plasterboard, chipboard, plywood sheets, etc.
Thermal protection of walls
Usually the walls are insulated from the outside.
Internal insulation is done in cases where, for some reason, work cannot be done outside. It is necessary to note the disadvantages of insulation from inside the house:
- the usable area of the room decreases;
- the facade remains cold, which causes some cooling of the house;
- Condensation may appear between the wall and the insulation and, as a result, mold may form.
By strictly following the work technology, negative consequences can be minimized.
- First, the cracks are caulked with natural materials, and then the wood is treated with antiseptic impregnations.
- Horizontal slats with a thickness of 20 mm are mounted.
- A waterproofing film is laid. It needs to be tensioned on the slats.
- Vertical counter-lattice posts are installed. The distance between the slats should be slightly less than the width of the insulation boards.
- Thermal insulation is placed in the space between the vertical slats.
- A vapor barrier layer is laid on top of the insulating material.
- Installation of decorative finishing.
Insulation of the attic floor of a log house
Thermal insulation is carried out in the following sequence:
- Before insulating the attic, you need to make a vapor barrier for the floor in the attic, which will become an additional barrier to heat escaping from the house and prevent condensation from getting on the insulation. To do this, the surface is covered with a vapor barrier membrane. The film should completely cover the entire floor area. The canvases are placed on top of each other with a small margin and glued together with tape. After this, they are secured to the floor boards with a construction stapler.
- The insulation is installed, the method is selected depending on the selected material. If slab insulation is used (mineral wool, polystyrene foam or polyurethane foam), it is laid in dense layers between the floor beams. Ecowool is applied by spraying with a high-pressure apparatus; all cavities must be well filled. Expanded clay is poured in a thick layer onto the floor and leveled.
- Floor beams can become cold bridges into the house, so they also need to be insulated. To do this, thin insulating material is laid on them.
- The thermal insulation is again covered with a vapor barrier film on top, which, like the first time, is laid overlapping. The membrane is secured to the beams with counter-battens.
- The final stage is laying the covering from boards or plywood.
How to protect the floor between floors
It is not enough to simply build a house correctly; it must also ensure that no problems arise during operation. To do this, even at the design stage, all factors contributing to its durability and protection of building structures are taken into account.
It is of no small importance to solve two problems - protection from fire and biological influence of the environment
Based on flammability, materials are divided into five categories, ranging from highly flammable to non-flammable. Structures made from various materials are distinguished by their ability to prevent the spread of fire. Fire-resistant properties - completely eliminating the spread of fire and semi-fire-resistant - capable of delaying its spread for some time. It should be noted that flammability is not the same as fire resistance. Fire resistance is understood as the ability of a structure or material to maintain load-bearing and enclosing functions in the event of a fire.
Protection from fire, fungus and insects
For these purposes, the wood is treated with fire-resistant solutions to ensure fire resistance for at least 30 minutes under experimental conditions. In residential construction, the structure of the second floor floor structure must have at least semi-fire-resistant properties.
When drawing up a design for floors, it should be borne in mind that beams are exposed to fire not only from the bottom side, but also from the sides.
The combustion rate of coniferous wood, according to resistance parameters, is 0.8 mm/min. Taking into account fire resistance, you should choose a material with a cross section of 11 by 24 cm, because with a beam height of 24 cm and a span width of 5.8 to 5.85 m, their width is increased to 120 mm or more.
The problem of protecting wooden structures from biological influences is also very relevant:
- water, which disrupts the structure of the tree and is a breeding ground for microorganisms.
- mold fungi, rot.
- insects that cause damage to the wood structure and rottenness.
- ultraviolet radiation, which contributes to the softening and darkening of wood.
Unlike other materials, wood is an environmentally friendly product, which is important for living spaces. In addition, wooden floors retain heat well in the house. Now there is a tendency to return to natural materials that were previously used everywhere
Means have already been created to effectively protect wood from harmful influences that impair its performance characteristics.
Now there is a tendency to return to natural materials that were previously used everywhere. Means have already been created to effectively protect wood from harmful influences that worsen its performance characteristics.