Door trims are made of natural wood, laminated MDF board or plastic. Each material has its own advantages and disadvantages; you should select a specific type of platbands taking into account the specific installation location, the overall interior of the room and your own preferences. They differ slightly in price, but the difference is not so significant that it has a decisive influence during the choice.
Installing trim on doors with your own hands
Types of platbands
In order to make it easier to choose platbands, or as they are also called - strips, let's figure out what they generally are. The first thing they look at is the material from which they are made:
Wooden planks are considered the most versatile, as they can be painted in the desired color. They are attached to liquid nails if the wall is smooth, or to nails without heads.
Laminated platbands made of MDF (fine fraction) are difficult to distinguish from wooden ones. But unlike the previous ones, you won’t be able to paint them, so they choose from ready-made colors. For MDF, any of the possible mounting options. When attaching to nails without heads, it is necessary to drill blind holes in advance.
PVC products are usually used with plastic doors. They are attached either with glue or with a perforated mounting profile.
Metal products are undoubtedly the most reliable and durable. The most common ones are steel and aluminum. However, this type of platbands has a specific appearance and is mainly used on entrance doors.
There are also gypsum, ceramic and polyurethane platbands. But they have an unusual appearance and are rarely used in ordinary residential apartments and houses. They are also not durable.
In addition to the material, platbands differ in the method of fastening: overhead and telescopic. The latter have their own grooves for fastening.
Tools for work
Standard set includes:
- plastic, wooden or MDF trim;
- primer, putty mixture;
- wax pencil or decorative rivets to match the color of the cash;
- screwdriver, plane or electric miter saw;
- self-tapping screws, liquid nails, “beaks”, or finishing nails;
- simple pencil, tape measure;
- level, corner templates;
- individual protection means.
Attention
Purchase platbands with a sufficient amount of stock. If you don't have hand tools, you can rent them. The self-tapping screws must be thin so that after completion of the work they do not protrude outward, and most importantly, do not spoil the building material.
Types of fastening
Before installing the trim on the workpiece, you must mark the cut angle and the desired length. Using this marking, the plank is cut with a miter saw, or, if it is not available, with a hacksaw using a miter box, which will help cut at an angle of 45 degrees. As in any other case, it is better to use a high-quality tool. This will help to avoid unnecessary irregularities, inaccuracies and, accordingly, unnecessary problems.
Flat platbands are attached at an angle of 90 degrees, wooden and MDF - at an angle of 45 degrees. Let's consider possible fixation options.
Materials and tools
To ensure a high-quality and durable product, it is important to choose the right type of wood. The most affordable option in terms of price and distribution to retail outlets is pine. It is easy to machine and can be painted without any problems. However, it is important to consider that this is a soft breed and can therefore deteriorate under unfavorable conditions.
Please note that pine cannot be properly coated with paint without first de-resining it.
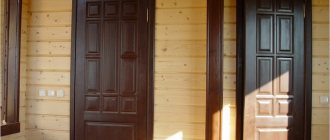
For exterior decoration, as well as bathrooms and kitchens, it is better to use oak. It is very durable, which can lead to difficulties when processing the workpiece, but this type of breed can last a long time.
Pine is the most affordable and convenient material
Among other types of wood, it is worth noting the following:
Such platbands do not require excessive decorative processing, as they have a beautiful texture, which is important to preserve visually. It is enough to use varnish and stain if necessary to give the product a shade.
The tools for making platbands will require the following:
- hacksaw;
- milling cutter with attachments;
- cutter;
- plane;
- sandpaper.
Required set of tools
They are used to cut parts, give shapes and polish the surface.
Finishing nails
Wooden and MDF trims are easier and better to fasten with nails with flat heads. Then, if necessary, they can be easily dismantled. And so that the platbands do not dismantle by themselves and hold tightly, the nail should be driven into the door frame at least 20 - 25 mm. It is better to make the distance between the nails the same. To simplify the task, you can pre-drill through holes in the lantern. At the end, so that the nails do not disturb the appearance, they can be painted over with a wax pencil.
You can also drive nails into the door frame first. Then use pliers to remove their caps. The length of the visible part of the nail without the head should not be greater than the thickness of the strip. Next, having placed the platband against the nails, a wooden beam wrapped in fabric is applied to the plank at the location of these nails, and with a few light blows of a hammer the plank is pressed onto the nail.
Manufacturing technology
So, let's look at how to make wooden trim yourself. First of all, we decide on the shape of the future product. The simplest option is flat platbands. Making them requires a minimum of time and effort. First, measure the perimeter of the doorway. Based on these data, cut the workpieces into pieces of the required length. Next, the surface is cleaned with sandpaper and, if necessary, covered with paint or varnish.
Shaped products are made in a similar way, but in this case you can do without sanding. Blanks with the desired relief and various widths are available for sale on any construction market.
The easiest way is to purchase blanks of the desired configuration and give them the desired shade using stain or paint
It is much more difficult to create carved platbands. It is recommended to work according to a template here. You can draw it manually or print a finished sample. The design is transferred to a flat workpiece or fixed on its surface.
Further, the work is carried out using a hand router and attachments of various shapes. For the simplest products with a figured edge, it is enough to first trim off the excess according to the markings, and then process the ends, creating a rounding or bevel. But imitation of carving will require holding the tool vertically and having the appropriate attachments in your arsenal. Creating a relief is a rather labor-intensive process, but the final result is worth the effort.
Liquid Nails
For a flawless appearance, without visible fixation elements, use a special glue - “liquid nails”. However, this method is characterized by weak fixation and difficulty in dismantling. In addition, it can only be used on perfectly smooth walls. But if you decide that this mounting method is the most suitable for you, then apply adhesive to the back side of the casing and lean it firmly against the wall. In the case of an interior door, it is enough to hold the bar in this position for about a minute.
Door frame division
Platbands can be made from:
The selection of cashouts based on material is based on what the interior doors are made of. If the structure is wooden, then the frame should be made of wood of the same type. And if the interior is designed in high-tech style. then metal trims will look great.
According to the format, it is customary to divide cash deposits into:
Flat elements are most often used. And figured (sculptural) cash is used as decoration, if the interior designer’s idea requires it.
Attachment by beaks
This one is different in that it does not use any of the above mountings. The casing itself is equipped with a latch, shaped very similar to a beak. Hence the name. This fastener is inserted into a recess on the door frame. Thus, the fastening is not visible from the outside. But over time, the joints may collapse, and then they will need to be treated with glue.
Elimination of defects
An unpleasant moment is the visibility of the nail head or screw. They are slightly recessed into the body of the cash, and sealed on top with sealant of the desired color. You can use a wax corrector.
On uneven walls, due to the curvature of wooden planks, joints diverge. During installation, the joining elements are additionally connected with a finishing nail.
Wide strips from 100 to 120 mm help to hide large defects around the door frame.
Installation methods
The installation of the trim should begin from the side into which the door opens. This is explained by the fact that the hinges interfere with the fastening of the strip to the door frame. Therefore, you have to make an indent that is the same on all sides.
It happens that the door is in a corner, then the platbands are installed only on two sides. Or you can saw off half the width of the plank and install it from the side of the adjacent wall (as in the photo).
There are also cases when the platband is installed only on one side. For example, when the slopes on other sides are finished with tiles or something else.
Installation instructions
Installation methods vary slightly depending on the material of the platbands. Some slats have special grooves, some trims are simple slats that need to be nailed or attached with self-tapping screws. The requirements for the rough surface also vary.
Wooden frames
Wooden platbands are good for their unpretentiousness to the rough surface. It is advisable that the wall be clean, but small differences in level can be easily overcome by loosening the fasteners or simply using polyurethane foam.
As a rule, there are two grooves on wooden platbands, and they are filled with a layer of polyurethane foam. This allows you to secure the casing more securely. Additional rigidity is added to the wooden frame using nails or self-tapping screws. The screw caps are flared and covered with acrylic putty. The heads of the nails are hidden in the same way.
Plastic platbands
Plastic trims are easy to install. They are installed on special nipples, which are self-tapping screws with plastic heads. The platbands have grooves in the form of longitudinal grooves. The groove is aligned with the nipple head and the casing is struck with a fist. A click indicates that the nipple is secured. Depending on the width of the rail there may be 2, 3 or 5 grooves. If desired, you can hide various types of communications in the adjacent furrows: wiring, Internet or television cable.
Plastic trims are easy to install
Telescopic platbands
Telescopic platbands are a relatively new trend in door technology. The meaning of such a platband is that the width of the door frame is less than the thickness of the wall. As a result, a natural groove is formed into which the telescopic platband in the form of a corner is inserted. There is nothing complicated in installation, just insert the platband into the groove.
Mounting at an angle of 45
This method is suitable for curly and rounded platbands. The procedure is as follows:
Measure the height of the vertical slats from the floor. They are placed on the floor, therefore, their joints with the baseboards will be on the side. The height of the vertical elements is measured from the floor. The planks from below are placed on the floor covering, which is why the joints of the baseboards and door frames are on the side.
Then the workpiece is cut according to the markings using a miter saw, and in its absence, using a hacksaw and a miter box. The top is cut at 45 degrees on the desired side.
Now the side trims are attached no higher than halfway, so that they bend at the top.
The upper loose parts of the platbands are folded back and the upper part is placed under them. At the joints, lines are marked at an angle of 45 degrees, then the excess part is cut off. Now you can secure the platbands in all remaining places.
Design
It’s good when the interior design matches the design of the doors and a similar texture is used in the implementation of the project. The door leaf continues the style of the room, its walls, ceiling, floor. Finishing with platbands will complete the composition of the room, making it decorated and functional.
Beautiful door frames help visually dilute the room, make it brighter and more interesting. It is necessary that the color of the structural elements goes well with the door, wallpaper, and floor covering. The materials of the products should harmoniously complement each other.
Installation of plastic platbands
For plastic trims, glue is used extremely rarely, since the connection with it is not reliable. The most commonly used mounting profiles are:
- The mounting profile is cut to the size of the door frame (a little smaller if possible).
- The joints are sawed off at an angle of 45 degrees.
- The profile is fixed with self-tapping screws to the door frame. If the door is cheap (Chinese), then the mounting profile is fixed to the wall, since it will not be possible to securely tighten the screws into such a door.
- The profile is screwed from the middle in two directions. At the same time, they monitor compliance with the level.
- Then measure the height of the side parts and cut off their tops at an angle of 45 degrees. Next, the workpieces are inserted into the grooves of the vertical profiles, where they can move.
- A fastener is inserted into the cut of the planks - corner fittings. The top is measured and cut at 45 degrees on both sides. The product is connected to vertical platbands, fixed in the mounting profile.
Preparing the work area
Before you begin directly attaching the platbands, you should properly prepare the working surface. The entire list of work can be divided into several stages:
- Installation of the box. Platbands serve as a kind of decor for doors, as they can create an impressive frame and hide minor wall defects. Consequently, their installation must be done at the very end after installing the doors.
- Removing foam. After the box has dried, it is necessary to cut off the excess polyurethane foam in order to create an even level between the wall and the tray; this is best done with a utility knife.
- Removing irregularities. If, when installing the door leaf and frame, small defects appear on the wall, for example, chipped concrete, they can be repaired with plaster; this will not only facilitate installation, but also improve the strength of the opening. To ensure that no gaps remain during the installation process, the surface for attaching the platbands must be flat.
- Wall decoration. Before installing the trim, it is necessary to complete all finishing work: painting, wallpapering, etc.
- Cleaning. Remove all dust and other debris from the surface; when using glue, you must additionally degrease the perimeter of the opening.
Preparing the work area for installing the door casing
Next, we will consider in detail the various methods of attaching platbands to interior doors.
Joining the platband with the plinth
Some people think that the trim at the bottom needs to be cut because the baseboard should go there. It is not right. You need to cut the baseboard itself, otherwise it doesn’t look nice. Therefore, at the very beginning of the article, we said that platbands are installed before baseboards.
Plastic skirting boards have decorative plugs that allow you to make the joint of the skirting board with the platband neat.
A 45 degree cut is made on the wooden plinth. This allows you to equalize the thickness of the plinth with the thickness of the platband.
Thus, in this article we examined the topic of platbands for interior doors. By following our tips and recommendations, you can easily choose the methods of fastening and installing the planks yourself and implement them at home.