Advantages of handwritten design
Like any other craft, decorating flower pots will help you decorate the entire room according to the hostess’ wishes, give it a unique look and comfort, and fill it with homely warmth.
This is a great opportunity to break away from social networks and the latest horror stories on TV, as well as to tear your household away from them and have a great time with them.
This is a wonderful opportunity to give unnecessary things a second life and get rid of some of the accumulated trash that you feel sorry for throwing away, because it will certainly come in handy someday.
Textile design
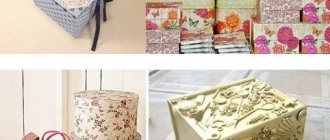
A great idea for decorating flower pots is to decorate the pots with fabric. Pots made of ceramic or plastic are best suited for this design, because their surface will need to be sanded down for strength. After this, glue is applied to the entire surface of the pot and textiles are carefully wound from one edge along the entire length of the base. In this case, to avoid the formation of air bubbles, the fabric must be smoothed. Next, you need to make triangle-shaped cuts on both sides and finally secure the fabric.
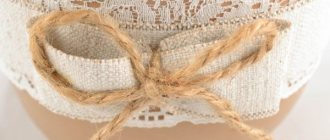
Lace fabric . The most elegant option for decorating a container with flowers is to decorate it with lace. The work will also require glue, but in this case you will need to work more carefully, otherwise traces of glue will spoil the appearance. You can use lace either as an independent element or in combination with other fabric. You can drape the entire pot with lace, or simply decorate its edges.
Burlap . The rustic-style interior will be complemented by a beautiful pot decorated with burlap. The design technique is similar to using any other fabric, but for greater effect, such a flowerpot can be supplemented with bright buttons and artificial flowers.
Preparatory work
The decor of plastic pots does not require additional preparation, but it is better to treat clay products with several layers of acrylic paint so that water does not leak through the pores and spoil the creation of its owner.
The second option would be to periodically change the decor, which will help quickly transform the location of the plants.
How to decorate flower pots using decoupage technique
Figure 5. Options for decorating pots using decoupage technique.
Attractive and colorful scenes cut from simple napkins can create a spectacular image on a flower pot. To do this, you first need to paint the very outside of the pot with bright acrylic paint. For this shade you need to choose a picture of a suitable color. It is better if the pot has a single color, since a pattern cut out of napkins will look much better on it.
The design you like is cut out from the selected multi-layer napkin, then the napkin is divided into layers. To work, you only need the top layer, which has the desired pattern.
The design is applied to the pot, and it is important that the container itself, along with the design, is dry. The image is smoothed out and smeared with PVA glue using a brush.
Before applying the glue, it must be diluted with water in a 1:1 ratio. When applying glue, you need to move from the center to the edges to avoid wrinkles and possible folds. After the glue has dried, the pot must be coated with clear varnish.
To make it more original, the surface rim of the container can be decorated with dry grass, a bow or raffia threads. A flower pot decorated using the decoupage technique (Fig. 5) will look elegant and delight guests in the house. It should be noted that for this technique you can use not only table napkins, but also other printing products, as well as fabrics or lace.
And these are not all the ideas with which you can decorate flower pots at home. Today there are many different options for decorating products intended for growing plants using any available materials. A decorated flower pot will enliven any window sill in the house, become a bright accent in the interior, and the flowers in it will bring incredible joy!
Popsicle sticks
The simplest sticks will help you beautifully decorate a round or square pot.
The main thing is that the size of the wooden utensils matches the size of the pot. If the container for decoration significantly exceeds the length of the sticks, the part that is not covered in beauty can be decorated with another material.
You can do the same with pencils or small tree branches.
Note!
Master class on decoupage: step-by-step do-it-yourself decoupage schemes. Master classes on creating products for beginners (130 photos)Bouquet of candies: TOP-170 instructions for creating a bouquet of candies + DIY design ideas
Bouquet of Raffaello: the best instructions for creating a bouquet of Raffaello with your own hands + simple diagrams with photo reviews
And finally, decorate your own creation with an elegant bow or a strict elastic band.
Paper
Decorating a pot with paper is a short-lived option. Although it will do to start the design process. Any material will be useful: for non-standard design, old newspapers, pieces of wallpaper, packaging or craft paper, sheets of music are used.
Even corrugated cardboard is suitable, which can be beautifully painted with paints, and then folded like an accordion and unfolded into a voluminous fence.
To create a custom pot, paper is glued to the walls of the pot, and then additionally tied with colored ribbon or regular twine. You can glue beads or artificial flowers onto the newly created surface.
Paints
If the hostess has the ability to draw, you can decorate the flower house with painting. And what it will be: elegant Japanese drawings, strict geometric shapes, non-standard torn lines, funny polka dots or pictures from cartoons, it’s up to her to decide for herself.
If you don’t have any special drawing talent, you can buy ready-made stencils or cut them out of durable cardboard. It will not be possible to depict a complex design, but even a novice artist can easily create an unusual ornament.
Instead of paints, you can use colored nail polishes or permanent markers.
Mosaic
Any small fragments will be suitable as a mosaic. They can be small pieces of ceramic tiles, multi-colored pieces of glass, plastic Lego parts, pebbles, buttons, shells, coins.
Note!
- Drawing master class: step-by-step do-it-yourself drawing schemes. Master classes on creating drawings using different techniques (120 photos)
- Master class on sculpting - TOP 150 photos with step-by-step instructions on sculpting products with your own hands. Master classes for beginners
Sewing master class - TOP 150 photos with detailed DIY sewing master classes. The basics of sewing from experienced craftsmen
For this type of decoration, the pot is first covered with soil and then with glue. And before it has time to dry, he lays down the selected decor. Usually you start decorating from the bottom, but some ideas will require you to change direction and start from the top.
This way you can decorate the entire pot, make unusual stripes or interesting inserts.
LiveInternetLiveInternet
Quote from Vetic
Read in full In your quotation book or community!
Decorating flower pots with fabric
This year I wanted to completely change the look of the flower pots in my apartment. Previously, when decorating them, I did not try to bring the pots to a single style. They were all bright, colorful individuals, each with their own flair. But our preferences change, we get tired of the familiar and ordinary, and we want change.
There was another reason why I wanted to not only change the appearance of the pots, but also replace the pots themselves. Unfortunately, many of the clay pots we purchase are of poor quality. During their use, it turns out that they were poorly fired. As a result of improper firing, the clay walls of pots over time absorb moisture from the soil and let it out. This is expressed in the form of ugly brown stains that spoil any design. Many of my friends face a similar problem. Pots of any price category are not immune to the appearance of rusty spots on the walls. Therefore, I advise you to use ordinary plastic pots for decoration. They are light in weight (which is important if the plant is tall and kept in a huge tub. Believe me, a plant in a clay tub is very difficult to lift!) and practical to use. Don’t let their unsightly appearance scare you; that’s what we have to refine.
I have a new image of pots, made in a single color scheme, elegant and stylish. To realize the idea of transforming the pots, I needed fabric. I went to the store and chose stylish Pakistani poplin of excellent quality and various decorative elements that matched the color and style (cords, ribbons, lace).
Well, then the fun began. This is what this whole mystery of reincarnation looked like.
In order to correctly measure the amount of material required for decoration, you should perform the following steps:
Prepare a pot of the desired shape and size.
- Using a fabric marker, make a mark on the pot showing the exact location where you started measuring.
- Place the pot on the fabric sideways, and mark its upper and lower contours with a marker, keeping indentations on both sides of approximately 3-4 centimeters (they are necessary for hemming the fabric when gluing)
- Roll the pot over the fabric, marking its outline until you see a marker mark indicating the start of the measurement. As a result, you will get something like a semicircle.
Prepare the glue you will use. I traditionally prefer universal glue "Titan". It is very durable and not afraid of moisture. For ease of use, I pre-fill several disposable syringes with glue. Then I squeeze out the required amount of glue from the syringe and distribute it over the surface using a toothpick or wooden skewer. This way you can use the glue in a strictly dosed manner, your hands remain clean and dry and, importantly, the surface on which you are working is also not stained with glue.
Before you begin the process of gluing the fabric to the pot, make sure that the glue does not soak through the material you have chosen. Adhesive stains of glue that seep through the fabric can change its color and ruin the appearance of the product.
Attach a piece of fabric to the pot, determine the size of the folds and the direction of the fabric pattern. Check how much stretch the fabric has. When distributing it along the walls of the pot, you will have to slightly stretch the material to avoid folds and creases. Then apply glue to a small section of the pot wall from top to bottom. Distribute it over the entire surface to avoid un-glued areas. Place the fabric on this area and smooth it carefully with your palm. Then fold back the rest of the fabric, apply glue again to a small area of the pot wall and repeat the entire procedure. I recommend gluing the fabric step by step, because... this allows you to regulate the tension of the material, ensure that the allowances at the top and bottom remain the same, and avoid distortions. In addition, in case of a mistake, you will have the opportunity to peel off the unsuccessful area and redo it while the glue is still wet. After gluing the walls is completed, you can begin gluing the top rim and bottom of the pot (if this seems appropriate to you). Since the rim of the pot is convex and rounded, before pasting the fabric will have to be cut in several places. The cut pieces can be glued overlapping, or the unnecessary pieces can be cut off.
At the end of the work, the product must be allowed to dry so that the glue sets thoroughly. In the case of Titan, it took me two days.
So that the fabric does not fade, does not get dirty and serves us for a long time and reliably, it must be treated with varnish. Since I wanted to protect the decor of the pots from the destructive effects of moisture, I chose yacht varnish. The varnish must be applied according to the instructions in several layers, with each subsequent one applied after the previous one has completely dried (crystallized). I applied three coats of yacht varnish.
I would like to warn you that in my case, after applying transparent yacht varnish, the color of the fabric changed somewhat. It became more intense.
In the photo it is easy to see the difference in the original color of the fabric (bow) and how much it has changed after applying the varnish.
For me this was not a critical indicator. I decided to use the difference in color as a decoration technique. I thought it would be interesting to make a decorative bow that would be slightly lighter than the background. The difference in color emphasizes it favorably and prevents it from blending into the general background.
But in order to avoid unpleasant surprises, I advise you to try in advance how the varnish affects the fabric in your case. This can be done on a small piece of material.
It's time for decoration. Do not be discouraged if during work you were unable to avoid small blemishes, wrinkles and folds in the rim area. All this can be hidden with the help of decorative elements.
Let me introduce you to my new flower pots.
This is a huge planter for Ficus Benjamin. It is decorated with a bow on the front, it is removable and fastened with Velcro. I remove it before spraying to protect the fabric.
The bottom of the tub and the neck are decorated with decorative cords for curtains. They suited me in color and size. All decorative elements are also secured using Titan glue. The cords, unlike other decorative elements, are also painted with yacht varnish (and also darkened slightly in the process).
The ficus in the tub is very comfortable, but it is so tall that it was not possible to take it all into the frame (the background height was not enough).
And this is a pot for a new ficus. He is still completely new to our home, but let's hope that he will be comfortable and cozy with us!
As a decorative element, I used braid with leather intertwined inserts.
A wide border for curtains looks very interesting as a decoration. Look what a luxurious pot another of my favorite ficus received (or rather, what was left of the once luxurious beauty).
And this is a modestly decorated Zamioculcus pot.
And finally, let me introduce you to the youngest inhabitant of our apartment. This violet was given to me quite recently. So tender and blooming, she knocked on our house.
The decor of her pot is double-sided. On one side there is a twisted leather braid,
on the other - braid for curtains. Since this pot is the smallest, I decided to decorate the bottom as well.
Series of messages “Master Class”:
Part 1 - Wedding ship made of candy Part 2 - Decorating a flower pot ... Part 27 - How I sewed shoes for a bunny Part 28 - How I made a flower cart for a bunny Part 29 - Decorating flower pots with fabric Part 30 — Fleece caterpillar Part 31 — Educational cube for kids made of felt and fleece… Part 35 — Christmas wreath Part 36 — Box for Christmas toys in patchwork style without a needle Part 37 — Felt cakes
Series of messages “Decorating”:
Part 1 - DECORATING BOTTLES Part 2 - DECORATING BOTTLES ... Part 43 - Tea and candy house (with dough molding) Part 44 - How I print on napkins on a printer Part 45 - Decorating flower pots with fabric Part 46 - Box for Christmas decorations in patchwork style without a needle Part 47 - Gift box decorated in patchwork style Part 48 - Decorating a box in patchwork style Part 49 - Tea set
Leg-split
Decorating a pot with twine is also not particularly difficult. It is necessary to apply glue and wrap the pot tightly with twine. The initial and final pieces of this rope are secured with an additional layer of glue.
The direction of winding is usually chosen horizontally, but no one forbids winding the pot diagonally or in any order. The main thing is that the twine fits tightly to the adjacent turn.
A lovely “country” pot can be decorated with artificial flowers or an elegant bow with a bead inside.
Instead of twine, you can use yarn, braid, or lace.
Using ropes and threads to decorate pots
The use of ropes and threads occurs in different ways of decorating a flower pot. They act as an additional element that will add sophistication to the product. For example, you can decorate a flowerpot with burlap, give it some delicacy with lace, and tie everything up (without using glue) with brown thread or rope. This method will emphasize the shape of the flowerpot and make it beautiful.
Also, ropes and threads can be used to decorate the pot yourself, giving them different shapes (colors, leaves), making curls, braids. They are attached with glue. The pot looks beautiful, completely wrapped in rope.
Decorating a pot using simple pencils and a ribbon bow.
This pot can be decorated with aerosol paints. Before you start painting, some parts of the flowerpot that should be a natural color should be covered with adhesive tape. Paint the areas not taped and let dry. Afterwards, remove the tape - the pot is ready.
Cereals
The decor of clay pots for the kitchen will help you create ordinary cereals. You can use them to make different color stripes or paint entire pictures.
A similar master class on decorating pots can be found on the Internet, but in itself it does not present any tricks. A small area of the flower house is carefully greased with glue and the selected type of cereal is poured. After this, they move to the neighboring area. For ease of work, it is better to immediately draw a sketch on the surface of the pot.
For work, any cereals, seeds and even eggshells are used. Only the last material must first be thoroughly degreased and washed. Otherwise, the stench of rotten eggs will force you to throw the entire pot in the trash.
Decorating flower pots with your own hands - ideas and photos
Are cheap store-bought flower pots making you sad? Do you think designer stylish flowerpots are too expensive? Don’t be upset - you can decorate a flower pot yourself, and even be proud of it as a real work of art! Next, we will look at several interesting ways to turn the most ordinary flower pot into an interior decoration.
Patchwork pot
Patchwork is a technique for sewing decorative items from scraps. We will imitate it by decorating our flowerpots. So, first, using acrylic paint, we repaint our object white.
This is not visible in the photo, but you need to paint the pot white with acrylic paint. Then we take square pieces of fabric (the more varied they are, the better), glue them to the pot with ordinary PVA glue. And to create the effect of using threads, take a felt-tip pen and draw stitches
After this, we take multi-colored scraps, with patterns and plain ones, and cut them into squares of arbitrary size, depending on the size of the pot. Next, glue them to the pot using any adhesive.
Using a felt-tip pen, we create the effect of stitches so that the scraps look as if they were sewn.
Pseudomosaic
This method is very simple and inexpensive, but the end result is a very beautiful effect. All you need is PVA glue and an unnecessary glossy magazine, as bright as possible.
Cut the magazine pages into pieces 2-3 cm long and wide. Their quantity should be quite decent, enough to cover the entire pot.
1 - cut the old magazine into strips, 2 - cut the strips into small pieces, 3 - apply glue to the surface of the pot, 4 - sprinkle our pot with cut pieces of the magazine
Apply PVA glue to the surface of the flowerpot, then sprinkle it with paper fragments so that a multi-colored “fur coat” is formed. Don’t forget to process the edge of our pot in the same way. We fix the coating with aerosol glue, which we spray evenly onto the resulting motley surface.
Ceramic tile pot
Take one ceramic tile and place it on newspaper
Cover our slab with the second part of the newspaper and use a hammer to break the tile into small pieces
Apply a thin layer of tile adhesive to the pot
Now we glue the pieces of tiles that were broken and let the glue dry for 24 hours
Now that the tile adhesive has dried, we grout the space between the tile pieces with a grout mixture.
In the last step, simply wipe the grout with a damp sponge, after letting it dry for 10 - 15 minutes.
Cute polka dots
This decor is suitable for pots that are planned to be placed in the kitchen. You can take a pot that initially already has some shade, for example, green or pink, or you can add the desired tone to the surface using acrylic paint. After that, arm yourself with a pencil with an eraser at the end and white acrylic paint. Alternately dip the eraser into the paint and press it onto the surface of the flowerpot - the result will be a pot of polka dots.
1 - we will need: a pencil, acrylic paint, double-sided tape and a pot of any shade; 2 - dip the eraser on a pencil into white acrylic paint and apply it to the pot, you get peas; 3 - we make such peas over the entire area of the pot; 4 - glue a strip of double-sided tape to the pot; 5 - and glue a satin ribbon onto the strip; 6 - we decorate the connection of the two ends of the ribbon with such a cute bow
As an additional decor, you can use a satin ribbon and a small bow made from it. We glue everything together with superglue.
Precious flowerpot
Perhaps you have an old amber bracelet at home that you no longer intend to wear. The time has come to take it out of the depths of the box and put it to work. Typically, the elements of such bracelets are flat on one side, which makes it easy to stick them on the surface of the flowerpot. To make our pot especially chic, we will give its surface a noble golden hue. To do this, stock up on black and gold spray paint. First you need to completely cover the flowerpot with black paint, on top of which golden enamel is already applied. With this technique, the golden color acquires a noble dark tone.
This cute pot is made from stones and ordinary rope
After that, in those places where you like best, stick amber elements using superglue. Around them you can lay out any decorative cord of a suitable color, which we also secure with superglue. Amber for decoration can be artificial; for the same purpose, you can use any beautiful beads or stones - in a word, everything that will create a chic effect.
Decorating flower pots in oriental style
If you want to add a bit of oriental mood to your interior, you can create an oriental-style pot. To do this, we use mesh fabric with a large cell, which can be bought at any sewing store. Old beads with round beads will be used as the main decoration, and if you don’t have any in your house, then purchase beads from the same sewing store. We will need to cover the pot itself with anthracite-colored acrylic paint. To do this, it is convenient to use a sponge so that the paint layer is perfectly even. From mesh fabric, cut two strips about 4-5 cm wide, one of which will be attached along the top edge, and the other along the bottom. We will glue the beads on both edges of each strip, taking this into account, calculate how many of them you will need.
So, using spray paint, we paint both the fabric and the beads golden. Next, glue the stripes on the top and bottom and frame them with beads. The result was a noble golden decor on a dark background. The remaining free strip can be decorated with Chinese coins, which are sold in feng shui departments. Coins can also be pre-coated with gold paint.
Pot with chopsticks
So, using simple things that can be found in any country house, you can make an incredibly beautiful flower pot
Painted flowerpot
You can make such a cute pot with your own hands, it’s indistinguishable from a store-bought one
In order to color the drawing, you will need glass and ceramic paints and a glass and ceramic outline. They fit well on any surface, so priming the pot is, in principle, not necessary. Color all the main elements of the picture using paints, and thin stems and curls using an outline. If you think that a particular shade is too intense, add a special thinner to the paint.
The second way of painting is to use a stencil. Attach a suitable stencil to the surface using masking tape and smooth it well so that it ideally adheres to the work surface. The design can be applied with a brush or sponge. Be sure to make sure that there is very little paint on the brush or sponge - this will prevent it from spreading. It is better to choose a brush with short, stiff bristles. The stencil should be removed only after the paint has completely dried.
Moss, a tin can and some thread... an unusual flower pot is ready to delight your eyes
So, there are many ways to decorate flower pots. But you can develop your own options. A little imagination and work - and your home will have an original and stylish product that cannot be found anywhere else in the world.
Knitted pot
A charming flowerpot can be easily made using yarn, knitting needles or a crochet hook. Large, dense knitting will help hide all the scuffs of the old pot, and using a crochet hook will create incredibly light and elegant designs.
This decor option can be removed and washed at any time, giving the item a pristine, clean look.
If the housewife is not particularly good at knitting, a piece of sleeve from a knitted sweater the size of the pot will do. All that remains is to cut off the excess part and decorate it with additional elements: buttons, flowers, appliqué, bouquets of dried flowers or dried berries.
An excellent solution for decorating a small pot would be ordinary or terry socks.
Translation of drawing and inscription (master class)
We will decorate pots and vases with our own hands in a French antique style. You can make interesting antique items from simple pottery.
To work you will need:
- White and gray acrylic paint.
- Wide brush.
- Sponge.
- PVA glue.
- Printing a drawing on a printer.
We take a pot or clay vase and paint it with a semi-dry wide brush so that the result is not a continuous coating, but an uneven one, similar to an old one.
Take a paper towel, soak it in gray paint and apply it to the bottom of the product. This coloring will give the necessary depth of color.
We prepare a printout of the drawing. It is better to print on a laser printer using photo paper. As a last resort, you can print it on a simple office paper. The printout must be a mirror image.
We cut out the design to make it easier and without wrinkles to stick it on the pot. Next, take PVA glue, pour a little into a glass jar and dilute it with water 1/1. We spread the surface of the product, apply the design, pressing it well with your fingers. Next, leave the product alone for 6-8 hours. The safest thing to do is leave the work overnight.
After the pot has dried, moisten the image with water using a sponge. It is necessary to moisten the paper well. Next, you need to roll the top layer of paper with your fingers so that only one design remains. Dry well again. If desired, you can coat the surface with any varnish, or spray. But this is optional.
The photo shows the decoration of the vases, the drawing was made in a similar way, with your own hands:
The video shows how to make jewelry using a stencil:
374
Stitched covers
Pieces of fabric are also suitable for decorating flower pots. To do this, you simply need to wrap the selected scraps around the pot and secure them with a ribbon or a lush bow.
Such sewn covers look great from leftover curtains, beautifully completing the decoration of windows.
Original design ideas
There are a lot of interesting, unusual ideas for decorating flower pots that will not require a lot of time and money. The most original of which are decorations with inscriptions and drawings or with the help of cereals. This technique can be performed together with your child.
Drawing and inscription . This bright option is suitable for pottery, ceramic or plastic containers. First step: use a brush to paint the entire surface, which must dry. Then the double-sided design is printed and cut out on photo paper. Then the drawing is glued. After everything has dried, you need to moisten the image with a sponge moistened with water. Now the paper is carefully rolled up so that only the design remains on the pot. After this, the flowerpot is dried and varnished.
Cereals . The prepared dishes are covered with glue, onto which a variety of cereals are attached. A flower pot will acquire a more original design if you use grains to depict a picture previously drawn on the product. When working with grains, it is best to use grains with flat edges, such as peas or lentils.
Decorating is a fun activity for the whole family. In order to create a real masterpiece with your own hands you will need glue, decorative elements, imagination and a good mood.
Custom pots
Very often for large plants you have to use a regular bucket. You can decorate it using any of the above methods.
Do the same with mayonnaise buckets.
Magically attractive flower pots will decorate any room; you just need to come up with a non-standard use for the most standard things. And for those who don’t want to strain their imagination, they will help you choose the design of the photo “pot decor”.
DIY flower pot decor
Lovers of “gardens” on the windowsill! All come here! Do your indoor plants and flowers still live in boring, same-type pots? Then I'm coming to you
