Using a rope
To create a basket that is indispensable in the household with your own hands, you will not need too much material; you can find it in the house or purchase it by visiting a specialized store.
At the preparatory stage, it is necessary to collect all the components and accessories for the work, which include:
- Rope made from natural raw materials.
- Yarn.
- Scissors, it is better to take large specimens.
- Hot glue gun.
- Needle.
Stages of work:
- The algorithm for weaving will seem complicated to beginners, but once you start implementing your plan, any doubts will be put aside.
- The first layer is wound around a base made of plastic or thick cardboard, which will serve as the bottom, and secured with adhesive liquid; similar manipulations must be done with subsequent rows.
- The master adjusts the height of the product independently, depending on the purposes for which the device will serve.
- Don’t forget about the handles, then the craft will become much more practical; they are created in the form of loops.
Advice! You can make it more impressive by using a contrasting colored thread, wrapping it around all the elements, maintaining a certain distance.
Instructions
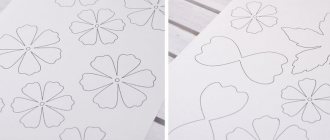
The photo of the basket craft shows that there are a number of tube weaving techniques. Below is the simplest option:
- Take 4 tubes and fold them in pairs to form a cross. Bend the fifth tube in the middle and begin weaving.
- On the 4th row, divide the paired racks and from the 5th row braid each rack with a working vine.
- After significantly widening the spaces between the posts, introduce additional tubes.
- After weaving to the desired height, bend the elements to form a border. Additionally, glue a couple more racks.
- Weave a border by placing the leftmost vine behind every 4th post. At the end, insert the rightmost element behind the 4th post, bring it out and cut it off.
- Lay the base posts, masking all ends.
- Treat the finished product with PVA glue or acrylic varnish. Decorate the craft.
Second version
Using the same material, you can make a comfortable laundry basket with perfectly even shapes. When winding rope, you need to take one of the available containers in the house.
It could be:
- Bucket.
- Taz.
- Sick.
Stages of work:
- With the help of such an additional template, it is quite easy to maintain neat and precise shapes, which will significantly highlight the finished product in the bathroom.
- Looking at a craft, it is very difficult to distinguish it from factory-made products, which is why most handicraft lovers prefer this solution.
- The process becomes easier; beginners in independent weaving will be able to verify this from their own experience.
- After securing the rows, you just need to pull out the template and attach the handles.
- Leather inserts in the form of loops will perfectly complement the design.
Materials for creating a wicker basket
Today there are a lot of materials that are perfect for creating baskets of any size.
Willow branches
Willow twigs should be prepared in spring or summer. The thickness of each branch should be from 10 to 12 mm.
Preparing rods for work includes several steps:
- the rods are placed in a solution of salt, this will give them elasticity during the weaving process;
- The branches are dried thoroughly.
It is worth noting that before willow branches are placed in a saline solution, they are cleared of bark. This point is very important, because otherwise, when weaving a basket, you can damage your hands, and the appearance of the product will not be attractive enough.
If after performing all these steps, the branches are wrinkled well enough, then the material can already be used to create a wicker basket.
Barley and wheat straws
A widely used material for weaving baskets, it is popular due to the high plasticity of the material. The final product is characterized by an attractive appearance and has a golden tint.
Birch bark
Birch bark is the top layer of birch bark; working with this material is a pleasure because it is very light and elastic. This material is prepared in the same way as willow branches.
Recently, baskets made from threads, paper, and ribbons have also become popular.
Decorative model
This rectangular basket is made of veneer; the product has no handles, because it serves as an interior decoration. You can put various small things in the container, which will complement the aesthetics of the room; you can also store fruits or balls of thread.
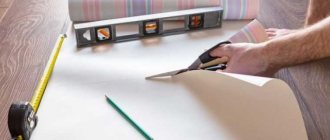
Before starting the process, you need to prepare the following:
- Sufficient quantity of veneer.
- Scissors.
- A few clothespins.
- Ruler for measurements.
Stages of work:
- The base material is pre-soaked in water at room temperature, one hour will be enough, after which the strips are hung to drain excess liquid.
- At the next stage, the blanks are cut to the selected sizes; you should strictly adhere to the divisions on the ruler to avoid mistakes.
- For trouble-free weaving, you need to secure several strips with tape or a book, and when you reach the top, use clothespins, otherwise the craft will begin to fall apart.
- There is no need to cut off excess veneer from the edges, just tuck them in and make sure they are securely fastened.
A basket of newspaper tubes for beginners step by step
I came across such creativity online as weaving from newspaper tubes. I was interested and decided to try it. I have reviewed more than a dozen master classes. Externally, the products are in no way inferior to wickerwork. And for home use they are quite durable and for a gift - nice! Using various varnishes, paints and coating impregnations when weaving, you can create braids of all the colors of the rainbow. And by decorating the baskets with beads, flowers, ribbons or appliqués using the deco page technique, you can turn them into works of art. Here's what I got. You will need: 1. Newspaper sheets 2. PVA glue 3. Knitting needle 4. Scissors, stationery knife 5. Paint (acrylic), varnish (Finish varnish), alcohol-based stain (Origon, larch, lemon...) 6 .Brushes for glue and paint. 7. Basis for weaving
First, you need to determine the direction of the paper grain. The direction must be longitudinal. There are several ways to determine direction. Here's one: stretch the edges of a piece of paper between the nails of two fingers. In the transverse direction of the fibers, the edge will become wavy; in the longitudinal direction, folds will not form. Strips of this size will make thin tubes for an elegant product. If you need thicker tubes, then the width of the strips and the diameter of the knitting needles need to be increased. I paint the tubes with a brush on regular oilcloth. I only use alcohol-based stains. On the recommendation of one master class, I tried to paint the tubes with a water-based stain - it ruined everything. When wet, the gluing area separates and the tubes unfold. Don't repeat the same mistakes. Stage 1: Preparation We mark the newspaper into strips of 7 cm.
On a backing board, cut the newspaper into strips with a utility knife.
The angle of the knitting needle on the newspaper strip is 10°-15°.
You need to start winding the strip very tightly, wrapping the edge of the newspaper around the knitting needle. The tubes turn out white if the white margin of the newspaper strip is left on the right.
Secure the edge of the newspaper with glue.
At this stage, the finished tubes can be painted in the desired color if desired and allowed to dry thoroughly. You can paint the finished product afterwards. And if you cover it with paint and varnish on top, then no one will guess that this basket is made from an ordinary old magazine (newspaper).
Stage 2: Weaving We will start the work by weaving the bottom. It all depends on the size of your product. To weave the basket presented to your attention, you will need 30 (thirty) tubes 50 cm long. Take 10 tubes (hereinafter: faces) 45-50 cm long. Lay them out in pairs.
We fold the working tube in half and wrap it around the first pair of rays.
The start of work can be marked with a marker on the edge of the beam.
We braid each pair of rays with a rope. The working tubes intersect, then one working tube goes on top of the pair of rays, the other below. As soon as the length of the working tube ends, we extend it (insert the end of the next tube into the hole of the previous one).
We weave two rows until the pair of rays marked with a marker.
We weave the third and fourth row into one ray.
We direct the working tubes to the middle of the bottom.
We form the edging of the bottom. With the first ray (marked with a marker), we go around the next one, directing it to the center of the bottom and so on in a circle.
We insert the last ray from below into the loop of the first ray.
Next, we braid each ray of 4 (four) rows with a rope, slightly bending the rays from the center.
We decorate the 5th (fifth) row with wooden beads with a diameter of 16 cm. You will need 6 pieces. beads
6 (sixth) and 7 (seventh) rows, knit with a rope. The work is almost finished! All that remains is to trim the excess length of the working tubes and tuck them between the rows using a knitting needle.
We cut off the extended ends of the working tubes with scissors.
To make the handle of the basket, leave 3 (three) rays on each side, separating them with clothespins. Place a drop of glue at the base of the remaining rays and cut them off with scissors.
We connect the ends of the basket handle tubes.
Before weaving the handle, drop a drop of glue onto the edge of the tube and secure it with a clothespin. We braid the handle with a tube along the entire length.
At the end of weaving the handle, drop a drop of glue onto the end of the tube and secure it with a clothespin. The main work is finished.
Stage 3: Painting For strength, saturate the basket with PVA glue and give it the desired shape. Let the glue dry completely.
Paint the basket with white acrylic paint. (you can add color paste, different dyes or paint with stain).
We cut out the motifs from a napkin and make a page deck. Cover the basket with Finish varnish and dry the finished work.
There is nothing better than something made with your own hands. Admire it, rejoice, give it as a gift.
Twine model
Each master chooses the shape independently, but the oval basket looks most impressive; it is spacious and fits perfectly into any home decor.
For manipulations you need to prepare:
- Twine, a skein of 25 meters will be enough.
- Scissors.
- Sample.
Stages of work:
- Without an auxiliary form, the process cannot be carried out, because the raw materials are too soft and thin, and if you refuse it, you can experience a lot of inconvenience and frustration.
- At the first stage, 12 pieces of 65 cm each are cut, after preparing the base, weaving work begins, which will take some time.
- Despite the laboriousness of the process, the finished item will look simply gorgeous, and the effort and hours spent will not be in vain.
- Having reached the last row, the auxiliary form is pulled out, and the edges are intertwined with each other so that the craft does not fall apart.
Veneer variation
A veneer basket looks like it is made of wood. Other similar material, for example, birch bark, is also suitable for similar work.
The tools you will need are a stapler, scissors and a ruler. Procedure:
- Pour warm water over the veneer and leave to soak for 60 minutes. Then hang it and wait for the water to drain.
- Cut the prepared material into 14 strips. Their size depends on the dimensions of the future craft.
- Make another 3 – 7 stripes for the sides.
- Place 7 blanks in front of you and secure with tape.
- Weave the remaining 7 pieces at an angle of 90 degrees. You should end up with a square.
- Using a ruler, fold the edges of the strips up.
- Weave a long strip, forming a side. Connect the ends using a stapler.
- Similarly, weave a few more veneer elements.
- When the desired height is reached, bend the strips inward and weave them under the outermost horizontal strip. The work on the DIY basket craft is completed.
Application of paper
The material is considered the most affordable, light and practical; such a basket in the interior looks very attractive and is as close as possible to the model from the store. Leather handles add drama, creating a contrast between the two types of materials.
You need to prepare the following components:
- Baking paper.
- The base is made of fiberboard.
- Skewers in the right quantity.
- Glue.
- Protective varnish.
The main blanks are made by rolling up tubes; you will need quite a lot of these elements.
After which several components are attached to the base, which should also be wrapped in paper for better contact of the surfaces with the glue, the frame of the product is formed.
Important! You must remember to insert skewers into the main elements, then the structure will gain rigidity and be as reliable as possible.
Before starting any process, you should look at a photo of a basket made of wicker, paper, thread or other materials to have an idea of the finished structure.
After completing the last rows, the height can be adjusted independently; handles are created for more convenient carrying of the product. A protective coating in the form of varnish is applied, it is better to purchase a special liquid in cans; working with a brush will not be very convenient.
Thanks to this product, the craft can be placed even in the bathroom, where temperature changes often occur and humidity rises; there is no need to worry about its integrity if the work is done efficiently.
Chic paper basket
You can’t buy a basket like this in a store; everything here is thought out to the smallest detail. The beautiful combination of the delicate color of the basket with contrasting handles makes it truly unique.
We will prepare the following materials:
- baking or kraft paper
- two cardboard or fiberboard bases of identical size
- skewers
- scissors
- glue
- acrylic varnish or paint
- leather belt
- a set of fasteners consisting of nuts, screws and washers
- awl or drill
- marker.
We begin to make thin strips for paper and twist them as shown in the photo. Lubricate the tip of the tube with glue to secure it.
We take a cardboard base and glue tubes to it at intervals of 3-5 cm. The result should be a design similar to the one in the photo.
Glue the 2nd piece of cardboard on top and firmly attach it to it. Leave to dry for several hours.
Let's start weaving, for which we bend the tube and wrap each vertical tube. Cross the ends as shown in the photo. We continue to do the same with the remaining vertical tubes. When the horizontal tubes run out, secure them with glue.
When the desired height is reached, we finish weaving. To do this, we cut off the horizontal tubes, keeping about 5 cm. We remove them inside and do the same with the vertical ones.
We paint the basket with acrylic spray or paint.
To make beautiful handles, cut off the buckle and the part with holes from the belt. After that, cut it into two identical ones.
From the inside we note the location of the latches.
We make holes with an awl, nail or drill.
We connect the handles with the washer and screws using a screwdriver.
We attach the handles to the basket so that the screw fits between the rows of weaving. We fix each of the screws from the inside.
Photo of a homemade basket
111111111