Modern finish
This type of material is conventionally called wallpaper - in its original form it is a dry powder that still needs to be diluted with water. The basic composition is represented by the following components:
- filler that provides texture to the finish;
- adhesive component as a connecting element;
- various pigments
- additives that give wallpaper a decorative effect.
As the last component, manufacturers use sparkles, glitters, flock, and vermiculite. Decorative additives may not be included in the main composition, but they can be purchased separately.
Powders of different textures are available on sale - fine and coarse. This provides ample opportunities to implement any design solutions. As well as a large selection of color shades.
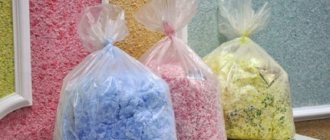
“Liquid” wallpaper in dry form Source wallpaper-store.ru
Classification by type
This finishing option is distinguished not only by the variety of colors, the presence or absence of decorative additives and texture. First of all, the material is classified according to its filler.
- Silk . Shiny threads of both natural and artificial silk are used, providing the wallpaper with maximum strength.
- Cotton . Cotton fiber particles are used as filler. This gives liquid wallpaper a special texture.
- Cellulose . The most budget option on a paper basis. May contain fine sawdust.
- Mixed . The combination of silk threads and cellulose helps to achieve a beautiful coating.
Each of the options fits organically into the design of the premises, allowing you to create amazing interiors.
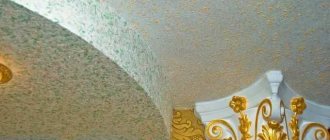
Types of liquid wallpaper Source fainaidea.com
Selection of liquid wallpaper
Manufacturers offer customers ready-made mixtures with pigments and decorative additives that are simply diluted with water. You can buy white material and choose the necessary dye and decorative elements (glitter, for example) yourself.
It’s easier for beginners to work with the first option of liquid wallpaper, but experts can handle the second one.
Advice. To make your kitchen tiling last longer, choose mixtures with a high level of moisture resistance. Manufacturers indicate this information on the bags.
Consider the fact that products of European brands are more expensive than domestic ones, but are often of higher quality.
Kitchen finishing
There are special requirements for the design of rooms where food is prepared. Therefore, sometimes the question arises whether it is possible to glue liquid wallpaper to the kitchen. There are no sanitary restrictions here - this type of finishing refers to environmentally friendly materials. The composition of the powder is non-toxic, odorless, does not provoke allergic reactions, and is fireproof.
In terms of practicality, there may be minor problems that can be easily fixed. The main disadvantage of liquid coating is hygroscopicity. Moisture ingress softens and spoils the texture. Therefore, it is not advisable to use this type of finish as an apron near the stove and sink.
Advice! But if, according to the design idea, it is necessary to decorate the work area with liquid wallpaper, it is enough to cover it with colorless acrylic varnish. This will protect the material from moisture.
To make a final decision whether to use liquid wallpaper for walls in the kitchen, weigh the pros and cons of the material.
Advantages and disadvantages of liquid wallpaper
| Positive points | Negative |
| harmlessness | instability to water |
| ease of use (no wall alignment required) | |
| sound absorption | restrictions in care |
| additional thermal insulation | |
| vapor permeability of the material | |
| do not prevent the walls from “breathing” | drying time |
| Beautiful design |
Advice! When pasting liquid wallpaper, you should make sure that there are no metal objects on the surface of the walls and ceilings. Over time, they will cause rust stains to appear on the decorative trim.
The positive aspects include the following properties of the material: the coating does not deform when the building shrinks, and does not lose the brightness of its colors when exposed to sunlight.
Fixing the defect will not be difficult Source dizainkyhni.com
Liquid wallpaper is good because if a defect appears in any place (dirty spot, tear, etc.), there is no need to remove the entire coating. It is enough to remove the problem area and apply a fresh patch. This feature of the material ensures the durability of the decorative finish and allows you to save your home budget.
Kitchen design with liquid wallpaper interior photo
Using liquid wallpaper in the interior of the kitchen, you can get an original design for the room. You can complete the workflow yourself. But, if you want to get a high-quality and complex drawing, we recommend using design services.
Prepare the mixture according to the manufacturer's instructions. Recommendations are indicated on the back of the package.
As we promised, at the end of the article, we present a photo report: the design of liquid wallpaper in the kitchen. Pay attention to the combination of ZhO with facing material and the variety of patterns.
A few words about application technology
Despite the fact that the working composition applied to the surface dries for about 72 hours, the overall process of interior design does not take as much time as, for example, when pasting roll wallpaper or painting.
The kitchen finishing option under consideration does not require careful leveling of surfaces, which already facilitates repair work. Only large cracks and recesses are sealed, and an antifungal primer is applied.
In fact, liquid wallpaper is a type of finishing decorative plaster - it is applied in the same way.
The working composition lies evenly on any surface (not excluding corners and hard-to-reach places). The absence of joints and seams makes the coating monolithic, which is not realistic to achieve with other types of finishing.
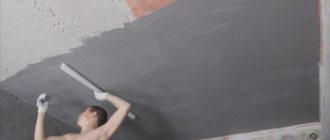
Plastering walls with liquid wallpaper Source roomester.ru
Despite the simplicity of applying the material to surfaces, skill is required in this matter. Especially if you plan to put liquid wallpaper on the ceiling in the kitchen. When working on a suspended horizontal surface, it is difficult to follow a uniform tactic for distributing the mixture, which affects the decorative effect of the finish. It makes more sense to entrust the process to professionals.
See also: Catalog of companies that specialize in finishing materials and related work
Finishing the ceiling with liquid wallpaper in stages
Technologically, working with ceilings and walls differs insignificantly. The only difference is convenience, comfort, speed. In any case, they begin with preparatory work. It is advisable to dismantle crumbling weak particles, remnants of old wallpaper, paint, and lime. Otherwise, they may “snap off” during the main work or even after its completion. Then the surface must be treated with a penetrating primer, and after it has dried, large irregularities must be plastered and gaps reinforced. Only then can you begin finishing.
Let's look at how to glue liquid wallpaper to the ceiling step by step.
- Cover the base twice with a thick “bleached” primer, for example, a mixture of PVA and high-grade paint (or a composition recommended by the wallpaper manufacturer). It is convenient to use a roller on a telescopic “fishing rod”. The result should be a dense, uniform coating with reduced uniform hygroscopicity. Metal and wooden elements must be removed or painted with white oil or acrylic paint.
- After 12 hours, prepare liquid wallpaper according to the instructions. As a rule, one package of material requires 8–10 liters of water. You need to mix thoroughly, but you should not use a drill with a mixer. After all, it is structured in a special way, and the mixer will ruin it all. Painters knead the solution directly with their hands, like dough. Please note that 1 package is 4 – 4.5 sq.m. surfaces. It is better to prepare the required amount for the entire ceiling at once.
- It must be infused in an airtight container for at least 12 hours. Transfer the mixture to the bag from which it was originally poured and tie. While the liquid wallpaper is swelling, a total of 24 hours will pass, necessary for drying the soil. Protect untreated areas with paper tape.
- When the material swells, place it in a container convenient for use and stir again. Consistency – medium thick dough (you can add a little water or PVA).
- Apply the solution to the ceiling with a wide façade or plastic spatula (350 mm) or a trowel. For convenience, also use a narrow “overlay” spatula (100 mm). The thickness of the layer depends on the texture (in fact, on the model) of the material and consistency. A thick layer covers irregularities well, but significantly increases consumption. The layer should be the same thickness and without gaps.
- As you pass the intended square, return to its beginning to smooth the layer, making sure everything sticks well.
- When the entire surface has been processed, you can return to the beginning and smooth everything out again.
Liquid wallpaper on the ceiling dries within two days, but gains strength in about a week. Drafts are undesirable, but acceptable. During drying, the smoothed texture will “fluff”, straighten out, and the surface will become as intended. After drying, the ceiling can be painted or varnished - tinted, transparent, glossy or matte.
After finishing the installation of this coating, squeeze out the remaining residue and dry it. Then they will be stored compactly almost indefinitely. If necessary, the dry piece is broken mechanically and reused .
Repair of damaged area
Considering that liquid wallpaper is, after all, not plaster, the issue of restoration of the coating is always relevant. It is impossible to prevent animal claws, “playful hands” of children, furniture, neighbors, and other aggressive influences. And although the ceiling is much less susceptible to them, some areas sometimes require complete replacement, while others require local repairs.
Local repair of liquid wallpaper on the ceiling, as a rule, consists of smoothing the existing coating. To make it soak, it is moistened generously with water, maintaining swelling for 20 - 30 minutes. Even varnish will most likely miss such an impact. When the area is wet enough, you just need to smooth it with a spatula, repeating movements at different angles, in different directions.
Replacing an area is complicated by the fact that there may not be an exact same model of liquid wallpaper in texture and color. However, it helps that the ceiling is most often white, and the replaced element can simply be tinted. To dismantle the damaged part, it is cut around the perimeter with a knife, then moistened generously. After 20 - 30 minutes of swelling, the layer should be removed without complications with a spatula. If necessary, treat the base with primer again, let it dry, and apply new material.
If the texture and color are chosen accurately, the patch will not be visible after drying.
Features of care
The hydrophobicity of the material eliminates wet cleaning. But it is not necessary if the liquid wallpaper was applied away from the work area. One of the advantages of this coating is antistatic. This means that liquid wallpaper does not attract dust.
Advice! To refresh the coating, it is enough to wipe it 1-2 times a month with a soft, dry cloth or use a vacuum cleaner with a soft brush for this purpose.
It’s another matter when greasy or dirty spots appear on the wallpaper (for example, a child carelessly touched the wall). In this case, the defect can be easily eliminated with the help of a fresh patch, and this was mentioned just above.
If liquid wallpaper is used to decorate the walls in the risk zone and cover them with varnish, then it is allowed to remove dirt using water (but in moderation).
Liquid wallpaper for the ceiling: reviews and recommendations
Reviews about liquid wallpaper are the most positive. And many videos and people on forums talk about this. The only thing is, of course, their cost, which is more expensive than the price of paper or non-woven wallpaper.
Liquid material is an excellent solution for those who do not have sufficient skills in wallpapering. During installation, there is no need to level the joints or get rid of bubbles; you don’t have to worry about the material falling off the ceiling or crumbling. It will take 3-4 hours to apply a single-color layer, while pasting a room with standard materials takes a day or two.
Applying liquid building material to walls is quite simple. You will have to tinker with the ceiling, since it is not entirely convenient to carry out the procedure.
You can combine liquid wallpaper on the walls and ceiling into one continuous composition
When applying building material to the ceiling, you should use construction safety glasses to prevent grains of the liquid mixture from getting into your eyes.
If necessary, if any area is deformed, you can always soak it with water and apply a new portion of wallpaper. In addition, such building material is not at all afraid of drafts and cold air. Dries quickly. But, before starting work, the walls must be treated with antiseptic preparations and waterproofing substances to prevent the formation of fungus and mold.
Related article: Yellow wallpaper in the kitchen
Often people on forums have a question: is it possible to apply wallpaper to a hardboard surface? If the ceiling or wall is located in a room where there is no particular humidity, then finishing with this building material is allowed. Otherwise, moisture will contribute to the deformation of the hardboard surface, and the wallpaper may become deformed. Therefore, finishing should not be done in the bathroom if the ceiling is made of hardboard. Other surfaces are not afraid of moisture, so you can finish the walls and ceiling in the bathroom.
Many people say that building materials in the kitchen will absorb essential oils, but this is completely misleading. Liquid wallpaper is not saturated with odors.
This building material in the interior allows you to add warmth and comfort to your home. Moreover, with the correct selection of colors and patterns, they will harmoniously fit into the interior of the kitchen, hallway or living room.
Design approach
If the practicality of liquid wallpaper for walls in the kitchen is still in doubt, then the advantages of the decorative component are undeniable. Seamless solidity, giving the walls harmony, is already a big plus.
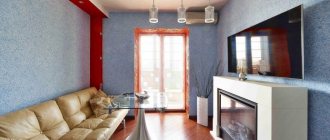
The designer did a great job Source vip-1gl.ru
Even a single-color coating, thanks to its slight relief, is an excellent design solution. And if you take into account the variety of pigments that are added to the composition, the kitchen can be transformed beyond recognition, giving the room a charming individuality.
But the main thing here is to maintain a sense of proportion and strictly follow the rules of interior design.
Color matters
Psychologists say that the colors surrounding a person affect his mood and sense of comfort. The same applies to increasing appetite. Therefore, when choosing shades of liquid wallpaper for the kitchen, the following features are taken into account:
- if the area of the room is small, you should choose delicate, soft colors (for example, pastels);
- If the walls are not high, you should not cover the ceiling with dark liquid wallpaper, otherwise there will be a feeling of being pressed down;
- in color solutions it is necessary to focus on the cardinal directions; For southern rooms, cold shades (blue, green, gray) are preferable; for northern rooms, warm shades (pink, yellow) are preferable.
The color red stimulates appetite. But there shouldn’t be a lot of it - it’s better to combine it with cool or pastel colors.
It is customary to zone a large kitchen into functional islands. In this case, liquid wallpaper of 2-3 colors is best suited. On a seamless coating, the transition of colors looks organic.
Liquid wallpaper as a way to zone a room Source design-homes.ru
Style solutions
This coating is not only appropriate in the kitchen, but also goes well with various interior styles.
- Liquid wallpaper fits best into classic designs. But here it is recommended to choose fine powders that make the walls almost smooth. Liquid finishing can be combined with regular wallpaper framed in baguettes, and the interior can be supplemented with moldings and paintings.
- If you replace regular white plaster with liquid pastel or lavender decoration, you will get an excellent alternative in the Provence . The kitchen will become more comfortable if you combine liquid wallpaper with roll wallpaper decorated with a print. Combination with brick and wood is allowed.
- The modern style provides for monotony, complemented by drawings or geometric patterns made directly on decorative plaster. The coating combines well with other types of finishes.
- Victorian lovers can use wallpaper with glitter additives. But you should take into account that golden shades are appropriate only in a spacious kitchen.
Interior in Venetian style Source stroycolorit.ru
Examples of using liquid wallpaper in the kitchen
Liquid wallpaper of different textures in one design Source pinimg.com
This is how they paint with liquid wallpaper Source dekoriko.ru
Fragments of decorative plaster - imitation stone Source mdv63.ru
Harmonious combination of shades Source masterpotolok.com
Briefly about the main thing
Liquid wallpaper is an excellent option for creating a cozy interior in the kitchen, despite some of the disadvantages of the finishing material.
Decorative plaster is classified into types based on the main component included in the composition. It also determines the cost of the material, as well as its durability.
The technology for applying liquid wallpaper is simple, but requires skill. Caring for the coating is not difficult either. The main thing is to take into account the characteristics of the material.
The variety of colors and textures allows you to use liquid wallpaper to create amazing design masterpieces in the kitchen, combined with interior design styles.
Ratings 0
What comes first: liquid wallpaper or suspended ceiling
In some cases, during repairs, people are faced with the question of what is done first - suspended ceiling or liquid wallpaper.
Stretch ceilings are suspended structures that are made of polyvinyl chloride or woven fabrics mounted on steel, aluminum or plastic profiles. Quite often, such devices are installed on plasterboard walls. This creates a multi-tiered ceiling.
Installing a stretch ceiling is a rather complicated process. When installing the ceiling, the wallpaper can get dirty: therefore, you should install the suspended ceiling first
If wallpaper has already been applied to the walls, then suspended ceilings should be installed only after the liquid building material on the walls has completely hardened to avoid deformation and damage. When installing a stretch ceiling, liquid wallpaper must be covered with polyethylene to prevent dust from settling on it.
Reviews say that the ideal option is to install a suspended ceiling before applying liquid wallpaper to the walls. The advantage of this option is complete protection from dust, which appears during the installation of the suspended ceiling frame.
Related article: How to make beautiful Roman blinds with your own hands