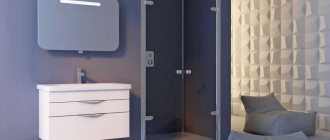
General room layout and preliminary design
When creating an ideal layout, it is important to draw up a preliminary design taking into account the architectural features of the room and the existing plumbing fixtures and individual furniture elements necessary to create a cozy corner for relaxation.
A cozy and comfortable environment with proper organization of space helps to turn even a small and compact bathroom into a spa and a place for mandatory procedures, with laundry elements and storage systems for textiles and hygiene items.
Selection of tools and materials
Laying tiles is not an easy task for a beginner. He will need:
- Profile;
- Tile cutter;
- Grout for joints;
- Drill;
- Roulette;
- Rubberized hammer;
- Level.
You will also need spatulas, dowels, seam crosses, glue, primer and a pencil. The profile, pre-fixed with dowels, is used to support the tiles located in the second row. The symmetry of the masonry is checked using a level.
Important! It rarely happens that when drawing up horizontal and vertical rows you do not have to trim the tiles. You can minimize the amount of separated material using a diagram that you drew in advance. When creating a drawing, you should consider the spacing for seams. Between tiles usually leave 6 to 8 mm.
To understand how many tiles will be needed to cover the selected area, you need to make a calculation (in m2). It includes several actions:
- Determining the width and length (height) of the floor, doorway and walls.
- Selection of optimal parameters for finishing material.
- Obtaining the required number of tiles.
For example, a master needs to decorate a small bathroom. Its parameters are presented in the table:
| Working surface | Length or height (m) | Width (m) | Area, m2) |
| 1 wall | 3 | 2 | 6 |
| 2 wall | 3 | 1,5 | 4,5 |
| 3 wall | 3 | 2 | 6 |
| 4th wall | 3 | 1,5 | 4,5 |
| Floor | 2 | 1,5 | 3 |
| Doorway (3rd wall) | 2 | 0,8 | 1,6 |
Tile dimensions – 25*25 cm.
The required quantity is calculated by dividing the area of the working surface by the area of one tile. The last figure is 0.0625 m2. Based on the initial data, the wizard will receive the following results:
| Working surface | Number of tiles (pcs.) |
| 1 wall | 96 |
| 2 wall | 72 |
| 3rd wall (including the doorway) | 71 |
| 4th wall | 72 |
| Floor | 48 |
| Total | 359 |
To make a horizontal row on the 1st or 3rd wall, you will need 8 tiles. For 2 and 4, 6 pieces are enough. The vertical row will consist of 12 tiles.
Professionals advise purchasing finishing materials in excess. You will have to add another 10% of the total to the calculated volume. The conclusion is quite simple: to cover the walls and floor in a small bathroom you need to cut 395 fragments.
Glue is used to lay the prepared material. It can be purchased at a specialty store. To choose the appropriate composition, you should be guided by the cost and characteristics indicated on the packaging.
There you can also see step-by-step instructions for preparing glue. Mixtures such as CERESIT, KREPS, LUX, KNAUF and WEBER are especially popular among consumers.
Important! The composition should be mixed in small portions. Glue that has been standing for a long time in finished form is unsuitable for use.
In the video you can see the options for laying tiles in the bathroom.
Bathroom zoning for beneficial use of room space
Positive energy and a comfortable psychological environment are achieved by zoning the room, distributing the main zones and maximizing the use of space with the possibility of creating personal space for all family members.
Free passages to a bathtub or shower stall, sink or cabinet with accessories, washing machine or mirror are ensured by the correct layout and distribution of functional areas, highlighted by arranging a podium or choosing the right lighting system.
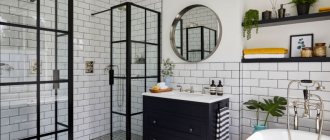
Taking into account architectural features, the presence of walls and partitions
Niches and corners are great for filling with functional furniture; corner structures help to properly and fully use the free space of the room, and in the niches you can organize spacious storage systems with mirrored door linings.
Low partitions with hanging or built-in shelves help place the necessary toiletries and towels, while they are used to zone the space, and on full-fledged structures you can place hangers for bathrobes and other textiles.
Rubbing seams
Once the tiles are laid, it's time to do the post-operations. So, after the tiles have dried well, the seams should be treated with a fugue. It is also called grout
. This procedure is very dirty and causes discomfort, but is required:
- protects seams from moisture;
- highlights the beauty of ceramic tiles.
Nowadays, there are enough grouts in a variety of shades and various decorative effects - you can match them to the tone of your tiles and significantly enhance the impression of installation. At the same time, it would be useful to know some secrets of successful jointing:
- do not rush to dilute the entire package of grout at once - the mixture hardens much faster than you can successfully handle the seams, and it is unlikely that you will be able to use already hardened lumps;
- In order to carry out the jointing process correctly, use a spatula - use it to apply the jointing into the seams, and the jointing should be done with a piece of cable.
We also recommend that you read the article for instructions on drilling tiles on a wall.
Important Note:
for wet rooms, use grout
with a water-repellent effect
.
Not every fugue can boast of the corresponding components in its composition, so pay attention to the specifications indicated on the packaging. Ceresit
brand have proven themselves to be excellent in various conditions . Take a look at the color palette this class=”aligncenter” width=”559″ height=”800″|fcw3qayjh5a| src=»https://stenaprofi.ru/uploads/posts/2018-01/medium/1516016170_1443607206-1418230607-13854516712-100008474.jpg» class=»aligncenter» width=»800″ height=»800″|fcw3qay jh5a| src=»https://stenaprofi.ru/uploads/posts/2018-01/medium/1516016172_c3d83d9b370c354c74572e353838fb406.jpg» class=»aligncenter» width=»800″ height=»800″|fcw3qayjh5a| src=»https://stenaprofi.ru/uploads/posts/2018-01/medium/1516016253_771146-851007.jpg» class=»aligncenter» width=»800″ height=»600″[/img]
Selecting a lighting system
Independently planning a bathroom combined with a toilet or separate rooms requires the mandatory choice of the right lighting system, which will help saturate the space with light and visually complement the interior.
For small rooms, an excellent option is the American system, which does not use the main light source, but uses several spotlights or ceiling lamps; for intimate settings, dim and dim lighting is used.
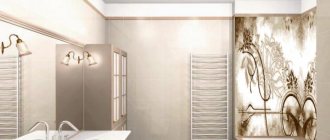
Cladding and materials
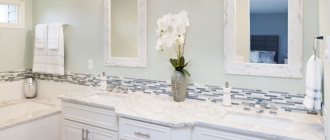
Bright and shiny mirror surfaces perfectly reflect light, so they are often used in bathroom interiors to saturate the space with light and give it additional volume and create the illusion of spaciousness.
Matte cladding materials are not so popular, but in combination with textured cladding they are necessary to hide water stains, so they are used to decorate partitions in the bathing area, design shower doors or changing screens that look effective in the interior.
Selection of plumbing
Properly selected furniture and functional plumbing fixtures are necessary for the practical arrangement of the room; when choosing a bathroom, you can pay attention to the original corner designs.
An excellent solution would be a shower cabin with a high tray for taking a bath; a sink built into a solid countertop will allow you to decorate it with sliding doors and use the space to organize storage systems, where you can hide the necessary utilities and pipelines.
The arrangement and furnishing of the functional areas of the bathroom as part of the bathroom layout in the apartment is based on the concept of harmonious combination and compliance with a single stylistic idea, supplementing it with thematic accessories, you can create an original and sophisticated interior.
Small bathroom 110 photo ideas for decorationBathroom design: original ideas, examples of interior and decor. 140 photos and recommendations from professionals
- Bathroom design 2021 - modern interior variations and selection of the best decor ideas (100 photos and videos)
Grouting joints
This stage begins 2 days after laying the tiles. Use a rubber spatula to fill the seams. The grout prevents the penetration of moisture and complements the decor of the tile covering. When buying a mixture, you should pay attention to the composition.
Latex grout is suitable for seams in the bathroom. The list of their advantages includes durability, plasticity, moisture resistance, and budget cost. Epoxy products are much more expensive. They also have a viscous consistency.
Grouting of joints is carried out as follows:
- Wet the seams.
- Apply the grout inside the seam using a spatula.
- Eliminate excess.
- Carrying out jointing.
- The seams are re-wetted.
- Form the relief.
- Clean the work surface.
- The seams are treated with a compound that prevents the appearance of fungi.
Cleaning begins 1.5 hours after finishing grouting.
By following fairly simple rules, you can decorate your bathroom and kitchen splashback with your own hands. With the right approach, laying paving and ceramic tiles will not take much time and will not require large material costs.