Origin of the amulet
Before making a dream catcher with your own hands, step-by-step instructions that will easily help you cope with this task, you need to familiarize yourself with the history and purpose of this item. This amulet was invented by the Indians living in the northern parts of America, who believed that evil spirits caused nightmares.
The design of the amulet is designed in such a way that terrible dreams get stuck in the tangle of threads, and good dreams pass through the hole in the middle of the amulet.
According to legend, this amulet was given to the Indian tribe by a good spirit in the form of a spider, which is why the dream catcher has such a structure, similar to a spider’s web. The amulet was made from various materials - animal horns, tree branches, beads, feathers, and so on.
Each of these materials carried a special meaning, but today this amulet has become an ordinary piece of furniture that can be made from any available materials. Try making a dream catcher with your own hands, it's an incredibly exciting activity.
Origin
An ancient legend says that the leader of an Indian tribe saw a teacher of wisdom in the guise of a large spider. The leader began to have a conversation with the spider, which during the conversation suddenly tore off a willow branch and made a circle with it. He transformed it with a beautiful bird feather, and inside the circle with incredible movements he began to weave a web.
In a quiet, languid voice, the teacher said, the circle is the life of a person who is born, grows, children and grandchildren grow up, thereby closing the circle. The teacher left a hole in the middle of the web. It turned out that this was not without reason.
Good human thoughts pass through this hole, but bad thoughts will not reach it and will remain in the web. But with dawn they will disappear without a trace. Since then they began to make catchers.
How to make a talisman against bad dreams?
To make a traditional amulet, you need to use only materials created by nature. But in our age, not every city dweller has something similar, so materials for the catcher can be bought at a decor or craft store
Ideally, it is best to use willow branches for the base, but if you cannot find them, then you can replace them with the most ordinary embroidery hoop.
We are preparing the following materials:
- Catcher base, willow branch or hoop
- Floss of different colors can be taken in the same color scheme, depending on the style of the amulet
- You can use different beads according to your taste
- An important part of the amulet is feathers, they are not difficult to get, ideally these should be the feathers of an owl or other birds of prey
- Scissors, needle and glue
- Satin ribbons to weave around the base
Do-it-yourself dream catcher weaving pattern is a simple instruction; the catcher should have thirty-six rays extending from the center and intersecting the spiral thread.
How to make a Dream Catcher with your own hands - 11 best master classes
Classic dream catcher from Evgenia Sultanova
A real DIY dream catcher Do you have trouble sleeping or are you tormented by nightmares? Or maybe your friends are having a holiday, but you don’t know what to give them? Try making a dream catcher with your own hands and hang the amulet above the bed, on the side of your head. This thing is Indian, very ancient.
According to Indian beliefs, a dream catcher collects all dreams , but allows only good dreams to reach the sleeping person, and delays all kinds of nightmares. They simply cling to its threads, like a fly in a spider's web.
Anyone can make a dream catcher like this, it's easy! I suggest you read this master class, watch the video tutorial and try to create your own dream catcher.
This step-by-step instruction has already become legendary and has been distributed on many sites. In some places the author is no longer indicated. I won’t make a secret of this and will honestly say who created this beauty. Author - Evgenia Sultanova, link under the master class.
If you need more information , then go to my post of the 7 best master classes on how to make a dream catcher.
What you need for work
- Any wooden hoop is the basis. The ideal option is a willow twig. But even the inner half of the hoop will do. Diameter 15 cm.
- Long, 12 meter cord, 2 mm thick.
- Thick threads of different colors.
- Large beads or beads.
- A few feathers.
- Fast-hardening glue. Take the transparent one.
- Craft knife or scissors.
Progress
Fixing the cord on the hoop
To secure the cord, tie it around the hoop, leaving an end 15 cm long. I advise you to immediately leave 15 centimeters of cord for the future tail for tying feathers. Take the other end of the cord and wrap it around the hoop.
Make sure that the cord is stretched well and lies tightly. Alternatively, you can use braid instead of cord; the amount of braid required depends on its width.
Wrap the hoop completely
Wrap the entire hoop in this manner. Tie the ends tightly. Some made multi-colored hoops from different colors of threads. The rainbow hoop will be more beautiful. You can even weave a pattern or ornament, but this requires experience. For now, let it be monochromatic.
Related article: DIY fabric paintings on the wall: diagrams and master class with photos
We tie the starting thread
Tie the starting thread tightly next to the knot from the cord. She will be the beginning, it is from her that the web of the trapping net begins.
Weaving in a circle
3-4 cm after the start, make a half-knot around the hoop. That is, wrap the thread around the hoop and thread it through the resulting loop. Tighten. Continue weaving the first row around the entire hoop.
The first row is ready
Make the same half-knots at equal distances throughout the hoop. The distance between the end and the beginning may be a little less. This is not scary, and some Indians even welcomed it.
Second row of weaving
Now make a half-knot again, but this time wrap the thread not around the hoop, but around the thread itself at the level of the first row.
Weaving inside
Then just weave in a circle and you will see for yourself how the radius of the web decreases.
Beads and beads in a dream catcher
Thus, going in a circle and reducing the distances between the nodes, weave a web. Tie the last knot fully. Cut the ends of the thread close to the knot and coat the knot with a thin layer of glue.
Please note that from time to time beads or large beads need to be threaded into our network as we work. The Indians used wooden beads, modern authors are experimenting with plastic materials.
How to make a dream catcher with your own hands
Additional ponytails
In the first steps we left the tails of the initial cord. Now cut 30 cm of cord twice and tie the pieces as in the picture.
Ponytail decorations
You need to thread beads onto the cord. Tie one end to a feather. If you have a feather without fastening, simply place the end of the cord and the feather next to each other and tightly wrap them with thin wire or thread.
You can thread a large bead through the other end. To prevent the beads from sliding down, tie knots.
Loop for fastening
Cut another piece of cord. Thread it through the hoop at the top and tie the ends together. Turn the cord so that the knot is at the bottom. Fold the resulting loop in half and make a knot close to the hoop.
Thread a bead with a large hole onto the loop folded in half. Make another knot.
DIY dream catcher
Ready!
That's all! Your personal dream catcher is ready! Now your dream will be protected and not a single nightmare will pass into your dream reality. We wish you only pleasant nights!
© Evgenia Sultanova
Video master class - DIY dream catcher
Video instructions for creating a dream catcher using suede cord.
General information about the dream catcher - its meaning
If you still don’t know why you need a dream catcher, then, as mentioned above, this Indian talisman protects you from evil spirits and bad dreams while you sleep . Evil spirits are afraid to approach the Hunting Ring, and bad dreams become entangled in the web. Good dreams, without the “load” of negativity, possessing pure energy, flow unhindered like clean water through a network.
Article on the topic: DIY beaded flowers: diagrams of trees and flowers with a master class, photos and videos
Weaving is made from raw threads , leather, deer sinews and a willow rod bent into the shape of a hoop. An even number of feathers are woven at the bottom of the hoop. Hang on the wall, above the head of the bed. Every morning, the dream catcher “self-cleanses” itself of captured energy debris by interacting with sunlight.
Since the 60s of the 20th century, with the development of the hippie movement and fashion for everything ethnic and traditional, interest in dream catchers has grown to unprecedented heights. Since then, in circles interested in esotericism and New Age, this amulet has become a kind of “must have” - an obligatory element of home decoration.
Inspiration ideas and useful links
A lot of information and ideas on dream catchers can be found on the page https://goo.gl/o4XpKf
Natalia Makovskaya presented a very high-quality step-by-step MK with a large number of detailed photos and a description of all stages of creating the Dream Catcher - https://goo.gl/4vxqRi
Another complete lesson from someone who has been creating dreamcatchers for a long time. The author makes traps both for himself and for sale, arranges master classes in real life - https://goo.gl/LAcX71
Some sources specifically indicate that the dream catcher should be made of branches. For a full master class on this catcher, see the link - https://goo.gl/6vFmPp
Beautiful DIY dream catcher
Advanced dream catcher design.
Oriental style hunter option at https://goo.gl/yBH5xE
An example of the use of peacock tails in the design of a dream catcher.
Chic Indian amulet.
How to make a classic Native American dreamcatcher
If you want your dream catcher to be truly correct , then try to avoid any synthetics in your work. And select the feather according to the one for whom you will make the hunter. For example, the feathers of a pheasant, rooster, eagle, hawk, falcon and other daytime birds are classified as strong solar in energy. That is, the masculine principle.
And the feather of an owl, duck, partridge, guinea fowl are feminine energies. Of course, all this is conditional, and by and large, it is important only for creating an accurate, technologically accurate, catcher. You can take something simpler for simplicity. But if precision is important to you... Next, see what some of the bird feathers used to create a dream catcher look like.
Eagle and buzzard feathers
Pheasant feathers
Short-eared owl
Guinea fowl
Dyed rooster feathers
Marabou
If you use natural stones when weaving, then take those that suit your energy, or just personal stones with which you already have some kind of relationship.
Suitable for use are amethyst, black agate, onyx, cat's eye, jasper, amber, coral, rose quartz, serpentine, malachite.
Related article: Do-it-yourself volumetric snowflakes
Making a hoop
The simplest solution is to buy a wooden hoop. But, of course, the ideal solution is willow twigs, cut from the willow yourself. In winter, branches can also be cut, but in this case they will have to be steamed in hot water for some time.
Choose young branches, no thicker than 6 mm . Make a cut on the branch at an angle of 45 degrees using a sharp knife. This technique will allow you to connect both ends of the branch without a joint. By bending a branch into a ring you will get a perfect circle, without protrusions. Then, after joining, we tie the joint with a strong thread, temporarily, until the workpiece dries. By the way, you can dry willow on a radiator.
What you need for work
- willow hoop;
- pheasant feathers and black marabou feathers;
- wood beads;
- stones: jasper, rose quartz, labradorite;
- threads 100% wool;
- cotton threads;
- scissors;
- glue "Moment".
The first stage is braiding the hoop with cord or yarn. At the end, we fix the thread and make a loop so that the trap can be hung in the future.
Let's start weaving a web . You can take thin threads like Iris. Traditionally, an odd number of angles are made between the thread and the hoop. Usually 9 or 11, and it is important to make the same interval between joints, as well as control the tension of the frame. If you use beads, place them on the web in random order.
All subsequent circles inward will decrease, while the number of joints will remain the same as in the first pass, just the distance will be reduced. Measure the thread immediately with a reserve, for example, this catcher took about 110 cm of thread for the web.
beads and stones at your discretion.
When you reach the center, you will need to finish weaving . The hole in the center is designed to let good dreams through, but the technology makes it extremely inconvenient to simply weave further. There are masters whose central hole is so small that one can only marvel at the filigree of their work.
Then comes the turn of feathers . We tie them to the hoop with threads. The places where the threads and feathers are attached are regulated at 3, 6 and 9 o'clock, if we consider the circle as a dial. Additionally, you can tie the threads for another 8 and 4 hours.
You can put beads, stones, etc. on these feather threads.
After all our actions, the dream catcher will look like this.
Before hanging the catcher at the head of the bed, it should be cleared in the sun . Place the trap in a sunny place and leave it for a day. By evening, your catcher will be ready to catch bad dreams.
DIY dream catcher
© Anna Varnashova — https://goo.gl/v1yEff
Video - dream catcher from Anastasia Gerasimova
This video explains and shows in sufficient detail the principle of creating a dream catcher, I recommend watching it!
Reason: preparation
The willow branches need to be bent into a circle, one end of the branch should braid the other end. After this, the base must dry, this may take several days. When the base dries, you can decorate it with ribbons, or leave it in its natural form.
If you can't find branches, you can use a hoop, or find a round wooden frame at a craft store. If you use a cardboard base, wrap it tightly with floss.
Weaving a web
Do-it-yourself dream catchers step-by-step instructions involve weaving, which is considered a very important element, because it is this web that holds bad dreams that dissolve with the first rays of dawn.
You need to immediately mark the place where the threads are attached, then the thread is tied to the base and taken out through the ring on the left side. This needs to be done over the entire base, the first row of weaving will be ready. Next, the second row is woven, but this time the threads are attached to the threads of the first row.
When you reach the central part, the thread is simply tied in a strong knot. You can string beads onto the weaving; to do this, you need to put them directly on the threads, as you weave.
Dreamcatcher: decoration
You need to approach the decoration of the amulet responsibly. If you are making a dream catcher with your own hands for children, then you can make the amulet colorful and bright using colored beads and floss threads.
On the sides and bottom of the catcher you need to hang several strong threads, which are decorated with beads strung on them, and do not forget to use feathers. The beads look very harmonious and go well with feathers and a natural wooden base.
What to make a dream catcher from
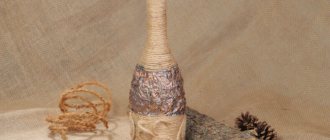
It is best to weave a dream catcher from natural materials. Use willow rods wrapped in a ring as a base. The rods of any other trees are also suitable. You can also be creative. For example, try making a triangular, square, rectangular or diamond-shaped base. Any branches will do for this. Fasten them together at the edges with thread.
The rods can also be wrapped with threads or tree bark, leather or something else. Experiment. You can use wool, cotton, twine, or a strip of leather as thread. But regular floss can also work. You can also use any beads. Pieces of branches, pebbles, shells... Anything. Feathers are used from different birds. Or they can be replaced with some pendants. But it is generally accepted that goose, rooster, eagle and pheasant feathers are masculine. And chicken, duck or owl are used to create women's amulets.
Where is the dream catcher hung?
The ideal condition for the amulet is when air currents pass through it, this will allow it to catch more bad dreams and trap them in its magical web. Of course, the dream catcher should be as close as possible to the place of sleep, which is why it is most often placed above the sleeping area.
The amulet must be exposed to sunlight; it is the sun that destroys and drives away bad dreams that get stuck in the web and remain there until the morning.
It is best not to hang the dream catcher on the wall, but a little further away from the wall so that there is air around it. You can make a variety of dream catchers with your own hands, as it is not at all difficult, but it requires a creative approach.
An amulet made with your own hands will have much more power, because your energy will be invested in it. Such a talisman can be hung on a crib; it will help the baby sleep soundly and see only good and kind dreams.
General information about the amulet
A homemade dream catcher talisman has great power.
According to one legend, a vision was sent to the elder of an Indian tribe who climbed to the top of the mountain. In it, the ancient teacher, taking the guise of a spider, began to talk with his student about wisdom. During the conversation, the philosopher bent a ring from a willow branch, explaining that the circle symbolizes the infinity of the human race.
Braiding a ring of vines with thread, the sage said that there are many roads that lie before people. Walking one by one, they do good deeds, feel happy, and get closer to their cherished goal.
Others can lead to troubles, make you cheat, and commit unseemly deeds. But these roads are intertwined. It is important to understand this in time and get on the right path.
When there was a hole left in the middle of the circle, the teacher in the form of a spider stopped weaving his web. Pointing to it, the sage explained that through this window good dreams, pure thoughts and noble desires can reach the sleeping person. Everything evil and unclean will be entangled in the web, and the morning sunlight will destroy it.
According to another legend, the first catcher was made by Grandma Spider, who lived on Turtle Island. According to myths, she was the goddess who wove the world from the web, the Mother of the Sun. The inhabitants of the Earth were also her children, whom she cared for. Grandmother Spider entwined the handles of children's cradles with cobwebs, which protected the babies at night.
The legend says that when the time came, the Ojibwe tribe, which was protected by the goddess, was divided. His people scattered around the world. It became difficult for the spider to help them: in order to weave a web, it was necessary to travel long distances. Then she taught the women to weave amulets that resembled her dream catchers, so that they could do without her help.
Strength and operating principle
Based on Ojibwe legend, a dream catcher filters dreams through the central hole between the threads. Good visions easily penetrate through it, and bad ones linger in the web, washed away in the morning by dew.
Residents of America and Europe have expanded the list of catcher properties. They added to him the ability to fulfill good wishes, which people previously write down on the round base of the amulet during the process of making the amulet. Mystical symbols are used to draw them. Sometimes elements of family or local folklore are added.
Ethnographers believe that this amulet is not at all connected with dreams. Remembering the legend, they call it a talisman with the help of which Grandma Spider protected babies while being away from them.
Today, most people are inclined to believe that this amulet filters all flows of energy coming to a person. Negativity settles on the web - the threads stretched inside, and everything positive is missed.
The image of an owl adds wisdom to the amulet, which will descend on the owner, long life and the ability to see what is inaccessible to others. The bird's predatory grip will make him dexterous and lucky.
There are also those who perceive the amulet as a creative man-made decoration of the room, giving it a unique charm.
Materials for a dream catcher
It is believed that artificial materials convey the energy of the owner worse than natural ones.
That is why it is highly recommended to use only natural stones, feathers, base and beads for this amulet. But if the dream catcher is created solely for decorative purposes, then you can fully show your imagination and make it from any elements.
How to make a dream catcher with your own hands as an effective protector against nightmares? By following the instructions, you can make a magnificent amulet that will contain a piece of your soul.
It is believed that the dream catcher has the unique ability to protect not only from bad dreams, but also from demons, which often attack the sleeping person. Sunlight cleanses the amulet of negative energy every morning as soon as dawn begins.
This amulet will fit perfectly into an interior in ethno and new age styles; it is also an integral attribute of hippie culture. Today, a dream catcher can be found in almost every second home, as it is not only a useful invention, but also a very stylish one.