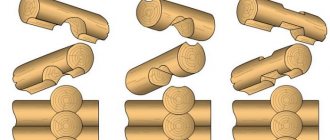
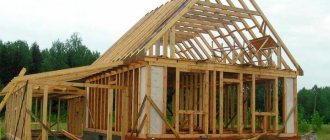
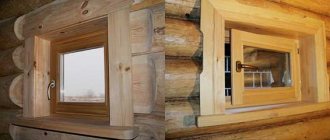
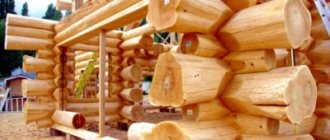
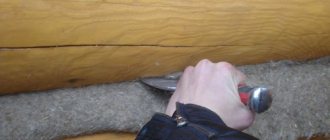
The selection of grooves and bowls is carried out using an adze - a special carpenter's ax with a convex grooved blade. The method of selecting grooves using shaft blades is also practiced: the boundaries of the future groove and dividing the wood into parts are marked with a chainsaw, then the selection is carried out using a sharpened felling blade.
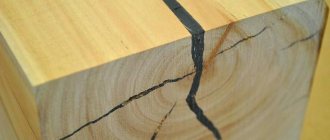
This careful attitude to the integrity of the wood increases the strength of our log houses. The adze crushes the pores of the wood, due to which the loss of moisture along and across the fibers is balanced, so shrinkage is more uniform. Closing the pores reduces wood cracking.
Interventional insulation
To fill bowls and grooves when assembling log houses, various inter-crown seals can be used. The most famous are jute and Klimalan. Recently, insulation made from polyester fibers “AVATERM” appeared on the market. This is an analogue of the Finnish extra-class insulation “PP-TERMO”.
- Jute
is a tradition. This is an environmentally friendly product with good spring properties. It has been a leader in the insulation market for a very long time, but its service life is a maximum of 15-20 years. Then it cakes and stops performing its functions. - Now “KLIMALAN”
is the No. 1 insulation material for log houses all over the world. It is made of pure sheep wool and comes with a 100-year manufacturer's warranty. When dismantling a house or bathhouse made of logs, this insulation can be reused. It does not get wet, does not rot, and quickly returns to its original shape when it shrinks and naturally increases the inter-crown gaps. Imagine natural sheep wool! What are its advantages? These same qualities are inherent in “CLIMALAN”. Add legendary German meticulousness to every detail and get the perfect insulation! - “AVATERM”
is a polyester fiber insulation that appeared relatively recently in Russia and has caused a lot of talk. Synthetic insulation “did not please” connoisseurs of all things natural. Fans of this material refer to the many years of experience of the Finns, who use polyester fibers to insulate their homes. This material does not rot, is not afraid of moisture and does not wrinkle over time. The only controversial point concerns “breathing” - synthetics do not allow air to pass through, but this is not critical for log houses and bathhouses, where all the walls “breathe”.
TO THE HOOK
There are two options for constructing log houses, which is called hook felling.
Option 1. The bowl is selected only half the diameter of the log relative to its axis. To the remaining part from above, select a through quarter. The ends of the logs receive a complex hook shape. The “hook” angle turns out to be windproof and durable, but in terms of execution it is a difficult option.
Option 2. The log from the inside along its entire length is trimmed to a quarter of its diameter. A tenon-presec is formed on the transverse log, the size of which must correspond to the size of the hem. The room has walls with a flat surface, which increases usable space.
This cutting method is considered one of the most difficult.
Only a master with sufficient practical experience can build a log house using this technology with his own hands. But as a result, you can get a very strong, reliable and warm corner connection. There are 2 varieties of this technique, differing in the way the bowl is arranged (up to half a log or through)
Russian cutting
A round log is used, the extensions of the crowns extend beyond the plane of the frame. The logs are connected using semicircular bowls that completely repeat the profile of the adjacent log. Longitudinal grooves in the logs ensure a tight fit of the crowns. Bowls and grooves are located in both the lower and upper crowns.
Cutting "in the oblo"
A bowl and groove in the lower crown is a less labor-intensive option. Log houses are assembled faster because there is no need to turn over logs to complete operations. But this design is the most vulnerable; atmospheric moisture gets into the bowls, the connections diverge over time and large cracks appear. The situation is aggravated when the logs dry out, so constant insulation is required.
Cutting "in a big way" (Siberian bowl)
An improved version of Russian cutting. This is an inverted version of the traditional technology - the bowl and groove are selected in the upper crown and “look” down. This protects against precipitation, but this technology requires great skill, because during operation the logs are constantly turned over.
Cutting "in the tail"
A thorn (“fat tail”) is created in the Russian bowl. A groove in the adjacent log is selected for it. The tongue-and-groove connection is strength and tightness. After shrinkage, the gaps in such log houses are minimal. The bowl with the fat tail is oriented up or down. For the reasons stated above, downward orientation is considered preferable. This is a complex technical solution, but it is in demand due to its high performance characteristics.
Performing markup
During the construction process, you should use a special tool that will increase the accuracy of the formation of the log house. This is a hammer that has two sharp rods, with the help of which the contours of the future bowl are outlined.
Carpenters call this tool a dash, but there are other names as well. The marking itself must be strictly guided by the technical specifications, which will be implemented by the Canadian log house. Projects, in addition to layouts, can take into account different parameters of the bowl.
Of course, for large buildings these dimensions will increase - and vice versa. Marking should begin with determining the parameters of the logs. Next, you need to number each whip, which will eliminate the possibility of errors in further laying.
Canadian cabin
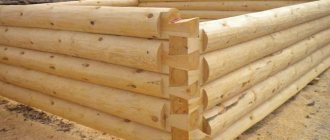
Here the bowls and grooves are also selected, and the internal tenon is made. Canadian cutting is more expensive than Russian cutting due to the labor intensity of the work. No moisture gets into the sealed corner, the insulation does not get wet, and its characteristics remain unchanged. The inter-crown seal is not visible on the plane of the walls, which improves aesthetic perception.
Connections are created like this:
a wedge-shaped bowl with a spike is made in the log, which is located below. The upper crown is hewn with an ax at an angle of 45 degrees to obtain a trapezoidal recess with an internal groove for a tenon, which repeats the profile of the lower log. This connection looks unusual due to the hemlines (cheeks).
The main advantage is in the behavior of the log house during shrinkage:
- A round log decreases in size as it shrinks - this is a fact that cannot be doubted.
This leads to the appearance of cracks, depressurization of corners and the need for insulation (“Warm seam” - once, caulking - almost annually). - The Canadian bowl is tightly wedged under the weight of the frame; no gaps are formed between the crowns either immediately after assembly or over time.
Such wooden houses and baths remain airtight and beautiful throughout their operation. But there is only one caveat - only experienced craftsmen, and not amateurs, can achieve this.
Diamond cutting
This is a type of Canadian felling, the difference is in the number of cheeks (cuts). In this case there are not two, but four.
- In one cut, 8 edges intersect (4 for each log), which gives the effect of a diamond.
This method looks beautiful; it can be used to emphasize the texture of the log and indicate the butt relief at the ends. Real virtuosos achieve a tight fit of the logs (deviation of no more than a millimeter is allowed). - This is an airtight and tight connection.
Its only drawback is the reduction in the width of the thermal groove due to the hems. That is why this technology is recommended for the construction of log houses from large-diameter logs (from 400 mm), where this nuance does not matter due to the massiveness of the walls. - Visually, such cuttings look amazing, much more impressive than ordinary Canadian cuttings.
For wild log houses, this is the technology of first choice, then comes the usual Canadian one, and only at the end do they remember the Russian method.
Tools used
This:
Types of log connections.
- axe;chainsaw;carpenter's chisel;dash;hammer.
If it is not possible to purchase a trait, then you can simply make it yourself.
To do this, use a square-shaped block of wood with sides measuring approximately 30 mm and a length of about 20 cm. Its edges should be ground off and sanded with emery cloth. This method is the most practical.
To complete the work, you will need two metal strips, the thickness of which is 3 mm and the width is 20 mm.
Its length will depend on the cross-section of the logs and the size of the bowl - from 20 cm to 30 cm. Using a hacksaw for metal, you need to sharpen one of the ends on each of the strips. Using tape, you need to secure the non-pointed ends to a wooden block, which will serve as a handle for about 1 m.
When bending the strips to the required size, the contours of the bowl and longitudinal grooves are marked. To prevent the strips from bending during work, they are secured with bolts or threaded rods.
In this case, one hole is made on the strips and bolts and nuts are placed in them. The sizes are adjusted using nuts. This is how a homemade trait is made.
Norwegian cabin
The bowl and all the advantages are like a Canadian loghouse with two cuts. The only difference is in the form of the material used. Norwegian felling is realized in the construction of a carriage - a round log hewn on both sides.
- The carriage is made like this:
a round piece is cut or sawed off on opposite sides. The hewn parts are located parallel, the log takes the shape of an oval. - When assembling a log house, the straight parts are oriented in and out of the log house, the rounded parts are “hidden” inside the wall: a bowl with a spike is made here.
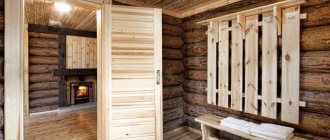
Smooth walls look amazing due to the original wood pattern. The operation of a house with smooth walls is more convenient, and the internal space increases compared to log houses made of round logs. - The roof structure and walls are a single whole:
logs are cut into the gables. There is no ordinary ceiling; massive logs (“wasps”) are visible on it, which look unusual. The remaining wood after cutting the logs is used to create a roofing system and other elements of the house.
Each log house will look unusual and last a long time if you do not skimp on the professionalism of the builders, the quality of the logs and all the component materials. Cutting maps and specifications for all lumber that are used in professional projects will help reduce construction costs!
Insulating walls with moss: recommendations
Laying moss between logs is done with special tools.
The next step will be insulation with moss. In windy weather, to prevent the insulation from blowing away, use an ax to stick it along the fibers. Why moss? In terms of characteristics, it is better than oakum, since it is the most durable, smells like incense and will improve the air in the house for a long time.
Related article: Bleached oak flooring in the interior: selection of furniture, examples (photos)
Logs filled with moss are placed on protruding dowels. Once they fall into place, they are knocked on with a wooden hammer until they settle completely. Tapping must be done with care so that the log sits evenly and does not break the dowels. The blows are given to them one by one.
The final caulking is done after the furnace is installed, but it is better to do it before the onset of winter. Caulk is made of wood and has the shape of a spatula. If it becomes dull, it is trimmed with an ax, after which it can continue to work.
Further laying of logs in the log house is carried out using ropes, which facilitates the installation of the upper crowns. When a log house is cut on a separate site, it is divided into two stacks according to height. One of them is closed in the center of the window openings with through elements, and after they are installed in place, they are cut out to fit the openings.
When cutting a log house, the work is carried out by two people, one at each corner. It takes two people to fit the logs, but one person works when removing the gutter. While the sampling is being carried out, other workers are preparing other elements of the frame for lifting, making dowels and performing other work.
So, the assembly of the log house “into a cup” has been completed. Thanks to the use of natural materials, such houses do not require additional finishing. But to extend the service life of the logs, it is recommended to treat them with antiseptics, as well as a thin layer of varnish. This will protect the wood from the influences of the natural environment, and then the house (log house) will delight you with its warmth and comfort for decades.
The best posts
- Advantages of children's playgrounds for summer cottages
- How to disassemble an interior door handle without the help of a technician
- DIY foundation made of plastic pipes for a veranda
- Installing door locks with your own hands: step-by-step instructions (video)
- Do-it-yourself ceiling made of plastic panels - instructions (photos and videos)
- How to insulate a metal entrance door with your own hands
- Install a lock on an iron door: technology
- Rock garden in the garden: DIY Alpine slide (30 photos)
AT OKRYAP
Rectangular tenons and grooves for them are formed in the logs. But simple-shaped recesses do not allow for tightness and high strength of connections, so this option is used for the construction of auxiliary buildings for utility purposes.
Anyone can do cutting this way.
However, professionals do not recommend practicing it when constructing a residential building. A log house built using this technology can be ventilated even with insulation, so it is used mainly for utility buildings.
