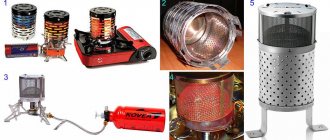
The use of gas fuel is ineffective without the use of special burners. Today the market offers a considerable selection of designs, from professional ones that create temperatures of up to 1500 degrees and above, to household devices that are needed for heating and cooking.
Nevertheless, it is common for home craftsmen to make these devices themselves. The reason is simple - a do-it-yourself gas burner, adapted to a specific task and working conditions, is more convenient, even if it costs more than a factory one.
Types and classification
Based on their intended purpose, devices are divided into professional and household.
The first include:
- Burners for work related to metal processing: soldering, forging, welding.
- Devices for general construction, road work, roofing, wood burning, and removal of old paint.
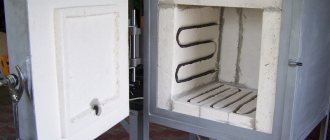
- Technological equipment for various purposes. For example, drying chambers, food industry tools.
For household purposes, this includes a gas stove, nozzles for home stoves, heating boilers, and gas convectors.
Household devices include home workshop devices . This is where you most often find do-it-yourself burners, not only manufactured, but initially designed to perform specific tasks.
They are arranged according to two main schemes:
- injection or injection;
- with complete preliminary mixing of the working mixture, or ejection.
In the first type, air (or oxygen) is captured by the supplied gas stream. In the latter, the gas-air mixture is obtained in a preliminary chamber.
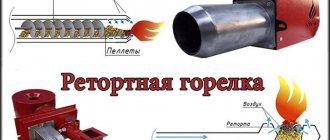
Device using two needles
A miniature propane torch is made by hand from 2 needles. One needle can be taken from the pump and the other from the syringe. You will also need two droppers and a compressor from the aquarium. The device is connected to the canister for charging lighters. You will also need copper wire.
The temperature in such a burner reaches 1000 degrees. It is made in the following order:
- A hole is drilled in the middle of the larger needle, which should be slightly larger than the diameter of the smaller needle.
- The syringe needle is inserted into this hole so that it is a few mm deep. came out of the end of a larger needle.
- The joint is sealed using copper wire and subsequent soldering.
- On both opposite sides, the needles are connected to 2 droppers.
- The opposite end of one of the droppers is connected to a lighter cartridge.
- The end of the second dropper is attached to the compressor.
- All joints are tightly sealed.
The gas coming from the can is mixed in a thick needle with air coming from the compressor. The composition of the mixture is changed by regulators.
If there is no compressor, you can replace it with a plastic bottle:
- A hole is made in the bottom of the bottle and a nipple or spool is screwed into it.
- A hole is drilled in the bottle cap and the body of the syringe is inserted into it without a piston and needle.
- This place is sealed.
- The cap is screwed onto the bottle.
- The body of the syringe is connected to a system connected to a thin needle.
- Air is pumped into the bottle through the nipple.
The burner is ready for use.
What needs to be done?
First the tools. Although for the most part the assembly is made from ready-made elements, the following are required:
- Hacksaw for metal.
- Drill with a set of drills.
- Pliers, screwdriver, personal files, velvet or appropriate needle files.
- Set of dies and taps with holders.
- Bench vice.
Basic materials you will need:
- Rubber or silicone hose for connecting the device to a gas cylinder.
- Two gas valves: the main one, which opens the gas supply, and the regulating valve, which serves to change the amount of gas supplied to the combustion zone.
- A tube with a thin hole at the outlet is a jet (nozzle).
Often, a gas nozzle is called a nipple, which is incorrect and contradicts the principle of operation of the device. Nipple - a threaded tube, often with a built-in valve. Used to connect parts. The jet ensures the injection of the required amount of fuel into the mixing chamber (for example, a carburetor jet).
- Tubes for the body of the product, injector chambers with a nozzle.
- Lever.
The exact list will be determined by detailed study of the drawings of a homemade gas burner, based on the blanks available.
How fuel is used:
- propane or propane-butane mixture;
- methane or natural gas;
- acetylene;
- hydrogen.
Each gas has its own characteristics. For household and home-made systems, the most convenient are acetylene, propane, and its mixture with butane.
It is quite difficult to get a hydrogen cylinder; methane has a higher pressure than household gas; it requires a reducer.
Work safety
The main traumatic factor when using and setting up a burner is temperature.
Gas, even household gas, is also dangerous, as evidenced by accidents involving explosions or poisoning.
The power of a propane torch depends on the diameter of the injector and nozzle . We must remember: it is not the gas itself that burns, but its mixture with air (oxygen).
The larger the volume that reacts, the stronger the torch. At the same time, the danger of getting a dangerous proportion of propane with air in the injection chamber increases, and as a result, a small explosion - cotton.
Therefore, a homemade burner does not need to be too large. As a rule, the injector diameter does not exceed 3-5 cm, and the nozzle opening is 0.5 mm.
Important! Work in a ventilated area or outdoors. Use gloves to protect your hands.
Which one should I do?
Before we begin manufacturing, we will select the appropriate type of burner from the following list:
- atmospheric injection;
- ejection;
- supercharged.
The second and third types are more difficult to manufacture. And to organize pressurization you will need compressed air or oxygen, which means a compressor or another cylinder.
The easiest way to do it yourself is the first type; it’s the one you should prefer..
The atmospheric burner process is controlled by a control valve. Therefore, the choice of type, as well as the model of the device itself, largely depends on which one turns up.
It must be remembered that the combustion of a particular gas depends on the diameter of the nozzle hole. The hydrogen jet has slightly less of it, the propane jet has more.
Designs, diagrams, drawings, assembly technology
First of all, you will need a drawing of the future device, a sketch or diagram of the burner, with dimensions.
It’s easy to find a ready-made one using the Internet . If you understand the general principles of the device’s operation and know how to calculate it, you can develop the project yourself.
An easy option is to use a valve from a propane or oxygen cylinder, known as model VK-74 (see diagram).
A fitting is machined into the side thread, which will also serve as a handle. You can use a pipe of suitable size. On one side, cut an internal thread, on the other, make a shank for putting on the gas hose.
We screw a plug onto the thread with which it is attached to the cylinder. We drill a hole in its end and cut a thread for the jet. We weld a nozzle to the plug on steel spokes, which will also serve as an injection chamber.
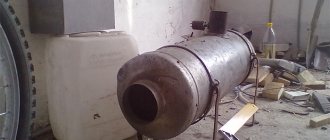
It's even easier if you come across an old acetylene cutter or gas cutter. Essentially, this is a finished burner . It is enough to remove the parts connected with the oxygen supply so that they do not interfere, replace the gas nozzle with a nozzle, and attach the injection chamber-nozzle above it.
Design of a device with piezo ignition
A portable gas torch with piezo ignition for soldering is characterized by the formation of a stable flame torch. The device consists of a cylinder containing gas. A nozzle is installed on top. It is attached using an adapter hose.
This design does not require heating, it does not become clogged and odors do not accumulate in it. It has small dimensions, weight and cost.
The purpose of piezo ignition is to automatically ignite the fuel. This is convenient if you don't have matches. However, this is also the most vulnerable part of the structure. With proper care it will last a long time.
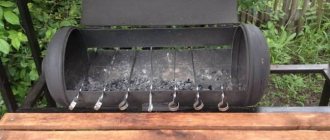
A gas torch for soldering at home is a necessary thing. It can be used to repair copper and brass items. These are parts that make up radiators and heat exchangers. The device is of great help during car body repairs, when high temperatures can cause warping of the metal.
Mini
A very tiny gas burner can be made from a fitting for inflating basketballs, a syringe needle and a couple of droppers , or as they are called medical “systems” for drip administration of drugs. The homemade product can even work from a lighter refill can.
Adjusting roller clamps will act as valves.
True, we will need a forced air supply for this device; the nozzle diameter is too small for injection of atmospheric air. For this purpose, you can use the compressor of an aquarium or an old refrigerator.
Carefully grind off the tip of the syringe needle and fitting. After this, bend the syringe needle slightly and insert it into the side hole of the fitting, so that the end comes out slightly from the cut tip.
We wrap the needle insertion site with copper wire and solder it well with acid.
The burner is ready. All that remains is to connect gas and air to it.
Nozzle and handle - manufacturing options
If you look from the outside, the handle and nozzle are, in fact, the entire unit .
The rest is pipes and valves supplying gas. For the nozzle, you can purchase a brass nozzle from gas appliances. They sell without problems and cost pennies.
If you need a special design, you can proceed as follows.
We clamp a suitable workpiece with a vice.
To avoid crushing the thread when clamping the part in a vice, first use a regular wooden clothespin.
Carefully drill a hole with a drill of a suitable diameter, not reaching the end about a millimeter. We grind down the remaining metal until the point left by the very tip of the drill appears.
After this, using a thin drill or a hardened awl, we punch a hole of the required diameter from the inside.
Any suitable object can be used as a handle. A handle from an old soldering iron, a piece of thick-walled hose, or a drilled piece of wood will do.
To fix parts and hoses, we use clamp clamps and hot glue gun.
The burner flame is adjusted and adjusted in the following ways:
- gas control valve - current;
- moving the nozzle (nozzle) along the axis of the injection chamber, changing its opening.
- changing the size and shape of the supply window through which atmospheric air enters.
The last two methods are used when setting up . They do not need to be changed during operation. However, if you are not sure of the accuracy of the design calculations, you should take care of the possibility of adjusting them.
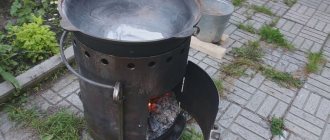
Burner design
A standard homemade burner functions this way. Gas is supplied under pressure through a special hose from the cylinder. Most often, propane is used as such gas. The volume of gas supplied is changed by a regulating operating valve located on the cylinder. Therefore, installation of an additional reduction gearbox is not required.
The shut-off valve is located behind the main valve and is mounted on the gas cylinder. It is used to open or close the gas supply. All other adjustments (length and intensity of the flame) of the burner itself are carried out using the so-called working tap. The gas supply hose through which gas is supplied is connected to a special nozzle. It ends with a nipple. It allows you to set the size (length) and intensity (speed) of the flame. The nipple together with the tube is placed in a special liner (metal cup). It is in it that the creation of a combustible mixture occurs, that is, the enrichment of propane with atmospheric oxygen. The created combustible mixture under pressure flows through the nozzle into the combustion area. To ensure a continuous combustion process, special holes are structurally provided in the nozzle. They perform the function of additional ventilation.
The design of such gas devices is developed taking into account ease of operation, prevention, and repair. Therefore, they must be easily disassembled. This simplifies the maintenance and repair process.
Based on this standard design, you can develop your own design. It will consist of the following elements:
- housing (usually made of metal);
- a reducer, which is attached to the cylinder (use a ready-made device);
- nozzles (made independently);
- fuel supply regulator (optional);
- head (the shape is selected based on the tasks being solved).
The burner body is made in the shape of a glass. The material used is ordinary steel. This shape allows for reliable protection against possible blowing out of the working flame. A handle is attached to the body. It can be made of various materials. The most important thing is that it provides convenience when working. Previous experience shows that the most optimal length of such a handle is in the range from 70 to 80 centimeters.
Gas burner device
A wooden holder is attached to the top. A gas supply hose is placed in its body. This allows you to give the structure a certain strength. The flame length can be adjusted in two ways. Using a reducer located on the gas cylinder and a valve installed on the tube. The gas mixture is ignited using a special nozzle.