LED lighting options
The operating modes can be the following:
- Constant lighting;
- intelligent lighting.
Continuous operation
The advantage of this lighting method is maximum ease of installation and minimal costs. When darkness falls, you turn on the lights and they work until the morning.
Disadvantages of constant backlight operation:
- Constant power consumption
- significant reduction in LED lifetime
Intelligent control systems
Lighting control is widely used in complex solutions for smart home projects. Control units are created on the basis of microcontrollers. Most authors suggest using an Arduino board as a control module.
To solve our problem, such a small chip, which costs less than a pack of cigarettes, will be enough.
Types of lighting fixtures and their installation location
The lighting of the steps of the staircase and the structure to the second floor as a whole should be functional and organically combined with the design forms of the staircase. Therefore, it is better to choose the lighting option at the planning stage of a private house.
LED strips and tubes
LED strips consist of an aluminum sheet on which the lamps are placed. The devices come in different colors, which will allow you to choose the most optimal solution for the type of staircase or interior.
LED lighting makes it possible to highlight the edge of each step separately. Diffusing light creates a comfortable home environment, filling the room with warmth and coziness.
Spot lighting for stairs
Spot-type lamps provide proportional and uniform distribution of light in the room. The service life is quite long, but the devices heat up during operation. Therefore, lamps should not be in close contact with other objects. In addition, due to changes in the network, the light bulbs in devices burn out, which leads to additional financial expenses.
Wall sconces
Lighting using wall sconces is considered the most common. There are several types of models:
- near-surface - fixed with the back side to the wall;
- sconces with a bracket-base, which allows you to place lamps at different distances from the wall;
- luminaire built into the wall - a mounting recess of at least 4 cm is required.
Staircase lighting with chandelier
A non-standard option is to use a wall chandelier for staircases. Mostly this design is observed in hotels or large estates. Large lamps are quite large in length.
Combined lighting option
Based on the parameters of the staircase, the lighting can be combined. A combination of wall, ceiling and stair lighting looks impressive and fashionable in a modern interior.
It is important to pay attention to the fact that thoughtfully placed built-in or wall lighting elements can visually change the geometry of the space. For example, by directing the lamps upward, you can visually increase the height of the ceiling
Types of stairs and optimal lighting for them
Stairs differ in structure and materials from which they are made. The methods of lighting different types of structures in a private house are different.
Methods for illuminating different types of stairs:
- made of wood. Wooden stairs are still very popular. The structure can consist entirely of wood; this material is also used to finish the steps. When arranging lighting for a wooden staircase in a private house, take into account its high degree of flammability. To avoid fire, insulate the wiring properly, install low-power lamps and light bulbs that practically do not heat up. To ensure fire safety, treat the interfloor passage with fire retardant solutions;
Carefully! To illuminate wooden structures in a private home, it is not recommended to use filament lamps, as they become very hot.
- made of metal, plastic, glass, etc. Metal stairs are dangerous to use, so now this material is combined with others. Structures with a metal frame on which steps made of wood, glass or plastic are attached look very attractive. When choosing lamps for a private home, you should remember that plastic can not only melt when heated, but also emit toxic fumes. Therefore, avoid lamps that get very hot. And metal is an excellent conductor of electricity, so the wires in individual staircase structures must be enclosed in additional flexible insulation;
- Marching stairs are the most popular option, which is most often used in a private house to connect the first floor with the second. They can have from one to 2 - 3 spans. Such designs are the most convenient to use and safe. Any lamps can be used to illuminate them, the main thing is to take into account the material of the steps;
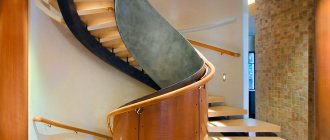
- screw interfloor transitions look original and take up little space. Organizing lighting for a spiral staircase to the second floor in a private house is much easier than for other types. The lamps can be installed on a support post, railing, on a wall or built into steps;
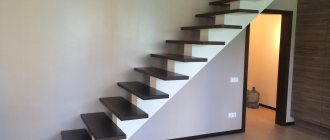
- the staircase is on rails, as if floating in the air. Its main feature is that its steps are attached to the wall on one side, and to the bolts (posts between the steps) on the other. The frame of such a transition is usually made of metal, and the material of the steps depends on the wishes of the client. Lamps can be installed under steps, built into them, or placed on the wall.
The principle of operation of LED lighting for stairs in a private house
Smart lighting is sensitive to the movements of a person moving along the steps. It turns on and off very smoothly.
By adjusting the lighting operation, you can:
- set the required turn-on speed, and also adjust the time of activated lighting for the cantilever staircase;
- make sure that the backlight turns on on all steps simultaneously when a person approaches the flight of stairs, and also set the mode for turning on individual sections one by one;
- set the “standby” mode for a certain number of steps (for example, in this mode, only the outer steps can be illuminated, so that in the dark a person can figure out which step to start with).
In addition, you can use non-main illumination of the outer steps, with the help of which the staircase will be illuminated in complete darkness. This mode assumes that the light brightness level will be activated only by 10%.
It is possible that you will be interested in information on how to choose siding for your home, which you can read about here.
The device can be placed in an appropriate place convenient for operation. Two motion sensors are usually installed on the outer steps, which react to a moving object. When approaching, they turn on, illuminating the entire staircase. The light also goes off automatically after a certain time after stopping movements, which can also be configured.
This type of lighting can be used for interior and exterior stairs
When installing lighting on a street staircase, it is necessary to take into account changes in temperature conditions, weather changes, and humidity levels. Therefore, it is easier to use automation in the house, since outdoors the chance of equipment breakdown increases.
You may also be interested in material about wooden railings for stairs.
It is more important to use smart lighting for long staircase structures. For long flights, it is appropriate to alternately adjust the light of several steps.
Types of lighting fixtures
Lighting is an important element of staircase decor, which brings with it both aesthetic beauty and ensures safe movement in the dark. Often, lamps in rooms and natural light are not enough to provide the structure with proper lighting. Then it is necessary to install additional lighting for the stairs.
There are several types of lighting devices:
- sconce;
- LED Strip Light;
- spot lighting;
- chandelier in the span;
- combined lighting.
Let's take a closer look at each type of device.
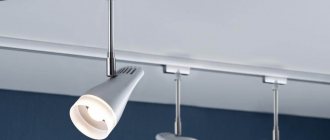
Spot lighting is provided thanks to a variety of lighting fixtures that are located pointwise. She looks very impressive. There are several ways to do it.
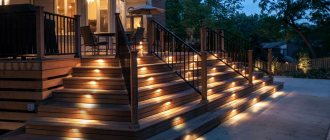
- Lighting built into the steps. To install lighting fixtures, holes are made in the steps and wiring is routed out. You can arrange the light bulbs in different ways. You can install them one at a time or every other step; you can install one lamp in the center or two at the edges. The heavy staircase structure becomes visually “lighter” thanks to the glow.
- Lamp. If you don’t want to spoil the cladding of the steps, you can purchase spotlights. Usually they are placed on the side of the step near the wall or under the railing at a point. They are fixed either with a self-adhesive base or with bolts. In some models, you can adjust the direction of the light thanks to the rotating head.
- Lanterns on the railing. Quite an effective lighting option. The lantern is mounted on balusters. Thanks to this installation, the steps, railings and the entire staircase structure as a whole are illuminated. Therefore, for sufficient illumination of the stairs, sometimes one or two lamps are enough.
- Wall lamps. The lamps cut into the wall pointwise along the entire length of the stairs. It looks very stylish and unusual.
A wall sconce is an even simpler lighting option that does not require any special intervention in wall cladding. The lamps are attached to the wall and connected to the power supply. To ensure good illumination, it is enough to install several sconces, as they have great power.
This type of backlight can be turned on mechanically or automatically if a motion sensor is installed. Typically, one switch is installed at the top and bottom to turn all sconces on and off simultaneously.
To install the sconce upon completion of the repair, you should ensure the presence of wire outlets in advance. If you do not take this into account in advance, you can lay wiring along the wall or make recesses. As an alternative to this, you can install lamps that run on external batteries.
A flying chandelier is the most spectacular and expensive way of lighting. The chandelier is ideal for a multi-flight staircase. Typically, such structures are found in public places such as hotels, theaters and in historical places - palaces and large estates.
Externally, this chandelier is distinguished by its massiveness and length. Its task is to completely illuminate the entire staircase opening. It is suspended from the ceiling of the upper floor and goes down along all the flights of stairs. Great for lighting a spiral staircase.
LED strip is a flexible strip with many energy-saving lights. Such devices are distinguished by a variety of colors. They are quite easy to install anywhere. They are attached, as a rule, thanks to their sticky side, if present, or they are placed on glue. Such lamps do not heat up, and therefore they are completely safe.
Two power supplies are attached to the tape, one converts electrical energy for lighting, the other serves to connect to the electrical network. In addition, it is energy saving. The amount of electricity consumed is 12 or 24 Volts. The number of working hours is approximately 50 thousand.
To achieve greater illumination or to be able to choose one or another lighting option depending on the conditions, sometimes combined lighting is installed, combining, for example, spot and wall lighting. This set is an interactive novelty of our time.
Lighting fixtures: how to choose and where to install
Lighting for a flight of stairs is selected at the design stage of the house, because it is required not only to be functional, but also to match the design of the staircase and the rest of the interior. Manufacturers offer a wide selection of lamps, and almost all are suitable for organizing staircase lighting.
Lighting should be consistent with the overall design Source cloudfront.net
Spotlights
The small size allows these products to be effectively used for organizing any form of lighting. A feature of point models is the creation of a directional light flux.
Depending on the characteristics of the lamps, the light can have different color temperatures, which is used to achieve different visual effects. Cool shades visually expand the space, while warm tones create a feeling of comfort.
Using spotlights Source enzie.com.au
For stairs with illuminated steps, several LED layouts are offered: through one or two steps, in the center or on the sides. Spotlights are used in the following parts of the structure:
- On the wall along the steps. If network lighting is planned, a method for masking the wiring and creating niches for the devices themselves must be thought out in advance. The easiest way to do this is on a plasterboard surface.
- In the risers. Useful lighting will be obtained if you place point elements in the risers (vertical elements). This solution allows you to get rid of distortion of the contours of the steps.
- On the steps. Installation on the horizontal surface of steps is carried out quite rarely. Here they choose less powerful products that do not irritate the eyes at night.
An eye-catching location Source chewjoinery.co.uk
LED strips and neon tubes
Flexible tape is a popular way to break up the darkness in a stairwell. Like all other LED-based products, the strips are economical in energy consumption, do not heat up to dangerous levels and are mounted according to a simplified scheme.
The tape, due to its plasticity, is fixed on a surface of any shape using an adhesive base; sometimes a metal profile is used. Traditional mounting locations: wall along the stairs, edge of steps, under railings.
Neon tubes are also used to create illuminated stairs. They are elastic, last a long time and create a pleasant diffused light that does not strain the eyes at night. Unlike LED strips, neon tubes create circular rather than directional light.
Creative solution to a problem Source pinimg.com
Step-by-step instructions for installing LED backlighting
The first step is to mark the installation of the future lighting system. At this stage, the location of the mounting profiles for the wiring, the lighting control unit and the method of mounting the LEDs are decided.
The next stage is creating mounting points. Using a drill or screwdriver, we make holes through which the elements of the future structure will be fixed.
Next, we install a profile for electrical wiring and diode strip with pre-soldered wires for connecting power.
If you plan to have side lighting from the wall using miniature bright LEDs, the profile can be used as a supporting structure for mounting the LEDs.
Using double-sided tape on the back surface, we glue the LED strip directly to the steps along the upper edge. To illuminate stairwells, it is better to use a sealed LED strip, which will not be damaged even when washing the floors.
Before installing the electrical wiring, you need to decide on how to control the backlight.
Backlight methods
Staircase lighting can be either built-in or adjacent. Lamps can be placed on the wall, directing the flow of light onto the steps; in some cases, they can be illuminated from the floor. Recessed lamps can also be widely used when lighting stairs or individual finishing elements. The built-in light source can be located in the steps, in the railings or in the supporting structure.
Recessed luminaires in the steps can be positioned in two ways:
- Horizontally
- Vertical
Overhead lamps on the wall should also be positioned so that the light spreads only to the steps and does not blind a person. Their main advantage is their relatively simple installation compared to built-in ones. For better effect, it is better to install them on the wall on both sides.
LED strip lighting
The railings can be illuminated with LED strip, and such lighting can be colored or even constantly change its color. Thanks to developing technologies, LED lamps are gaining a variety of assortments. Such lamps are easy to hide, difficult to notice with the naked eye, which adds zest to your staircase.
To illuminate the staircase at the base, you can place a regular lamp in the shape of a candelabra. This way you can bring the interior closer to what is acceptable to you. Lighting located on the floor should be directed along the stairs.
Imitation in the form of a railing
For quality lighting, you need to calculate the required number of lamps in such a way that they are evenly placed, and any specific area does not stand out with brighter light. The lighting of individual elements must be done in such a way that it does not affect the overall level of illumination of the steps.
When you are planning how to place lamps on the stairs, it is best to combine the methods of placing them - wall and railing, illumination of the vertical plane of the staircase and general lighting from the wall, railing and floor. For example, if you decide to illuminate the steps, and install them on every fourth, then it is worth adding more sources of general lighting, for example, along the perimeter of the wall.
What should you pay attention to?
As a rule, the choice of lighting is dictated by the basic style of the room. But this is not the only criterion that should be followed. After all, your safety depends on the correct arrangement of the lift.
1 4
Before purchasing such elements, you need to decide on the location of their further installation. When they work, the steps should be illuminated evenly.
When purchasing equipment, as a rule, pay attention to the following aspects:
- price;
- installation complexity level;
- amount of electricity consumption;
- combination with the interior;
- safety of use (risk level of short circuit);
- duration of service life;
- possibility of repair;
Stylish chandelier made of glass balls
A white background will help highlight the beauty of natural wood
The light from the lamp that falls on the pedestrian area should be soft and in no case bright, so as not to blind the person walking. Since intense lighting can cause an accident (as well as in its complete absence)
Therefore, it is worth paying attention to the type and power of the lamps used. The number of devices depends on their type and the structure of the design itself
Automatic lighting
Lighting of staircase structures is most often necessary only when a person moves along it. The exception is the emergency lighting of the stairs, which, when switched on, is constantly on.
Automatic systems are programmed for the level of general illumination of the room and come into operation when staircase lighting becomes necessary.
Staircase lighting scheme
Automatic staircase lighting is provided using special sensors that respond to movement or sound. Such a system can also be controlled using a remote control.
Motion sensors
Built-in motion sensors for staircase lighting turn on the light on the staircase system when a moving object appears within a certain range of the room. Stopping movement helps turn off the light sources after a certain period of time.
Noise sensors
Automatic acoustic systems respond to the noise level in the room. Staircase lighting in an apartment building is often performed using just such devices.
Sound sensor on stairs
Automatic lighting control systems not only help save energy, but also provide convenience for going up and down stairs, since there is no need to search for a switch in a dark room.
The price of such systems can be quite high. But their cost will quickly pay off due to the saved costs on paying electricity bills. Manufacturers' instructions advise protecting automatic sensors from voltage surges.
Other types of staircase lighting controls
You can control the staircase lighting in other ways:
- Radio controlled switches can be less expensive. They do not require electrical wiring, which is very convenient when installing them in finished rooms. Such a system consists of the switch itself and radio signal receivers. The first element is fixed on the wall or fence. Receivers are installed on lighting fixtures. The range of these systems may vary. The disadvantage is the periodic replacement of batteries.
- You can also install keys with a timer on the switches. They are programmed for a certain period of time during which the staircase structure is illuminated. Then the light turns off automatically.
- Automatic lighting of staircase steps sequentially turns on the illumination of each step as you move along the staircase structure. Motion sensors are installed in front of the first and last steps of the stairs. The backlight turns on automatically when you cross its coverage area. You can configure the staircase lighting controller with specified parameters for the number of steps, light brightness, and speed of turning the lighting on and off.
If you want to make automatic staircase lighting, then the choice of devices for this is currently quite diverse.
Light Source Control
The lighting design of the staircase system significantly affects traffic safety and creates its unique appearance.
Night staircase design
The answer to the question: how to make staircase lighting, everyone chooses depending on their individual design and taste. The variety of interior solutions that can be achieved using lighting structures will satisfy any needs. The main thing is not to forget about safety. And then the staircase will become a decoration of the whole house.
Methods of lighting stairs
In many private houses, the structure on the second floor serves as a decorative component of the entire house. The lighting should properly illuminate the structure, highlighting its aesthetic aspects. Turning on all the light on the staircase or in its individual sections is carried out manually or automatically. In the second case, the automatic control function can be part of the smart home system or installed additionally.
Automatic backlight
Automatic control makes it easier and simpler to operate lighting devices. A smart automation system can be equipped with various control devices. It can be:
- Motion sensors. The light automatically turns on as soon as someone enters the room. After a person has ascended or descended, after a certain period of time the light goes out, usually after 20-30 seconds.
- Time Timer. Allows you to turn on the lighting at the same time every day. It is also convenient, especially for very busy people.
- Load or touch sensor. The light turns on when there is an external impact on the steps or when a hand touches the railing.
- Sound sensor. Instantly turns on the light when there is a clap or a voice signal.
Related article: Making a metal staircase with your own hands (assembly guide)
Correct and thoughtful setting of automatic backlight will allow you to use electricity rationally and economically.
Wireless and regular network lighting
Today, for staircase lighting, it has become possible to use not only network sources, but also wireless ones, which are used on the structure and in other parts of the house.
Wireless
It is provided from autonomous power supply and is the most advantageous in terms of convenience and safety. As a rule, such a smart system consists of several motion sensors and lighting elements - 4 pieces. and more, depending on the length of the staircase structure.
Composite devices are tuned to a specific frequency and do not require additional regulation. The modules operate on regular batteries.
A wireless lighting system has many advantages, in particular:
- eliminating the need to turn on the main lighting;
- autonomy, allowing you not to use electricity;
- Possibility of use during a power outage in a private home;
- built-in light sensors turn on the backlight only at night;
- ease of installation of all parts, which does not require special knowledge and skills;
- installation is carried out without the need to drill walls and ceilings.
When installing a lighting system, it is also worth considering the high degree of safety. Wireless devices are not afraid of overheating, which reduces the possibility of fire to zero.
Backlight from the network
Cabling is a little more difficult to do, so the process requires some experience and skill. As a rule, installation of system components is carried out by a specialist. A large scale of work requires corresponding costs. In addition to the lighting fixtures themselves, you need to purchase many different wires, motion sensors, and in the automated switching mode - relays, power supplies and other elements.
Assembly and installation of the system
Assembling an electrical circuit
First, we need to assemble and test a circuit that will control turning our backlight on and off.
It’s easier to do this when all the parts are disassembled - this way we don’t have to run up the stairs when setting up each element:
We connect the controller to the computer and load the control code into it. In principle, if you have programming skills, it’s quite simple to understand the principle of operation and write your own circuit, but if this is included in the list of your skills, it doesn’t matter. Standard “firmware” for controllers on the network is quite sufficient.
- Next, we install the programmed controller on the board, connect it to the LED drivers and connect it to the tape outputs.
- We separately connect two terminals for sensors that will control the system’s activation.
- If a photocell is used, add one more output.
Advice! It is better to place the control module together with the power supply either in a special electrical cabinet in the wall or in a plastic case under the stairs. The main thing is that the case protects the components from dust and moisture, but at the same time provides easy access.
In addition to all this sophisticated automation, experts recommend adding a simple switch, which will make it possible to de-energize the system in case of malfunctions or malfunctions, or switch it to permanent mode.
Installation of parts
When the system is assembled and everything is working, installation can begin.
Do-it-yourself LED staircase lighting is assembled in the following sequence:
From the tapes we cut the required number of fragments of the required size. For cutting, we use scissors, carefully ensuring that the cutting line does not pass through a diode or resistor.
We put special connectors on the ends of the tapes. You can, of course, solder the wires, but this way the connection will be more reliable. And the speed of work will increase.
Advice! If you do the installation yourself, then it is better to make the wires from “+” and “-” multi-colored. This will make it much easier for you to assemble all the elements into a single circuit.
- After degreasing the surfaces of the steps with acetone, we glue LED strips to them. We run the wires to the back side of the risers either through the holes made, or simply through the gap between the step and the wall.
- To form a directional light flux, the tapes can be mounted in special U-shaped profiles.
- An alternative to the profile can be a groove made at the bottom of the step, but this option is best implemented directly during the construction of the stairs. Otherwise, you will have to cut out the channels with a router, crouching under the steps.
- We make holes in the wall opposite the top and bottom steps. We install socket boxes into the holes and recess the touch sensors into them.
- We run the wires from the sensors through grooves under the steps on the underside of the stairs.
- We attach a cable channel to one of the stringers. Plastic clamps can be used to temporarily secure cables.
- We fix the box with the control module in a place hidden from prying eyes.
- We connect all the conductors and connect the cables to the connectors on the board.
Next, you can conduct a test run of the system. If everything works properly, then it’s time to close the cable channel with a lid.
Taking into account today’s abundance of affordable “smart” electronics, we can say that LED staircase lighting is just a godsend for the home owner. With their help, you can provide very attractive and effective lighting, while the costs will be quite “lifting”. In the video presented in this article you will find additional information on this topic.
DIY staircase lighting (instructions)
The lighting of the stairs with LEDs looks quite original and beautiful. Lighting effects guarantee comfortable movement and transform the interior beyond recognition. The equipment is sold as a complete set, so if you have basic knowledge, you can assemble the system yourself.
Regular
For simple lighting from the network, you will need a switch. The side surfaces or overhangs of the steps are equipped with LED strip. The system is started by a button located on the wall. To work, you will need an aluminum profile, metal scissors, a ruler or tape measure, self-tapping screws, a drill and a screwdriver.
To make the appearance of the lighting more attractive and hide the LED strip, also purchase a plastic plinth to hide the electrical wiring.
The process of installing LED backlight from the mains is as follows:
- At each step of the stairs or at the junction between the wall and the steps, you need to install an aluminum profile, which is secured with self-tapping screws.
- The installed profile must be degreased. Alcohol, white spirit or another product is usually used for this purpose.
- The LED strip needs to be cut into segments, the length of which corresponds to the width of the steps; you can make them 5-8 cm smaller.
- The protective film is removed from the tape, the finished elements are glued to the pre-installed profile.
- Next you need to output the contacts for the LEDs. This is done on both sides of the tapes, the outer contacts are connected to a common electrical cable.
- All that remains is to connect the controller and power supply and start the system. To hide the LED strip, you can install a plastic plinth on the profile.
Related article: Design features of a living room with a staircase and design ideas |+76 photos
The figure below shows an approximate diagram of connecting LED lighting for a single-flight staircase.
On the video: how and to what to connect the LED strip.
Automatic
The circuit is based on the relationship between the sensor and the controller (preferably use an Arduino/arduino device). Touch sensors are installed directly opposite the lower and upper steps, and when moving, the LED controller is activated.
To assemble an automatic system, you need to purchase the following components:
- controller - the main component of the entire scheme, suitable for most stairs;
- board with circuits required to install the controller;
- LED driver - a microcircuit connected to the controller outputs;
- sensor sensors - they are the ones who will respond to movements;
- a photocell that is installed so that the light does not turn on during the day;
- You will also need wires to connect and connect all components.
Before starting installation with your own hands, you need to assemble the circuit and run it in test mode to make sure that the components are in working form. To do this you need:
- Connect the controller to the computer and download the control code.
- Install the controller on the board, connect it to the LED drivers and connect it to the tape outputs.
- Make two additional pins for the sensors responsible for turning on the light.
In addition to the above components, it is also recommended to install a switch that will allow you to turn off the system or switch to permanent mode.
On video: smart staircase lighting - how it works.
After the system is assembled, installation begins. Do-it-yourself automatic LED lighting of the Arduino staircase is mounted in the following order:
- The required number of fragments are cut from the tapes.
- The ends of the tapes are closed with special connectors.
- After degreasing the steps with acetone, LED strips are glued.
- Opposite the lower and upper steps, holes are made into which socket boxes are installed and touch sensors are recessed.
- The wires from the sensors are routed through grooves under the steps, and a cable duct is attached to the stringer.
- The control module box is placed in an enclosed area, often under a ladder.
- The conductors are connected, after which the cables are connected to the connectors on the board.
After a test check, if no problems or inaccuracies are identified, this system is launched into permanent operation.
On the video: the process of installing and connecting automatic staircase lighting.
Having familiarized yourself with the methods of organizing staircase lighting and understanding what types of lighting fixtures are best used in each individual case, you can safely develop your own scheme. You will also need to make a list of the necessary materials and equipment used.
Review of automatic LED lighting of steps (2 videos)
Functional and decorative lighting (58 photos)
Option 1 – Pass-through switches
We have already discussed with you the connection diagram for a pass-through switch. There is nothing complicated, but with the help of such devices you can control the light from 2, 3, or even 4 points. This idea is often used in private homes. If the length of the steps is small, one switch should be mounted on the first floor, the second one on the second floor. The staircase lighting diagram will look like this:
If you need to control the light bulb from three places, you can install an auxiliary switch - cross. In this case, the lighting scheme for a landing in a private house will look like this:
As you can see, wiring is not complicated. The zero is connected directly to the lamp, the phase is connected to the break.
Features of lighting of external stairs
If changes in temperature, humidity and other atmospheric influences are not particularly important for organizing the lighting of internal staircases, then external structures have their own characteristics.
- The power of outdoor light sources should be greater than that of indoor lamps.
- In the case of using general lanterns to illuminate the courtyard and stairs, their location should provide enough light for the entire system.
- Only lighting fixtures specifically designed for outdoor installation should be used. Lamps for lighting the stairs in them must be protected from atmospheric influences, that is, covered with shades.
- Electrical wiring is used with reinforced insulation that can withstand temperature changes and precipitation.
Original options
Lamps can be located:
- On the walls of the house;
- On the fence;
- Suspended from cables;
- Installed on poles.
Low columnar lighting structures are often used.
https://youtube.com/watch?v=CMlPUekL1S8
Step-by-step installation instructions
Choosing a lighting scheme
The first thing you need to decide is how to place the lighting on the staircase steps - in the wall on the sides, below, every other step, across the entire width or just in the center. You can see examples of lighting in the photo below:
You also need to decide on the way to control the LED strip - it will be turned on by a regular light switch, a motion sensor, or a pass-through switch. A lot also depends on this. Once you have decided on all the organizational aspects, you can move on to counting materials and selecting lighting elements.
We calculate materials
We recommend that you make your own staircase lighting as follows:
- Illumination of each step with a distance from the edges of at least 5 cm.
- Motion sensors are installed at the top and bottom of the flight of stairs.
- The operation of the lighting system is organized on the basis of an Arduino controller.
- Additionally, a photo relay must be installed so that the LED strip turns on only at dusk.
- As for the tape, its characteristics should be as follows: 60 LEDs per meter, SMD 3528, IP protection degree of at least 67.
Please note that in your case you can use other materials. For example, if you don’t want to bother with automatic lighting and figure out how to connect all the elements to the Arduino controller, you can simply control the lighting using pass-through switches, which will significantly simplify the installation and cost of the system. When all the materials have been calculated and purchased, you can proceed to installing and connecting the LED strip on the steps of the stairs with your own hands.
Installation work
So, to make built-in lighting for the stairs to the second floor, follow these instructions:
- Cut the LED strip into strips of suitable length. Don’t forget that you need to cut it in specially designated places, as shown in the photo below:
- Solder wires to the contacts to connect the backlight to the controller. You can also use special connectors so as not to waste time working with a soldering iron.
- We degrease the steps and glue the LED strip in a suitable place. If it is not possible to make hidden lighting for the landing, you can use a special aluminum profile that will protect the lamp from mechanical damage.
- We install sensors opposite the lower and upper steps, as shown in the diagram below. We talked about how to connect a motion sensor to lighting in the corresponding article.
- We hide all the wires in a cable channel, which we attach either to the side of the wall or under the flight of stairs.
- In a suitable place we install a box in which there will be a controller for intelligent control of the LED lighting of the stairs.
- We connect all the elements into one system, connect the controller to the computer and download the code, which can be easily found on the Internet. The connection diagram looks something like this:
- We check the correct installation and if no errors are found, we test the LED staircase lighting. We customize the lighting mode for ourselves and enjoy what you managed to do.
Following these instructions, you can make your own staircase lighting using LED strip. As you can see, there are no particular difficulties in installation, however, in order for you to have automatic lighting of the steps to the second floor in a private house, you will have to figure out how to connect the Arduino controller.
Choosing a lamp
Today, there is a wide range of lighting devices on the market that can be placed to illuminate the rises. They differ not only in the manufacturer, but also in material, design, structure and functionality. Let's look at the most popular ones.
This list opens with the most famous and familiar device - a chandelier. This is a classic option, which, in fact, appeared even before electricity itself, and was presented in the form of large candelabra with candles. But it is used extremely rarely to equip this zone, since it is not functional for every structure, it can interfere with movement and illuminate not the entire movement area. But it is worth noting that a properly selected chandelier functions well and looks great in combination with a spiral staircase.
Edison LED Bulbs
Beautiful lanterns on ropes along the entire staircase
The sconce can be considered the same age as the chandelier. These compact, convenient lamps do not lose their popularity in interior design.
But it is important to choose the right design for such a device so that it matches the overall style of the interior. And if the passage has minimal dimensions, then this option may not be suitable.
Spotlights are more modern lighting options compared to chandeliers and sconces
They are very compact, versatile and extremely popular. They can be placed either on the wall or on steps - it all depends on your personal preferences. They differ in shape, size, and can be built-in or overhead. The only drawback that can be noted is the use of special lamps. They have a smaller update and base size than standard ones.
1 4
They appeared on the market not so long ago, but LED strips and tubes are already rapidly gaining popularity. You can buy them according to the required footage and place them both on the wall and on handrails or steps. At the same time, the high cost is subsequently compensated by savings in energy consumption, which goes to diodes in a minimum amount.
Selection of lamps
When you are wondering which lamp to choose and which one is easier to install yourself, a huge assortment appears before you. Of the many varieties, halogen and LED lamps are best suited. We will advise you to use the LED system, since with its help you can make the lighting more colorful and beautiful. They are also much easier to install yourself, thanks to their simple design.
https://youtube.com/watch?v=8oDwhsmF-NA
The main indicator of the quality of a lamp for this application is its strength and wear resistance. Manufacturers specializing in the production of lamps for stairs usually produce them in a durable housing, either metal or dense plastic. LED lamps are better suited than others; there are simply no breakable elements. Built-in ones must be shock-resistant, since someone could step on them and there is a risk of an object falling on them.
The intensity of the luminous flux should not only be within normal limits, but also fit harmoniously into the decor of your home. Brighter light has the effect of expanding space, and soft, dim light will add calmness and help you relax faster.
Different types of lighting in the house
When choosing lighting, you should also consider what your staircase is made of. The color design of the housing must be combined with the color of the materials, and the color of the emitted light must be harmonious with the environment. If recessed luminaires are installed in wood, their housing should not overheat too much, as elevated temperatures can cause a fire.
When making staircase lighting with your own hands, you can install both centralized and remote control. It is possible to supplement the lighting elements with a motion sensor, so they will turn on when necessary.
Centralized control involves installing a switch, or a group of switches. Some will include recessed lights, others will include general lighting. Or one button for all the lighting at once.
Summarize
Lighting the staircase of your home is a creative process, although it is quite simple, but it must be approached with understanding and complete seriousness. Only a properly lit stairwell will help make your life more comfortable, and getting up to the bedroom after a hard day at work will not be a torment for you, but the beginning of your relaxation.
By correctly placing lamps on the floor, railings, steps and walls, and harmoniously choosing their colors, you will make your staircase the highlight of your interior. The most important thing is to always remember that in this matter you are not limited by any standards, use your creativity and imagination, then you can achieve an excellent result.
Types of lighting
Recessed lighting for stairs are small lamps that are usually located along the direction of the stairs. They can be wall-mounted, lamps on steps, or floor lamps.
LED strip is very popular because it has low power consumption and is also easy to install.
It is made in the form of a tube, which contains diodes inside, and is available in different colors, which allows it to harmoniously fit into any interior.
A staircase chandelier is installed in spacious rooms; you can match it to the overall design of the room and be sure that it will fit harmoniously into it.
It is suspended from the ceiling, and also connected using a cable, which is safely placed under the external decoration of the walls.
Using sconces to illuminate a room, they will perfectly complement the overall design of the room.
To connect this type of lighting, they resort to a common network or using a cable channel. Depending on the length of the staircase, the total number of lighting fixtures is determined.
To illuminate a small staircase, one is enough; for longer ones, two or more are used. They are all combined into a common circuit and output to a common switch. If necessary, you can install a motion sensor.
What light sources are most practical?
When choosing staircase lighting in your home, it is important to become familiar with the characteristics of various lamps. Knowing the pros and cons will help you evaluate different options and choose the best one. The following types of sources are allowed:
- Incandescent lamps. Due to their low cost, they still remain popular, despite the high heat and wasteful energy consumption.
- Halogen. They are distinguished by bright, even light and are used in chandeliers or sconces. They are not suitable for local illumination of steps (especially wooden ones) due to their brightness and rather noticeable heating. Halogen lamps are sensitive to voltage surges.
Combining three types of lamps Source pinimg.com
- Neon (gas discharge). The color of the dump depends on what gas is inside. Neon has a red-orange glow color, but in principle it can be anything. Models in the form of tubes are used for longitudinal illumination of steps; the light is soft and does not hurt the eyes. The lamps last a long time, but require delicate handling.
- LED. Popular due to their stable bright glow, low energy consumption, and variety of assortments. They have an impressive service life and are suitable for installation on wooden elements, as they practically do not heat up. Available in different forms: lamp, point source, tape.
Recessed LED luminaires Source diodeled.com
