December 17, 2020
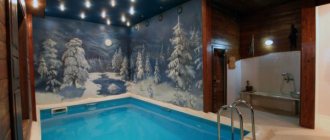
A concrete pool is an expensive, labor-intensive and complex hydraulic structure. There are many designs of swimming pools, but if we talk about durability and reliability, a better concrete option has not yet been invented.
It can be assembled from individual elements or be a monolith; in any case, a multi-layer structure of external and internal waterproofing will be required. A concrete pool belongs to the classic type of reinforced concrete structures, but allows for countless modifications with the addition of bends, cascades, waterfalls, hydromassage and artificial flow.
The technology for constructing a concrete pool includes the mandatory implementation of the following steps:
- Project development.
- Preparing the base.
- Installation of embedded elements.
- Formwork installation.
- Reinforcement of the prepared pit.
- Stage-by-stage concreting.
- Waterproofing device.
- Finishing work and decoration of the surrounding area.
All stages of the technology for constructing a concrete pool are important; the correct execution of them will affect the final result of the work.
Before continuing reading, we would like to remind you that on our website you can order the construction of a swimming pool by creating a tender. Masters and companies will respond to your order and you will be able to choose the most suitable candidate.
Preparatory stage
Create your own estimate for the construction of a country pool. Before calculations you need to determine:
- Pool size. Based on the budget and the number of people who will swim in it.
- Depth and its shape. If you have no experience in construction, it is better to choose a regular rectangular shape. Convenient bowl depth – from 1.5 meters.
- The thickness of the structure. The deeper the pool, the more reliable its base should be; the thickness should not be less than 15 cm.
- Geology of the site. It is better to order a geodetic study of the land plot, which will determine the density of the soil and groundwater level, and will help you choose the best place for installation.
- Pool equipment. Proper selection of equipment and embedded elements will allow you to use the pool comfortably and reliably.
- The proximity of the pool to other buildings. Neighboring foundations will put a load on the foundation pit, so all buildings must be completely autonomous.
- Materials. Construction must be carried out with high-quality and proven materials.
The preparatory stage in the construction of a concrete pool is very important; the accuracy of subsequent processes and the overall result of the work depend on it.
What is it for?
When ordering the construction of swimming pools for their dachas, people, first of all, want to add comfort to their dacha holiday. It’s no secret that today growing garden crops is, first of all, not a way to provide yourself with food, but an active recreation that allows you to forget about problems at work, the bustle of the city and get as close to nature as possible. And such a vacation is doubly pleasant if you have the opportunity to swim after useful work or simply lie down next to the surface of the water in a sun lounger.
What to consider at the very beginning
Before finding out how much it costs to build a pool on a turnkey plot, you need to analyze a number of points that directly affect the cost of the pool:
- what will be the functional purpose of the pool
(decorative, children's, for adults);
An inflatable children's pool is the most inexpensive and simplest option for a summer cottage.
- will it be stationary or collapsible
pool;
- opportunity deepening the structure
in terms of groundwater levels;
- how will it be organized drain system
and water treatment;
- how much is free area
, suitable for placing
a tank
; - which form
will be at
the bowl
.
Stationary or prefabricated
The type and size of the pool directly determines how much it costs to build a turnkey pool on a site. Permanent structures tend to be more expensive than comparable sized prefabricated bathing tanks.
In addition, maintenance and operation of collection tanks will require less money. It should be understood that if the pool is being installed for a long time and will be used frequently, then you will have to invest in a stationary structure. If you need it for short-term use on a small summer cottage area, then you can get by with a prefabricated pool.
Inflatable structures can be quite large in size, sufficient for bathing adults and children.
Non-stationary structures
These types of bowls are small or medium in size. Depending on the characteristics of the selected type of pool and the option of installing equipment (on the surface or with recess), the installation time of the structure can range from several hours to three days. There are the following main types of collapsible bowls for a summer cottage:
- rod frame
;
- sectional frame
(plastic, metal, wood);
- inflatable
.
If you need the most economical option, then it is easier to buy a ready-made inflatable bowl than to make a pool at your dacha. Its price is minimal and ranges from 2 to 16 thousand rubles. The diameter of the inflatable bowls does not exceed 5 meters, and the depth ranges from 50 cm to 120 cm. They are made of PVC film; for large-sized products, the structure is reinforced with a frame of thin-walled aluminum tubes.
Large inflatable bathing tanks may have additional supporting sides of the structure.
Some models are equipped with filters for water purification. The small volumes of the bowl allow the water in it to quickly heat up to ambient temperature. The weaknesses of inflatable products are:
- high risk of mechanical damage
due to a puncture or cut;
- the need to resolve the issue storing the bowl in winter
;
- exposure to negative influences ultraviolet
which can cause
PVC to crack
.
The next in increasing cost are prefabricated rod products. On average you will need to pay from 4 to 20 thousand rubles for them. The frame in them is a structure of vertical and horizontal posts with special fastenings. The water is retained by a PVC cover; these pools are supplied with a pump equipped with a filter. The weaknesses of rod frame tanks are the same as those of inflatable products.
To install a rod frame bowl, you need a flat base and 2-3 hours of installer work.
Sectional frame products or rigid frame pools are among the most reliable prefabricated structures. Metal, plastic or specially treated wooden elements are connected by locking, bolting or gluing. The depth of such bowls ranges from 1.2 to 2.4 meters.
Their advantage is the absence of the need for dismantling during the cold season. It is enough to simply remove the polyvinyl chloride tension element. A typical pool kit includes a pump with a water filtration unit and a skimmer (cleaning device). The average cost of frame products ranges from 40 to 100 thousand rubles.
Sectional frame pools are similar in performance to stationary bowls.
Stationary
Stationary pools are made from various materials, this in turn affects the cost of constructing the pool and its operational properties. In particular, bowls are made from:
- concrete
;
- red ceramic brick
(walls) and
concrete
(base); - metal
;
- multilayer
(composite)
fiberglass
; - polypropylene
.
Excavation
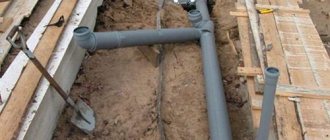
After all the initial work, we begin digging a pit for the concrete pool bowl. We draw out the width and length of the pit on the ground, mark the required distances with electrodes or rods using a rope. It is also necessary to leave additional depth for drainage and reinforcement, taking into account that you will need space for formwork spacers. The depth of the pit should exceed the pool bowl by 50-70 cm in width, depth and length. After determining the location of the drainage and filling paths, we begin to dig a pit.
An excavator will dig a pit faster, but this method requires extra costs. If the future pool is small, you can dig the pit yourself. During the work, we take into account the digging angle, and to prevent the soil from shedding, we make the walls of the pit with small slopes. On one side of the pit we make a special recess for the necessary equipment and pipe outlet.
Main building material
Naturally, this is concrete. The classic version is the M350-M400 brand. Brand F100, in addition to standard properties, has frost-resistant characteristics, and W6 is waterproof. Independent modeling of a concrete bowl occurs using heavy concrete with plasticizers and hydrophobic components.
Concrete for a swimming pool can be ordered ready-made from industrial enterprises - supplying cement mixtures is a fairly common practice. You can also make the solution yourself using the following recipe. For one cubic meter of volume you need to mix:
- 600 kg of cement grade M600;
- 1600 kg of medium-grained sand;
- 60 kg microsilica;
- 800 kg of fiber fiber;
- 1 kg plasticizer;
- the amount of water in relation to cement is 0.3.
We invite you to familiarize yourself with: Foundation slab for a bathhouse made of monolithic concrete
The solution is mixed in a concrete mixer, the components are added, starting with water.
Backfill under the bottom slab
After digging the pit, we proceed to the following stages of work:
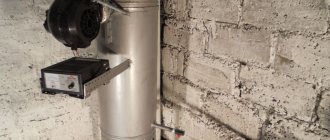
- We lay out the equipment. We dig trenches for bottom water drainage pipes. In the left recess we place the necessary equipment (filter, heater, etc.). We arrange the pipes and connect the drain to the sewer. We lay the drain pipes at a slight angle to the equipment pit for easy drainage of water.
- We lay geotextiles. We compact the earth well with a slight slope towards the drains. We install geotextiles with a slight overlap to avoid gaps in the ground. This creates a protective layer between the soil and the drainage pad and prevents water erosion.
- We create reliable drainage. Crushed stone and river sand were used as drainage materials. We fill the bottom of the pit with crushed stone and river sand with a fraction of up to 8 cm. The average layer of crushed stone and sand is 15-20 cm.
- We are setting up roofing felt. For reliability, we arrange the rolls in two layers with an overlap. Roofing felt rolls are a high-quality and affordable method of waterproofing.
It is very important to take care of high-quality strengthening of the concrete bowl of the pool, since after completion of the work the bottom of the pool will experience enormous pressure from the water.
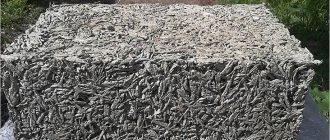
Where can you use fragments and remains of aerated blocks?
Even if the order of aerated concrete was carried out “back to back”, trimmings, rejection and scrap will remain after each construction. They can be used in a variety of ways, from filling holes in floor slabs to recycling them into cat litter.
One popular method is to add it to cement or adhesive mortars. This is done when sealing seams between slabs, technological holes, and any other places where it can be used to reduce the consumption of the base composition.
Reinforcement of the bottom plate
Before pouring the structure with concrete, we perform reinforcement work on the bottom of the pool. We use reinforcement measuring 8-12 cm. We treat it with a special anti-corrosion agent twice. We lay the rods horizontally and vertically to obtain reinforcement in the form of a 20*20 cm cage. We make two levels of reinforced mesh, and tie the intersections of the frame with special wire or plastic clips.
The frame rods cannot be connected with a welding machine, as they will be subject to rapid corrosion. We install the necessary embedded elements at the bottom of the pit and secure them with wire; if necessary, protect them with formwork. In order for the concrete pool bowl to be strong and reinforced, it is important to place the frame on special supports or bricks, so that the reinforcement will be inside the concrete screed. We bend the rods upward along the perimeter of the bottom (later we will secure them with the reinforcement rods of the pool walls).
Filling the bottom with concrete
Self-prepared concrete will cost less, but then you need to have several assistants for the work, so that one person prepares the concrete, another pours the solution, and a third levels it. Formwork for the bottom of the pool will help to carry out the pouring process more smoothly and accurately. To prepare concrete you will need:
- concrete mixer;
- vibration installation;
- cement M500;
- sand;
- water-repellent additives;
- water.
The quality of concrete greatly depends on the purity of its components. To preserve all the properties of the substance, we buy bags of cement no earlier than a month before pouring. We use crushed stone of a fraction from 10 to 20 mm; it should not contain foreign impurities. The preferred sand granule size should be up to 2mm. On average, a bucket of M500 cement will require 5 buckets of sand and 7 buckets of crushed stone. For good mixing of materials, it is better to use a concrete mixer. To get a high-quality solution, add the components in the following order:
- Mix sand and cement.
- Add water and stir until it reaches the consistency of sour cream.
- Add crushed stone.
- Before pouring, add a hydraulic additive to the solution.
Fill the solution with a slight slope towards draining the water. The minimum thickness of the pool bottom is 15 cm. The larger its size, the thicker the bowl is needed. During the pouring process, you should focus on the maximum density of concrete and the absence of air voids in its thickness. For this we use a vibration machine. The reinforcement must be inside the concrete solution. Leave the filled bottom to dry completely for 10-12 days.
Step-by-step instructions for building a pool from blocks with your own hands
Since the pool is a rather complex engineering hydraulic structure, it is very important to construct it correctly .
Constructing a pool from concrete blocks with your own hands should be carried out according to clear step-by-step instructions. Only in this case will the end result be a high-quality object that will withstand all existing operating conditions for a long time without problems.
Design and calculation
At this stage, a detailed plan for the construction of the future font from blocks is drawn up. It will allow you to realistically assess the possibility of implementing the idea and draw up an estimate.
During design, the following points are considered:
- The first step is to calculate the size of the pool. The indicator determines how many water procedures a person can take at the same time. A do-it-yourself bowl with an area of 25-40 m2 is considered optimal. Depth varies from 1.5 to 2 m.
- Taking into account the geometry of the area allocated for the construction of a block font, the shape of the bowl is determined.
- The thickness of the bottom of the pool and its block walls depends on the properties of the soil on the site, the level of underground water layers, and the depth of immersion of the bowl into the ground. It is better to trust these calculations to a specialist. The more heaving the soil, the higher the location of groundwater, the thicker the bottom and walls are made. The same applies to the depth level of a bowl made of blocks.
- The pool diagram shows the location of communications. They provide for drainage, sewerage, nozzles, the location of stairs, filters and other equipment for caring for the font.
When everything in the project is carefully thought out, making a pool from blocks will be much easier.
Digging a pit
The construction of a bowl from blocks begins with preparing the area. The area is cleared of debris, trees and bushes. The soil must be leveled into a level area. On the site, stakes and cord mark the contours of the pool. The pit should be slightly larger. Gaps are needed for waterproofing walls and supplying communications.
Excavation work is carried out manually or special equipment is hired. In the first case, it is advisable to dig a hole with a shovel for a small pool made of blocks. If the font is large, you cannot do without an excavator. Special equipment is provided with access. It is important to think about where to put a large amount of land. Part of the soil is left for backfilling the gaps between the walls of the pit and the pool.
Advice! To prevent the earthen walls from collapsing, they are made at a slight slope when digging a pit.
Preparing the base
It is worth constructing a cushion under the pool because in this case concreting will be much easier. In addition, such a base allows you to extend the life of the object. The backfill under the pool bowl should be made of sand and crushed stone. This mixture must be spread evenly along the bottom of the pit and compacted thoroughly. Its height should be between 25 and 35 centimeters.
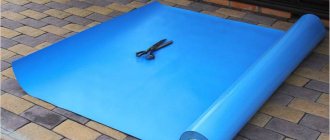
To waterproof the bottom, you can use polyvinyl chloride (PVC), bitumen or roofing felt. These materials are lined in one or several layers. Be sure to lay them with an overlap of at least 15 centimeters. The edges of the materials need to be placed on the walls of the pit.
Installation on the ground
Hydraulic structures should be laid during the preparation of the pit. In order for the drainage of water to be optimal, a slope should be made at a level of 4 to 8 percent, that is, about 2-4 centimeters per meter of bottom. It should be directed in the direction in which the drain will be installed.
IMPORTANT! Before installing the base, it is worth equipping all sewerage systems that would allow water to be drained from the pool. Also in the additional reception area you can place pumps, filters and other equipment.
The drainage hole must be below the water level. In this case, all the water, if necessary, can completely leave the pool bowl.
Concreting the bottom and installing a base on it
To prepare the solution for concreting the day, cement is used, the grade of which is not lower than M400. A pure sand-cement mixture should not be used, since certain additives and additional water-repellent substances must be added to it, which will allow the material to withstand aggressive and quite difficult operating conditions in the future.
When preparing the solution, it is necessary to use less water than usual. The result is a semi-dry mixture. Its main advantage is that the ripening period is significantly reduced. Often it is only 7-10 days instead of 28 days.
Water-repellent concrete can be made either using a concrete mixer at home or ordered from the appropriate enterprise. But in the first case, the work must be carried out together, since in no case should premature setting of the components be allowed.
Depending on the additive, after filling you need to wait from 4 to 10 days . As soon as the concrete reaches the required characteristics, the construction of walls can begin.
Reinforcement
Reinforcing the bottom of the pool is a mandatory step. In this case, the height of the concrete layer should be about 20 centimeters.
In the reinforcement process, ribbed reinforcement is used. Its cross-section should directly depend on the operating conditions of the pool. But the diameter should not be less than 12 millimeters. The spacing of the twigs should be 20x20 or 30x30 centimeters. It can be equipped with one or two belts. The second option is often chosen in the presence of soil heaving forces.
NOTE! The reinforcement should be recessed into the concrete by 5 centimeters. That is why it is laid on bricks, which give the desired size. The distance between layers should be 10 centimeters.
Walling
In most cases, walls are built in one row of blocks. Due to the fact that these products are quite massive, they can easily withstand the mass of water that will be in the pool.
The first two layers of blocks must be laid on ordinary concrete mortar with water-repellent properties. As for the third row, it is best to reinforce it. This sequence must be continued until the construction of the wall is completed.
The reinforcement can allow the blocks to gain greater rigidity and resistance to the mass of water in the pool. That is why other methods for constructing walls of hydraulic structures of this type do not exist.
Interior decoration
You should not assume that interior finishing of a swimming pool is a fairly simple task that anyone can handle. In fact, it must be carried out in accordance with certain rules and recommendations.
First, the surface of the blocks must be impregnated with an appropriate primer. It is best to choose a deeply penetrating composition that has antibacterial properties. You can also apply an antiseptic on top of this material.
After the preparatory work has been done, it is worth putting an appropriate construction mesh on the block wall. After this, you can begin the plastering process.
If the embedded parts are installed after the walls are covered with mortar, then a special cord should be laid around the perimeter of the products . In this case, all joints must be sealed with sealant.
Waterproofing
Waterproofing the pool should be done in the same way as this work is carried out in relation to the foundations. The easiest way is to use a coating material. It is enough to apply it on the outer wall of the structure, after which you just need to wait for it to dry.
Film waterproofing material can also be used, but in this case you should choose the highest quality and most expensive products. This is due to the fact that the operating conditions of the pool are quite difficult.
In cases where the soils are quite heaving, it is necessary to fill the walls with a metal section before waterproofing work. The top can be plastered with a small layer of mortar.
Insulation
In order to reduce the financial costs of heating water in the pool, it needs to be insulated after waterproofing work has been carried out. It is important to understand that heating several tons of water by 1 degree will require quite a lot of electricity. Due to the fact that this structure is buried in the ground, the sun will have minimal influence on it.
For thermal insulation, builders recommend using foamed polystyrene. It performs its main function well and does not absorb water. In addition, various microorganisms do not multiply in such material. Polystyrene is not eaten by insects, so it cannot be damaged in this way.
It is worth noting that it is best to choose high-density thermal insulation material. This figure must exceed 35 kilograms per square meter.
NOTE! Installation of polystyrene should be carried out in two layers. It is necessary to lay it in such a way that it overlaps the joints of each other. Additionally, water-repellent mastic should be applied to the seams.
Other Important Details
The recess around the perimeter of the pool can be filled in various ways. For this purpose, soil dug during the construction of the pit is often used. But in cases where the soil is quite heaving, crushed stone can be used. It needs to be poured into the hole and compacted quite firmly.
On top of the perimeter of the pool, you can fill it over crushed stone, on top of which you should lay a tiled covering. It is best to use a material with a matte surface. This will increase the level of safety near this hydraulic facility.
Pros and cons of block pools
A review of the positive and negative qualities of the structure will help you decide whether to build a bowl from blocks.
Pros:
- An undeniable advantage is the increased strength of the pool. The masonry can withstand heavy loads and resists seasonal soil movement well. The bowl can be erected in the open air without fear of the destructive effects of negative natural phenomena.
- The font lends itself well to finishing. The bowl is covered with tiles, mosaics, and decorative plaster is used. The owner decorates the pool according to his taste and wealth.
- Despite the complexity of the design, building a swimming pool with blocks yourself will cost less than ordering the installation of a swimming pool made of composite materials.
Minuses:
- If the drainage and water supply system is initially incorrectly equipped, it is difficult to redo it.
- Violation of waterproofing technology or the use of low-quality blocks in construction will lead to leaks.
- Poor masonry damages not only the integrity of the bowl, but also the decorative cladding crumbles.
- A pool made of any type of blocks requires careful maintenance. Failure to follow the rules will lead to the formation of mold on the walls, the water will take on a green tint, and an unpleasant odor will appear.
Among all the shortcomings, the main problem is the complexity of construction. You will need to carry several tons of concrete mortar with your own hands and lay heavy blocks on the walls.
Features of block pools
If you decide to build a font on your site, even before starting the design you need to familiarize yourself with the features of a complex structure:
- The bowl should not come into contact with groundwater in the ground. From such proximity, blocks are destroyed faster. The problem can be solved by creating reliable waterproofing.
- The blocks should not come into contact with water from the inside of the font. Here, similarly, reliable sealing is required.
- It is important to take into account that 1 m3 of water in terms of weight is equal to 1 ton. The masonry of blocks must withstand pressure. Usually they create fonts with their own hands with a volume of up to 15 m3.
- The presence of weak areas in the walls is unacceptable. This is where the first cracks appear and the font begins to leak.
Construction of a swimming pool requires precise design, which is best left to specialists.
Construction of walls
At the joints of the bottom and walls of the pool bowl, we lay a water-expanding cord to waterproof the seams. Such a cord will close any possible gaps and will not allow water to pass through. Vertical formwork will help build the walls of a concrete pool. The correct shape and durability of the pool bowl depends on its quality. You can use formwork made of wood, metal, plywood or corrugated board. The main thing is to ensure maximum strength of the formwork.
We place reinforcement in the center of the formwork and connect it with specially left vertical rods when filling the bottom of the bowl. We allocate space in the wall for embedded elements (skimmers, nozzles). It is important to take into account the water purification system in advance, since its absence will cause considerable discomfort. A skimmer filtration system for water purification is more accessible and cheaper than an overflow one.
To reduce the number of voids when pouring a wall, we use a reinforcement rod to simulate vibration. The thickness of the wall is at least 20 cm. After the concrete hardens, we remove the support elements. Since we receive a bowl with unevenness and roughness, we begin the plastering process.
Theoretical foundations of the process
Before you begin construction, you need to understand the structural features of a concrete pool. The standard design consists of the following parts:
- bowl;
- waterproofing layer;
- water supply and outlet system;
- filters;
- external finishing;
- decorative elements.
The bowl is the concrete base of the pool. The thickness directly depends on the dimensions of the future structure, but should not be less than 10 cm. There is a general formula for calculation - (3.1415926*R2*Depth)*2/10 = cm. The thickness of the walls of the bowl must withstand water pressure on one side, pressure dense soil - on the other.
Waterproofing protects concrete in swimming pools from constant contact with water. In principle, concrete is not susceptible to high humidity, but with prolonged exposure the material loses its dense structure, falls apart and is subject to erosion.
Monolithic concrete pools are filled in two ways - using a hose or installing a water supply system. The first method is a budget option, but it takes too long and there is no way to control water quality. Speaking about special systems, it is worth taking into account the presence of filters that improve the properties of the water used.
Exterior finishing - laying tiles, grouting joints - is an important stage of construction. You can make another coating, but in practice it has been proven that tiles are the most suitable option. Any type of tile can be used for wall cladding; non-slip tiles are preferably chosen for flooring.
The decorating stage is the final stage of pool construction, which includes the manufacture of stairs, handrails and other details to aesthetically improve the appearance of the pool.
Having decided on the type of structure, it is necessary to draw up detailed drawings, each point of the process is carefully planned. It is better to make several sketches and choose the best option that will match the landscape and size of the dacha.
Plastering
To ensure reliable adhesion of the plaster to the concrete, before plastering the walls we prepare them:
- Manually make the surface of the bowl more rough.
- Using dowels, we attach the mesh to the pool bowl.
- Before fixing, we treat the mesh with a special anti-corrosion agent.
After fixing the mesh, apply moisture-resistant plaster to it, level the pool bowl as much as possible and leave it to dry completely. After drying, we install the embedded parts of the pool.
Waterproofing
Waterproofing a swimming pool is an important stage that should protect the structure from moisture as much as possible. Liquid products based on latex and silicone will be effective and reliable. We apply them to the plastered surface with a regular brush or roller, filling all the pores and cracks as much as possible, applying in two layers.
After a strong film has formed, we check the pool for leaks. Fill it with water, note the liquid level and leave to sit for 10-15 days.
Thermal insulation
Thermal insulation is used to better retain heat and save energy when heating. It is produced by a spraying process and often hired specialists are called in. The modern market provides kits for self-insulation by spraying polyurethane foam. However, such disposable kits are expensive and not available to everyone.
Thermal insulation of the pool can be done using polystyrene foam sheets. They are laid in a double layer with a total thickness of 5-8 cm so as to cover the seams of the first layer. At the end, water-repellent mastic is applied.
Installation of water supply and drainage systems
There are two systems - permanent and cyclical. Permanent involves constant circulation of water; despite its high cost, it can significantly reduce water consumption.
We suggest you read: How to strengthen a screed that is crumbling, and how to repair cracks? The floor screed has burst or buckled
Installation of a permanent system consists of the following steps:
- Installation of the storage tank is below the water level in the pool.
- Equipping the tank with additional devices - filters, ionizers, controllers, installing a pump.
- Ensuring a constant flow of water - connecting the pump to a constant source.
- Installation of an overflow system - it is necessary to maintain a slope of up to 5 degrees.
- Installation of a drain system to regulate the water level in the pool - such a system is controlled automatically or manually.
The cyclic system involves periodically adding water to the pool as needed. Water purification is carried out using chemicals. This system is much cheaper than a permanent one, but the cost of chemically cleaning a large pool after 5 years exceeds the cost of a permanent system.
backfilling
Backfilling is carried out manually and evenly so that the bowl does not move or tilt. We install insulation sheets at a distance of 25 cm from the outer edge of the pool. We fill the space between it and the bowl with a mixture of sand and cement (for 1 bucket of cement we use 3 buckets of sand). We slightly moisten the cement-sand mixture with water. We fill the distance between the insulation and the foundation pit with sand, this will improve the tightness and density of the backfill. Backfilling is carried out in several stages over 3-5 days for better sand shrinkage.
Decoration
Decoration is the final touch in the construction of a swimming pool.
The pool will take on its final appearance after finishing touches. First, the stairs are installed. Ready-made metal structures are popular, which can be purchased in a store and installed without much effort. They do not rust and do not require additional maintenance.
The space that borders the concrete pool is turned into a platform with sun loungers, and a sun canopy can be made. You can also add several modern gadgets - fountains, hydromassage, whirlpools. But it is better to plan such moments in advance; most of them cannot be installed without dismantling the bowl. After completion of construction, you will receive a real decoration for your dacha.
Tags: pool, concrete, wall, thickness
« Previous entry
Conclusion
Construction of concrete pools is not an easy and painstaking task. Each stage of construction does not like to be rushed and requires high responsibility. For the longevity of the pool, it is important to buy high-quality materials and think through all the little details and nuances in advance. Using the described pool construction technology, we obtain a high-quality and durable concrete pool. If a lot of things are unclear and difficult for you, then we recommend creating a tender on our website, where many craftsmen will compete for your order.
What to make from aerated block for the garden
Any construction project guarantees the presence of remaining waste; even with accurate calculation of the material, waste accumulation is guaranteed. Trimming, culling, fighting - all this may become necessary and will be useful for the subsequent arrangement of the site. What exactly will be built: an original barbecue made of aerated concrete or a greenhouse needed on the farm depends on the amount of material and your imagination. You can see the possible options in the table.
| Construction object | Minimum number of blocks, pcs. |
| Bath | 200 |
| Garage | 200 |
| Greenhouse | 75 |
| Alcove | 50 |
| Pool | 100 |
| Chicken coop or other outbuilding | 100 |
| Sculpture | 1 |
| Brazier | 10 |
| Inspection hole | 25 |
| Toilet | 40 |
| Flowerbed | 1 |
| Porch | 10 |
| garden furniture | 2 |
| Decorative elements | 1 |
| Shelves for storing preserved food in the cellar/basement | 2 |
Expert opinion Vitaly Kudryashov builder, aspiring author
Ask a Question
Note! We remind you that the quantity of aerated block is indicated as a minimum value. The exact value will be determined based on the size of the object.
Alternative option
If you don’t have the funds and space on your property for a large pool, you can make a cute bathhouse near the bathhouse or a decorative pond from concrete rings with your own hands. And for this you will need one standard reinforced concrete ring and a lifting mechanism capable of lowering it into the pit.
Everything else is based on the technology of constructing a concrete pool. True, it will not have a filtration system, but with such a volume of water you can get by with chemicals. But such a tiny pool is easy to operate and repair and regularly solves its functional problems.
Composite pool or concrete?
Composite pools are based on a special coke-polyester bowl.
Nowadays, composite materials are widely used - modern substitutes for concrete, its artificial analogues. The peculiarity of such materials is that they combine the advantages of several materials, neutralizing the disadvantages.
The first composite material to be used is reinforced concrete. The reinforcement makes the structure more durable, and the concrete protects the metal components from corrosion. Reinforcement techniques are used to produce durable polymers. Such composite materials are stronger than reinforced concrete, but they do not retain their original dimensions - they sag under external influences.
Another disadvantage of composite materials is the difficulty in eliminating scratches, the appearance of which is guaranteed during operation. For repairs, it is necessary to dismantle the entire bowl. In addition, composite materials are short-lived, they lose their initial properties under the influence of ultraviolet radiation and chemicals - fungal microorganisms develop in the cracks formed.