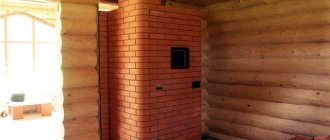
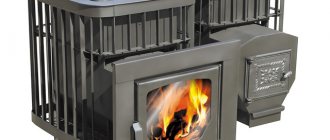
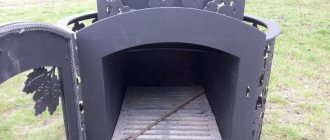
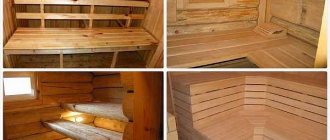
Which furnace device to choose, because there are several types of designs and they are all good in their own way. Let's look together at the peculiarities of the operation of different designs, and for homemade ones, I will tell you in detail, with order and materials, how to build a convenient and inexpensive stove in the house.
There are many ovens, and each model is designed differently.
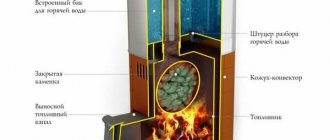
How wood stoves work
The operating principle of these heating devices is based on the classic stove heating, but is complemented by a more rational and efficient mechanism for converting fuel into energy. The installation of a wood-burning stove for residential buildings and baths allows you to achieve maximum energy efficiency at low fuel costs.
Long-burning stoves are made, as a rule, from cast iron or thick sheets of steel, which retain heat well inside the stove and the house without releasing it into the chimney. Less often they are made on the basis of bricks. The choice of unit must be planned already when developing a project for a house, bathhouse, workshop, warehouse or other room that will need to be heated. This will allow you to use the capabilities of heating devices most efficiently.
Construction and arrangement of wood-burning stoves
- cylindrical body for burning fuel;
- chimney with a diameter of 100 mm or more;
- a piston for supplying air to the combustion chamber;
- a valve in the upper part to regulate the flow of incoming air;
- cover with a hole for the piston pipe.
The design of long-burning wood stoves has its own characteristics. The mechanism of their action is based on gas generation or, in simpler terms, smoldering, achieved through a constant controlled air flow. The heat generated by the stove is evenly and gently distributed throughout the room due to the built-in heater. The outer walls of the heating device only reach a safely permissible temperature level.
Preparatory stage
Any work requires preparation of a place, material, tools, and the stove also requires the spiritual investment of the master.
Any wood-burning stove is made of two types of red brick:
- ceramic - performs an enclosing function, builds an external frame;
- heat-resistant (fireproof) - laid out in the center of the stove, where the temperature is high.
On average, the cost of refractory bricks is 4,200 rubles per 100 pieces.
In addition to the brick, you need to prepare:
- A clay compound used to join bricks together. The cement composition is inappropriate.
- Cast iron doors for the firebox, ash pan, and compartments for cleaning channels.
- Cast iron plate with holes (cooking plate).
- Valves that will shut off the wells when the stove is not in use or is already heated.
- Grate - firewood is laid out on it. Oxygen enters through the holes from below, supporting combustion in the firebox.
Having prepared the material, build a reliable foundation for the stove. The finished structure has an impressive weight. A simple floor will not support the structure. A pit is being dug for the foundation of the stove in compliance with waterproofing standards.
After preparing the foundation for the brick structure, let it dry.
Installation
You can install a wood-burning stove in a bathhouse and even a house yourself, or you can order a service from a company that professionally designs bathhouses, houses and technical premises.
Main working areas:
- fuel loading area;
- ash collection;
- area of combustion of pyrolysis gas.
Installing wood-burning stoves in bathhouses is very popular. They are able to heat the room very quickly and maintain the required temperature for a long time. Even in very cold times, this only takes about half an hour.
At the top of the stove, where the wood smolders, there is an air distributor that regulates the intensity of the flow of fuel to maintain optimal operating conditions. The firewood smolders from above and is also lit from above. This makes it possible to achieve the release of pyrolysis gases, which are also capable of burning and releasing heat. This operating mechanism allows you to obtain additional heat from one volume of fuel.
Pies from the Russian oven
The traditional Russian oven does not have a stove; delicious pies, borscht and other dishes are cooked in a huge oven. Frying pans and stoves came to us from the East, later from the West; Russian people, from tsars to serfs, ate healthy, dietary food before the appearance of stoves. Today, in addition to the classic design, many improved multifunctional versions of the Russian stove have been invented. In addition to the traditional universal firebox-bread maker and a comfortable bed, they can be integrated with a stove, fireplace, water heating device (tank or coil), cabinet for utensils and much more.
A Russian stove in one of the prestigious restaurants near Moscow is used mainly for preparing delicious dishes of national cuisine.
Chimney
An important part of the stove design is the chimney and connecting pipes. Installation of wood-burning stoves both in houses and in bathhouses requires special care and precision. The process of installing a chimney is especially complicated. Therefore, the features of installing a stove should be thought through at the stage of building houses.
In general, the design of the stove is simple, due to which it operates for the longest possible service life, is easy to repair and is easy to maintain.
Furnace device diagram
Having chosen one of the ordering diagrams as the basis for assembling a wood-burning stove made of brick, you need to print it out and study it in detail.
Stove makers recommend choosing a Swedish model for your home or cottage. You can build a Russian stove for your home. The choice is up to the owner.
Photos are enlarged, click!
Let's look at the rules for installing a heating and cooking model that is suitable for both home and garden. A practical guide for the home craftsman will be supported by photos.
- Laying out any stove begins with the bottom row, which must be perfectly level. Here you need to use a level, a construction angle. The work starts from the outer contour and moves to the center. The bricks are connected using clay mortar.
- The second row has a functional meaning. It is necessary to fill the vent hole with the door. Having determined the location of the door on the desired side, we lay out the bricks in a checkerboard pattern so that the seams do not line up in a single vertical line. Alternate long and short parts.
- Raise the third row to the upper edge of the blower door, blocking it from above.
- The fourth row has its own peculiarity - the brick is placed on the left and another door is installed in the blower area. This compartment will be responsible for the accumulation and cleaning of ash obtained from the combustion of firewood. The hole will also be located in the fifth row. Therefore, the principle of work is the same. Here it is necessary to provide for chipping the brick so that sharp corners do not interfere with cleaning the compartment.
- From the sixth row, refractory bricks are used. Laying out the firebox begins, where the temperature is the highest. Order drawings usually have a special shading for the location of this material. Therefore, there should not be any difficulties. Using the diagram, you can calculate in advance the amount of all materials. A grate is placed at the base of the row on which the firewood will be placed. It is necessary to trim off rough corners so that the grille lies flat.
- From the seventh row, in addition to the combustion compartment, the channel is rebuilt; it is divided into three wells. Following the scheme, this nuance will not go unnoticed.
- A firebox door is mounted on the horizontal of the 6th row, which is gradually covered with brick from above.
- We gradually approach the cooking compartment of the brick stove, observing the sequence of ordering schemes.
- After completing the masonry of the cooking portal, we move on to the nuances of the heating hearth. How warm the house will be in cold weather depends on the correctness of its construction.
It’s also worth taking the time to study the chimney system, which has its own characteristics in every home.
Conclusion:
It’s also worth taking the time to study the chimney system, which has its own characteristics in every home. Some owners choose the method of embedding a stove into a ready-made pipe, which has separate wells for removing combustion products and filtering air. Sometimes you have to build a separate pipe for a wood-burning stove, which is located away from the exhaust duct. Then the specifics of the work on the construction of the stove at the end of installation will have a different sequence. Create comfort and warmth in your home yourself, so that you can enjoy it later. Be sure to put your heart and soul into the process of building a wood-burning fireplace. The stove will give its warmth to each family member both in the winter cold and in the autumn slush. If you add ingenuity and design ideas for the design of the façade or around the entire perimeter of the fireplace, the stove can become a unique object in the interior of a country house or dacha.
How do wood stoves work?
In a classic stove, wood burns in 1-3 hours. Long-burning heating devices operate on average 6-10 hours. They do not require frequent addition of firewood, retain heat better and do not take oxygen from the air.
The construction of wood-burning stoves for baths is organized on the principle of purposefully blocking the flow of air into the combustion area. Under such conditions, wood under the influence of high temperatures breaks down into a volatile part (pyrolysis gas) and a solid component (coal or coke).
Firewood in the firebox burns much slower and at a higher temperature compared to a conventional stove. This is achieved by loading a large volume of firewood into the firebox with limited air access. Firewood does not burn immediately, but smolders, producing combustible fuel gas, which also effectively participates in heating the room.
It is better to install a chimney for a wood-burning stove installed in a bathhouse or in a house with the help of a specialist, because this is a very labor-intensive and time-consuming process. When installing a chimney, complete tightness of all joints must be observed, and all parts of the system must be properly processed to ensure safe operation of the equipment.
Structurally, the firebox of a long-burning furnace is more spacious and is divided into two parts. In one compartment, firewood smolders, heating the rooms; in the other, dry fuel simply gradually heats up, releasing gas. The combustion process of gases is regulated. Conveniently, you can replenish the firebox at any time while the stove is operating.
Some models are equipped with a water heat exchanger and have an air convection system. In the process of designing a heating system based on a wood-burning sauna, it is necessary to take into account the minimum functionality of the device, which will allow it to cope with specific tasks.
Operating rules
A fireplace, a small sauna stove or a wood-burning model with a steam generator should not create fire situations. The operation of wood heaters involves:
- Installation next to the combustion chamber of a metal sheet 2 mm thick. The length of the protective product is 30 cm, the extension beyond the brick structure is 15 cm.
- Installation of smoke exhaust systems for metal structures made of acid-resistant materials.
- Use for burning dry firewood stored indoors.
- Dense fuel laying - thick lumber is on top.
- Use thin dry twigs for ignition.
- Laying firewood with a gap of 1/5 of the height of the firebox to the roof.
The second batch of fuel can be added after at least 1 hour, for long-term combustion models - after 3-4 hours.
Peculiarities
Wood stoves provide cyclical heating of indoor air, which has a positive effect on health. The cyclical change in temperature has a hardening effect and, according to doctors, such heating is the most favorable for the home.
The main principle of operation of these heating devices is the ability to operate in two modes: rapid heating of the room and long-term burning. The efficiency of furnace operation is achieved through pyrolysis - smoldering of fuel due to the work of gas.
Long-burning stoves on the Russian market
A large assortment of stoves with long-burning options from the world's leading manufacturers is presented in all showrooms. In the showrooms, customers will find products of various sizes, designs, arrangement methods, and power. Models are presented with a hydraulic circuit and pipes for distributing hot air to adjacent rooms. We also sell individual components, heat-storing stones and materials, and services for creating individual projects for heating houses of any size.
Classification
Long-burning furnaces, depending on the design features, are classified according to the following criteria:
- form,
- size,
- appointment,
- power,
- fuel processing method,
- heat transfer method
- Wall thickness.
The shape of the units is round, rectangular, triangular and angular; by purpose - compact, with economical fuel consumption, increased fuel efficiency, fireplace stoves. There are two types of fuel processing - direct and injection.
Based on the duration of smoldering of the fuel material, furnaces are divided into units with a minimum heating period (up to 4 hours), average (up to 8 hours) and maximum (more than 10 hours). For installation in a bathhouse, home or workshop, the appropriate model of wood-burning stove is selected.
The most popular models are Buleryan, Professor Butakov, Teplodar, etc. Fireplace stoves are in great demand, which, in addition to their heating function, are distinguished by their special external aesthetics. They can be used in residential areas as decorative elements. The fireproof glass door safely covers the flames while allowing you to observe them at the same time.
Chimney installation
Wood-burning stoves are often used in saunas. The simplicity of the design makes it possible to assemble and install such a stove with your own hands. But it is very important to pay due attention to the installation of the chimney. Only with proper organization of the chimney can you be sure of fire safety.
Problems with chimneys of long-burning stoves arise due to their high efficiency. All the heat is transferred to the room, rather than going out into the chimney. In this case, the burnt gases condense on the inner walls of the pipe and flow down. This condensate, at the slightest cracks at the joints of pipes, can escape to their outer side, which leads to the appearance of an unpleasant odor and spoils the appearance of the device. To avoid such problems, at the design stage of houses and baths, all the features of the premises and the internal architecture of the space are taken into account to create the optimal shape and design of the chimney.
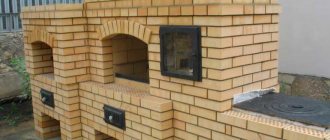
Main types of brick kilns
Based on the functions assigned to a brick stove for a home, which is built with your own hands, all structures can be divided into certain types:
- heating stove device, which is primarily intended for heating rooms in the house;
- cooking stove structure used for preparing culinary masterpieces;
- a combined heating and cooking device that combines previous analogues.
At the same time, modern brick stoves are subject to fire safety requirements, high-quality heating of the room and creation of coziness and comfort in a private home.
Naturally, building a brick stove yourself is not as easy as it might seem at first glance. First of all, this is due to the complexity of the orders. Although, if you set a goal, even a beginner in construction will be able to build a simple cooking and heating structure with his own hands.
Principles of chimney installation
- “According to smoke” - the upper links of the pipes are put on the lower ones so that the smoke does not experience resistance from the joints as it moves. Such installation is acceptable for primitive furnaces and only if there is a special sump to collect condensate.
- “By condensate” is the optimal type of installation for long-burning furnaces. In this case, the upper section of the pipe is inserted into the lower one to allow condensate to flow down. This eliminates the possibility of condensation passing out. All liquid enters a special sump and burns in the oven.
Foundation construction
A heating and cooking stove, like any other stove equipment in principle, is a rather large and weighty device.
It is for this reason that the first stage before laying bricks, in accordance with the project, is the construction of a high-quality and durable foundation. The service life of the brick kiln will depend only on the reliability of the base. The dimensions of the base should be 50 mm wider than the stove itself, and the stove foundation should not be allowed to come into contact with the load-bearing foundation of the house. When choosing a suitable location for the foundation, it is important to consider in which part of the building the exhaust gas exhaust pipe is located. If this is neglected, then during the assembly process the chimney may get into the ceiling , which will not allow the pipe to be brought outside.
In a house, the assembly of brick stove equipment should be carried out at the stage of house construction, while there are no floors. At the same time, in order for the foundation to be reliable, a pile foundation structure is used , for which certain actions must be taken:
- Soil is selected to a depth of 250 mm at the base of the furnace.
- Using a hand drill, holes are made one meter deep and 20 cm in diameter.
- Crushed stone is poured into the resulting recesses at the bottom, which is compacted well.
- Sheets of roofing material rolled into a tube are inserted into the resulting cylinders.
- Finally, concrete is poured.
After the piles have completely hardened, formwork is installed on them. According to the appropriate dimensions, a concrete base is formed in the form of a monolithic slab, on which the brickwork will be laid.
What to look for when purchasing
When purchasing a heating device, first of all, you need to pay attention to its power. This is a key characteristic that affects performance. To be sure, you can order a calculation of the power of a wood-burning stove for a bathhouse from specialists on the eve of purchase.
In addition, it is equally important to choose the right oven size. If the size of the stove is too large for the room, then it will overheat and fuel will be wasted. The choice of stoves is very large, so it is possible to select the optimal equipment for absolutely any type and size of premises.
Before choosing a stove, you need to find out the area of the potentially heated room and decide on the required set of technical characteristics. Using different models of stoves, it is possible to heat rooms with an area of 80-250 m2.
This type of units, in addition, has two varieties. The first is used exclusively for heating the room. The second model is more functional and, in addition to heating the air, provides the ability to cook food.
The simplest models are very affordable in cost. More complex models with advanced functionality vary in price and can be quite expensive. Therefore, you need to know which features are needed so as not to overpay for unused features.
Advantages and disadvantages
Wood stove with hob
The advantages of using wood-burning stove models include:
- versatility - suitable for cooking and heating;
- ease of adjustment of fuel combustion intensity;
- the ability to create a comfortable temperature in a large house;
- ease of installation of ready-made devices and construction of brick ones;
- minimum amount of emissions of harmful substances;
- durability of the structure;
- high efficiency - for models with long-term combustion systems it reaches 82%.
The downside of the units is the use of only one type of fuel and the difficulty of building brick modifications for beginners.
Advantages of wood stoves
- do not require the construction of a foundation,
- compact, light in weight,
- have high efficiency (up to 85%),
- economical in fuel consumption,
- allow the use of not only firewood, but also coal or pellets,
- suitable for work in all types of premises,
- Many models have a modern design and fit well with almost any interior.
- many types of long-burning stoves do not operate on liquid fuel,
- have a complex setup system,
- create condensation
- require supervision during operation.
In general, long-burning stoves are the best option for economical and high-quality heating of a country house, bathhouse and any technical premises.
We are building a furnace with a boiler
When choosing, I tried to find a compact design that could heat a house with an area of more than 100 m², plus I could cook on it.
Tools and materials
| Illustrations | Recommendations |
Tool:
| |
Materials.
| |
| |
| |
| |
| |
Solutions.
| |
|
As for the foundation, a separate reinforced concrete foundation must be laid under the brick structure to a depth of about 700 mm, and it should not come into contact with the foundation of the house, the minimum distance is 100 mm.
The monolith is poured 100–150 mm wider than the furnace itself. Before laying the brick, waterproofing is laid (roofing material 2 layers).
The foundation for heavy structures must be exclusively reinforced concrete.
Let's start laying
| Illustrations | Recommendations |
Characteristics.
| |
| Level 1 . It is made continuous and laid on the waterproofing of the foundation. | |
| 2 – 3 levels . At these levels the base for the blower is formed and the blower door is installed. They are laid out the same way. | |
| Level 4 . We begin laying the lining of the combustion chamber. A grate will be installed in this row, so you need to cut grooves in the fireclay bricks for it. The groove is made 5 mm wider than the grille itself. | |
| Boiler installation. The boiler is made in the shape of the letter “P” and covers most of the firebox. I cooked a cauldron from 5 mm thick metal. Basalt cardboard or koalin wool is placed between the boiler and the brickwork, a gap of 5 mm. Boiler dimensions:
| |
The supply pipe is on top, the return pipe is on the bottom.
The window on the rear side of the structure serves to allow flue gases to escape. This boiler model has the highest efficiency; if this is not the main thing for you, then you can install a simple register in the firebox. | |
| Levels 5–6. These levels are almost identical; 2 cleaning hatches are installed in them and a side smoke exhaust channel is formed. In the 5th row, behind the boiler, a half-brick window is left for air intake. | |
| Levels 7–8. Technologically they are the same, only in the 8th row part of the contour is laid out with refractory. At this point, flue gases will exit through a window in the boiler. We place a 50x50 mm corner above the firebox door. | |
| Level 9. We lay the vault above the fire door. Please note that the central brick is cut on both sides at an angle of 45º. We divide the side channel into 2 sectors. | |
| Level 10. Here we do not make a jumper between the firebox sector and the nearest smoke channel. Gases exit the window behind the boiler, go around the boiler from above and are directed into the nearest smoke channel. | |
Level 11.
Both under the hob and under the corner, cutouts are made with a gap of 5 mm. | |
| Level 12 . We close the nearby smoke channel with fireclay bricks. | |
| Level 13 . We continue laying. | |
| Levels 14–15 . In these levels we combine 2 side channels and insert a cleaning door. | |
| Levels 16–17 . After the 16th row, a corner and a 50x6 mm strip are laid above the embrasure of the cooking chamber, and the floor brick is laid on this scaffold. | |
| 18 row . Everything is the same here, only 2 strips of 50x6 mm are placed on top of the cooking chamber. They will become a support for the ceiling. | |
| Row 19 . We close the cooking chamber and install a valve on the side of the steam exhaust duct. | |
| Rows 20–21 . They are placed the same way. Here we insert 4 cleaning hatches and install 2 columns the size of half a brick in the center. | |
| 22 row . Solid bricks are laid on the posts. On the left is T-shaped, on the right is L-shaped. | |
| 23 – 29 rows . These rows are laid in the same way; we drive out the main and auxiliary smoke channels. | |
| Row 30 . In this row, we leave only the main smoke channel intact, all other channels are combined, and the roof of the hood is formed. In the diagram, the passages are shown with arrows. | |
| 31 row . We begin to partially block the channels of the upper cap. | |
| 32 row . We continue to cover the top cap. | |
| 33 row . We completely cover the upper hood, leaving only the chimney channel measuring 260x130 mm. | |
| Rows 34–35. The 34th row is used for dressing the 33rd row. The chimney valve should be installed on top of the 34th row and slightly recessed into the groove cut for it. There is no thirty-fifth row as such; then we remove the chimney. | |
| Metal expansion compensation. A gap must be left between the metal components of the furnace and the brickwork to compensate for the expansion of the metal. To ensure this gap, heat-resistant insulators are used. In the photo, the doors and metal frame are wrapped with asbestos cord. In addition to asbestos cord, you can use asbestos sheet, koalin wool or basalt cardboard with a thickness of 5 mm. | |
| Door fixation. There are fastening holes on the doors and cleaning hatches around the perimeter; previously, annealed steel wire was tied to these holes and embedded in the masonry. Nowadays, mounting tape is used for these purposes. In order for the tape to hold better in the masonry, it is additionally fixed with self-tapping screws, which are driven between the bricks into fresh mortar, as in the photo on the left. | |
| Masonry reinforcement . Brickwork must be reinforced. In our case, it is enough to lay the tape between the rows in problem areas (firebox, doors, hob). |
