A DIY camp sauna is one of the easiest options to implement. Having built a small sauna tent, you can take a steam bath while hunting or fishing, as well as while hiking. If desired, such a structure can be built even on a suburban site, if the traditional option is still at the design or construction stage.
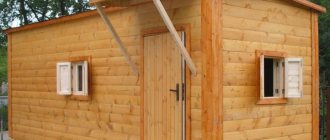
DIY camp sauna
Do-it-yourself camp sauna – photo
There are many manufacturing options. You can purchase a ready-made portable tent - entirely or in parts (stove, awning, frame).
Mobile sauna
Mobile portable bathhouse Mobiba
Mobile sauna Mobiba
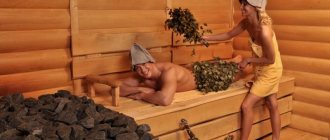
Mobile sauna inside
There is an alternative option - to make a bathhouse from a tourist tent, but exclusively of the Soviet type, that is, made of tarpaulin. This is explained by the fact that modern tents are made from fabrics that are not only not designed for high temperatures, but are also capable of releasing harmful substances when heated. As for the old canvas models, they are quite suitable for this: there are no harmful fumes and the thermal insulation is good.
Canvas tent
If we talk about creating a camp bathhouse from scratch, then this will require a frame, thermal insulation material and a stove.
Features of the design of a camp bath
| Features of the design of a camp bath | Description |
| Frame | It is better to make it from aluminum posts (for example, from a sales tent), since this material is safer than wood. In the absence of such, you can make supports from young trees, but in this case you will have to carefully ensure that the wood does not ignite. To fix the frame elements, you can use both rope and soft wire. |
| Covering material | The simplest option is thick polyethylene film, but due to its disadvantages - low thermal insulation qualities and density - it is preferable to use tarpaulin. It is important that it is a large and solid piece of material. The size of the covering material depends on how many people will be steaming at the same time, but if there are no more than four or five people, then a piece of 6x6 m will be enough. |
| Walking heater Portable metal heater | Here the choice is also quite wide: you can install a factory-made stove-heater, you can make it yourself in the form of a mesh metal box made of metal rods or thick wire, or you can simply build a well of rounded stones and line it with firewood. |
Note! A camping sauna can be made “white” (that is, the heater is built separately, and the hot stones are transferred to the tent) or “black” (the stove is installed directly in the steam room). Today we will take a look at each of the options.
Exploitation
Rules for using a camp stove for a bath:
- Before assembling the structure, you need to prepare the base. To do this, you need to remove the top layer of soil and level the substrate. You can strengthen the base with stones or thick logs located along the edges of the structure.
- You need to ask the seller about the availability of screens that can protect the walls of an improvised steam room from thermal radiation.
Place 1-2 buckets of water next to the tent to put out the fire in an emergency.
People who love to hike can continue to hike no matter where they are. To do this, you need to buy a camp stove, an awning, and assemble a homemade steam room.
Important Terms
A camp sauna can be made only under certain conditions. The resting place must meet the requirements below.
| Photo | Conditions | Description |
| The presence of a body of water is an important factor | First of all, there must be water there. | The ideal option is to choose a place on the bank of a river or other body of water. |
| Stones for the stove | There should also be stones there. | Layered cobblestones should not be used, as when heated, they can fly apart into pieces, causing serious injuries to steamers. The stones should not be too small or too large, the optimal size is 100-120 mm, the shape is somewhat elongated. If the stones are smaller, they will not be able to accumulate the required amount of heat and will cool down very quickly; Large specimens will take a very long time to heat up. Although, if you have time, you can build a kind of foundation from large stones for a future fire. If there are no boulders, then it is quite possible to use pebbles. As for the quantity, for each person who will steam, you will need 1 bucket of stones. Therefore, each participant is required to collect a bucket of boulders for themselves. |
| Frame material | Near the resting place there should be thin young trees (or better yet, dead wood), which will be used to construct the frame (if the aluminum posts were not prepared in advance). | From these trees you need to make poles with a diameter of about 30-40 mm, and you should also think about the method of attaching them in advance. |
| Firewood | A fire will require firewood, and in large quantities, because it will burn for at least 3-4 hours. | Excessively thick logs are not suitable for this, as they do not burn well. The maximum diameter of the firewood should be 100-150 mm - this way they will quickly burn out and transfer all the heat to the stones. |
Preparation of materials and choice of location
It happens that you decide to go on a hike, but are not ready to give up traditional friendly gatherings in the sauna. This is where an unusual invention comes in handy: a mobile (mobile) camp sauna. It allows you to combine your love of tourism with the desire not just to wash, but also to take a steam bath. Of course, you need to think about arranging a steam room in advance, before getting ready for a hike, because some elements of the future bath should be prepared at home. To have an idea of what the finished steam room should look like, look at the drawings.
Advice. A camping device is an excellent temporary option for summer residents who have not had time to completely build a good-quality stationary bathhouse or are just planning to build one.
In any case, to install a simple but durable and functional structure you will need:
- Basis for the frame. These can be racks made of aluminum or carbon fiber taken from home, or parts of a camping tent. Stakes made, for example, from the trunks of young trees are also suitable. If it is not possible to treat them with a fire-fighting compound, during operation of the bath it is necessary to ensure that the wooden elements do not catch fire.
Polyethylene can be used as an awning for a camp bath - Tent. Its function can be served well by tent covering material or an old banner. Another option is dense polyethylene. From it you need to prepare a square pattern, the optimal size of which is 6x6 m. In such a bathhouse, a maximum of 6 people can take a steam bath at the same time.
- Material for fastening: electrical tape, tape or rope.
- Axe.
- Shovel.
Attention!
For a mobile bathhouse, you can only use material from old Soviet-made tents, since modern tents emit harmful substances when heated. When choosing a place, take into account the conditions around you so that you don’t have to spend a long time looking for the main natural components of a bath:
- Firewood. Their diameter for use in a camping steam room should be no more than 0.15 m. In order not to look for firewood in the midst of bathing procedures, prepare more of them.
- Stones. For one time you will need at least a bucket of round boulders. Do not take layered, heterogeneous, chipped, or flat specimens. They may crack when heated. In this case, flying pieces cause injury. Granite is also not the best option, since at excessively high temperatures it turns into sand.
- Water. Without it, the whole idea loses its meaning, so it is best to arrange a camp sauna on the shore of a lake or river. And taking a dip in a cool pond is what you need after a steam room.
Making a camp sauna “white-style”
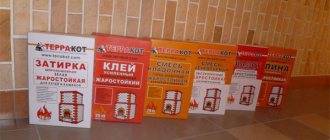
First, we will consider the simplest option, for which only adhesive tape and film (and possibly clothespins) will be required from special materials. We are talking here about a sauna-tent “in white”, i.e. the stove will be located separately from the steam room.
Making a camp sauna
We start with the construction of a camp bathhouse.
Stage one. Frame making
There are several ways to make a frame, let's look at them.
Method No. 1 (suitable only for white baths)
To work you will need:
- axe;
- film, 10-15 m; you can use the thinnest film - it will cost less and weigh less; experience shows that the film is almost never used more than once;
- wide tape (1 roll);
- stationery clothespins (20 pieces, they can be replaced with the same tape).
After preparing everything necessary, we begin to create the frame.
Step 1. First, we prepare 8 poles with a length of at least 100 cm (more is possible, but warming up the steam room will take longer). We construct a parallelepiped or a cube from poles, depending on the number of people who will be steaming. If there are a lot of people, then it is preferable to steam in groups of four people - this is the best option.
Frame assembly
We connect the poles with tape. You will need a lot of tape - it is intended not only for fastening, but also to protect the film from the sharp ends of the frame.
The main frame of a wigwam for a bath
Step 2. Having finished with the frame, we build a place on the side for stones, using 3 more poles, each 300 mm or 500 mm long.
The result should be something similar to the design shown in the image below. The base of the heater is lined with stones.
It's worth noting that a lot of things here are optional. Thus, the design of the frame can be significantly simplified and made in the form of a wigwam. The frame in this case will consist of 3 poles connected at an angle.
Arrangement of a place for a heater
Step 3. Next, the frame needs to be covered with film. The width of a standard film sleeve is 1.5 m. We cut it and get 10 m or 15 m of film 3 m wide. We cover the finished frame with film, we do this extremely carefully so that sharp ends or knots do not pierce it.
Note! The dimensions of the frame can be made such that the width of the covering material (3 m) is enough not only for the walls, but also for the roof. In this case, the tightening procedure will be significantly simplified; there will be no need to cut the film and make additional seams.
There will be no problems at all with tightening the wigwam.
Stretch the film Tree trunks were used as stands. The film is fixed between them
Option for a camp bath in the form of a hut
Bathhouse from the inside
Step 4. Attach the film to the frame using clothespins or regular tape.
Film fastening
Step 5. On the entrance side, leave enough film for the “door”. The entrance must be securely closed so that steam from the tent does not escape outside. This can be done in one of two ways:
- fasten the film with clothespins from the inside;
- leave a person at the entrance who will hold the “door”.
Almost finished bath
Step 6. Using heavy stones, press the film to the ground along the perimeter.
The photo shows stones laid around the perimeter
Step 7. To cover the floor, you can use spruce branches, which not only smell nice, but are also good for health. You can sit directly on the spruce branches, although there are other options: lay out a small tourist rug, bring folding chairs or hemp.
Film prices
film roll
Method No. 2 (can be used for a black bath)
We use available materials - for example, four willow branches 1.4-1.5 m long. Using tape, we tie two branches in length and install them crosswise. Of course, you can try to find a couple of long branches to cross, but it will be quite difficult to find ones that are the right size. You can also build a square structure, as described above, but this will require more time and effort.
Frame made of willow branches
Similar design
Note! It is recommended to try the film on the finished frame in advance, so as not to cut or glue it later when the stones begin to cool.
If the bathhouse is large, and the standard 3 m width is not enough for this, you can connect two pieces together using office clothespins.
Attaching the film to the frame
Film try-on
Method No. 3 (can be used for a black bath)
A prefabricated frame can be welded from profile pipes. It only takes a few minutes to assemble it at the resting place. The image below shows that metal tubes 60-70 cm long were used to make such a frame (a total of 16 pieces are required).
Table. Elements for connecting the frame
| Elements for connecting the frame | Quantity |
| Metal tubes 60-70 cm long | 16 pieces |
| Special tees | 4 pieces |
| Direct connections | 8 pieces |
For this, larger diameter pipes were used.
In this case, the thermal insulation material is an awning, pre-sewn in accordance with the dimensions of the structure.
Collapsible pipe frame
Awning tailored to the dimensions of the frame
Used camping sauna made of polyethylene and tent frame
Method No. 4 (can be used for a black bath)
A simpler way is as follows: you need to purchase a regular two-person tent, cut off the tarpaulin, and use the tent poles as a frame.
Often tents are set up entirely, but for the reasons described at the beginning of the article (unpleasant odor, possible release of toxic substances), it is better to use film.
Assembling the bath frame
Installation of frame arches
Having finished with the frame, we proceed to making the stove.
Stage two. Stove
To create a stove you will need:
- river stones of the sizes indicated above, approximately 25 pieces (can be taken not from the river, but from the shore);
- a sapper shovel or a slingshot made of branches (for transferring cobblestones to the steam room);
- firewood.
Note! We remind you once again that you should not use brittle stones (such as sandstone), as they can crack at high temperatures.
Step 1. From the collected stones we build a well about 10 m from the bathhouse. It is important that the well is stable, so it is better to use flat stones. It may not work out the first time, so you should be patient.
Stacked stones for a camp sauna
Future heater
Step 2. After this, we cover the stones with firewood so as to completely hide them. We set fire to the wood.
Lighted fire
By the way, the film on the frame can be additionally covered with the same spruce branches or branches (as shown in the images below) so that the steam room retains heat longer.
Camping sauna covered with spruce branches
Step 3. While the stones are heating, prepare a mining shovel or slingshot. It will take approximately 1 hour for the stones to heat up to the required temperature. During this entire time, the wood should burn intensely. After heating, we transfer the stones to the bathhouse.
Carrying stones to the bathhouse
Using a Mining Shovel to Carry Stones
Note! It is advisable to carry the stones together to prevent them from cooling down. You should also place several plastic bottles with warm water inside the tent in advance, which will be poured over the hot cobblestones.
It’s convenient for two people to take a steam bath in a camp sauna
Using a camp sauna
Prices for a camp stove
camp stove
Video – Portable sauna
Ready-made designs
No matter how surprising it may sound, a bathhouse can be not only fundamental and equipped according to all the rules, but also a camp one.
You can not only quickly assemble it at your summer cottage, but also take it with you on an outdoor vacation. It is this kind of camping sauna with a stove that will be discussed further in the material. Probably, many lovers of outdoor activities will like this design of a camp bathhouse, because you can relax in it after fishing, hunting or mountaineering, while feeling a certain unity with the surrounding nature.
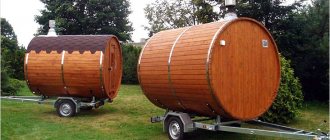
The modern market for tourist equipment offers a huge selection of ready-to-use mobile bath structures.
The distinctive characteristics of such devices are a frame with an awning and a heater stove.
High-quality models are made of durable and wear-resistant material, retain heat excellently, and are resistant to high temperatures. They are light in weight and compact in size, so a regular travel backpack is suitable for carrying such a design.
In ready-made devices, you can install folding or portable heaters.
The most popular among industrial models in terms of quality, cost and functional characteristics are two baths - Nova Tour and Mobiba.
The tourist bathhouse from Nova Tour is distinguished by its lightweight design, low weight and ease of assembly.
To make the tent, a special heat-resistant material is used - Poly Taffeta - a unique combination of polyester and nylon threads. This material is resistant to ultraviolet radiation and deformation as a result of getting wet.
Additionally, the tents are equipped with small windows that provide sufficient lighting and ventilation at any time of the day. The entrance to the tent is sealed thanks to a reliable two-way zipper.
The standard package of the tent does not include a frame, so it will need to be equipped using available materials or purchased additionally.
This type of mobile design is quite popular among young people. A wide range of models allows you to choose tents for small and large companies.
The tent can be made in one or two layers. To make the awning, we use modern heavy-duty fabric based on nylon thread and polyester - Oxford. It can be plain or colored and is highly waterproof.
The main element of this type of camp baths is an aluminum frame made of a unique aviation alloy. It has high strength with a fairly low weight.
Mobiba baths provide for the use of heaters, for which there is an outlet for the chimney in the upper part of the body. Mobiba recommends using special models of wood-burning stoves equipped with a built-in spark catcher.
When choosing a ready-made mobile bathhouse, experts recommend paying attention not only to the dimensions, but also to the speed of assembly of the structure.
Structurally, a standard sauna for hiking consists of a tent stretched over a frame and a heater for internal heating. How to make a camp sauna with your own hands if you don’t have the free funds to purchase a ready-made structure? We offer the simplest and most affordable options for homemade baths.
Externally, a camp sauna with a stove is similar to a regular tourist tent, which does not have a bottom. Structurally, it consists of the following elements:
- Aluminum pipe for frame with a diameter of up to 12 mm.
- Metal eyelets.
- Wear-resistant and moisture-resistant awning with a protective skirt.
- Fiberglass sleeve for the chimney outlet.
- Stove-heater and chimney.
Step-by-step assembly of the structure:
- First, the frame is assembled. Aluminum tubes are bent in arcs to fit the size of the awning. The ends of the tubes are inserted into the eyelets, defining the 4 corners of the structure.
- The awning stretches over the frame around the entire perimeter. First, the ceiling (top of the tent) is carefully tied to the junction of the frame arcs, then the fabric is fixed along the entire length of the arcs using hooks and a zipper. Finally, the awning is firmly fixed to the installed pegs. A skirt is laid out along the perimeter of the structure and pressed to the ground. It provides reliable protection against the penetration of cold air.
- A heater is mounted in the finished tent at a distance of up to 11 cm from the edge of the awning. To accumulate heat, stones are placed on top of the heater.
This sauna design allows you to accommodate up to 6 people at a time.
Making a sauna tent “the black way”
The main difference between this option is that the heated stones will not need to be transferred from the fire to the steam room. In this case, a large frame will be placed directly on top of the hot cobblestones after removing the coals. The manufacturing procedure begins with the construction of the furnace.
Making a sauna tent “the black way”
Stage one. Bake
There are two possible options here, let’s take a look at each of them.
Option #1
We put a pile of stones and make a hole in it for loading firewood (in the image the hole is on the back side - where the smoke comes from). You will need much more stones than for a white bath, but neither the shape nor the size play a special role.
It is worth noting that this option is quite difficult to implement, so you should be prepared for the fact that the heap will constantly collapse.
Stones for the stove
Option No. 2
Using a welding machine, we make in advance a small frame (40-50 cm high, similar width) from reinforcement rods with a diameter of 5 mm. Once in place, we cover the finished frame with stones. The main advantage of this design is that the stones will rest on the frame, so they will not fall apart. However, they will take longer to heat up than in the option described above.
The principle of laying stones on a frame
Small welded structure for a camp sauna
Note! In addition to its direct purpose, such a frame can serve as a kitchen stove, and if you put a sheet of plywood on top, it can also serve as a table.
Camping sauna stove
A camping sauna stove that can easily be converted into a teapot stand or table
Option #3
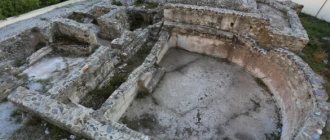
Here, on a pre-selected site, it is necessary to lay the foundation of the heater with sides of 100 cm, having previously dug a small hole under it, 50-60 cm deep. We make a base of flat stones, on top of it we lay rectangular stones measuring 0.4 x 0.5 m in increments of 25 -30 cm.
Fire pit and heater
Kamenka
Warming up the heater
We install stone slabs on top of the boulders so that there is a small through hole in the center of the structure, through which the fire will reach the top of the heater. At the end, we lay another plate (it could even be a mesh or a sheet of thick metal), which will close the central hole.
Having completed the construction of the stove, we load the wood and set it on fire. The stones, as noted above, will heat up for quite a long time. We maintain an intense fire all this time, periodically adding firewood. While the cobblestones are heating up, we begin building the frame.
Stage two. Frame
We make the frame using one of the possible methods (in the images below there is a structure of 4 poles). When the stones heat up to the required temperature, remove the coals and cover the frame with film. We press down the film along the perimeter with large cobblestones, and if possible, cover the floor with spruce branches. That's it, you can proceed directly to the bath procedures!
The main stages of constructing a bath using improvised means
Experienced travelers quickly erect a sauna tent with a stove. A beginner should follow the steps step by step, following the recommendations. After several training sessions, installing a camp sauna will take no more than an hour.
Selection of location
A suitable site for a camp bath is selected taking into account important conditions. Any source of water, firewood and stones is required. Carrying cobblestones from afar is difficult. The same goes for water. You can bring a couple of buckets, but the pleasure from bathing will be limited. It’s good to stop on the shore of a pond, where you can take a dip after the steam room.
When choosing a site, it is worth examining the soil. The ground must be solid. In soft and loose soil it is impossible to reliably strengthen the tent poles.
Construction of the stove
The most important step is to install a stove for a camp bath using cobblestones found in the vicinity. The simplest heater is built according to the following rules even before covering the tent with a tarpaulin:
- Under the stove, cut off the upper part of the soil with a sharp spatula. The base is laid out in the recess with cobblestones. If there is dry grass nearby, remove it with a spatula to prevent fire.
- Using flattened cobblestones with a size of 200 mm or more, lay out the fireplace. Its height and diameter are approximately 700 mm. A small opening is left for storing firewood in the fireplace. The hearth is covered from above with a large flat stone. You'll be lucky to find a slab-shaped savage. It is convenient to place a bucket of water on a flat stone.
- A fire is lit in the stove of the camp sauna tent 4 hours before swimming. The readiness of the stones will be indicated by their red or white color, which depends on their breed.
The first watering on the stove is done with caution. If the stones do not crack and no fragments fly off from them, the cobblestones are selected correctly.
Frame structure
A collapsible tent has a frame made of tubes. When using a homemade structure, the felled poles are cleared of knots. The most convenient and safest is a two-compartment camping sauna. The frame of the tent is made in such a way that the steam room is slightly removed from the stove.
First, 4 racks are dug in the corners. From above they are connected along the perimeter and crosswise by crossbars. The poles form a strong outline of the tent and prevent the tarpaulin from sagging on the ceiling. Two long poles are placed at an angle to one side of any wall. They are attached to the tent frame from above, and pressed into the ground from below. This creates a second compartment for the stove.
Canopy for camping steam room
For a tent, it is advisable to use a single piece of film or tarpaulin. It should be larger in size than the frame so that the bottom edges can be strengthened well. The canopy is pressed to the ground with cobblestones or earth. The best option is to dig a trench around the frame, lay a canopy, and cover it with soil.
The warm floor inside the tent is made of spruce branches. Lay a rug on top or lay out thin branches with foliage. Birch is ideal.
For comparison: how much does a factory sauna tent cost?
Today, camp baths are produced by both Russian and foreign companies. The price of the finished model ranges from 25,000-30,000 rubles. (the set consists of a heater, a hood and a thermal tent). The amount is considerable, but you can save money: build the frame yourself and buy only a small metal heater. In this case, the costs will be about 9000-10000 rubles.
Factory-made mobile sauna
Options for mobile baths
Prices for a camp sauna
camp sauna
Conclusion
Most private transport baths are mobile only nominally and are only “on the road” once, when they are delivered from production. Plus, someday there may be a need to move the structure to another location within the site. In our realities, tent baths in various designs can be considered truly mobile. A tent and a folding stove in a backpack can be taken on a hike, or fishing, and can be used for the time being while the capital is in the project. As for the main voiced disadvantage - cost, then everything is relative. You can also steam in the forest for free.
If we talk about the functionality of ready-made kits, the majority of owners are satisfied.
Those who are planning to build a bathhouse will find this article about the dimensions, layout nuances and parameters for choosing stove equipment useful. The article about stones for backfilling is also informative, because the quality of steam largely depends on them. The video is about a budget mobile speed sauna.
Subscribe to our Telegram channelExclusive posts every week
Tips for using a camp sauna
Tips for using a camp sauna
- Despite the fact that making such a bathhouse requires a lot of time, you still won’t be able to steam in it for a long time, since the stones will quickly cool down, especially if you water them.
- Stones with visible defects at high temperatures can shoot off small pieces, so you need to stay as far away from the stove as possible. It is worth knowing that after watering the stones with water, the risk of cracking is minimized.
- The stove should be installed in the part of the tent opposite from the entrance - this will make it safer to enter/exit.
- The main disadvantage of a sauna tent is the low temperature near the ground. Therefore, you need to put something under your feet, otherwise you can catch a cold.
What is needed to build a mobile sauna?
So that in nature, in the forest or near a river, on a hike you can enjoy a good rest - a camping sauna, which can be easily made from scrap material, is what you need.
For a regular camping sauna you won’t need much:
- - a stove, which can be assembled in nature from available stones, small pebbles, or, as an option, purchased ready-made in a store;
- - a special frame that can be made from branches in nature;
- - tight-fitting material - this can be simple, dense polyethylene or a tourist tent, which is very convenient and practical;