The diversity of modern manufacturers and the presence of their own technical conditions have led to the fact that the same building material or product can differ in size. Differences in wall thickness make it impossible to actually standardize frame sizes for interior doors. The solution to this problem was the production of a door frame with a minimum acceptable width, guaranteeing strength, and an additional board that would cover the remaining thickness of the opening wall. What are door trims and how are they installed? We will tell you in our article.
Materials, design features, types of accessories
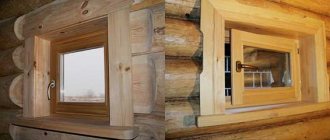
Additional strips are used to mask slopes in cases where the width of the box is less than the thickness of the wall. Inserts are placed in the space between the trim and the frame. The materials of additional elements are selected in accordance with the canvas. To ensure that the color and texture of the decorative inserts match the doors, it is recommended to purchase the entrance structure as a complete set.
Materials from which the planks are made:
- three-layer plastic panels reinforced with metal;
- from wood species;
- MDF and chipboard panels;
- covered with laminate.
Types of extensions in accordance with installation technology:
- Standard - ordinary slats, often covered with eco-veneer. The edges of the plank can be raw or framed with edge tape. If there is no edge, you will need to perform installation work more carefully. The smallest imperfections are visible at the ends without an edge film. The protective layer also prevents the panel from deforming when exposed to moisture and temperature fluctuations. You can glue the film yourself using an iron.
- Combined - angular-shaped elements that combine extensions and platbands in one piece. Used for narrow floors. They are built into grooves located in the box.
- Telescopic - a complex design that involves fastening using ridges and grooves. The edge of the plank is inserted at different depths and can decorate walls of any width. Installation does not require additional fastening.
Measuring and preparatory work
The installation of the extensions is necessary first of all in order to securely fasten the platbands. Correct fixation of the platbands can be carried out if the products are placed with their end faces towards the plane of the wall. It is best to take measurements when the box is assembled and installed. After this, the actual installation of the accessories is carried out.
Initially, you should place the ruler on the platform of the box and hold it strictly perpendicular to the wall. It is necessary to determine the dimensions of the upper and lower parts of the product. At the same time, the width of one extension in different parts may differ, since the walls are almost always imperfect. All data should be recorded on paper so as not to confuse the product parameters.
Many experienced specialists use a more accurate method. All additions are measured using a square and a straight line . The first device is installed in the seat, and the second is applied to the plane of the wall. Where the square intersects with the rail there will be a width indicator. The size of each slope must be carefully checked, since an error can be made at any stage.
After these manipulations, they begin to cut the board. This is easy to do with a hand saw. A jigsaw and bench saw also work well, provided you have them.
Standard sizes of door panels
The dimensions of the door extensions correspond to the average dimensions of the door leaf:
- Standard height is 200-220 cm.
- The approximate thickness of the strip is 10 cm. These dimensions ensure that the insert is tightly fastened into the hole in the box.
- The width of the elements depends on the thickness of the interior partition. In this regard, the parameters of the slats can be different - 3-20 cm or more.
For private homes and individual layouts, ready-made inserts are not always suitable. It is necessary to order the manufacture of the entrance structure with additional components of a suitable size.
A Question of Choice
It is difficult for a person ignorant of construction to answer the question of how to fasten the extensions , and the whole process appears in the mind as a puzzle that is difficult to solve. Actually this is not true.
The answer to the question of how to fasten the extensions lies in the design of the door frame (this is indicated by the presence or absence of a groove). In the first case, the connection will be more dense, and the second is more suitable for additions with a thickness of more than 10 mm.
It is necessary to decide how to attach the extensions yourself or not at the stage of purchasing the door. The concept of “free installation” does not include fastening of this element. If you completely rely on yourself to install the door, then adjusting the fittings will not be difficult.
Rules for calculating the width and length of the extension
The width of the extensions is calculated according to the following principle:
- If there are grooves in the box, it is necessary to take into account the recess into which part of the strip is built.
- The width of the remaining opening is measured from the frame to the edge of the wall.
- Additional parameters are determined based on maximum point measurements.
- If measurements are taken before installation or after dismantling the door structure, the width of the strip is calculated as the difference between the thickness of the wall and the width of the future frame.
Important! Measurements must be taken separately for the top and side panels in at least several places. The surface of the walls is often uneven.
The length of the panel is equal to the height of the side posts of the box. When calculating the dimensions of individual parts of the entrance structure, generally accepted standards must be taken into account.
Basic requirements for the dimensions of the door block, according to GOST:
- the gap between the box and the wall should be 10-15 mm;
- the perimeter distance between the canvas and the loot is 3 mm;
- the gap between the door and the floor in the absence of a threshold is 10 mm;
- To improve sound and heat insulation, sealing strips or sealant are used.
If the parameters of additional inserts do not comply with regulatory requirements, you need to adjust the dimensions manually using tools.
Installation
Door trims are installed using foam, finishing nails or self-tapping screws, depending on the preferences of the installer, since the stability of the fastening of the trims does not depend on the method of installing the trim. Experienced installers recommend installing foam extensions, as this method is the simplest and takes the least amount of time. Adjustable extensions for interior doors are installed only using polyurethane foam.
Installation on mounting studs
Using a drill with a diameter of 1 mm at the end of the additional strip, which will then be adjacent to the box, holes are drilled at a distance of 15-20 cm from each other, the depth of the holes should be 0.3 - 0.5 cm less than the length of the nail. Finishing nails are inserted into the drilled holes until they stop, with the sharp end facing outward. If non-finishing nails are used, the heads must be cut off.
The parts of the frame are individually strung with the tips of nails onto the door frame. Using a rubber hammer or an ordinary metal hammer, hammer the nails into the box through a wooden spacer. Precise dimensions and careful actions minimize the possibility of gaps or cracks, which can be eliminated by dismantling and re-installing the boards or using matching wood plaster. Such corrections worsen the aesthetically pleasing appearance of the installation and indicate amateurishness of the installer.
The additional structure fixed with finishing nails is strengthened with strips of masking tape, cleaned of possible dirt and dust and slightly moistened. Then they start foaming. The additions are not heavy, so the most budget-friendly polyurethane foam is suitable for installation. After the foam has completely dried, its protruding parts are cut off and you can begin installing the platbands. Step-by-step instructions on how to install extensions on an interior door can be found in the video below.
The finishing nails securely press the additional board to the door frame, but do not keep it from being pulled out, which is a significant drawback of this method of installing the additional board.
Installation using self-tapping screws
A hidden hole is cut out from the end side of the plank using a wood drill. The diameter of the drill should be at least 1-2 mm less than the thickness of the additional strip, and also correspond to the size of the screw head. The length of the screws is selected so that when drilling they fit into the door frame by 2-3 turns. A higher number of revolutions can cause cracks and chips in the box.
The hole is drilled at a distance of 1-2 mm from the front side of the panel; drilling through the back side of the plank is allowed. It is recommended to hold the drill at a slight angle when working to prevent the possibility of drilling through the front side of the extension. A sufficient number of self-tapping screws for fixing the side part of the goods is 4 pieces; accordingly, 4 holes for them are pre-drilled.
Installation of door panels begins with partially screwing the screws into the intended holes. The additional strip prepared in this way is pressed against the door frame and screwed with a drill. It is recommended to start installing the extension on interior doors with vertical planks and finish with a horizontal board. If you notice that the screw is difficult to screw in, do not use excessive force. It is recommended to unscrew this screw a couple of turns and then tighten it again.
After screwing the top strip, it is important to check the design of the extension for a loose fit to the door frame, which can be corrected by tightly pressing the strip to the frame using improvised means. For example, construction tape. The entire panel is strengthened with the same tape to avoid deformation when the drying foam swells. For the vertical additional part, 3-4 strips of construction tape are enough, for the horizontal part - 2-3 strips. If it is impossible to stick the tape to an uneven wall surface, use wooden pegs for spacers.
The disadvantages of installing extensions on self-tapping screws are the complexity and duration of the process, the high probability of cracks and chips due to unsuccessful drilling or the wrong choice of tools.
Marking of additional strips and installation using foam
Installing the extension on foam is considered the simplest and fastest way, since you do not need to pre-drill or hammer anything into the planks. How to install extensions using foam on an interior door?
Adjusting the additional board to the dimensions of the doorway begins with the upper horizontal part, which is first cut to length and then to width. The width of the addition is marked with a pencil after fitting the board to the thickness of the opening wall, and then the excess board is sawed off with an electric jigsaw. The side vertical strips are adjusted in a similar way. An important condition is the accuracy of measurements. Preliminary assembly of the extension should not reveal the presence of gaps between the side and top planks.
Dimensional accuracy and aesthetically pleasing appearance after installation depend on measuring tools, such as a ruler or a building square. The second option is more preferable due to greater accuracy and minimal likelihood of marking an uneven line for cutting.
Installation of extensions on interior doors begins after you make sure that all parts fit tightly to each other and to the opening. The upper part of the additional board is fixed using available means between the door frame and the wall of the opening. The best option is masking tape, which is characterized by a high level of tensile strength in the perpendicular direction and easily withstands the forces of foam when swelling. 3-4 stripes on the side panels and 2-3 on the top board are enough. Another good option for fixing the extension is wedging with wooden pegs made by yourself.
Then the vertical planks are installed so that the top plank lies level on them without gaps or cracks. The side parts are also fixed using wedges or masking tape. Then the resulting space between the extension and the walls of the opening is filled with polyurethane foam under low pressure. First, the edges along the width of the opening are filled point by point, and after drying, the remaining void is filled.
Please note that the installation of trims and trims is carried out after the foam has dried on the door blocks. Before the final stage of installation, interior doors should stand for about a day for the polyurethane foam to dry.
The telescopic extension strip is installed according to the same operating principle (adjusting the length of the top and side strips), the difference is the technology of gradually increasing the structure. It is strongly not recommended to pre-assemble the entire structure and then install it in the opening, since filling the empty space with foam increases the likelihood of broken connections and misalignment of the frame. First, the first extension rail is installed along the entire perimeter, after it is fixed, the next one is installed, etc.
How to determine the required thickness
The thickness of the additional board should not exceed the dimensions of the groove in the box. The average value ranges from 10-16 mm.
Factory strips are produced in standard sizes, depending on the parameters of the partition:
- if the wall width is up to 9 cm, then the thickness of the decorative insert is 1.5 cm;
- up to 16.5 cm - 1.5/2.5 cm;
- up to 26.5 cm - 2.5 cm.
The maximum thickness of finished panels is 3 cm. For non-standard openings, extensions are made to order.
For interior structures, planks of average thickness up to 1.4-1.5 cm are sufficient, and for entrance doors it is recommended to use extensions of 1.5-2.5 cm or more.
Classification of additional strips
By location on slopes
- Vertical.
- Horizontal.
By material
- Tree.
- Metal.
- Fiberboard.
- PVC.
- MDF.
By degree of protection
Accessories with or without lamination.
According to the specifics of installation
- Without protective edge. Such additions to entrance doors are the cheapest. But it is recommended to install them after additional processing of the edges. Otherwise, the gradual absorption of moisture initiates deformation and destruction of the material, if we are talking about wood-based products.
- With protective edge. More reliable modification of panels. The difficulty is choosing the size. Any inaccuracy will lead to the need to adjust the fitting in place. This means that it will have to be cut off.
- Telescopic panels. They have docking tenons, grooves and are adjustable in width; The quality of the cladding and its durability are ensured.
What to do if the dimensions of the extensions are not suitable
There are situations when the size of the extensions is larger or smaller than the remaining uncovered section of the wall. If it is not possible to order new strips, you can adjust the inserts yourself.
If the elements are too wide, you will only need to carefully reduce the size of the board using available tools (saw, hacksaw). On the front side you need to make a groove for installing platbands. Difficulties may arise with telescopic slats. The ends of the plank are equipped with grooves on both sides. Such boards are sawn lengthwise, the tenons are cut off from the platbands and nailed to the smooth edge of the board with nails or pins.
For overly wide walls, several additional elements are used for cladding, combined with furniture clips, glue, hardboard strips, and thin wooden blocks. Telescopic structures are connected by specially prepared thin strips, which are placed in the recess of two adjacent ends.
Another way is to select a plastic insert that matches the color of the block and sew up the area with the bare wall. It is better to glue onto colorless silicone. This mount can be easily dismantled if something needs to be changed or corrected.
If you plan to line the passage yourself, it is better to buy parts with a margin in measurements. Additional centimeters may be needed to correct flaws or errors in calculations. It is also recommended to select all the components of the structure at the same time, so as not to make a mistake with the shade and texture of the finished block.
Platbands on the front door
If the extensions are a continuation of the box, filling the slope of the opening, then its completion can be called the platband. There is also a large selection here.
Purpose and varieties
The immediate task facing such an element as the platband is to frame the doorway. These interior elements are decorated with them. Modern door frames can be divided into the following categories:
- flat;
- rounded;
- curly.
The first option allows docking in any form. But rounded and figured platbands can only be sawn at an angle of 45 degrees . In this case, it is necessary to have a special device called a miter box.
Curly trims are sawed at an angle of 45 degrees
In addition to the shape, platbands can be divided into:
- Monolithic;
- With built-in cable channel.
The use of monolithic elements can be considered a classic option for framing doorways. But cable channels began to be placed in platbands in order to “hide” excess wires from prying eyes. These structural elements are made of PVC and consist of two parts. One is attached to a wall or box, and the other serves as a decorative cover that covers the wires laid inside.
Source: DomZastroika.ru
Features of installation of telescopic bars
Installing panels with grooves is quick and easy. The wall and side of the box are pre-cleaned. The extensions are tried on, the excess is cut off. The top (horizontal) element is installed, then the sidewalls. The planks are inserted into the grooves of the box to the required depth: the panel should cover the open sector of the wall. The end of the bead is tapped with a mallet. The panel is attached to the wall using liquid nails. The horizontality and verticality of its surfaces is checked by a level. At the end, the platbands are put on. If the opening has a depth exceeding 15 cm, the telescopic bar is assembled from two or three parts. The stackable telescopic panel will firmly fix the frame, ensuring the reliability of the door structure.
How to attach an element?
The presence of a groove simplifies the installation procedure - you just need to measure the thickness of the wall and, if necessary, cut the strip. How to attach the accessory to the box if it is completely missing? In this case, the groove is knocked out with an electric router and the further steps are the same as for the finished hole. If the manufacturer has made partial fastening, it is necessary to install support liners and attach the extension to them.
How to attach extensions to the door if the wall is too wide? In this case, it is necessary to connect two extensions to each other using self-tapping screws or nails if their sides do not have fasteners. When sawing off part of the plank, it is necessary to process the cut for a better fit.
Carefully drill holes for screws and nails - the holes in the box and the extensions must match. Hats are masked with decorative patches. We fill the gaps with regular mounting foam, and if the unevenness of the wall is too large, we use a telescopic fastening system (foam should be used with caution to avoid distortions).
It is important that the fastening of the extensions is carried out in stages - first the vertical part is installed, then the horizontal (the first overlaps the second). We install them opposite the door hinges - this way they will not interfere with opening and closing.
The attachment of the extensions must be correct from an aesthetic point of view. Their main task is to create a single, monolithic surface. If the panels are made independently from chipboard or fibreboard, it is necessary to select the exact color. Usually, when purchasing a door, you can purchase a set of additional elements that match the texture of the door - in this case, the match will be the most accurate.
Why are additional parts needed?
Extensions for interior doors are a strip - an expander that covers the end of the opening wall and is located between the platband and the door frame, that is, the door frame. The door system is manufactured with standard dimensions. It happens that the thickness of floors with openings diverges from these data.
With the help of additions you can solve two problems at once
- strengthening the door frame to prevent it from becoming loose and distorted;
- from the aesthetic side, all defects will be covered, the door structure will take on a finished and beautiful appearance.
Installing simple extensions using self-tapping screws
Expanders are installed simultaneously with the door leaf or after its installation. First, the dimensions of the horizontal extension are determined. The excess is trimmed off. The extension is tried on to the surface on which it will be attached, and if the dimensions match, the strip is secured with self-tapping screws. These actions are carried out similarly with the side parts of the plank. The joints are then sealed and the platbands are fitted. The screw heads are hidden under furniture self-adhesive or plastic plugs that match the color of the finish.
Adviсe
Before you start attaching the extensions, to speed up the process you should prepare the necessary tools:
-ruler, tape measure or centimeter; -pencil or other writing device; -power tools: drill, screwdriver, router, jigsaw or saw; - screws, nails, polyurethane foam, decorative elements; -if necessary, material for wedges and spacers.
Attaching extensions to interior doors is possible both before and after installing the door frame. If you adjust the bar before attaching the box, it is screwed on with self-tapping screws on the reverse side - you need to accurately calculate their length so as not to damage the outer side. This method is suitable if the wall unevenness is small, otherwise deflections will appear.
Igor Serba, member of the editorial board of the online publication “AtmBud. Construction Bulletin"
How useful was the information for you?
Source: atmbud.ru
Eliminating gaps after installation
Rice.
6. Closing gaps The immobility of the extensions can be ensured by fixing them to the frame and walls with masking tape. Spacers are placed between the two elements, and if they are missing, the gap is filled with foam. You should take a balloon and introduce foam in small portions (so that the structure does not move). After it dries, the excess is cut off with a knife at the level of the wall.
Door extensions allow you to aesthetically design the opening. With minimal skills in handling glue, nails, saws and foam, such work can be done independently.