When planning to build your own bathhouse, everyone is faced with the fact that there are quite a lot of types of bathhouses, so choosing an option becomes difficult. They differ in the number of floors, shape, material, etc. In this article we will look at bathhouses with floors.
Design elements of bath shelves
The bath shelf has another name - a bench. The benches come in different heights and are arranged according to a certain pattern.
They consist of two main elements:
- Frame , which is the base to which the flooring boards are attached. The flooring can be fixed or dismountable. The most common is a frame made of support posts that resemble bench legs, connected by wooden crosspieces. There is also another option, when the frame is made as a stair stringer, to which the steps of the shelves are attached. Sometimes the frame is built in the likeness of the frames in a sauna. In this case, there are no supports, and the frame looks like a railway shelf fixed to the walls of the steam room.
- Flooring made of well-polished linden or aspen planks. There should be a small distance of 1-2 cm between the planks. The flooring is either fixed to the frame or consists of separate elements. Loose flooring can be taken outside to dry. It can also be used as a seat, a couch or a podium for the bath attendant. In the same way as the flooring, the backs and sides of the shelves, headrests, and devices allowing you to lie down so that your legs are located at head level or higher are made. You can make a headrest for a bathhouse with your own hands, drawings are available.
As a rule, a steam room is small in size, since it is easier, faster and more economical to heat a small room to the desired temperature, so the shelves have a simple rectangular shape (read: “What are the optimal sizes of a steam room”). Usually the shelves in a steam room look like a staircase with 2-3 degrees. Such steps can be similar to chaise lounges or corner sofas with a rounded shape. However, something like this can only be done in a large steam room.
If there is not enough space in the steam room to build a rectangular lower bench, it can be made in the shape of a right triangle. It is located as follows: one leg should fit loosely against the wall, and the other against the shelf adjacent to it.
How to make shelves with a pull-out bench?
This option can be used by owners of a small steam room . In our case, the work was carried out in a steam room with the following dimensions: height -220 cm, width - 180 cm, length - 210 cm. The structure of the shelves itself occupied a space of 110 x 210 x 220 cm. The entire remaining area was allocated for the stove and for the steamer.
To install the top shelf , a height of 113 cm was chosen. It was made with a width of 69 cm and a length of 210 cm. The retractable lounger is made with a width of 49 cm, it was decided to place it the entire length from wall to wall. The shelf was installed relative to the lounger at a distance of 49 cm, due to this it became possible to use the lounger as a footrest for those sitting on the shelf.
Since the upper stationary shelf turned out to have a higher seating position than specified by the standards, it was decided to make a special bench made of three boards 36 cm wide. This provided more comfortable conditions for the soarer. The bench was installed relative to the shelf at a distance of 70 cm.
The shelf design includes two elements: a support base made of timber and a flooring. For support, two load-bearing beams were used, installed along the width of the shelf and fastened to each other with jumpers at a distance of 50 cm. One beam and the outer transverse beams were secured to the corresponding walls along the entire contact area, and the second stick was secured at the ends. To attach the lintels, it was decided to make grooves of suitable sizes in the beams.
To ensure the necessary stability, resting on the wall installed To ensure a tight fit, the ends of the posts were sawn down at a pre-calculated angle. Screws were used as fasteners to connect the structural elements - two per rack.
thin, processed boards with rounded edges were placed on the finished frame They were installed at a certain distance so that there were gaps 1–2 cm wide between them. In this way, the problem of rapid water drainage and ventilation during drying was solved.
It is advisable to choose boards for the manufacture of shelves with a width not exceeding four times their thickness. Then the material will dry well and will not develop cracks for a long time. Due to the limited area of the steam room, a lounger width of 69 cm was chosen for the project. As for the shelves, they were made at least 90 cm wide. For this, 7 boards were used.
A retractable lounger can be made according to the same scheme as the shelves. For the frame, take two longitudinal beams with transverse struts. The flooring is made of 5 boards.
The reason for the multi-stage shelves in the bathhouse
According to all known laws of physics, steam and hot air rise to the ceiling. After some time, the air flow at the top cools down. Some of it goes through the ventilation of the steam room, and some goes down to the floor. For this reason, it is much hotter at the top than at the base of the bath shelves.
Multi-stage operation allows a person to independently choose the best temperature regime for him. Therefore, in order to be able to steam both at the maximum temperature in the steam room and at a more gentle one, you should make shelves in the sauna with your own hands in the likeness of steps. In a Russian bathhouse, two shelves are most often built, but three can be made, but there must be enough space for them. This means that space should be left for people in the steam room to move without getting injured.
Care instructions
Having made your own bath shelves, it’s a good idea to learn how to properly care for them. Despite extremely high temperatures and significantly increased humidity, the bathhouse is subject to the aggressive effects of various microorganisms and ordinary dirt.
Useful tips
To protect wooden surfaces from the negative influence of the environment, first of all, it is necessary to regularly perform sanitary and hygienic cleaning and various preventive measures.
You should also consider the following recommendations:
- At the end of the bath procedures, it is recommended to first wash the shelves with ordinary laundry soap and then wipe them dry with a towel or regular rag.
- If possible, ventilate the room as often as possible. To do this, open all windows, doors and ventilation valves wide, having previously closed all containers with water with tight lids. The room must be ventilated for at least 3-4 hours.
- Several times a year, wooden furniture in the steam room must be treated with special water-repellent compounds. Before processing, it is recommended to clean all contaminated surfaces with a scraper or sandpaper.
Regular and timely care of bath furniture significantly extends its service life and also helps prevent the appearance of various fungal infections.
How to arrange shelves
To build a shelf in a bathhouse with your own hands, you will need drawings, and you should also make all the necessary calculations. A small plan of the room is drawn, dimensions are indicated, equipment installation locations, the location of windows and doors are noted.
It is very important to remember that you cannot place shelves near walls with glazed windows. Under the influence of hot steam, the glass may burst and fragments may fall on people. Therefore, in steam rooms with windows there are not many options for arranging shelves in the bathhouse. They can only be placed along walls where there are no windows or glazed ventilation vents.
There are several shelf layouts:
- Along one wall in 1-3 rows, placing shelves on top of each other.
- Design in the form of the letter G with various options for the number of degrees. For example, 2-3 along each wall, the top and bottom shelves along the long wall, and the middle one along the adjacent short one.
- Two parallel structures located along opposite walls, similar to a compartment in a train carriage. Structures can be either symmetrical or asymmetrical.
Before making shelves in the steam room on paper, you should draw several options and choose the most suitable one from them. In order to plan everything correctly and calculate the required amount of lumber, you need to know the exact dimensions of the shelves for the bathhouse.
Foundation
Strip foundation for a bath
It is possible to install a strip or pile type foundation. The pile method is cheaper and can be implemented in sloping or lowland areas. But the strip foundation for a bathhouse is more durable and has increased thermal insulation, which is especially welcome when planning a heat-loving bathhouse. Let's look at the steps to bookmark it.
Instructions:
- We prepare the ground by removing all debris and removing the top layer of vegetation.
- We apply markings using wedges and cord. We hammer the wedges into the corners of the future building and stretch the cord between them.
- According to the markings, we dig a trench half a meter deep and ten centimeters wider than the thickness of the planned walls.
Advice: under the internal partitions, a trench can be dug flush with the walls in order to save money, since they still do not have a load-bearing load.
- We make a fifteen-centimeter pillow of gravel, compacting it thoroughly.
- We place wooden formwork on the sides.
- We install reinforced rods on the bottom.
- Fill it with concrete.
- Cover with film and water for a month until completely hardened.
Hardening concrete
Dimensions of bath shelves
Based on a person of average height and configuration, the following sizes of shelves in the bathhouse have been developed for receiving steam procedures in a sitting or lying position:
- The length of the shelf so that you can lie with your knees bent is 1.5 m.
- To lie on a shelf at full height without bending your legs, the length should be 1.8 m. But in this case, everything is individual, since all people are of different heights and it may be that 2 m is not enough (read: “What is the size of shelves in you need to make a steam room - practical advice").
- The minimum width of the shelf is 40 cm. Most often this is the bottom shelf, which is used mainly as a stand for the bath attendant’s feet. You can not only stand on such a stand, but also sit if you want to cool down a little.
- The most common bath benches are 60 cm wide. However, they are not very convenient for steaming in a lying position. If you make benches for a bathhouse with your own hands, you need to focus on the people who will use the bathhouse, taking into account their height and physique.
- The width of the shelves is 90 cm, allowing a person of any size to sit crosswise with their legs tucked in and lie down.
The minimum dimensions are given, but no one forbids making larger shelves. But there is no point in building smaller bath benches - they will simply not be comfortable.
Methods for fastening boards
Proper fastening of bathhouse shelf boards and other external elements guarantees pleasant use of the shelves and their long service life. To do this, measures should be taken to avoid contact of the human body with the metal of screws or nails.
Most often, when installing shelves for a bathhouse with your own hands, the following fastening methods are used:
- The simplest and most effective fastening option is when the screws are screwed in all the way until the head is sunk into the thickness of the wood.
- Self-tapping screws can be screwed into wood from the back.
- To ensure the maximum level of safety, oak wedges are most often used. Special holes are made for them and hammered in. Although this method of fastening boards is environmentally friendly, it is quite labor-intensive.
- Some owners install a backrest on the wall where the shelves are fixed. It can be made from three boards placed on a vertical stand made of bars. The backrest provides even greater comfort for those sitting on the shelf. Then a person does not have to worry about burning his back when touching the heated lining of the steam room. For safety reasons, the backrest must be made of the same material as the shelves. The boards must be secured with gaps for ventilation.
You can create even more comfortable conditions if you make a footrest from blocks on the end wall. But when resting on the shelf, it is advisable to raise your legs above your head. Then they will warm up faster.
Height of bath furniture
Regarding the height of the shelf in the bathhouse, completely different principles apply; there are no standard values. First, the height of the top shelf is determined. 1.10 - 1.20 m is measured from the ceiling and the top shelf is installed at this level. This will allow you to sit on it, and gives you enough room to swing the broom to whip the person's back rather than the ceiling. But in order to be able to do this while holding the broom in an unbent hand, you should leave more space, about 1.5 m.
Sometimes the top shelf is installed opposite the steam door. This will allow you to get more benefits from the steam. However, it is not necessary to adhere to such a scheme.
The height of the bath shelves can be 40 - 60 cm. The lower bench should be at least 30 cm from the floor. The height of the shelves depends on their number.
As a rule, the lower part of the structure is not fixed. This allows you to wash and dry the floor underneath. For a fairly heavy lower step, special skids are made that move along rubber guides.
FAQ:
How to order and buy a log bathhouse:
- To order a log bathhouse, cutting into a bowl, only upon prepayment, upon conclusion of the contract.
What are the delivery and assembly times:
- Delivery time from the date of order is 3 - 4 weeks. If a log house is available, delivery can take from 3 to 7 days. Assembly 3 - 5 days.
How do you pay:
- Payment is made in three stages: 1) Advance payment upon conclusion of the contract. 2) After unloading the log house by a team of assemblers, at the customer’s site. 3) After completion of assembly and acceptance of the log house.
What kind of foundations are you doing?
- For the log house we make foundations: strip, pile-screw, concrete driven piles.
Rules for creating shelves for a steam room
To guarantee the comfort of steaming, safety and long service life of bath decorations and furniture, you should adhere to the recommendations below, which explain how to properly make shelves in a steam room:
- Shelves should not fit tightly against the walls . A gap of approximately 10 cm should be left between them; it is necessary for ventilation. To ensure such a gap, sections of timber should first be secured to the wall. The frame elements are attached to it using self-tapping screws, and the heads of the screws should be recessed into the wood.
- To build the frame, it is recommended to take 50x70 mm timber. In order for the wood to dry completely, the thickness of the board should be 4 times less than its width.
- Depending on the thickness of the planks, the required number of supports is determined. If the board is 22 cm thick, then the supports are installed at a distance of 60 cm from each other.
- To give the structure stability , the frame supports should be connected along the entire length with a board from the bottom and top.
- Rubber pads should be nailed to all legs of bath furniture
- To fasten the boards, it is recommended to use wooden nails or pins, which are driven into the holes drilled for them. If there are only self-tapping screws, then they should be screwed in from the reverse side so that you cannot get burned on them. If there is no other option but to fasten it from the outside, then the metal caps need to be buried in the wood.
- The planks of the shelves should be located at a distance of at least 1 cm from each other.
How to make it yourself
For a novice craftsman, the proposal to make shelves in a bathhouse with your own hands may raise many questions, but if you have some carpentry skills, these structures can be made on your own. To do this, just carefully study the step-by-step instructions or a competent detailed manual. All work related to the creation of a bath shelf can be divided into several main stages.
Calculations and drawing
Before starting work, you need to create as detailed a drawing or sketch as possible. When making calculations, first of all, it is necessary to determine the length and width of the structure, as well as calculate the most optimal height for its placement.
Frame production and installation
After creating a detailed sketch, all elements are cut out in full accordance with previously made calculations. Next, the wooden beams are carefully sanded and installed in a vertical position. The supporting joints are fixed to each other with transverse jumpers.
Fastening the deck
Attaching wooden flooring is very simple. Carefully planed boards are fixed on the frame parallel to each other at intervals of 1-2 cm.
To fix the flooring, you can use either ordinary wooden nails or screws or special self-tapping screws. Of course, it is more preferable to use wooden fastening elements, since any metal surfaces in the steam room can cause burns if they come into contact with human skin.
Finishing
The very last step is additional treatment of the structure with special protective compounds, which not only effectively protect natural wood from extremely high temperatures, but also greatly contribute to the prevention of various fungal diseases. Bath loungers and benches treated with special protective compounds will delight you for a long time with their pristine appearance and impeccable wear resistance.
Technology for creating a simple shelf
Here's a step-by-step guide for building simple shelves in a bathhouse with your own hands:
- The length of the flange is measured. There should be a gap between the wall and the shelf.
- The shelf frame is fastened with galvanized corners.
- The frame should be adjusted to the required length.
- The frames are attached to the wall with screws, and you should use a level.
- Next, right and left frames are installed at the same level.
- To ensure ventilation between the wall and the shelf, pieces of plywood are placed on the outside of the frames.
- Flooring is made for the upper shelf measuring 60 cm, for the lower shelf – 40 cm.
- The shelf frames are attached to the walls with screws.
- Finished shelves should be cut to the length of the frame. Then they are placed in their place and secured.
- The backrest is made to the required size and fastened in place.
There is nothing complicated about how to make shelves in a steam room. It is important to follow the recommendations given above on how to properly make shelves in a steam room, and to approach construction responsibly.
The Finnish sauna has a high temperature - from 90° C to 110° C, humidity 10-25%. Lovers of Russian baths prefer lower temperatures from 40° C to 70° C, combined with high humidity 60-80%.
A Russian bath differs from a Finnish sauna not only in terms of temperature and humidity in the steam room. The fundamental difference between them is the different speed of movement of the heated air flow, the use of birch and oak brooms in the Russian steam room.
How to make shelves for a bathhouse with your own hands
Patting the steam bather lying on the shelf of a Russian steam room with a broom, the bathhouse attendant occasionally increases the temperature by pouring water on the hot stones of the heater. Burning wet steam, escaping from the slightly open door of the heater, quickly rises to the ceiling and, slowly cooling, settles and gradually fills the steam room.
High moisture content slows down the process of movement of air masses in a Russian bath, which determines the nuances in the arrangement of shelves:
- large distances between the boards of the beds are required;
- the seats are tilted to drain water;
- to make cleaning the bathhouse floor easier, the side walls are not sewn up or are removable;
- you need a wide indentation of the bench from the wall of the steam room.
Differences in the basic dimensions, height and structure of the shelves also add features to the soaring process itself.
IMPORTANT: in a Russian steam room it is necessary to maintain the ratio of the height of the shelf device and the distance to the ceiling.
The height of the upper bench is made so that there is a distance of one meter between the top of the head of the person sitting on the upper bench and the ceiling - for the normal arm span of the bathhouse attendant with a broom gaining temperature in a cloud of steam.
Drawing of bath shelves for a Russian steam room
The length of the shelves is regulated, which must be at least 220 cm, since it is advisable to take the bath procedure while lying down, exposing the body to massaging blows and stroking with a birch broom.
A traditional Russian bathhouse has only one or two steps of shelves located along one of the walls of the steam room; the steamer lies on a wide (at least 90 cm) upper bench.
IMPORTANT: benches in a Finnish steam room must be equipped with backs made of boards so that the person sitting does not burn his body on the hot wall cladding.
In a Finnish sauna, people often sit rather than lie on the benches, so the distance to the ceiling is shorter and the length of the loungers is not so critical.
Drawing of sauna shelves
You can often see special foot rests on the walls of a sauna, usually raised above the level of the body of a person lying on the upper bench.
Since the air in the sauna must warm up quickly, the size of the steam room is usually small, so the sauna shelves occupy the entire free perimeter of the walls, except for the wall with the door and heater.
Important shelf design features
- For a steam room, shelves that are open at the bottom are best suited. Then they will be able to be well ventilated below, without interfering with the ventilation of the room and for cleaning the floor.
- It is best to arrange the shelves with your own hands at a slight angle. Then water can flow from it freely.
- When installing a corner or regular shelf for a bath, it is necessary to install plastic or thick rubber pads between its vertical posts and the floor. This way you can protect the material of the racks from rotting, providing it with a longer service life.
- When installing a shelf for a bathhouse, do not forget about its appearance. It should have a smooth surface and the corners of the boards should be rounded. During operation, the shelves should not create unpleasant squeaks or other sounds. To do this, you need to fasten the parts together as tightly as possible during installation.
Types of bath shelves
Example of a simple bath shelf
Bath shelves can be of several types:
- compartment - when the beds in a small sauna are placed one above the other;
- complex bath shelves - with a retractable bottom shelf or a folding top shelf;
- in the shape of the letter “L”, when the bath seats are placed on two adjacent walls;
- Stepped shelves for spacious steam rooms have two or three steps, on which several steam lovers can comfortably sit.
Where to place
All benches and sunbeds are usually placed strictly along the walls. Ideally, these structures should be located out of reach of cold air masses. Benches and loungers can be arranged in two or three tiers, with the lowest shelves usually being the coolest while the topmost are the hottest.
In compact steam rooms, wooden flooring can be placed in a corner or L-shaped pattern, while in more spacious and large rooms they are most often located in a single line along one wall.
Tree species used for making stands, bath chairs, backrests
Wood characteristics table
Wood plays an important role in the interior and design of the bathhouse. Different types of wood behave completely differently at high temperatures and high humidity. Therefore, you should carefully choose the material for making shelves.
| Wood | Photo | Description |
| Pine and spruce |
Pine and spruce give a special coniferous aroma, which has a beneficial effect on the general condition of a person. The rather high price of other types of wood forces many steam lovers to give preference to wall coverings made from inexpensive pine boards - clapboards, bath shelves, and backrests.
IMPORTANT: the only condition is the absence of knots or cracks on the surface of the boards, good quality of drying of the material, carefully processed surface of the planks.
Thermoabash - thermally treated abashi wood
Abash shelf texture
Loungers made from it do not burn the human body, since the material has low thermal conductivity and heats up very slowly. A successful advertising campaign made abash the most purchased wood for making bath shelves and saunas in the homes of wealthy nouveau riche.
Combination of several types of wood at the same time
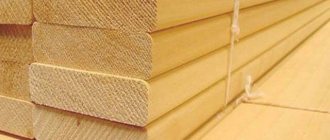
Prices for edged boards
What types of wood are they made from?
It is believed that bath shelves are best constructed from hardwood, since this material not only has very low thermal conductivity, but also boasts fairly high wear-resistant qualities. In addition, in terms of the composition of healing fumes, shelves made of deciduous wood have practically no equal.
Abashi
It is not without reason that African oak wood is considered an almost ideal solution for making bath benches and sun loungers. Due to its high density, abashi wood is very resistant to both high humidity and various types of mechanical stress. Over time, this lumber practically does not deform and does not shrink. As a rule, the porous structure of African oak has a very beautiful fine texture with a noble cream or slightly yellowish tint.
Alder and black alder
The main advantage of alder is its extremely low thermal conductivity, which means that steaming on alder shelves will be very comfortable and pleasant. In addition, alder does not crack under the influence of high temperature and high humidity.
Also, over time, it practically does not change its light, noble shade. Therefore, if you want to build a shelf of a darker color, then use black alder wood for its manufacture, which in its properties and quality characteristics is practically not inferior to traditional gray. The disadvantages of alder include very mediocre flexibility and a fairly high tendency to rot.
Maple
Despite its fairly high density, maple wood is characterized by very good flexibility and high wear resistance. Typically, maple material is very easy to process, so almost any carved parts can be made from it.
It should also be noted that many varieties of maple have a very beautiful texture with clearly visible core rays. The wood of many maple varieties has a standard yellowish hue, but some species boast a more unusual reddish-brown or whitish-cream color palette.
Linden
In terms of price-quality ratio, linden wood is considered one of the best. However, many people like this material primarily because when heated, linden wood begins to release a very pleasant woody aroma into the air, which has pronounced healing properties.
It is believed that the essential oils secreted by linden contain special substances that in many cases help prevent colds and various nervous diseases. As a rule, linden wood has a slightly yellowish tint, but under constant exposure to moisture it can darken over time.
Aspen
Aspen is also a budget option. Despite its low cost, this material usually withstands use in a Russian bathhouse very well. In addition, it lends itself perfectly to processing with various hand tools and retains its very attractive appearance for a long time.
However, when choosing this material, it should be taken into account that aspen has a fairly high tendency to rot from the inside. Therefore, before purchasing this lumber, it is recommended to cut at least one board from the supply in order to check the wood for initial signs of rotting.
Poplar
Soft poplar wood is characterized by a texture that is not too dense. Most often it has a light brown or yellowish-brown tint without pronounced medullary rays. Despite its inconspicuous appearance, the aesthetic properties of wood can be significantly improved through the use of special impregnating compounds. As for strength, poplar wood has rather weak indicators.
Stages of manufacturing a bath shelf
You can make a bath shelf yourself
You can make bath shelves yourself if you follow a simple sequence of installing beams and boards, carefully process the material, and securely fasten the structural parts together.
IMPORTANT: the top boards of the couch must be attached to the supporting beams using oak wedges driven into pre-drilled holes in the parts. The use of metal nails or screws to assemble the deck chair is unacceptable. Hot steel caps can cause serious burns to the surface of the body.
Shelf installation diagram
Installation of racks
The racks on which the bath lounger is located must ensure the stability and strength of the entire structure. Typically, for the manufacture of the top row of beds, 4 to 6 racks are used, 1.05-1.15 m long, with a cross-section of 50x100 mm or 100x100 mm each, depending on the length of the shelf.
Start of installation of shelves
Support beam for shelves
Fastening the support bars
Frame of bath shelves (one of the options)
The racks are connected to each other along the perimeter by rectangular bars 50X100 mm, onto which the load-bearing bars and boards of the bench are subsequently attached. The racks are attached to the wall with long (20 cm) dowel screws.
The timber for the upper seat posts can be used unpolished, without cracks or chips. A gap of 0.1 m is made between the wall and the adjacent rack - inserting pieces of thick boards for better circulation of hot air and improved ventilation of the shelf.
Making a frame for bathhouse shelves
Assembling the load-bearing structure of the shelf
The supporting structure of the upper shelf must withstand the weight of the planks of the couch plus the mass of the people on top, so it is better to use a supporting beam with a cross-section of 50x100 mm or 50x120 mm.
Bath shelf frame
The top row of supporting beams with a cross-section of 50x50 mm is attached across the length of the upper plane of the shelf every 0.5-0.6 m, depending on the thickness of the upper boards. The thinner the board, the more often the supporting bars should be located so that the boards do not sag under the weight of people sitting on them.
IMPORTANT: the bars must be attached with a slight slope (1-2°) from the wall towards the steam room, for better drainage of moisture from the wooden surface of the bath lounger.
The top shelf is covered with boards
The width of the top shelf is ideally made 0.9 meters for the convenience of steamers, but the size can be reduced to 0.6 m.
Fastening can be done either using nails or self-tapping screws.
Upper bed arrangement
Smoothly planed and polished boards of the bench, from 3 cm to 6 cm thick and from 0.1 m to 0.24 m wide each, are laid on the supporting bars at intervals of 1-2 cm, ensuring the free passage of hot air.
The boards must be fastened to the supporting structure using wooden (oak) wedges in pre-drilled holes.
Boards arranged along the length of the bed look more aesthetically pleasing, but you can attach the boards of the top row across the bed. In this case, material is saved, since there is no need to pierce the load-bearing bars.
IMPORTANT: do not fasten the boards of the bench with nails or screws, leaving the caps on the surface of the benches. Only by recessing the metal parts of the fasteners 5-10 mm deep into the board can the steamer be protected from possible burns.
Bottom shelf arrangement
When the height of the upper bath seat is 1.1 meters above the floor surface, for the convenience of the bath attendant working with a broom, the lower bench is lowered by 0.7 m.
The bottom shelf should be made at a distance of at least 0.3 meters from the floor - if it is used not only as a step for the bath attendant, but also as a full-fledged bath bench.
In the photo there are three tiers of shelves, each of which is suitable for a lying position
Most often in a Russian bath, the bottom step is made in the form of an attached bench on legs, which is removed while the steam room is being cleaned. But the installation of a fixed lower shelf is quite acceptable.
To do this, it is necessary to attach four load-bearing wooden beams with a cross-section of 50x100 mm to the posts of the upper bench at a height of 0.4 m from the floor surface, making a kind of rectangle out of them - the frame of the lower bench. This is done so that one part of the load-bearing rectangle protrudes beyond the surface of the upper shelf to a length of 0.4-0.6 m.
The supporting frame of the lower step can be attached to the main posts with 12 cm long nails or self-tapping screws. In the corner and in the middle of the frame of the lower bench, four racks with a cross section of 50x100 mm or 100x100 mm resting on the floor are fastened with self-tapping screws or nails.
Every 0.5 m, load-bearing bars with a cross section of 50x50 mm are packed. The boards of the lower shelf are attached to them using wooden wedges driven into pre-drilled holes.
How to make shelves in a bathhouse - types of flooring for shelves
IMPORTANT: the surface of the benches is carefully sanded. The boards should not have sharp corners, chips or cracks.
The boards should not be too wide; the optimal ratio of width to thickness is four. The fifty board should ideally be 0.2 meters wide.
Video - Assembling a bath shelf with your own hands
Processing bath shelves
After the construction of the bath beds is completed, they need to be impregnated with a protective solution, since the negative effects of water, air humidity, and high temperature destroy the structure of the wood quite quickly.
Processing bath shelves
To protect wooden surfaces in the steam room, you must use environmentally friendly products, otherwise you risk your health. Wooden beds of Finnish saunas have long been impregnated with ordinary linseed oil, which perfectly protects against mold and mildew. The shelves of Russian baths were impregnated with a wax solution, which included purified turpentine and beeswax.
Ideally, you should apply the wax solution or linseed oil in two layers. Drying time for one layer is about 8 hours.
Bath loungers do not require preliminary preparation or processing, provided that the boards have been previously sanded with high quality. After applying protective impregnation, all wooden surfaces acquire water-repellent properties and a characteristic matte shine.
Impregnation is designed to protect wood from rotting
In the photo on the left is protected wood, and on the right is without protection
Proper installation of the heater, rational use of steam room space, cozy design of the relaxation room and careful assembly of steam room beds will bring health, joy and satisfaction from bath procedures.
Simple shelves in two tiers for a Russian steam room
Wood impregnation prices
Video - The process of making a bath shelf
Video - DIY steam room shelves
Video – Sauna with sliding shelves
The “furniture” in the bathhouse does not shine with any decorative delights. Its main goal is maximum functionality and providing vacationers with complete comfort. Any benches or shelves in a bathhouse are usually made of natural wood - this is an ideal material for a steam room, which is highly environmentally friendly, easy to process, and has a traditional and very attractive appearance.
You can easily make shelves in a bathhouse with your own hands. Thanks to the simple design of such a unique “furniture”, even a non-professional can make it in a short time with high quality and much cheaper than if the shelves were bought in a store or made to order at a factory.
Construction of a log house
A log house is a traditional structure for a bathhouse; we will examine its construction further.
Material and cutting method
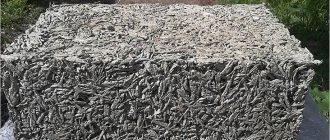
Pine logs
The best and most common material is pine, due to its strength, water resistance and low thermal conductivity. The logs themselves should be selected with a diameter of about 25 cm.
It is recommended to carry out the felling “in the paw”, performing internal protrusion of the walls.
This gives two advantages:
- The net area is 4 m by 6 m.
- Ease of subsequent interior finishing.
Tip: you can choose round logs for the rest room. This will give a natural look to the interior, increasing unity with nature.
Steam room and washing room
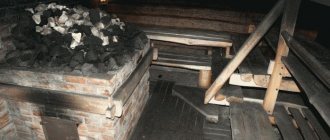
Steam room in the bathhouse
We divide the six-meter wall of the building into segments of 2.5 m and 3.5 m. We leave the larger part for the relaxation room of the bathhouse, and divide the smaller part again, but for the steam room and washing room. The logs in them must be hewn with high quality, since they will then be covered with insulation and waterproofing.
To create floors above these two rooms, proceed as follows:
- We make the net height 2.3 m.
- Lay sanded boards over them, giving 12 m2 of additional roof space.
- We make the skate two and a half meters.
- We install the rafters from boards with a section of 50 mm by 150 mm, while we extend them half a meter from under the frame, and lower the roof slope by 20 cm. This will provide several advantages:
- Attractive roof interior.
- Protection of walls from precipitation.
- About seventy centimeters of dry space to create a woodpile.
Roof
DIY roof installation
To save money, you can initially cover the roof with ordinary roofing felt. It is inexpensive and easy to use.
If you have a larger budget, you can first cover it with plastic film and install any roofing material of your choice on top.
Floor
The flooring can be made of wood or concrete. A wooden floor will look more aesthetically pleasing, complementing the overall natural composition.
Means:
- We lay thick beams on the foundation.
- On them we install a rough layer of unplaned boards 25 mm thick.
Installation of a subfloor in a bathhouse
- We attach the logs on top.
- We lay insulation and waterproofing between the joists.
Insulation of the underground in the bathhouse
- We create the finishing layer from a 38 mm tongue and groove board. We also use it for installing floors.
Some time after the construction of the building, the log house will shrink, and then it will be possible to move on to the exterior and interior decoration to your liking.
Peculiarities
It is impossible to imagine a traditional village bathhouse without shelves: often multi-tiered, reminiscent of a wide-step staircase. In another way, such shelves are called canopies. They are an integral part of any steam room.
A shelf, or canopy, is a wooden flooring - a kind of elongated multi-tiered bench located along one or more walls of the room. So that you can relax in the steam room, such shelves are made in such a way that even a large, tall person can calmly lie on them. In addition, multi-tiered shelves allow vacationers to independently choose the most comfortable temperature for them.
Bath shelves can be divided into three types. The most common option is shelves used as benches; They are suitable for both small steam rooms and spacious large rooms. Loungers are not as popular as benches, but they are also found in a variety of bathhouses. And finally, the third type of bath shelves - sun loungers. They are practically no different from beach loungers, and they can be used with equal success both as a bed and as a chair, which makes them very functional, although far from the traditional design of a bathhouse.
The design of the shelf is extremely simple. Decorative elements are not welcome, as they can cause injuries, and they simply stand out from the traditional external design of the steam room. The simplicity and small selection of shelf shapes is easily explained: it is customary to set aside a small room for a bathhouse, which can be easily, quickly and quite economically warmed up without spending extra resources. That is why the most beloved by craftsmen is the ordinary rectangular shape of the shelves.
Structural features
Rest on the beds
In such a building there is no horizontally hemmed bathhouse ceiling. And the steam room and washing room are covered with floorboards on top. The mattresses placed on them will become a wonderful place to rest and spend the night during the construction of the main house or while visiting the dacha. For ease of visiting, a staircase is installed.
Floors with a ladder installed to them
Advice: be sure to take care of high-quality ventilation under the roof. Otherwise, when the sauna stove is operating, it will be too stuffy and hot.
Sauna covers significantly increase its functionality at minimal cost.
In order to save the family budget, all construction work can be done with your own hands. To do this, we will consider their step-by-step implementation.