Many of us associate a fireplace with a warm, cozy atmosphere and homely gatherings. Correct installation of this structure allows you to avoid the appearance of soot and soot during the burning of wood. An important role is played by its decorative finishing, which adds luxury and sophistication to the interior space.
Modern building materials help to choose the right appearance of a structure based on the chosen stylistic direction.
Experienced experts recommend choosing materials that have a moisture-resistant and washable coating. In the future, this will help get rid of traces of soot and soot. In our material you will learn possible options for decorating fireplaces with your own hands.
Types of finishing materials
The following types of finishing materials are used for decorative finishing of fireplaces. These include:
Heat-resistant plaster. The composition uses fire-resistant components that can cope with sudden changes in temperature. Special pigments, which are combined with the building composition at the initial stages of finishing work, help to add bright colors.
Ceramic tile. This type of building material helps to achieve complex textured lines and add decorative details to the interior space.
Decorative rock. Most often, artificial stone covering elements are used for finishing work. It consists of polyurethane elements that are attached to a special adhesive. This artificial decoration of the fireplace is no different from natural materials.
Modern pigments and technologies help achieve complex color shades and depth of textured lines. All these elements will fit perfectly with the chosen stylistic direction.
High-quality brick - a classic option
Nowadays you can find a stylistic trend in design called loft. When decorating apartments and houses, a unique interior is created, reminiscent of abandoned garages and technical bases, but at the same time it is quite cozy and comfortable. Accordingly, a logical question may arise about how to decorate the fireplace in this case, so as not to violate the concept.
A hearth made of brick looks best in this design. If the work is done correctly, by an experienced and competent craftsman, then the masonry is not hidden under other materials, but, on the contrary, they try to make it more expressive.
Decorating with bricks
The loft facing of the fireplace with brick looks like this:
- They choose the empty masonry method, when about 6 millimeters of space without mortar is left from the outer zone.
- When the fixing composition dries, the voids are filled with decorative grout.
- If necessary, the brick is ground and chamfered on the edges.
- To make the surface bright and impressive, the brick is treated with a solution based on hydrochloric or sulfuric acid.
It is not recommended to carry out such work on your own if you do not have practical skills in this area. There is a possibility that the brick will be placed incorrectly, which will spoil the appearance of not only the structure, but the entire interior.
Of course, the options for finishing a fireplace with this material may be different, but in any case, the final look of the structure will be very stylish.
Good to know: Types of fireplace portals and features of their manufacture
Types of plaster for finishing
This type of decorative fireplace decoration is considered the most durable and durable. Special devices and tools help create any texture on the surface of a decorative coating.
For finishing, two types of building composition are used. The first is used for initial or rough coating. It has a dense consistency and dark color. The layer thickness should not exceed 5 mm. The building composition allows you to get rid of external defects in brickwork on the surface of the fireplace.
The second type of building composition has a white tint, which can later be changed using special color schemes. It is applied in a thin layer and left until completely dry.
To create textured lines, use a decorative roller or spatula. Decorative plaster contains fire-resistant substances. They prevent excessive accumulation of soot and soot during wood combustion.
In addition, they reduce the risk of possible deformation. Most often, their surface has a moisture-resistant coating. This allows you to clean the plane as it gets dirty.
Cost of finishing work
The price of finishing fireplaces directly depends on the type of finishing material and the area of the stone structure. As a rule, finishing with ceramic tiles costs much more than decorating with artificial stone.
Decorative plaster is considered a budget option. The cost of the construction composition depends on the components and special equipment that is used during the work process.
Solid fuel boilers - tips for choosing the best models and ideas for using boilers for heating (110 photos and videos)Screen for a heating radiator - a review of the best ideas and recommendations from designers for selecting screens for a heating system
- Chimneys for gas boilers - main types and step-by-step instructions for do-it-yourself installation (video + 100 photos)
Decorating a fireplace with your own hands: design, decorative finishing and step-by-step work
Finishing a fireplace with your own hands is quite possible if you have the desire to carry out this process and certain tiling skills. A lot in this work depends on the chosen types of finishing. Some of them are quite simple to implement - you just have to carefully study the technology. However, there is also a finishing that will require not only theoretical knowledge, but also sufficient experience. Since every master stove maker has his own little secrets, some fireplace cladding techniques need to be learned only in practice, standing next to a professional and adopting the techniques he performs.
DIY fireplace decoration
Complex techniques for finishing the surface of a fireplace include working with tiles. A completely accessible technique even for beginners to transform a fireplace can be called tiling - it can imitate a variety of materials, from wood to wild stone.
Fireplace finishing is carried out in order to transform its appearance in the event that it is outdated and has lost its respectability, or when the initial masonry did not turn out as desired or the design for the jointing was not planned in advance.
Before you begin finishing the fireplace, it is necessary to carry out preparatory work. They will help you get the job done faster and securely fasten the finishing material to the wall.
Preparation for facing work
Whatever material is chosen, the following tools will be needed to work with it:
Basic tools for finishing work
- Construction level for marking the surface and monitoring the evenness of the masonry.
- Container for mixing compositions.
- Notched trowel.
- Smooth spatulas of different sizes for applying and grouting solutions on the surface.
- Rubber hammer for fitting tiles to fireplace wall.
- To cut out ceramic tiles you will need a tile cutter.
- Pencil and ruler.
- Rubber or metal grater.
- Electric drill with mixer attachment.
- Inserts for maintaining evenness of seams. Pieces of ceramic tiles of the same thickness are often used as them.
- Rule.
- Grinding machine with stone wheels.
- Jointing will be needed if the fireplace is designed to look like brickwork
- Sponge and soft cloth.
- Knife for cleaning seams.
- Wire brush.
- The auxiliary materials you will need to purchase are a primer, a heat-resistant plaster mixture, the same tile adhesive, and grout for the joints.
When all the tools and materials are ready, you need to work on the surface of the fireplace.
- First you need to use a knife to deepen the seams between the bricks by about 12 ÷ 15 mm.
- Then both the seams and the entire surface of the fireplace are cleaned of dust deposits. If whitewash or paint was previously applied to the walls, then this is also cleaned off with a metal brush.
- The surface and seams must be treated with a primer for better adhesion with the plaster and grout mixture.
Possible types of fireplace finishes
You can tidy up the surface of the fireplace in several ways and using different materials.
Renewing seams
It happens that after cleaning the brickwork and covering its surface with a primer, it turns out that it has a quite decent appearance. In this case, only the joint sealing material can be updated.
Updating brickwork jointing
Since the seams have already been cleaned and treated with a primer, all you have to do is dilute a heat-resistant solution to seal the seams and fill them with a construction syringe. Then all that remains is to smooth the solution with jointing, giving the seams a neat shape.
Tiling
Different materials are used for facing the fireplace - it can be porcelain stoneware, ceramic glazed or unglazed tiles, natural stone veneer, gypsum volumetric tiles imitating various types of stone, and other types.
For each type of tile, it is necessary to select a suitable adhesive that will combine well with both the surface of the walls and the facing material. In addition, the adhesive composition must be heat-resistant in order to easily withstand high temperature changes.
Special plaster mixture for stoves and fireplaces
- When the tiles and adhesive have been purchased, and the surface has been cleaned and primed, the walls of the fireplace must be leveled with plaster before starting masonry.
Leveling the fireplace wall with plaster
- If the walls need to be leveled to perfection, then beacons are installed on them or a reinforcing mesh is fixed to the wall.
- If the wall is leveled according to the beacons, then plaster mortar is thrown onto the wall and leveled using the rule. If you do not plan to apply a thick layer of plaster, then it is applied with a wide spatula and evenly distributed over the surface.
Plastering over reinforcing mesh
- The tiles are laid only after the surface of the walls has completely dried and gained strength.
- The adhesive is applied to the wall with a notched trowel, which leaves grooves that promote good adhesion of the tile to the surface.
Applying adhesive for laying decorative tiles
- Laying begins from the bottom row, gradually rising upward.
- The first row is leveled to an ideal horizontal level, since the accuracy of the entire masonry will depend on it. This applies to all tiles that are laid in order and not in a chaotic disorder.
Laying tiles is done from bottom to top in a row
- To achieve the same size of horizontal and vertical seams, each master uses his own methods. Some people place pieces of tiles between the rows, others use special crosses, but they are only suitable if you plan to make very small seams, no more than 3 ÷ 5 mm.
- If the seams need to be wide, then thin wooden or plastic slats are used to maintain evenness and uniform spacing. They are convenient because they are quite long, which makes the work much easier.
The work will be simplified by the temporary installation of calibration strips, which will guarantee the same thickness of the seams
- When the masonry is finished, it must be left to dry. During the period when the glue has not yet dried, but has set well, you need to carefully remove the leveling slats or other inserts from the row spacing.
- Then, after the glue has completely dried, the seams are sealed with grout, which is applied with a rubber spatula or using a construction syringe, depending on their width.
Sealing joints after laying tiles...
If the joints are wide, then they are given the desired shape using jointing.
... and subsequent jointing
- When filling joints and grouting, grout may accidentally fall directly onto the tiles. It must be removed immediately using a damp sponge and dry soft cloth.
- After the grout material has hardened, the tile or stone, if desired, can be coated with heat-resistant fireplace varnish.
Video: an interesting option for combining fireplace tiles
Prices for fireproof mortar for stoves and fireplaces
Fireproof mortar for stoves and fireplaces
Tiled fireplace finishing
Cladding fireplaces with tiles is a whole form of art, the technology of which has been used for centuries and has shown its effectiveness.
A fireplace decorated with tiles turns into a real work of art
The advantage of this method is that, due to its design and the material from which the tiles are made, a stove or fireplace lined with them can retain the resulting heat two or even three times longer than conventional brickwork. This factor helps save fuel, and therefore save money for the home owner.
Basic structure of tiles
A tile is a tile that has a protrusion on the back side in the form of a hollow box, which can have different depths. This structural element is called a rump. It serves not only as a heat storage device, but also to secure the tile in the fireplace masonry during its construction.
Tiles can vary in height and dimensions of the tumbler
For ease of laying and forming a single surface, tiles are produced in different types that complement each other - these are not only even tiles, but also corner tiles, as well as baseboards and elements for creating cornices and shelves.
In addition to ordinary wall tiles, figured tiles are also produced for external corners, shelves, and baseboards.
Tiles are produced with various relief designs and paintings, covered with or without glaze. Previously, all tiles were always painted by hand, and today there are also original designs that are made in the singular. Sometimes, on the walls of fireplaces and stoves, various stories were shown in pictures using tiles.
For a long time, relief plot drawings have been used to decorate tiles.
To make tiles, special fire-resistant clay with the addition of pure quartz sand is used, so this material is environmentally friendly and does not emit any fumes hazardous to human health. In addition, thanks to the design of the tiles, the surface of the fireplace, finished with them, is not too hot. It gradually releases heat into the room, so it maintains a comfortable temperature for a long time.
Video: interesting information on the types and properties of tiles
Laying tiles
Traditionally, tiles are installed along with the construction of the fireplace walls. The wire attached to each of them is embedded in the seams of the masonry, and the tiles are connected to each other by the ramp with metal staples.
The diagram clearly shows how the tiles are fastened together on the back side and how they are embedded into the wall.
Schematic diagram of the installation of tiles
1 - The clay box on the back side is a rumpa, often has one or two holes. A metal pin can be installed in them or a wire can be directly fixed.
2 - Steel pin.
3 - Wire embedded in the joints of the masonry.
4 - Staples fastening the tiles together at the sides of the tumbler.
The work is carried out in stages:
- The first step is to simply lay out the bottom row of tiles, without securing them into the masonry joints. This process is carried out in order to determine the required number of elements on each side of the fireplace. Laying out the tiles begins from the corners, and it is possible that one of the middle blocks will have to be made somewhat narrower. Having determined the number and size of parts, you can proceed to the final laying.
- Like all other facing tiles, tiles are installed from the bottom row, starting from the corner elements. First, soft wire is screwed onto the holes in the tiller or onto the pin. The tiles are connected to each other by the edges of the tiller, on the back side, with staples. The edges of the front tiles are coated with an adhesive solution and pressed tightly against each other.
- The space around the tiller is filled with clay mortar mixed with small pieces of bricks, or filled with dry backfill. It is important to ensure that there are no air bubbles left in the solution.
- The twisted wire is laid on top of the laid brick row. Then the mortar is laid on it, and the next row of bricks is laid on top. It is important here to ensure that the pump is pressed tightly against the brick wall of the fireplace.
- On top of the first row of tiles, the next one is installed in the same way as the first, but it is additionally fastened to the previous row with vertical brackets or rods.
- It is desirable that the seams between the rows, both vertical and horizontal, be minimal, so for horizontal rows they should not be more than 3 mm, and for vertical ones - 1 mm. If they do form, they are sealed with gypsum-based grout.
- If a ready-made fireplace is laid with tiles, then the wire is secured to nails or hooks driven or screwed into the brickwork. Even the smallest hole around them needs to be covered with plaster mortar.
Video: one of the options for installing tiles
Prices for different types of tiles
Tiles
Decorative plaster
In addition to finishing the fireplace with tiles, it is very popular to transform this interior detail using decorative plaster, which can imitate stones of different types or reproduce various relief patterns.
At the moment, several types of decorative plaster are produced, which are made on different bases.
- The acrylic-based plaster mixture also includes a certain percentage of mineral additives. This type of plaster can withstand temperatures reaching up to 90 ÷ 95 degrees, and can be used to tidy up an existing fireplace.
- The most affordable option for finishing a fireplace is mineral plaster, which is made on the basis of cement. It can easily withstand high temperatures and therefore will last quite a long time. Mineral-based finishing material is quite suitable for decorating a fireplace that is used throughout the cold season.
- Based on liquid glass, silicate plaster is made, which is produced in different shades, which gives it an advantage over other materials for which dyes need to be selected. This coating is vapor-permeable, which means it can “breathe,” which increases its service life. This plaster can withstand fairly high temperatures, so it may well be suitable for finishing fireplaces.
In addition to classification by type of base, plaster can be divided into textured and smooth. A material is produced containing marble chips, which immediately upon application gives a certain relief pattern. If a fine plaster powder is used, it can be rubbed into a high shine by adding different shades to create a surface that is indistinguishable from natural marble cladding.
- The preparation of the base for applying decorative plaster is carried out in the same way as for tiling. The surface must be smooth and well dried.
- Then, a solution of decorative plaster is mixed.
- If you choose an option that contains crumbs, then apply it with a wide spatula, distributing the solution vertically, horizontally or in a circular motion.
Applying relief plaster with crumbs
- If a material of a homogeneous composition is applied and it is planned to finish it in several colors, then plaster of a different color is applied to the still wet surface with a spatula. By movements that predetermine the direction of the textured pattern, the required relief is displayed.
Another way to apply relief to wet plaster.
You can achieve the desired texture by using any auxiliary means and tools - this could be a brush, spatula, washcloth, plastic bag, or even many other household items that have a certain pattern.
Plastic film can also be used
- Another option for finishing a fireplace with decorative plaster is to apply relief strokes to a flat surface using a spatula. Next, on top of the already dried plaster, it will be possible to apply the selected color shade, and perhaps even more than one - the main thing is that they are harmoniously combined with each other.
- Venetian plaster is a smooth, polished surface that creates an imitation of polished stone finishing.
— The work is carried out on a damp surface of applied and leveled plain plaster. Parts of the mortar are tinted in different shades and applied to the plastered walls of the fireplace with wide and narrow strokes, and then rubbed and carefully smoothed, creating the desired picturesque design.
A very interesting technique - applying Venetian plaster
- Next, the plaster is allowed to dry a little time and then sanded with a metal spatula or grout approximately 80 ÷ 100 mm wide, achieving the shine of natural polished stone.
If you decide to decorate a fireplace using decorative plaster, then the master has a wide choice of different techniques. The advantage of this method is that the plaster surface can always be transformed by applying a different shade, relief or laying tiles on top. Therefore, for those who prefer to frequently make changes to their interior, decorative plaster is exactly what is required.
Video: decorating a fireplace using the Venetian plaster technique
Prices for fireplaces and stoves
Fireplaces and stoves
Fireplaces in the interior
As an example, we can cite several options for finishing fireplaces using different techniques. Perhaps, after such familiarization, it is easier for some owners to choose the option that is more suitable for a particular interior.
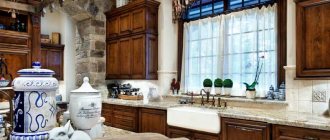
Fireplace with original stone veneer finish
A fireplace finished with stone veneer will look perfect in an interior decorated in any style. The material is made from stone of different types, which is cut into thin tiles with a thickness of 7 ÷ 10 mm. The material is quite fragile, so work with it must be carried out by an experienced craftsman, otherwise the tiles can easily be damaged. Stone veneer is a natural material, so its price is quite high.
Imitation of natural stone is also produced. This finishing material is made from gypsum and is tinted to resemble various stone types. If the tile imitating stone veneer is quite large in size, then you also need to work with it extremely carefully; the larger its area, the more fragile it is.
Both natural material and its imitation can be used to decorate both false fireplaces and actively used ones. The material is quite heavy in weight, so the base for its installation must have a certain rigidity, and it is also important to choose the correct adhesive composition.
Combined option - finishing techniques for the lower and upper parts of the fireplace differ
In this case, a combined version of materials that are harmoniously matched to each other was used to decorate the fireplace. The lower part is lined with ceramic terracotta tiles, which go well with the heavy oak mantels, which gives the structure a solid look.
The upper chimney section of the fireplace is decorated with light-colored decorative plaster. It makes this part of the building lighter, without burdening the interior. The color of the upper section is closer to the ceiling tone, and the lower one is in perfect harmony with the shades of the floor and furniture made in the English style. For this interior, decorating the fireplace in this way is an ideal option, which fits organically both in terms of color scheme and style.
Finishing with ceramic tiles can also give wonderful results.
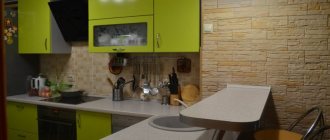
A tiled fireplace is perfect for a modern living room or bedroom interior. It has a rather modest design, without stucco elements and a heavy stone base. The fireplace looks like a light structure thanks to the perfectly selected delicate pistachio color and snow-white design.
All the material used in the design of this fireplace can be purchased in modern construction stores. To make a fireplace portal, both gypsum elements and those made of polyurethane are used, which are coated on top with white heat-resistant paint or disguised as wood of various species, and varnished on top.
Ceramic tiles can also be purchased in various colors and sizes, matching them to the color scheme and style of the entire interior of the room. It is quite possible to do this type of fireplace design yourself if you carefully prepare the surface and carefully approach the masonry.
For finishing, ready-made decorative relief elements are often used.
This design is suitable for fireplaces located in spacious rooms decorated in classical, romantic and other styles close to them. The surface of the fireplace is covered with decorative plaster in the Venetian style, which is perfectly matched with portal design elements in the form of columns and relief ornaments. These parts are made from polyurethane and are glued to the prepared surface with polymer-based adhesives. On top they are tinted to match the overall surface or highlighted in white or dark color.
Design in this style gives the fireplace respectability and solidity. It can become the central decorative element of the interior of the hall, to which all other style details are matched.
If you want to cladding the fireplace yourself, then the main thing is to correctly calculate your strengths and creative capabilities. To do this, it is recommended to start with a sketch of the future structure, from which it will be easier to estimate the volume of work and determine the amount of material needed.
To achieve the desired result without spoiling the plan, on a small sheet of hard cardboard you can conduct a “dress rehearsal” of all planned work, starting with the primer and ending with the final stage, strictly adhering to the chosen design technology.