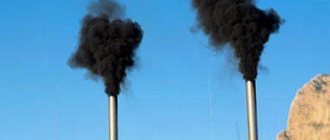
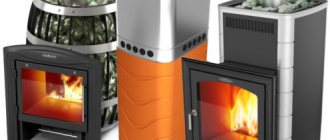
It has become a tradition for us that various products with downright miraculous properties appear on the market from time to time. Just remember ultrasonic washing machines, which easily fit into a medium-sized pocket, and replace no less than a full-fledged professional-class Electrolux drum washing machine from the nearest Swedish laundry. But let's move closer to the bathhouse. The long-burning stove has gathered a lot of advertising noise around itself. Manufacturers and sellers vied with each other to describe a lot of miraculous qualities inherent in the innovative product, and in the first place is very high fuel efficiency. Is it really? What is the basis of such amazing qualities?
Tools and materials
In order to make a sauna stove with your own hands, you will need the following materials:
- Sheet steel . The optimal thickness is 2 - 3 mm. Sheets of greater thickness are expensive and heavy; smaller ones can quickly burn out. And only for the firebox it is better to take a thicker sheet, for example, 5 mm.
- Cast iron for grate . If the design of the stove includes a grate between the ash pan and the ash pan, it is better to buy it ready-made or make it from cast iron beams - this material is more fire-resistant.
- Asbestos thread . Braided into a cord, it serves to seal the connections.
- Special fire-resistant paint for finishing coating.
For the firebox, it is better to take not ordinary black steel, but chromium steel containing 13% Cr.
It holds a higher temperature and does not burn out. The minimum set of necessary tools looks like this:
- Inverter welding machine with a set of electrodes, mask, leggings.
- Angle grinder (grinder) with cutting and grinding wheels for metal.
- Drill with a set of metal drills.
- A set of plumbing tools: a hammer, a pair of files, pliers.
Job requirements
The operating principle described above is the basis. However, in addition to all this, there are also additional requirements that are necessary for the full and high-quality operation of pyrolysis. If assembled correctly, such a boiler can be used for heating and for supplying hot water to the bathhouse. In order for the process to proceed smoothly, without sudden changes in temperature and pressure, certain conditions must be observed. Here are some of them:
Homemade heater from an aluminum bucket
- To make your own boiler, you only need high-quality materials.
- First of all, the metal from which the frame and casing of the boiler is made must be of high quality. Alloy steel is perfect for this, as it meets all the required parameters and building codes.
- You need to know how to use a welding machine, without which it will be impossible to assemble the entire system. In addition, you need to be able to understand the drawings of units and their structural parts.
- Electronics are required to monitor the operation of the boiler, which can be expensive.
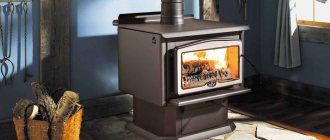
Long-burning potbelly stove
The potbelly stove has become a real symbol of Russia since the times of the Revolution and Civil War.
This is the name given to the simplest iron stove of a cylindrical or cubic shape. Its advantage was that the smoke channel - an ordinary iron pipe - could be taken out anywhere - through a wall or roof, into a window.
Taking the simplicity and practicality of a potbelly stove, you can make a small stove that will embody some simple ideas that significantly increase its efficiency, safety and environmental friendliness.
Basic scheme
The classic potbelly stove has a cylindrical design. However, it is difficult to do this when making it yourself, so you need to take a cube or parallelepiped as a basis.
Contains the following structural elements:
- Firebox _ This is the chamber in which fuel combustion occurs, most often wood. The walls and bottom of the firebox must be thick, since they bear the main temperature load. There is a door in the front for storing firewood in the firebox; if desired, it can even be equipped with heat-resistant glass.
- Ash pit (ash pit) . The compartment under the firebox is separated from it by a grate. The ash pan is also equipped with a door, only of a smaller size. It is used to remove ash and ash. which fall through the grate from burnt firewood. But this is not the only point of the ash pan - air is sucked in through the ash door and passes through the fuel layer from below, ensuring the best combustion.
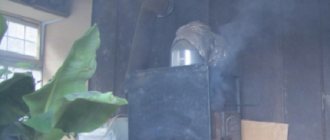
- Smoke channel . To arrange it, a round hole is cut out in the upper part of the stove, a piece of steel pipe is inserted into it and scalded. In the future, you can attach other sections of the pipe here or use a factory sandwich chimney with special locks.
Expert opinion
Levin Dmitry Konstantinovich
Some manufacturers of homemade stoves believe that the design with a blower and grate is not suitable for a sauna stove - it creates too much draft, which prevents complete combustion of the wood. Instead, it is proposed to lay the firewood directly on the bottom of the stove, and ensure air flow by drilling several round holes in the lower part of the combustion door and equipping them with a sliding damper.
How to make a door
The door is made of a thick sheet of metal. For fastening, you can use store-bought factory hinges or make your own. To seal the fit, an asbestos thread is used - it is wedged in a groove cut by a grinder.
If there is a suitable sheet of heat-resistant glass, it is inserted as follows: cut a window in the door and grind the cut area. Then they lay the glass, lay asbestos fiber around the perimeter, invisibly from the outside of the part, after which, using small steel tongues, I make tacks on each side.
The turning handle of the latch is easiest to make from the outside.
Homemade secondary gas afterburning system
The main disadvantage of a potbelly stove is its low efficiency. A stream of air passes quickly and strongly through the entire oven, carrying with it not only unburned food, but also heat. As a result, the case does not warm up sufficiently and gives off less heat. To solve this problem, a simple but ingenious modification was invented.
By placing two steel sheets above the firebox, the smoke passage channel can be significantly increased the length of the path that burnt gases travel before exiting through the chimney opening:
- The first horizontal sheet is welded directly above the firebox so that a channel remains for the passage of gases in the rear part of the stove.
- The next sheet is cooked higher, offset so that the passage is now at the front of the oven. It turns out that smoke, gases and heat, once in this labyrinth, snake through it all the way to the chimney. Along the way, they give off all the accumulated heat to the sheets, side walls and top plate of the oven.
If you drill several holes from the bottom from the back and cover them with a screen made of steel sheet, then at the top point, when fresh air, but already heated by the screen wall, meets unburned gases, the process of afterburning secondary gases will take place in the channel, which will lead to a significant increase in efficiency ovens.
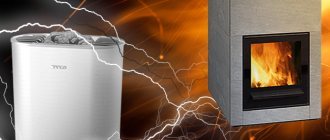
Bathhouse or house with a pyrolysis boiler: advantages and disadvantages
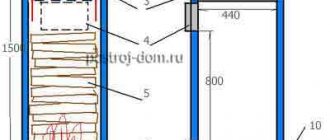
Vertical stove model
People who plan to install such boilers in their home or bathhouse need to know about the advantages and disadvantages of pyrolysis.
The advantages include:
- Economical fuel consumption for the furnace. What makes this boiler economical is that almost anything can be used as fuel, even waste engine oil. Now you won’t need to dump it anywhere, but start using it for useful purposes.
- Soot production is practically reduced to zero. The constant release of smoke from the chimney can certainly disturb the neighbors in whose direction the wind is blowing. In addition, it harms the environment, that is, ecology. Now, with such a fuel combustion system, you can forget about this. Due to the fact that secondary and sometimes tertiary processing occurs, combustion residues, soot, soot and smoke simply do not exist for natural reasons.
- High heat dissipation. When operating such a boiler, the efficiency level can reach up to 80%. At maximum boiler load, the room temperature, even without installing heating radiators and additional piping, can reach such a limit that in winter it will be hot in just a T-shirt. That is why people use this heating method.
- Easy to use. Even a small child could control the operation of the pyrolysis boiler system. All that is required is to periodically (not as often as in a conventional stove) add fuel for combustion and select the required operating power, otherwise the system is completely autonomous. Such systems are perfect for a bathhouse, since this is where autonomy is required.
- Possibility of safe disposal of almost any chemically produced substances: rubber, wood industry waste, polymer substances, etc. In addition to the fact that this method is absolutely safe for the environment, it provides an opportunity to save financial costs on fuel. Efficiency, durability, etc. can be easily adjusted.
Despite such a long list of advantages, the pyrolysis heating system has its drawbacks. Here are the main ones:
- High cost of the finished boiler. However, you can solve this issue by making the stove yourself.
- Do not use fuel with high humidity.
- A permanent connection to the power supply is required.
Gate equipment
Another way to combat increased draft, which causes wood to burn out too quickly and not completely, is to install a damper on the chimney.
A damper is a valve that closes the chimney exhaust duct and blocks the draft:
- In the closed position there is practically no draft - almost no air is sucked in through the blower and combustion doors.
- In the fully open position of the gate, the thrust is maximum - this is the kindling mode.
- By partially retracting the damper , you can reduce the draft so that the wood does not burn, but smolders. This way you can steam on one tab longer than usual.
In factory long-burning furnaces, the gate is made rotary. In a summer cottage it is easier to make it movable. To do this, you just need to cut the sheet to size and make a gap in the chimney. You can pull out such a flap by the tongue.
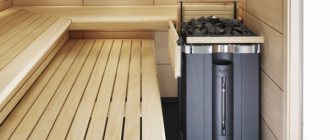
How to arrange a heater
The heater is an integral part of the sauna stove. Thanks to it, thermal inertia increases, and there is also a wonderful opportunity to add steam by pouring a ladle of water on the stones. The two types of heaters are constructed in different ways.
Open
It's easier to make it. In fact, all that is needed is to build a tray for the stones at the top of the stove.
To do this, you can weld the sides onto the top panel - either from solid sheet metal blanks or from mesh. By laying stones in several layers, you can achieve a significant increase in heat transfer.
The second option for constructing an open heater is around the chimney duct. Although the air in it is colder than at the exit from the firebox, it is still hot enough to heat the stones.
To do this, a ring of the required width is put on the pipe before installing the chimney, then it is boiled and becomes motionless.
A mesh stopper is attached around it - you can either buy it in a store or make it yourself from a chain-link mesh. By filling this container with stones, we get a small but effective heater that takes up little space.
Expert opinion
Levin Dmitry Konstantinovich
An open heater allows you to achieve the effect of a Finnish sauna - rapid heating up to 100 degrees and hot, “dry” steam, which is instantly formed when a ladle of water is poured onto the hot stones.
Closed
This is a cavity inside the oven where stones are placed. In this case, the stone aggregate itself should not come into contact with water. The stone hopper is usually located at the back of the stove, directly next to the firebox. In order for the stones to warm up better, sometimes they make channels from pipes that run along the firebox and open into the heater - this way the temperature rises faster.
A channel also leads inside the closed heater, but it is a funnel. When water evaporates, it does not immediately rise into the air, but gradually comes out in a superheated state - this is how you can achieve the effect of a Russian bath with soft steam.
Which version of the heater would you make?
OpenClosed
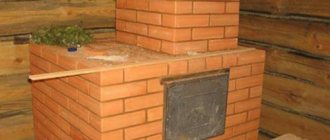
Technology for constructing a brick pyrolysis stove
The best option for heating equipment for a bathhouse and a private house is a brick pyrolysis oven.
To install a gas generator stove with your own hands, you need to prepare:
- red fireclay and refractory ceramic bricks;
- steel sheets;
- cast iron grates;
- fan (power up to 350 W);
- doors for the firebox and ash chamber;
- welding machine;
- electric drill;
- Bulgarian
The construction technology includes the following steps:
- Clearing the site for pouring the foundation. For pyrolysis devices, it is recommended to equip a strip-type foundation, which has increased strength and durability.
- Execution of brickwork after pouring and hardening of the foundation. For the construction of heating equipment, only high quality refractory bricks are used.
- Lining the internal walls of the chambers with fireclay bricks, resistant to high temperatures.
- Installation of a chimney system, the inner part of which is a metal or ceramic pipe.
- Carrying out decorative finishing of surfaces and test firing of the furnace after completion of the main work.
If building a pyrolysis stove from brick seems complicated and time-consuming, then you can use an alternative option - making a simple wood-burning stove from an all-metal gas cylinder.
How to make a water tank
Only stainless steel should be used as a material. If there is no suitable material, you can try to fit a stainless steel container under the tank. A rectangular tank shape would be optimal. It is not welded to the furnace wall, but simply touches it closely.
If the top of the stove is free from the heater, the tank can be placed on top. If this is not possible, the tank is placed at the side or rear wall - a shelf is welded to the wall, the tank is placed on it, and then it is pulled in with a tire and two studs with wing nuts on them.
Basic installation rules
If we take into account that the metal body of the device is subjected to strong heating during operation, then it should be understood that the stove should not be installed near objects that could ignite due to thermal effects. It is necessary to leave a free space of 20-30 centimeters to any of the surfaces. It would be best to equip the floor and walls in the area of installed heaters with screens that repel heat. It is important to pay special attention to the chimney. The subsequent operation of the furnaces, as well as their overall service life, depends on the quality of the pipe used.