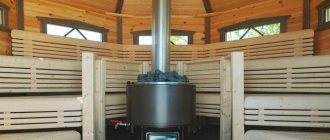
All self-made heating boilers are based on a general principle: fuel, burning in it, heats the heat exchanger. That is the coolant, which the vast majority of home craftsmen choose water as.
The operation of such a boiler and its appearance directly depend on two main factors: what materials are available and what kind of fuel is the cheapest in your area.
The efficiency of a homemade boiler depends on:
- The design of your heat exchanger - the larger the available area of direct thermal contact of the container with the coolant and the firebox, the greater the amount of heat the coolant receives per unit time.
- Complete combustion of the fuel used - if pyrolysis gas escapes into the chimney along with the resulting combustion products, afterburning which can significantly increase the efficiency, and the flow of oxygen to the combustion site is insufficient - the design needs to be modified.
It directly follows from this that it is necessary to achieve a minimum temperature of combustion products. The lower it is, the higher the efficiency of the boiler.
The second advantage of the low temperature of combustion products entering the chimney is the key to safe and durable operation of your boiler.
For reference: the best models of boilers operating on solid fuel can achieve the indicated indicator in the range from 120 to 150 degrees.
Drawing of a simple long-burning boiler
This design of a solid fuel boiler is quite simple. The heat exchanger can be made of sheet steel in the form of a “water jacket”. To maximize heat transfer efficiency and increase the contact area with flame and hot gases, its design includes two reflectors (protrusions inward).
Drawing of a simple solid fuel boiler
In this design, the heat exchanger is a combination of a “water jacket” around the combustion chamber and an additional slot-like sheet metal register in its upper part.
Diagram of a boiler with a slot-type heat exchanger
1 - chimney; 2 - water jacket; 3 - slot heat exchanger; 4 - loading door; 5 - firewood; 6 — lower door for ignition and cleaning; 7 - grate; 8 - door for regulating air supply and cleaning the ash pan.
Important information
Advanced industrial models, despite their high cost, allow for significant savings during their long-term operation due to lower fuel consumption and the need for frequent maintenance.
It is almost impossible to make a high-tech heating device at home that has all the qualities of industrial analogues. In this regard, most homemade boilers have a fairly simple design made from cheap materials. They, as a rule, have low efficiency, require frequent maintenance (cleaning of ash and soot) and constant supervision during operation.
When deciding to independently manufacture a solid fuel boiler, you need to realistically assess your technical skills and abilities, the availability of the necessary materials and tools, as well as the approximate costs of purchasing them.
During work (especially when using welding), all fire safety measures should be carefully followed.
Top combustion boiler
This unit differs from the previous ones - firstly, in its shape (it has a round cross-section and can be made from pipes of different diameters), and secondly, in the method of burning fuel in it (it is burned in it from top to bottom).
In order to ensure such a combustion process, it is necessary to provide air supply from above, directly to the combustion site. This function here is performed by an air supply telescopic pipe, which rises up when loading fuel and falls down after igniting the fuel. As it burns gradually, the pipe falls down under its own weight. A “pancake” with blades is welded to the bottom of the pipe to ensure uniform air supply. To ensure better fuel combustion conditions, an air heating chamber is located in the upper part. The air supply, and therefore the burning rate, is regulated by a valve at the entrance to this chamber from above. The heat exchanger here is made in the form of a “water jacket” around the combustion chamber.
Drawing of a top combustion solid fuel boiler
1 - outer wall (pipe); 2 - inner wall; 3 - water jacket; 4 - chimney; 5 — telescopic air supply pipe; 6 — air distributor (metal “pancake” with ribs; 7 — air preheating chamber; 8 — air supply pipe; 9 — supply pipe with heated water; 10 — air damper; 11 — loading door; 12 — cleaning door; 13 — pipe with water from the system (return); 14 — cable controlling the damper.
Is it possible to install the equipment yourself?
Installing a wall-mounted gas boiler is not the easiest task. The safety of the residents of the house directly depends on the correctness and quality of the settings. Therefore, the requirements for the installation of a gas heat generator are regulated by strict standards, in accordance with the legislative framework of Russia.
As a result, installing a wall-mounted gas boiler is a very difficult task, and often beyond the capabilities of a beginner. Special knowledge is required on how to properly install and connect the equipment so that it works properly and is safe.
Boiler with pyrolysis combustion of solid fuel
The difference between this design is that solid fuel does not burn in it, as in a conventional one, but if there is a lack of primary air supply, it is “distilled” into wood (pyrolysis) gas, which is burned in a special afterburner chamber when secondary air is supplied to it. Such a presentation can be either natural or forced.
Scheme-drawing of one of the variants of a pyrliz boiler
1 — draft regulator with temperature sensor; 3 - firewood; 4 - bottom door; 5 - grate; 6 — air damper for primary air supply; 7 - ash pan; 8 — grate; 10 — cleaning; 11 - drain; 12 — thermal insulation of the body; 13 — return (coolant supply from the system); 14 — nozzle; 15 — secondary air supply; 16 — chimney damper; 17 - pipe with heated water; 18 — damper; 21 — loading door; 22 - afterburning chamber.
Device and design
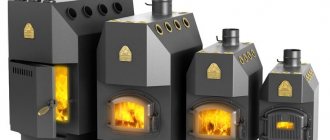
As mentioned above, all solid fuel devices are characterized by increased sizes of fuel chambers. The most popular models for heating are Buleryan and Bubafonya technologies.
The design using this technology contains several basic elements:
- Metal body
- The upper and lower chambers are for burning gas and fuel, respectively.
- Door.
- Smoke exhaust duct.
- Ash pit.
It is interesting that in the Bubafonya system the ash pan is absolutely sealed, and the upper chambers, equipped with a special damper to regulate the supply of oxygen, are responsible for the supply of oxygen.
Shaft type boilers
As already mentioned, a feature of such boilers is the presence of two chambers: a large vertical loading chamber (shaft) and a chamber with a heat exchanger. The fuel is ignited from below in the first chamber and the flame enters the other through a hole, where it transfers its energy to the coolant through a heat exchanger.
Such boilers can be either with conventional fuel combustion or with pyrolysis. In the first case, all the necessary air is supplied through the lower door, and the combustion products, after passing through the heat exchanger, are removed into the chimney. In the second case, a limited amount of primary air is supplied to the combustion site, where the wood burns, releasing pyrolysis gas. In addition, such structures are equipped with an additional afterburning chamber, where secondary air is supplied and gas is burned. At the top of the heat exchange chamber there is a valve that opens when ignited and allows the flue gases to escape directly into the chimney.
Drawing diagram of a shaft-type boiler with an afterburner chamber
1 — primary air supply damper; 2 - lower door for ignition and cleaning; 3 - grate; 4 - firewood; 5 — loading door (can be located on top); 12 - pipe with heated water (supply); 13 — starting valve; 14 — chimney damper; 15 - heat exchanger; 16 — secondary air supply; 17 — afterburning chamber; 18 — return; 19 — drain; 20 - cleaning; 21 - damper; 22 — grate; 25 - ash pan.
Diagram of a shaft-type boiler with lining of the inner surface of the combustion and afterburning chambers
Internal details
The internal parts of the heating device are cut out according to the pattern using a grinder or drill (in places where it is impossible to cut with an angle grinder). They work according to an algorithm - drilling closely spaced holes along the contour of the part, cutting jumpers with a chisel or small sledgehammer).
When cutting parts, you must strictly observe the dimensions and not deform the sheet of metal. During final assembly there will be alignment problems and gaps that are too large.
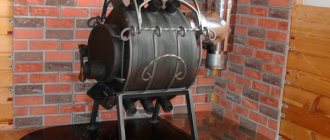
Boiler - general view without chimney
Do-it-yourself solid fuel boiler for ultra-long burning
A homemade heater will have the following design:
- The firebox is a “box” 460 mm deep, 360 mm wide and 750 mm high with a total volume of 112 liters. The fuel load volume for such a combustion chamber is 83 liters (the entire volume of the firebox cannot be filled), which will allow the boiler to develop power up to 22 - 24 kW.
- The bottom of the firebox is a corner grate on which the firewood will be placed (air will flow into the chamber through it).
- There should be a 150 mm high compartment under the grate to collect ash.
- The 50 liter heat exchanger is mostly located above the firebox, but its lower part covers it on 3 sides in the form of a 20 mm thick water jacket.
- A vertical flue pipe connected to the top of the firebox and horizontal flame pipes are located inside the heat exchanger.
- The firebox and ash pan are closed with sealed doors, and air is taken in through a pipe in which a fan and gravity damper are installed. As soon as the fan turns off, the damper lowers under its own weight and completely blocks the air intake. As soon as the temperature sensor detects a decrease in the temperature of the coolant to a user-specified level, the controller will turn on the fan, the air flow will open the damper and a fire will break out in the firebox. Periodic “shutdown” of the boiler in combination with an increased volume of the firebox allows you to extend operation on one load of fuel up to 10 - 12 hours with wood and up to 24 hours with coal. The automation of the Polish company KG Elektronik has proven itself well: a controller with a temperature sensor - model SP-05, a fan - model DP-02.
do-it-yourself solid fuel boiler with extra long burning time
The firebox and heat exchanger are wrapped in basalt wool (thermal insulation) and placed in the housing.
The process of making a boiler with your own hands.
First of all, you need to prepare all the necessary preparations:
- Steel sheets 4 - 5 mm thick for making a firebox. Alloy steel of heat-resistant grades 12Х1МФ or 12ХМ (with additions of chromium and molybdenum) is best suited, but it needs to be welded in an argon environment, so the services of a professional welder will be needed. If you decide to make a firebox from structural steel (without alloying additives), then you should use low-carbon grades, for example, Steel 20, since high-carbon grades may lose their ductility due to exposure to high temperatures (they are hardened).
- Thin sheet steel 0.3 - 0.5 mm thick, painted with a polymer composition (decorative cladding).
- 4mm structural steel sheets for the body.
- Pipe DN50 (fire pipes inside the heat exchanger and pipes for connecting the heating system).
- Pipe DN150 (pipe for connecting the chimney).
- Rectangular pipe 60x40 (air intake).
- Steel strip 20x3 mm.
- Basalt wool 20 mm thick (density - 100 kg/cubic m).
- Asbestos cord for sealing openings.
- Factory made door handles.
Welding of parts should be performed with MP-3S or ANO-21 electrodes.
Making a cabinet from chipboard
Manufacturers of furniture and boilers still cannot agree among themselves on combining sizes, so they have to take the situation into their own capable hands. After browsing through furniture stores and not finding a suitable option for a camouflage cabinet, buyers can make the module themselves. If you don’t mind the time and effort to maintain comfort in your apartment, go for it.
Tools and materials
You can purchase everything you need at any construction hypermarket. Choose chipboard sheets larger in size than the dimensions of the future cabinet by 5-15 cm. You will also need wooden blocks, hinges, door handles, wood screws, metal corners, hanging fasteners, and covering material. Don't forget about fire retardant impregnation for wood.
The tools you will need are a jigsaw, a screwdriver, a level, a measuring meter, a tape measure, a corner, a pencil and skillful hands.
DIY heat exchanger for a solid fuel boiler
First, the firebox is assembled from two side, one rear and one upper walls. The seams between the walls are made with full penetration (they must be airtight). A 20x3 mm steel strip is welded horizontally from below to the firebox on 3 sides, which will serve as the bottom of the water jacket.
Next, to the side and rear walls of the firebox, you need to weld short pieces of small-diameter pipe in a random order - the so-called clips, which will ensure the rigidity of the heat exchanger structure.
Now the outer walls of the heat exchanger with pre-made holes for the clips can be welded to the bottom strip. The length of the clips should be such that they slightly protrude beyond the outer walls, to which they need to be welded with a sealed seam.
In the front and rear walls of the heat exchanger above the firebox, coaxial holes are cut into which flame tubes are welded.
All that remains is to weld the pipes to the heat exchanger for connection to the heating system circuit.
Homemade sheet metal boiler
Testing, connection to the heating system
After assembling the main part and applying the final seam, it is necessary to check the tightness. Just pour water into it. Gross welding errors will be identified. Deeper lack of penetration will remain unknown and will appear at the most unexpected moment during operation.
To test the heating device, before connecting it to the home heating system, you need to use a pressure test pump. You can create the required pressure and identify design flaws.
Using a pressure test pump, you need to create a water pressure inside of at least 3.5-4 atmospheres. If it does not leak during testing, it will successfully operate at the standard 1.5-2.5 atmospheres of internal pressure.
A pressure test pump is expensive equipment and requires skill to use. It is impractical to purchase just once. It’s easier and more effective to contact a plumber or a specialist who installs heating equipment.
After pressure testing, the test firebox can be installed in the planned location and connected to the heating system of the house. It is necessary to include an expansion tank in the safety group. Safety group - pressure gauge showing the pressure in the system, automatic air release valve, emergency valve.
Start of assembly
How to increase efficiency
A homemade device, with all its advantages, still cannot be compared with a factory device.
But every master can increase the efficiency of his brainchild by following these useful tips:
- install a spare heat shield above the boiler;
- install a reserve tank of water so that it is heated by the heat of combustion products;
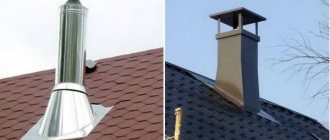
- make a gas exhaust pipe at least 7 meters long;
- install a circulation pump - it will increase the efficiency of the entire system by at least 20%. Brick stove with oven read on our website.
Circulation pump prices
circulation pump