Stoves are popular heating elements that are often used in a variety of spaces today. They are divided into many varieties, each of which has its own characteristics and sizes. Any type has a firebox, and it can have different configurations and parameters. This element is considered the most important in the entire subject, therefore, resource savings and efficiency of space heating . Calculation of fireplace elements is often required, since it is found everywhere in modern homes.
What to consider
In addition to the direct dimensions of the working chamber, such indicators as the power of the firebox and the volume of the heater are taken into account, which is most often measured in the mass of loaded stones. The power of the stove determines what size steam room it will effectively heat, and the volume of the heater affects the amount of steam produced.
For kilns made independently, it is very difficult to calculate the optimal ratio of power to the number of loaded stones. Most often this is done experimentally. In factory-made models, everything is calculated, so the stones are guaranteed to warm up to the required temperature for the release of “white steam”.
How much heat is measured in grams?
Let's say you plan to heat the stove in winter. Let's make a calculation for a temperature of -25 degrees. At this temperature, each cubic meter in a room loses about 60 kcal of heat per hour. By multiplying this number by the volume of the house, you can calculate the heat loss of the entire room. For example, if the volume of a house is 100 cubic meters, its heat loss will be 6000 kcal per hour.
So, in order to make up for heat loss at home, the stove must produce at least 6000 kcal of heat per hour. But in addition to compensating for heat loss, the stove is also required to increase the temperature in the room. Therefore, its heat transfer should be at least 100 kcal more. In our case, this is about 6100 kcal per hour. But this is in theory. In practice, the heat loss of a house - and therefore the required heat transfer - may be greater, since our formula does not take into account the quality of insulation, interior decoration and other factors.
Large size fireboxes
Large stoves have firebox dimensions of 73x73 cm. The power of such devices is 40 kW, which allows you to heat a steam room up to 50 m³. The maximum load of bath stone is 250 kg. In addition to a large amount of good steam, this makes it possible to steam for 6 hours without worrying about additional loading of firewood.
In addition, there is an original design of sauna stoves with a metal mesh around the firebox. The stoves have relatively small fireboxes for a bath, but can accommodate a large number of stones: the backfill is located around the chamber, and not just inside. This design warms up the room more slowly, but retains heat longer and produces more steam. Another advantage of stoves with a wire heater is that you can produce steam at different temperatures. When water is supplied to the lower part of the heater, hotter steam is released, and softer steam is released to the upper part.
Main characteristics of the PDA stove
This type of stove has pros and cons. The disadvantages include:
- All working surfaces become very hot during use of the product, which is dangerous for use in residential areas.
- The heat capacity of the oven is low, so after heating it cools down very quickly.
The positive parameters of the PDA product include:
- You can do it yourself using high-quality bricks, but the calculation must be correct so that all structural elements have the necessary parameters.
- A universal product that can be used not only for heating, but also for cooking, as well as for pottery.
- High efficiency .
The overall dimensions and design of each component element of such a furnace can be completely different depending on the parameters of the created item.
What's the easiest way to calculate?
There is a more convenient way to determine the required stove size, heat output and other characteristics. Typically, in the instructions for the stove, manufacturers indicate the volume of heated rooms for which it is designed. In this case, you only need to know the volume of your room or bathhouse. And then just choose a stove that matches the given volume. Below are stove options for rooms of various sizes.
Stoves for home
| volume of heated premises | oven model | oven dimensions, mm |
| up to 100 cubic meters | Ermak Stoker 100 | 600x350x670 mm |
| up to 150 cubic meters | Termofor "Professor Butakov" – Student | 370x520x650 mm |
| up to 200 cubic meters | Teplodar Top Model 200 | 700x375x520 mm |
Bath stoves
| volume of heated premises | oven model | oven dimensions, mm |
| 4-9 cubic meters | Teplodar Rus 9 | 672x308x469 mm |
| 8-16 cubic meters | Teplodar Sahara 16 | 799x374x549 mm |
| 12-24 cubic meters | Ermak Elite 24 | 600x480x760 mm |
| up to 40 cubic meters | Severyanka | 750x500x1300 mm |
When choosing the dimensions of the stove, it is worth taking into account the individual characteristics of the owners. Someone, for example, prefers coolness and sleeps with the window open all winter. And someone, on the contrary, “likes it hot.” It is better for such owners to take a stove with a power reserve so that they can be warm even on the coldest days.
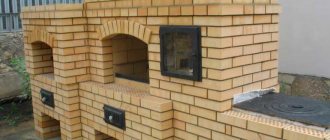
Do-it-yourself stoves: diagrams and drawings
The construction of any furnace begins with drawing up a detailed diagram of the location and appearance of the structure. Order drawings (order is an exact description of the placement of bricks in each row of masonry) can be found on the Internet. But before that, you should decide on the type and size of the structure, its location in the house.
The stove should be positioned so that its outer surface is capable of heating as many rooms as possible (for example, near one of the walls or in the partition wall of several adjacent rooms).
In addition, we should not forget about the ceilings: the stove should be positioned so that its pipe does not rest on the beams. The size and type of construction largely depend on the area of the house. Almost any furnace design can be modified to suit your own needs. At the same time, the structure of the furnace will be the same.
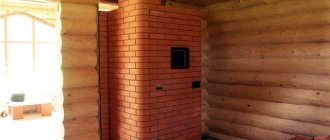
So, a Russian stove of any kind consists of:
- Foundations (in the form of a separate foundation);
- An ash pan, which will provide air flow to the combustion chamber and accumulate ash;
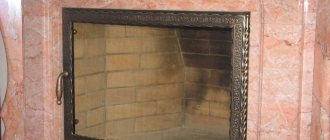
- Firebox with a door for loading firewood;
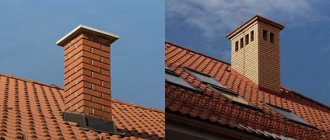
- The chimney, which is responsible for the removal of combustion products (one of the main roles here is played by a metal damper that will block the hole between the chimney and the furnace);
- Smoke circuits are channels that connect the firebox to the chimney.
A drawing of the design can be made on plain paper, you can create diverse projects using programs for 3D visualization, or you can make a mock-up of a stove from cardboard (for this you can use a regular box, forming paper channels inside).
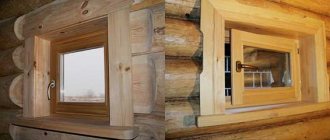
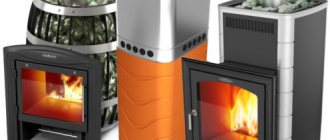
Dimensions of sauna stoves: metal
All that can be found on the market are metal stoves . They can be steel or cast iron, wood-burning, electric or gas, but they all belong to the class mentioned. So there shouldn’t be any problems with them: the manufacturer will tell you everything himself.
Steel and cast iron, with most models for Russian baths:
| Model | Manufacturer | Length mm | Depth mm | Height mm |
| "Anapa" | "EasySteam" | 420 | 730 | 800 |
| "Angara 2012" | "Termofor" | 415 | 830 | 900 |
| "Taimyr" | 415 | 605 | 800 | |
| "Vesuvius Russian steam" | "Vesuvius" | 660 | 860 | 1120 |
| "Hephaestus ZK" | "Techno Lit" | 396 | 731 | 534 |
| "Zhiharka" | "Zhar Gorynych" | 350 | 650 | 1400 |
| "Cinderella" | 500 | 500 | 1800 | |
| "Emelyanich" | "Dionysus" | 510 | 630 | 1050 |
| "Karelia 4" | "Petrozavodskmash" | 500 | 500 | 980 |
| "Kalita Russian steam" | "Magnum" | 650 | 800 | 1110/ 1365/ 1600 |
| "Sudarushka Prima" | "Inzhkomcenter VVD" | 595 | 860 | 1130 |
| "Enchantress Russian Steam" | 610 | 886 | 1042 | |
| "Steam Classic" | "Feringer" | 460 | 790 | 740 |
| "Baby Steam" | 460 | 790 | 740 | |
| "Steam Harmony" | 550 | 870 | 900 | |
| "Kuban" | "Teplodar" | 493 | 701 | 907 |
| "Lagoon" | 330 | 690 | 855 | |
| Kutkin 1.0 | "Kutkin" | 460 | 450 | 900 |
| Kutkin 1.5 | 450 | 540 | 900 | |
| Kutkin 2.0 | 450 | 620 | 900 | |
| "Slavyanka Russian steam" | "Svarozhich" | 480 | 570 | 900 |
| "Firebird Russian Par" | 640 | 770 | 1600 | |
| "Troika-06M2" | "Troika" | 320 | 700 | 1150 |
| "Khangar" | "Teklar" | 440 | 670 | 800 |
| "Etna" | 500 | 900 | 1306 | |
| Harvia Classic 280 TOP | "Harvia" | 485 | 520 | 930 |
| "Volcano Etna" | "Vulkankomplekt" | 610 | 770 | 800 |
| "Ermak Elite 16" | "Ermak" | 450 | 620 | 730 |
| "Cuirassier" | TM Greivari, Technotrade company | 430 | 477 | 688 |
| "Wasp" | "Termofor" | 415 | 415 | 605 |
| "Rus 12" | "Teplodar" | 335 | 690 | 810 |
| "Sahara 24" | 398 | 693 | 800 | |
| "Scythian" | "Vesuvius" | 520 | 710 | 580 |
| "Tunguska" | "Termofor" | 510 | 740 | 820 |
| AITO AK | Narvi | 570 | 570 | 1160 |
| Harvia M3 | Harvia | 390 | 450 | 710 |
| Helo 20 PK | Helo/Kastor | 390 | 470 | 730 |
| Kastor Saga 22 | 585 | 600 | 825 | |
| Narvi NM 600 | Narvi | 430 | 280 | 580 |
| "Olympus" | FireCom | 500 | 820 | 770 |
| "Tornado" | "Compact" | 410 | 620 | 950 |
You can find out which models are the best for a Russian bath by studying the information from a separate publication.
As for electric heaters , the dimensions of the models in question are presented in the reviews that are available on our website . One of them is dedicated to models of domestic manufacturers, the other - only to electric heaters from the Finnish Harvia, the third - to other Finnish companies that make electric stoves for saunas and baths.
Do-it-yourself mini-Russian oven: photo
Today, the dimensions of private houses, dachas and cottages do not always make it practical to fit a standard Russian stove into the kitchen. If there is no space for a large enough structure, then instead of a traditional stove you can use a Swedish oven. Such a stove will take up no more than one square meter, and at the same time will cope perfectly with heating a room measuring 30 square meters. There are several modifications of the “Swedish”.
The most common options are a mini-oven with a cast iron hob built into the oven and a full-fledged three-turn oven with a fireplace, hob, oven and drying niche.
It is quite difficult to build a Swedish model yourself. In order for the building to effectively cope with its cooking and heating functions, only high-quality materials should be selected for the work. Step-by-step instructions and recommendations from experienced stove makers will help you complete the laying.
So, before you start laying, you need to lay a square foundation for a stove with an area of 1.21 square meters. m.
We make the first two rows of masonry continuous. At the same time, in the 2nd row we install a grate under the fireplace. In the 3rd row of the stove we build an ash chamber, a vertical channel and a place for the oven, and lay out a fireplace firebox. We place the next row as the 3rd, and in the 5th we equip a place for mounting the grate. We block the passage between the oven and the vertical channel in the 6th row.
At the same time, it should be taken into account that between the oven and the firebox we always place the bricks on their edges.
In the 7th row above the firebox we place metal strips (2 pieces), and we do the 8th and 9th rows in the same way as the previous one. We will install a chimney for cleaning the fireplace along with a place for installing a hob in the 10th row. We form the crucible in the 11th row. We lay out the front wall of the fireplace in the 12th and 13th rows with bricks cut diagonally. In order to make a shelf in the 14th row, we move the bricks out 2.5 cm. We finish laying the cooking niche in the 16th row, making the next two rows the same.
We organize chimneys in the 19th row: between the fireplace duct and the vertical one we place bricks cut diagonally on both sides.
We lay out subsequent rows in the same way, and in the 26th row we connect the vertical channel to the chimney. In the 30th row, we push the bricks 30 mm outward on all sides, and start laying the pipe from the 32nd row.
Modern Russian stove with your own hands: recommendations
In order for the stove to be reliable, attractive and serve its owners for a long time, it is important not only to follow the instructions for laying rows, but also to know some of the tricks that experienced stove makers use in their work.
.
So that the masonry is strong and reliable, and the stove is efficient and safe, it is necessary:
- Select high-quality bricks without chips and cracks, which must be soaked before laying.
- In places where cast elements are installed, a technological gap should be left between the brick and the plates for metal expansion.
- Every 5-8 rows, make a fire-proof cutting in half a brick. If there is not enough space for bricks, then for cutting you should choose materials with low thermal conductivity (vermiculite, supersil, calcium silicate).
- Joints in masonry should be made no thicker than 7 mm.
- To organize the firebox, it is better to use refractory fireclay (yellow) bricks, which can withstand temperatures up to 1600°C.
Before you start installing the stove yourself, professionals advise studying the relevant literature and, if possible, observing the stove maker at work. Preparations for work should be approached responsibly and thoroughly, because an incorrectly assembled stove can cause fire hazards and endanger the life and health of all residents of the house.
How to fold a stove with your own hands: step-by-step instructions
The construction of brick stoves requires care and a lot of patience. The time that will have to be spent on masonry depends on the dimensions of the structure and the qualifications of the worker. In order to complete the work as quickly as possible, it is necessary to understand in detail the features of furnace construction and determine the principle of work.
So, regardless of size and type, the construction of a cooking heating structure includes:
- Preparatory stage. At this stage, the dimensions of the stove are calculated, its location in the house is determined, and drawings are prepared.
- Laying the foundation - the foundation for the furnace.
- Formation of the ash chamber and purge channels.
- Installation of the stove panel and formation of a cooking niche with two channels.
- Formation of a steam exhaust channel.
- Organization of the drying chamber and chimney.
- Laying a chimney.
An outdoor stove is installed in exactly the same way. After completing the work, the structure should be dried. Drying can be natural or forced. In the first case, drying takes 6-9 months, in the second - 3 weeks.