The wall behind the stove An option for protecting a wooden house from accidental fire
The wall behind the stove (more precisely, its protection) is a very important issue of fire safety. This issue is especially relevant if the house is wooden. And for good reason! After all, a negligent attitude towards such a place as the “stove wall” can lead to disastrous consequences.
To neutralize the dangerous effects from the main heater in a building on walls located close to it, various methods and construction technologies are used. Starting from the use of protective mastics and impregnations that are used to treat the wooden surface, and ending with the arrangement of so-called “fire-retardant shields”.
In the first case, the wall near the stove retains its original appearance. Those. a wooden house remains that way internally. This option will be useful when you want to preserve the image of wood in the interior. But there is one significant drawback. Over time, wood shrinks, becomes deformed and even cracks. And this leads to the formation of “weak points”. And to neutralize the possible risk of fire, the wall behind the stove requires periodic treatment of the wooden surface with protective agents.
The second option is more durable and more reliable. He suggests that insulation of the walls from the furnace is carried out by installing a fireproof shield. Let's look at this option in more detail using an example.
The easiest way is to install a sheet of metal to the wall of a wooden house from the stove side. Yes - simple and fast. But this approach will clearly harm the interior of the house! In this case, decorative finishing of the wall behind the stove will be difficult. And, besides, the efficiency of such a design will not be the highest.
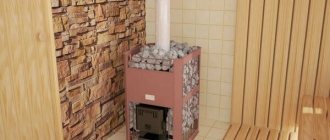
There are many options for arranging a shield. And here is one of them. The wall near the stove is lined with non-flammable thermal insulation to reduce the impact of hot air on the wood, and the top is covered with non-flammable sheet material to prevent the surface from igniting when a coal or spark hits it. It usually consists of a sheet of metal (not the best option), fireproof gypsum plasterboard, LSU, etc.
So, we've sorted out the materials. Next, let's look at an example of how a wall near a stove is insulated from harmful influences.
First of all, the wall behind the stove is prepared for work. We remove sawdust and other debris that is on it. This, of course, is not necessary, but it will not be superfluous.
Next, a metal profile and self-tapping screws are used. With their help, we equip the frame of the future “thermal shield”.
When the frame is ready, we install thermal insulation slabs of stone wool into it...
... and sew it up with LSU sheets.
31, total, today
Why are homemade metal sauna stoves so popular today?
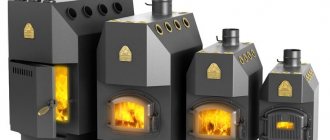
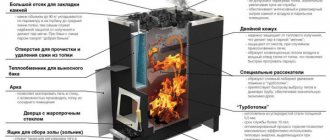
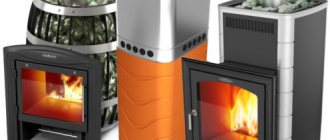
Metal stoves have always been serious competitors to brick stoves, especially when it comes to heating baths. With their help, baths quickly heat up, and installation of such stoves is simple and does not require any special knowledge or experience. In addition, modern models have a presentable appearance and can operate on any type of fuel.
We suggest you familiarize yourself with the brand of mortar for installing foundation blocks
But first let's make one disclaimer. Metal sauna stoves have many advantages, but they are subject to very stringent requirements in terms of operation. A small violation of the rules and a fire cannot be avoided. That is why all experts unanimously demand a thorough study of the furnace design with the obligatory use of drawings. And only after that you can proceed to creating them. In addition, we will consider the nuances of manufacturing.
Installation of a sauna stove with a remote firebox in a sauna made of non-combustible material
The simplest situation is when you do not have to replace part of the wall. However, if the walls of the steam room are sheathed with wood, you will have to remove this sheathing on part of the wall. The base - stone or concrete - is not a combustible material, so the hole that will be made in it depends solely on the parameters of the outlet channel of a particular furnace.
The expansion of metal when heated is the reason to make the opening a centimeter or two wider than the dimensions of the channel itself. The empty space between it and the wall is filled with refractory, and not only basalt wool, but also asbestos cord will do.
We have already mentioned the finishing of non-combustible walls with wood (lining, false beams, etc.). The minimum distance to which it should be removed is 25 cm. But make it half a meter and you won’t go wrong. And in height - 25 cm above the edge of the stove.
In the photo, the gang is standing with one edge on a shelf, holding the stove with its handle, and the distance to unprotected flammable materials should be at least half a meter. What is behind the stove is a sheet of metal, possibly on top of the refractory, but you need to leave a gap between the wall and the refractory (ceramic bushings for this). The size of this sheet is a little small - if we take the diameter of the chimney as 12 cm, then the sheet extends beyond the stove up and to the side by no more than 20 cm. Another five would be nice). In general, the design is “on the brink”. Note also that without passing through the wall, the insulation can really be just that - a sheet of refractory. sheet metal and that's it.
The edges of the lining are covered with platband. The bare wall inside the steam room can be decorated with tiles, the kind that can withstand high temperatures, or with natural stone - do not forget that the stove is very close to the wall. Plaster is also good. A portal is usually made in an adjacent room.
Purpose and functions of the chimney
Before we start learning how to build a passage through the ceiling for a chimney, it wouldn’t hurt to get to know the main “hero” for whom, in fact, this work is being carried out. So, you already understand that the chimney is important and necessary. Why? How does it function? Thanks to this miracle pipe, clean air, separated from gases, enters the firebox.
Where do the harmful compounds that appear as a result of burning wood go? They go through the pipe into the sky. Moreover, without any motors, levers, current or intervention of human hands, but in a simple way - under the influence of traction of natural origin. Here is a magical device that seems extremely simple, but to achieve this natural simplicity, you will have to work hard. Ready?
A chimney in a bathhouse is like an engine in a car, one of the important components
Immutable rules
What are the requirements for the chimney and its passage through the ceiling of the bathhouse?
So, remember this important list:
- the most suitable pipe length is 5 meters;
- the prefabricated structure should not contain protrusions (the main guideline is the vertical position);
- the optimal height above the roof level is up to 1.5 meters (otherwise stretch marks will be required);
- the distance between the pipe and the ceilings must be at least 13 cm with cutting the passage and 30 cm without it;
- Smoke elements cannot be joined in roof or ceiling structures;
- contact of the pipe with communications (plumbing, ventilation, wiring, sewerage) is unacceptable.
This is how the bathhouse heating system works
Work plan
Now that you are familiar with the design and the basic requirements for it, you can learn how to construct a chimney passage through the ceiling. Learn a step-by-step case study:
- Surface cutting and marking.
- Box installation.
- Sheet installation.
- Arrangement (insulation) of the opening.
This, as you understand, is a theory that needs to be put into practice, and that’s what we’ll do.
This is what the installed chimney looks like from the attic side
The difference between a stove and a boiler
Many people mistakenly believe that a stove and a boiler are one and the same. Indeed, making a boiler is somewhat simpler than a stove, but this does not eliminate the disadvantage that the boiler will never create the required temperature in the bathhouse. The main purpose of the stove is heat transfer. It dissipates heat around or transfers it to a certain place, but does not concentrate it inside itself.
With the boiler, everything is exactly the opposite. It pumps heat inside and then transfers it through the pipes. However, the lion's share of the heat is lost as it passes through the pipes, causing the temperature to drop significantly, so the boiler is unable to properly heat the bathhouse.
Protective screens near or around the oven
Such a system will need to be implemented when installing a potbelly stove in the corner of the room. You can mount or lay out several screens from brick, installed at a short distance from each other. In this case:
- The first screen protects a person from touching the iron stove and getting burned. It is usually made of refractory or fireclay bricks;
- To protect walls made of flammable material, a second layer of protection is provided. It can be made of brick or covered with a barrier made of sheet steel with a mirror-like front surface. In this case, heat waves will be reflected from the mirror and spread faster throughout the room;
- if the foundation is insufficient in size or it is impossible to manufacture it, it will be necessary to lay a protective screen made of durable fire-resistant material on the wooden floor. This can be a sheet of steel or a decorative layer of heat-resistant clinker tiles or porcelain stoneware. The surface will first have to be covered with a layer of thermal insulation.
Installation of metal screens
This is the easiest way to make surface protection. It is better to use sheets with a polished front surface. Before fastening, the wall surface at the required level along the height of the screen is covered with a layer of thermal insulation. In this way, we protect the surface of the walls from the effects of heat.
You can lay a layer of thermal insulation or fasten the metal with self-tapping screws with inserted ceramic spacers. But it is better to attach the screen to strips or a metal profile treated with a layer of protection. In this option, the air gap will not allow heat to pass freely to the walls, and reliable insulation of the stove from the wooden wall is ensured.
A special gap is made at the bottom of the wall for the passage of cold air, ventilation of the wall and screen. When arranging a wall with a layer of thermal insulation, a number of longitudinal guides are installed on the surface. The space between them is filled with a layer of mineral wool or other material. Then sheets of metal are installed and screwed to the sheathing with self-tapping screws.
In this design, there is no need to leave a gap at the bottom. The air will not be able to pass through calmly, but the wall will be reliably protected from high temperatures. To protect the floor of the house, a slab made of non-flammable durable material can be used.
Brick screens
This protection option is usually installed near the stove. Thus, you can protect not only the wall, but also the person from burns. By installing a brick wall, you can reduce the distance from the stove to the wall. For laying, it is better to use ceramic or fire-resistant bricks.
The work is carried out in several stages:
- you will need to make a small foundation or remove boards from the floor along the marking lines for laying the screen and, by drilling holes in the concrete of the base of the building, insert metal rods to fasten the bottom of the wall and the foundation;
- Having leveled the floor surface, lay out a layer of mortar and lay the first row of bricks; you need to place the bricks in the same plane without distortions. This determines how level your entire wall will be. Do not forget to make small grooves for ventilation; for this you can move several bricks of the bottom row.
- checking the level and pulling the twine for laying each subsequent row, all bricks are laid on a mortar of clay and sand. Having raised the wall to the required height, the top is sealed with a layer of mortar or covered with a board. This way you can make a shelf for decorative ornaments and all sorts of little things.
The brick is laid no higher than the top of the furnace at a distance of at least 40-100 mm from it.
Using both types of protective screens, you can reduce the distance from the oven to 500 mm.
Examples of installation of protective brick screens in the photo:
Potbelly stove stove design
One of the biggest problems with furnaces of this type is the design itself. Conventionally, the model of a potbelly stove can be imagined as a hearth wrapped in metal and slightly raised above the floor level. Classic cast iron stoves have a firebox and a blower. The design does not provide a gate to regulate the air supply to the combustion chamber, so this is done by opening and closing the blower door. Such an operation is unsafe - when the ash pit is filled with ash, sparks often roll out, which causes a fire. So the “potbelly stove” fully lives up to its name and the appetite is exorbitant and a fire can break out at any minute.
The fuel combustion process also looks specific, which is the reason for the low efficiency of the potbelly stove. When wood burns, the metal shell of the stove body heats up and the heat spreads into the room through thermal radiation. The burning of wood usually occurs irrationally; when burning, the wood simply does not have time to reach the required temperature and therefore some of the combustible gases from the firebox simply go into the chimney. By the way, the pipe itself, like the furnace body, wastes precious heat irrationally - heating of the room occurs due to thermal radiation, and occurs only when the fire is burning in the firebox. As you can see, everything is quite simple - the fuel burns inefficiently in the firebox, while this type of heat energy release such as convection is used irrationally. So it turns out that any improvement immediately allows you to increase the efficiency of the potbelly stove, which means it will allow you to use fuel more efficiently.
Materials for laying stoves and chimneys.
When laying stoves
The following
materials
:
- for the main masonry of the walls of furnaces, hearths, chimneys
and
channels in the walls
-
fired solid red brick
of the first grade (
GOST 530-71
); - for lining (internal lining) - use refractory refractory brick
; - for portal cladding (external) - tiles, roofing and rolled steel, asbestos plywood
; - for cutting smoke circulation, fire-retardant insulation and cladding - solid bricks, asbestos cardboard, asbestos-cement insulating boards, inorganic mineral wool products on a synthetic basis
(mats, semi-rigid boards),
construction felt
soaked in a clay solution should be used.
NOTE: Use of mineral products with a bitumen binder
NOT ALLOWED for fireproof insulation.
Brick
They are selected of
the correct shape, the same size, without cracks, inclusions of stones and dummies, and normal firing
.
NOTE: Bricks from dismantling buildings or old furnaces
, subject to careful selection and cleaning of the solution, it can be used for laying
pipes, cutting
and the lower parts
of furnaces and hearths
.
ATTENTION! Brick from dismantling stoves, impregnated with flue gas condensate, is PROHIBITED for re-laying fireplaces. The following solutions are used in furnace work:
During furnace work
The following
solutions
:
- for laying stoves and kitchen stoves
from ordinary bricks -
clay-sand
; - for masonry made of refractory bricks - refractory clay with sand
; - for masonry made of refractory bricks - refractory clay with fireclay powder
; - for laying chimneys, ventilation and smoke ducts
in the walls of buildings -
lime-sand or lime-cement
; - for laying chimneys above the attic floor
-
lime-cement
, and on top of the roof -
cement
.
Quantitative ratio of clay-sand mortar
, depends on the fat content of the clay, and should ensure drying of the solution
without a noticeable change in its volume and without cracking
.
ATTENTION! The solution is prepared at least DAYS before the start of work. When laying ordinary bricks, plastic clay is used, mostly red, not contaminated with random impurities.
Before use, the clay is soaked in solution and rubbed through a mesh with 3-4 mm holes.
When laying ordinary bricks, plastic clay
, predominantly red, not contaminated with random impurities.
Before use, the clay is soaked in solution and rubbed through a mesh with 3-4 mm
.
To prepare the solution
As a rule,
mountain sand
, without foreign impurities and plant residues,
fine-grained, sifted
through a sieve with holes of
1.0-1.5 mm
.
Water
must be clean to prepare the solution.
When using sea water,
the cement rate must be increased
by 10-15%
.
Table 5: Clay mortar compositions.
| Brand of solution | Type of solution | Type of additive | Composition of the solution, (clay dough + additive + sand), in volume parts | |
| in dry climates | in moderately humid climates | |||
| Clay solution: | ||||
| 10 | 2 | 1- on oily clay | without additive | 1+0+4 |
| 10 | 2 | 2- on clay of medium fat content | without additive | 1+0+3 |
| 10 | 2 | 3- on lean clay or loam | without additive | 1+0+2,5 |
| 4 | 4 | Clay with black binders | black binders (tar, bitumen, pitch) | 1+(0,05…0,1)+(2,5…4) |
Note:
- Clay mortars
are used in summer conditions for finishing work, mainly in dry climates with normal indoor air humidity. - The amount of sand in clay solutions with black binders
depends on the fat content of the clay. - When using hard black binders,
an emulsion of clay
with black binders is pre-prepared in a heated state
.
NOTE: Masonry mortars
must be used before setting begins. “Rejuvenating” (diluting with water) “set” solutions is PROHIBITED.
For insulation
materials with low thermal conductivity are used:
ordinary clay brick, felt, as well as asbestos in the form of sheets and cord
.
Felt
, usually made
5 mm
, conducts heat poorly and serves as a good heat-insulating material.
It smolders and with its pungent, suffocating odor
signals the outbreak of a fire.
To make the felt more resistant to fire, it is impregnated with a liquid clay solution before laying it in place
.
Installing a stove in a bathhouse with an external firebox, fire safety rules
Regardless of what type of stove is installed, there are a number of requirements that must be met. In particular, we are talking about ensuring that surfaces heated to high temperatures (up to several hundred degrees) do not come into contact with flammable materials.
The main source of danger in a bathhouse is the stove. Both the floor and the ceiling need to be protected from it. By the way, you don’t have to protect the walls if you place the stove at a sufficient distance from them.
And even if you are busy installing a stove in a bathhouse with an external firebox, the first thing you need to do is protect its base. It doesn’t matter whether you place it on a foundation or directly on a wooden floor - in any case, you need to lay a sheet of fire-resistant material (asbestos or basalt cardboard, for example) under the stove, on top of which you need to place a sheet of metal.
Foundation diagram for a massive furnace (see more about furnace foundations).
Asbestos cardboard for placing under a not very heavy stove (see more about installing stoves).
Another universal point of fire protection is the correct installation of the chimney through the ceiling and roof.
Ceiling passage box
The walls remain. Since in this case we are talking about installing a stove with a remote firebox, the main “problem” will be the passage of the fuel channel directly through the wall, and the distance between the wall and the stove will be minimal - about 5 cm on average. This means that covering the wall with fireproof materials alone will not do.
Therefore, we will analyze two options: installing a stove in a bathhouse with an external firebox, when the walls are flammable (that is, wooden) and non-flammable (brick, block concrete). The material is also a criterion for dividing stoves into separate types; in accordance with this classification, metal and brick stoves are distinguished. Some experts classify cast iron stoves as a separate category. In addition, there are other types of stoves:
Peculiarities
A bathhouse and a sauna are far from the same thing, so the stoves for them will be completely different. If in a sauna it is necessary to create a high temperature, and the heat should be hard and dry, then in a bath the opposite is true. The temperature also remains high, but due to the high humidity, the heat turns out to be soft and the temperature is practically not felt. Such procedures are useful for both physical and mental well-being.
Linden buildings are extremely rare due to the fact that linden wood is a scarce product, and few people can afford such construction. The stoves here should not be very powerful. The heat should not be strong, since linden baths are classified as light. Of course, the simplest solution is to buy a ready-made stove designed for a certain area of the bathhouse. However, many refuse this decision.
Firstly, you don’t want to overpay. Indeed, a high-quality hand-built stove costs two to three times less than the same option from a reputable manufacturer. Secondly, a stove built with one’s own hands allows the master to express himself. Thirdly, such a design can be made of any size and configuration so that it fits perfectly into your bathhouse. Stoves made to order according to personal measurements are very expensive, so it is much easier to make a stove yourself.
We suggest you read: How to treat shelves in a bathhouse: oil and other wood impregnation options
Covering bathhouse walls with non-combustible insulating materials
To prevent the walls from overheating, you can use materials with increased thermal insulation properties and inertness to high temperatures. Two types of materials are used:
- reflective;
- fireproof with lining.
The first type includes materials for wall cladding, consisting of thermal insulation with fire-resistant properties and a metal covering in the form of a sheet.
Insulating walls with reflective sheathing
A protective cake with reflective materials is done this way. First, the thermal insulation is attached using ceramic bushings directly to the wooden walls, then it is sewn up with a stainless steel sheet.
Advice! It is better not to use galvanized metal, since heating may release heavy metals harmful to the human body.
Stainless steel with a polished surface reflects the heat flow inside the steam room, reducing heat loss. In this case, reflected heat is more useful than direct heat. For thermal insulation use:
- basalt cardboard or cotton wool, the only material with increased hygroscopicity, non-flammable, environmentally friendly;
- asbestos cardboard, which reliably protects against flames and has a long service life;
- mineralite, an artificial material made specifically for these purposes.
Protective sheathing requires ventilation gaps of 2 cm from the wall to the insulation, 2 cm from the insulation to the steel sheet. If it is necessary to install the stove as close to the wall as possible, make a double skin of non-combustible insulation, use ceramic bushings to maintain gaps of 2-3 cm and sew them up with a steel sheet.
Insulation with cladding
Measures to protect walls with cladding are necessary in order to preserve the interior decoration of the room. They are more expensive, but no one has canceled the aesthetic advantages of the bathhouse. It is based on tile cladding, which is laid on fire-resistant cladding made of gypsum plasterboard, non-deformable gypsum-based cardboard with fiberglass, mineralite, non-flammable cement-fiber material, moisture-resistant and resistant to biochemical influences, LSU, fiberglass material bound with magnesium additives, resistant to high temperatures, high humidity. Heat-resistant glue is used for installation.
Advice! Use heat-resistant reinforced Terracotta glue, made from fireclay dust bound with kaolin additives, intended for tiling stoves, fireplaces, and all heated surfaces.
The recommended facing materials are quite varied, the best of them are:
- terracotta tiles, they are made from specially fired clay, which gives increased heat resistance and durability;
- clinker, denser clay tiles with a surface of various colors, similar to facing bricks;
- tiles, also made from clay, having an original embossed surface;
- porcelain stoneware made from a mixture of clays, kaolins, quartz sand, feldspars by high-temperature firing under a pressure of 400-500 kg/cm², with imitation of stone, wood, durable artificial material;
- soap chloride, a rock mineral consisting of talc, magnesite and chlorite, an environmentally friendly natural material that does not absorb moisture at all, has an attractive appearance, does not crumble, and is not afraid of high temperatures.
Advice! Use soap chloride to finish the steam room, this mineral has a healing effect on the human body, regulates blood pressure, stimulates cerebral circulation, expels viruses and microbes due to the release of vitamin D when heated.
All of the listed tiles are an element of protection that forms a cake, the basis of which is a fire-resistant material. Just like a screen, sheet material is installed on ceramic bushings with a gap of 2-3 cm from the wall. The minimum distance to the heat source from the tile should be 20cm.
Protection with cladding decorates the room, creates a positive mood, and helps to increase the efficiency of procedures. And most importantly, properly installed insulation prevents wooden walls from overheating and catching fire. Have a nice steam!
Brick or metal
The classic option is a brick oven. Such designs have an aesthetic appearance, in addition, they are quite simple. Homemade brick stoves are a nested brick firebox with an ash pan underneath. A grate for stones should also be installed here. It can be made of steel or cast iron.
Instead of mortar, they use not cement, but a mixture of sand and clay. This is due to the fact that cement does not have the required degree of resistance to high temperatures. And in order to give the structure maximum strength, the masonry must be carried out according to a special scheme. On the Internet you can find a detailed description of this method, which is used specifically to create a sauna stove.
Another option is a metal stove. Structures made of cast iron or steel are more compact in size than their brick counterparts. They also have better heat dissipation. Using a metal stove, the sauna can be heated in a short time. Their design is practically no different from brick. But it is worth noting that they cannot be built directly at the installation site.
If you use thick sheets of steel or cast iron, it is a good idea to build a square-shaped structure, and if you build from metal pipes with thick walls, you can give it a round shape. Modern metal sauna stoves are made a little differently than those made several decades ago.
In addition to a number of advantages, such installations have one drawback: they have a fairly large surface area, upon contact with which you can get a serious burn. Therefore, to prevent danger, you should additionally line the stove with bricks that have fire-resistant properties.
Practical lessons
And now about each action in detail.
Some pioneers in bathhouse construction are wondering: how to determine the location of the pipe? To avoid further frustration, remember: this location is determined at the stage of drawing up the steam room design.
When marking, it is important to determine the vertical axis of the pipe. The beginning of the layout is the outlet pipe coming from the stove
The axis starting from this structural element, resting on the ceiling, is the center of the skylight that you have to make. If the steam room has an attic, then the axis extends all the way to the roof.
And don’t forget about the rule: the distance from the chimney to the ceiling is at least 13 cm.
Your photo tip for installing a pipe for a bathhouse
What dimensions should the ceiling trim for the chimney have? Many people think that these parameters depend on the materials from which the chimney is made
This is not so, the only important thing is that the structure does not touch the ceiling, but is not too far from it, since the hole will be difficult to repair, and besides, the heat that is so necessary in the steam room may subsequently evaporate through it
You probably already remember about the gap of 13 cm, now understand one more indicator - the thickness of the insulating sandwich should not exceed 5 cm. Are you afraid that the insulation will slip out and fall down? Don't worry, the iron sheet that you attach below will serve as insurance against such situations.
This is how the finished structure should look from the inside
Many people confuse the purpose of the insulating layer, thinking that it is done for beauty, to make it cozy inside. Not only that, its main mission is to protect the steam room from fire and cold. The ideal materials are fiberglass, asbestos, mineral or basalt wool.
However, insulating the hole is not enough; you need to additionally create a heat-reflecting screen around the chimney, which we already briefly mentioned above. A piece of polished stainless steel, ideally with a mirror coating, will do an excellent job as a screen. Creating the greatest possible reflective effect for infrared waves is your goal when installing an iron surface.
To reduce the opening, a ceiling-passage assembly is constructed, providing a kind of air gap, which serves as additional insurance against heat leakage from the steam room.
Construction assembly details
You already know the wisdom of the process, let's assemble the device? So, the cutting of the bath consists of:
- iron sheet;
- boxes;
- clamp.
The box is a kind of shell that protects the tree from fire
A galvanized box with parameters 40x40 cm is installed from the attic side. And from the inside of the bathhouse, an iron sheet is attached to it, the dimensions reaching 50x50 cm. The pipe at the lining is covered with a clamp in order to avoid stress on the stove. And only after that, insulation is placed into the hollow part of the body - usually the surface is covered with insulation and covered with expanded clay. Then you can install the final fragment - part of the pipe going through the roof to the street.
How to increase the efficiency of a sauna stove
There are situations when a solid fuel sauna stove cannot sufficiently heat the room. In this case, it is necessary to increase the efficiency. In this article we will talk about ways to increase efficiency.
What is furnace efficiency
Each furnace has its own parameters, but they are all united by efficiency. The combustion process of fuel in a furnace is accompanied by the release of heat. Efficiency means how much heat remains in the stove after complete combustion of the fuel.
But if the efficiency of the furnace is not enough, methods are used to increase it.
Convector or economizer
Convectors come in three types: water, electric or gas.
Convector chimneys are successfully used for the accelerated rate of heating of adjacent rooms, which is carried out by selecting heat flows from gases escaping through the smoke. They also protect against infrared radiation that comes from the chimney. They are easy to install and simple to operate.
The convector is mounted in two ways:
- By connecting the pipe to the general chimney.
- Installation of your own smoke removal system. This method will allow you to heat two rooms at the same time. You can install a convector in one room and install a chimney in another. This method is especially relevant for those who have a bathhouse with a relaxation room.
The process of operation of a convector involves the transfer of heat by convection currents. This is a constant circulation of air flows from bottom to top, which is due to the fact that cold air is heavier than hot air.
We recommend the Fehringer economizer
It is designed to quickly warm up the steam room. There are four 60 mm pipes installed in the chimney, and spiral swirlers are placed in each of them. They prevent the free release of heat to the street. Heat is transferred to convection channels and directly to the steam room.
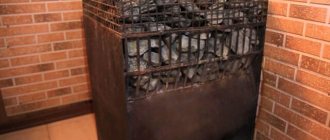
Economizer mesh for stones on the chimney
The economizer mesh is placed on the chimney pipe. Stones are placed in the space between the chimney pipe and the mesh.
This is one of the important elements of the steam room, since it allows you to remove the hard infrared radiation emanating from the hot metal of the chimney pipe, which burns the human body.
Thanks to the economizer grid, you will get softer and more pleasant steam. It allows you to significantly increase the heat capacity of the stove and protect the chimney. It removes heat from the thermally loaded section of the chimney much more efficiently, which prolongs its life by more than 50%. The convenience of this economizer is that you do not need to remove the pipe to install it.
We recommend using the Ermak economizer.
We hope our recommendations will be useful to you when arranging a bathhouse. We wish you success and easy steam!
Application of protective screens
Screens are shields made of brick or metal that protect walls from intense thermal radiation. Similar protection is used when installing metal stoves.
- Metal screens are made from steel or cast iron sheets, these
casings surround the heat source with a distance of 3-5cm.
Advice! When purchasing a metal sauna stove, you should give preference to a model equipped with a metal casing. Its cost is not much higher, but the issues of wall insulation are eliminated.
Additional frontal or front shielding, which is located on the walls depending on the location of the stove, will not hurt. The protection guarantees the wood from overheating, reducing the temperature by 100 degrees or more, and provides the opportunity to save space in the steam room. A stove protected by a casing can be installed at a distance of 50-55cm from the wall.
Installation of screens is simple. The casing, equipped with legs, is secured to the floor by side or front screens - with galvanized nails or self-tapping screws.
- Brick screens are masonry used to cover the stove with
on all sides, the same casing, only made of brick. Another method is to lay half a brick between the firebox and a wall made of solid fireclay bricks laid on a solution of clay and cement. The width of the wall should be 120mm, although there is an opinion that it is permissible to put 60mm in a quarter of a brick, but it should be remembered that in this case the thermal insulation value is reduced by exactly half. It is recommended to raise the height of the masonry 20-30 cm above the surface of the firebox, but if you raise it to the ceiling, it will not be worse.
The screen should be placed at a distance of 10-15cm from the wall, 5-15cm from the stove, that is, the space saving is 30-40cm
Important! Functional openings for heat exchange should be made at the bottom of the masonry. Protective screens are effective, they reduce the temperature to a level acceptable when using high-temperature fuel units
The same function is performed by wall cladding made of non-combustible materials.
Protective screens are effective; they reduce the temperature to a level acceptable when using high-temperature fuel units. The same function is performed by wall cladding made of non-combustible materials.
Types of fuel and types of stoves
Bathhouse appliances differ in the type of fuel used for their operation:
- Wood burning units. They appeared earlier than other types of metal furnaces. They require a considerable amount of firewood to release thermal energy, and they also need constant care. Typically, they are preferred by those bathhouse visitors who can wait until the room warms up and then slowly enjoy the fragrant steam and warmth coming from natural wood.
- Electrical devices. In this case, the design of a metal sauna stove consists of several main components: a body equipped with a heating element, and special heat-insulating elements.
- Gas units made of metal. They are rightfully considered the most modern and reliable designs; they are equipped with a thermostat to regulate power. The safety of gas appliances is ensured by a safety device that is instantly activated when the gas supply is turned off or reduced.
Products used
The following materials can be used for chimney insulation:
- mineral wool;
- glass wool;
- brick;
- slag slabs or heat-resistant cement mortar.
The insulation of a chimney depends on the material from which it is made. If the pipe is steel, then construction wool is used. The design consists of 2 parts (length does not exceed 1.5 m), which simplifies compaction of the insulating material. The size of the casing should be 12 cm larger than the diameter of the pipe.
The first part of the structure is first put on. Then the insulation is applied evenly. The second part of the chimney is installed. The building is insulated. The pipe is installed with a slight slope. The resulting gap is covered with cement mortar.
A steel chimney consists of 2 pipes of different sizes. A protective casing is placed on the smaller pipe (chimney). A thermal insulation layer is laid between the pipes. A pipe with a smaller diameter is placed in a structure with a larger diameter. The gap formed between the pipes is filled with construction wool.
A brick chimney is insulated using the following technology:
- applying the base;
- installation of reinforced mesh;
- sealing cavities and cracks with a solution;
- applying plaster in several layers (their thickness should not exceed 5-7 cm);
- complete thermal insulation;
- mineral wool is cut taking into account the size of the chimney;
- fixing the heat insulator with metal tape or wire;
- lining the pipe with ceramic or asbestos slabs;
- plastering the surface.
This method of thermal insulation allows:
- reduce heat loss by 2 times;
- seal the chimney;
- prevent the formation of condensation and destruction of the chimney;
- improve quality and safety.
Furnace insulation is a necessary procedure for a high-temperature furnace used to heat a home.
Selecting fuel for kindling
The degree of heating, the microclimate in the steam room and the consumption of firewood depend on the correct choice. Not all wood is suitable for this purpose. This applies to the following categories:
- Old boards or logs. They give off heavy steam and smell bad.
- Rotten raw materials - minimum heat, a lot of waste.
- Painted logs. This is dangerous for the body.
- Knotty firewood is characterized by uneven burning. The wood burns before the knots, and they have to be removed from the stove or chips added.
- Young trees and their branches. They have low heat transfer.
Trees growing near the house are more often used. In steppe areas these are usually branches of bushes. Spruce, pine and birch are taken for kindling in areas where there is forest. Such firewood emits a pleasant aroma of the forest.
The best option for kindling is dry wood with a minimum of knots. Its preparation is carried out in the middle of winter. Frozen logs are easier to split and contain little moisture. Hardwoods are used more often. A hot sauna is obtained using logs made from birch, ash, alder or when using wood from fruit varieties. Coniferous firewood is used less often - the resin contributes to the abundant formation of soot.
Each breed has its own set of characteristics:
- Oak is a prestigious and expensive fuel. Leader in heat transfer if the wood is chosen correctly. Oak logs should be from middle-aged trees. Then the steam will be tart and healing, and the warmth will last for a long time.
- Alder burns quickly, contains almost no resins, so there is no smoke from it. It is distinguished by ardent heat. Its healing aroma invigorates and helps cope with colds. Alder wood dries quickly and can be stored for up to 3 years, while retaining its scent. Destroys soot deposits on the heater.
- Birch – gives a disinfecting heat with light and fragrant steam, beneficial for the respiratory tract. They burn evenly and set quickly. They do not spark, they form a high flame. When birch logs burn, tar and resin are released, which settle on the chimney. This protects the bathhouse from fire, but you have to clean the chimney more often. In terms of heat output they are in second place after oak.
Birch firewood, known for its high heat output, produces an even flame without sparks
Fruit trees are not always available, and it is not profitable to burn poplar trees. It is best to use hardwood logs. Ash, oak, and birch wood are ideal. But the first two varieties are classified as valuable, and they are more often used for furniture production, which is why they are more expensive. Birch is more accessible and practical. It produces almost no soot and produces a lot of heat. The chimney will always be clean if you add aspen firewood at the end of the firebox.
Aspen flares up very slowly and does not burn for long, but it cleans the chimney perfectly, so it is recommended to combine it with other types of logs
Wood pellets are inconvenient to use in a conventional oven. Grate bars with smaller slots or special baskets should be provided for them. Then, when using pellets, the material itself burns first, and then the gases released. Fuel briquettes are much more convenient.
To heat a bathhouse, they will need five times less volume than conventional firewood. But they cost several times more. The heat from briquettes is almost the same, and they burn 25% longer than pure wood. There is a third less ash left after compressed fuel.
The raw material for the production of briquettes and pellets is waste from the woodworking industry. Most often this is dust left over from plywood production. In the process of its creation, phenol and urea are used. When burned, they release substances harmful to health. The smoke from them is corrosive, and there is a lot of soot. If you don’t have firewood on hand or have nowhere to store it, then compressed fuel can be used, but it is not recommended for regular use.
Pellets or fuel granules are made from wood waste and used in pellet stoves
Such materials are absolutely not suitable for sauna stoves. Sleepers most often contain traces of fuel, and due to prolonged contact with the environment, the wood deteriorates and becomes saturated with moisture. The flame from such firewood will be uneven, and they emit little heat and burn out quickly.
Rotten sleepers and painted boards emit an unpleasant odor when burning, as well as toxic substances. Breathing such vapor is harmful to health.
Before you make your final choice on any of the options, you need to evaluate it according to several parameters. Such careful preparation is required due to the fact that building a stove (especially a brick one) is a troublesome task and requires financial investment, so it is important not to make a mistake.
The assessment is made on the basis of the most obvious and common factors, and these affect both the choice of material and design.
Heating rate
How quickly the stove heats up is crucial when it comes to a sauna for year-round use. If in summer there is practically no risk that the bathhouse will not warm up well enough, then in winter this probability is extremely high.
We invite you to familiarize yourself with: Clay for the kiln: necessary technical requirements for the binder
It is also important how well the stove holds heat. For example, a steel structure heats up well, but cools down just as quickly, which negatively affects the time during which you can wash in the bathhouse. The controversial issue is whether it is worth heating the sauna for 3 hours in order to be able to steam in it for only an hour. Maintaining the temperature will take too much fuel, which is not sustainable from a financial point of view.
Layout
This implies the presence of a steam generator, a tank, as well as the location of the firebox relative to the stove. All these nuances were discussed in detail in the classification section.
The contact of stones with smoke from heat sources plays an important role, since it determines how quickly one can wash in the bathhouse. This affects the temperature and humidity in the bathhouse, as well as the microclimate. Some varieties are more suitable for saunas, others - for Russian baths, but recently combined options have become most popular, when you can vary the air humidity at will. Intermittent heaters with a miniature steam generator are most suitable for this.
Decide in advance what you want to fuel your stove with. The complexity and high cost of making a stove largely depends on this. Thus, the easiest option to implement is a wood-burning design, since there is no need to resort to technical improvements.
In addition to those listed, there are several more factors that are not so extensive, but also significant. These include the temperature power of the oven.
The temperature of the walls of the furnace unit is also not least important. Not so long ago, so-called “cold” stoves appeared. They take much longer to warm up, but their outside temperature never exceeds 60 degrees, while inside it can be several hundred degrees higher.
