Korovin Sergey Dmitrievich
Master of Architecture, graduated from Samara State University of Architecture and Civil Engineering. 11 years of experience in design and construction.
Insulating walls from the inside in wooden houses makes them more comfortable and economical. In addition, good thermal performance of the walls allows you to save on heating. The issue should be taken seriously, since the result will depend entirely on the chosen material and compliance with the technology.
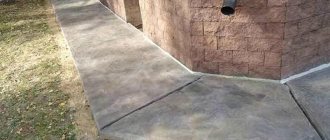
Thermal insulation of brick housing
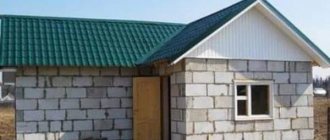
Brick walls must be insulated, since in order to reduce heat loss with just a brick frame at home, you will need to use a large amount of this material (the increase occurs due to the thickness of the walls).
Moreover, as in the case of other types of buildings (made of wood and foam blocks), it is advisable to insulate brick walls from the outside.
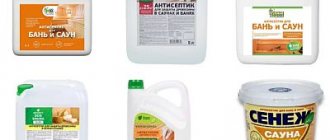
Overview of suitable materials
- One of the popular options is warm plaster, the thickness of which should be 30 mm. It is attached to a woven mesh, which will provide good adhesion. To achieve high efficiency, you need to insulate the ceiling and floor. If the old plaster begins to crumble, it must be removed so that the installation of a new coating can begin.
- It is not advisable to insulate walls with polystyrene foam from the inside of a brick home, because this material is susceptible to combustion, and, in addition, it is not resistant to moisture
- And expanded polystyrene has all the necessary qualities for highly effective thermal insulation. It does not absorb moisture, is characterized by a low thermal conductivity coefficient and is multi-tasking, as it can also be used to insulate the ceiling, as well as to reduce heat loss when installed outside the house. Polystyrene foam is attached with glue
Another option is mineral wool material. It is freely used for insulating ceilings and for thermal insulation of walls and roofs. This covering is installed between the sheathing profiles. You can use metal or wood material to create the frame. To protect the walls from moisture, a film is used. A vapor barrier is also laid on top of the insulation layer.
Vapor barrier materials: types, selection rules and prices
Modern industry offers many types of materials for waterproofing. Almost all of them are artificial polymers, because natural fibers always absorb moisture well and allow it to pass in both directions.
The main indicator of the quality of such products is vapor permeability, which is defined as the amount of water (in grams) that a unit of material area (1 square meter) will let through in one day: g/m2. Normal vapor permeability does not exceed 15-20 g/m2.
Causes of moisture
Dew point offset results
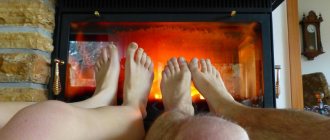
In the winter season, with the onset of frost, the walls of our houses freeze. In a correctly calculated wall thickness, the transition point from sub-zero to positive temperatures, called the dew point, is located inside the wall and condensation does not occur. That is why they used to build houses with walls made of stone no less than 80 cm thick. Today, with the use of the latest construction technologies and innovative materials, it has become possible to build houses with thinner walls, but such buildings require the installation of additional thermal insulation structures.
The question arises: should insulation be carried out from the outside or inside?
The issue of exterior finishing disappears when the house is made of timber and does not require external finishing. If the house is made of stone, then it would be more competent to insulate the facade, but this does not exclude carrying out internal work.
There is the only exception - the internal insulation of the walls of an apartment in a multi-storey residential building, where the use of any type of thermal insulation material will not give tangible results.
Preparing for installation of the premises
Cladding inside the house with clapboard is carried out after purchasing the necessary materials and tools:
- Wooden slats.
- Material for thermal insulation.
- Fastening elements – dowels, screws.
- Electric jigsaw.
- Nails, staples, clamps.
- Hammer.
- Screwdriver.
- Electric drill.
- Building level.
- Materials for coating: antiseptic, primer, varnish.
Before installing it yourself, you need to prepare the lining.
For this:
- Boards of the required size are selected.
Tip: Fresh or damp boards should be thoroughly dried first.
To cover the room, boards of the same width are selected, usually from 6 to 10 millimeters.
- Places for cutting are marked on the board. A factory part can serve as a stencil.
- Excess edges are sawed off.
- Grooves are made on both sides of the board using a milling cutter.
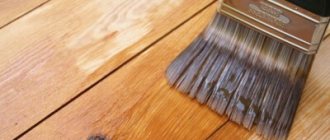
- The outer side of the panel is chamfered.
- The material is treated with a special solution to increase its moisture resistance and durability.
Finishing and ventilation
Both outside and inside the house, after the insulation work has been completed, most likely, all surfaces will have to be finished. Depending on the insulation used, different types of decorative coatings can be used. For example, finishing is not necessary for cork material, as it looks quite attractive. The same applies to warm plaster.
Mineral wool coating, polystyrene foam, polyurethane foam must be covered with decorative material, since walls without finishing, in this case, will look bad. The most common way to “sheath” walls is with drywall.
Considering that multi-layer vapor barrier is used for thermal insulation from the inside of the room, so that the air in the house does not stagnate, a forced ventilation system is equipped. Since the option of private housing is being considered, it is possible to hide the ventilation duct system before performing insulation and finishing.
Thus, the same materials can be used for the ceiling, walls and floor, but for each building the most suitable option for installing thermal insulation should be selected.
ABSOLUTELY FLAT WALL
this, of course, is the best option, since small thickness bars (1-1.5 cm) are used for this. They need to be fastened at a short distance from each other so that air can circulate freely under the upholstery. Attach with glue or nails. Before this, it is necessary to treat the frame with waterproof protective agents if moisture is detected in the walls.
Hint: if, in the presence of moisture, the wood remains untreated, then the frame will become fragile over time and begin to deform, and accordingly the entire wall will deform.
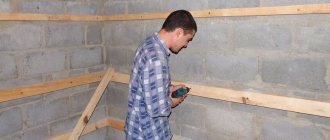
Air circulation between bars
Installation of insulation in a timber house
Considering that wood, of all building materials, is most susceptible to moisture, it is very important to protect the walls. Insulation of a log house from the inside is carried out only after surface preparation
At this stage, the following actions are performed:
- Regardless of whether housing is being built or an existing structure is being modernized, you need to check all wall surfaces for cracks and leaks. In a private house made of wooden beams, all joints must be filled with jute fiber. If larger cracks have formed over time, then tape tow is used. Then the surfaces are treated with a special composition, which reduces the risk of mold and mildew formation
- In wooden housing, it is necessary to take care of moisture protection in order to avoid rotting of the frame of the house in the future. To do this, a film waterproofing material is fixed before installation.
- Do-it-yourself insulation of walls from the inside in a wooden house is done using a mineral wool coating. This option is the most preferable, as it allows the house to “breathe”. It is also used to insulate ceilings and floors. Thermal insulation with mineral wool is carried out between the beams of the sheathing
- The frame is made of a wooden block with dimensions of 5x5 and 5x10. This is quite enough for reliable fastening of mineral wool. It is better to start installing the sheathing from the corners of the room, and you should use a building level
- The distance between the vertical bars should be slightly smaller (1-2 cm) than the width of the mineral wool roll. This is due to the fact that this material is elastic, so this trick is used to increase the density. But insulation with mineral wool should not be carried out with excessive pressure on the material, due to which it loses its thermal insulation properties
- Another layer of film coating is fixed on top
If you choose the method of insulating a wooden house with mineral wool, it is better to play it safe and glue the joints of the waterproofing material with construction tape. In addition, the film strips are laid overlapping.
Additionally, mineral wool should not be attached; this may damage the waterproofing layer located under the insulation.
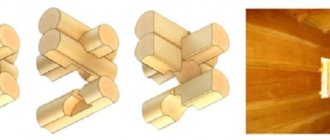
Direct upholstery of the frame with clapboard
There are several ways to attach lining units to the frame:
- The first method is to drive the nail obliquely from the side of the tongue. In this case, the nail head is completely cut off so that the attachment point is almost invisible. Wall upholstery with clapboard will have a more uniform appearance.
- The second method involves using a clamp (the so-called “clip”). This option provides a useful advantage: you can remove the lining at any time and fix it in another place.
- The third option is only possible with a short external latch. In this case, the nail is driven into the inner latch.
Upholstery of walls with clapboard. Three types of fasteners (according to the description)
Remember that when the installation of the lining on the walls is completed, it must completely cover the fasteners. Why? – Appearance, aesthetics of your room!
The most difficult type of fastener is fastening with a clip . There are specific instructions for this technique.
It is worth considering it in more detail point by point in order to make this fastener with high quality with your own hands without any problems:
- Cut off part of the edge of the plank.
- Place it in the corner so that it does not reach the ceiling by 0.5 centimeters.
- Carry out a vertical check.
- Attach the bar. Nails should be driven as close as possible to the corner and in the projection of each backing bar.
- Mark the height and attach the groove using a ready-made clip. The clip is secured with nails or construction staples on each block.
- Fill the height of the wall with the second plank.
- Connect the edges of the planks and attach them to each other with nails.
- Secure the rest of the second strip to the first.
- Pull both parts together and secure with clips to each backing beam.
- Cut off part of the third plank and secure it at the bottom.
The point is that all of the above activities are repeated in turn until the entire wall is closed.
An example of the sequence of laying planks and their numbering.
Some tips:
- The clapboard wall is upholstered from left to right.
- When tapping the slats with a hammer, use a piece of wood. This will soften the blows and protect the lining from deformation.
- You should consult with experts to choose what kind of wall lining is best for you. After all, each wood has its own characteristics and price.
- When attaching the lining, you should leave a small space between it, the ceiling and the floor. To do this, a thin wooden strip is temporarily attached. This is necessary later for air circulation.
- If there are sockets or switches left behind the paneling, then it is worth dismantling them. Mark their location on the lining and then use a flared saw to make a hole. If you need to move them to a new location, then the wiring should be carried out in a tube under the frame beams and brought to the new location.
Materials for thermal insulation
Materials for thermal insulation
As a result, several main conclusions can be drawn:
When installing thermal insulation on the inside of the walls of a house, the dew point inevitably moves to the inner surface of the wall. This will happen even taking into account the correct calculations of the thickness of the heat insulator. As a result, the service life of the entire thermal insulation structure is reduced. The thermal insulation structure must include a vapor barrier membrane. As a result, it is necessary to resolve the issue of normalizing humidity in the room (increasing costs for heating and ventilation systems). Indoor insulation reduces the volume of rooms. Since the entire structure is installed inside the house, the issue of human life safety becomes the most important
It is important to understand which insulation material best satisfies this requirement. Materials made from natural raw materials are the best choice
Soft slabs or rolls of mineral wool, which have high heat-protective and sound-proofing properties, are well suited. All materials that have good vapor permeability and are capable of absorbing moisture will lose their functional properties over time. The use of expanded polystyrene or polystyrene foam, as materials that practically do not absorb moisture, is more profitable. In this case, it is necessary to consider a tight fit of the plates to each other. The main disadvantage of this option is that it is a completely synthetic material, and they will have to breathe. Today there is a lot of talk about polyurethane foam, which hardens when applied to the surface and, of course, gives strong adhesion to the inner surface of the wall. Condensation does not form, but to carry out the work it is necessary to construct technological formwork. This process is quite long, and the wall does not breathe.
There are many wall insulation materials, there is plenty to choose from, but the right decision must be made. People will live, work and breathe in this house.
Insulation materials
Nowadays, the two most commonly used types of insulation are mineral wool and polystyrene foam . You can achieve better results in terms of thermal insulation from polystyrene foam, but alas, it is not well suited for a bathhouse and specifically a steam room. Here, the best option would be mineral wool, as it is more convenient to install and serves as a more reliable thermal insulator.
Types of foam
Expanded polystyrene is one of the most popular types of foam. Can be used for both internal and external insulation. Expanded polystyrene itself is a flammable material, but thanks to the addition of fire retardant it becomes non-flammable and does not emit harmful substances at high temperatures. It has a short name in this variation - PSB-S.
Penoizol is a newer material, it is also called liquid foam. Manufactured directly on the construction site. Usually it is used to fill cavities, for example in walls, and due to its integrity and high thermal insulation parameters, a very good result is obtained.
Polyurethane foam is also one of the subtypes of liquid foam. Applied by spraying, used for internal insulation. Has a long service life and good performance.
Types of mineral wool
Glass wool - made from thin strands of glass. Not afraid of high temperatures, fire resistant. When working with it you need to be very careful; glass dust is very harmful to health. Not suitable for internal insulation of residential premises.
Slag wool - fibers made from blast furnace slag, resistant to moisture. This material is not suitable for insulating facades. Also, due to its high hygroscopicity, it is not used for insulating pipes, both metal and plastic.
Stone wool is not a prickly material, so it is more convenient to work with it than with other types of wool. Withstands high temperatures up to 600 degrees. Stone wool is most often used as insulation.
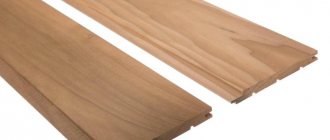
Lining for interior decoration of a wooden house
Manufacturers offer a variety of options for facing materials for interior decoration. However, to decorate a wooden house, they often resort to lining. It allows you to maintain the overall style and atmosphere of a wooden building. This material can be used for both exterior and interior finishing (only the methods of processing differ). Lining comes in a variety of types. Moreover, we are not talking about the wood from which it is made and not about its size. The profile of the lining, depending on the wishes of the customer, can be modified. There are wavy or even design of the material, as well as imitation of timber or logs (block house).
To finish the walls inside a wooden house, lining 15-20 millimeters thick is used. Its cost is less than that of thicker analogues, but such material fulfills its tasks. You can arrange the lining boards in any order: horizontally, vertically, at an angle. Those with remarkable patience and hard work are able to create entire paintings from lining.
When fixing the lining to the sheathing or to the walls, do not forget about possible shrinkage of the house. To compensate for possible changes in wooden walls, leave a gap of 20-40 millimeters near the floor and ceiling.
How to cover a room with clapboard
Tip: When lining a house with wooden clapboards, before starting work, you must leave the material in the room for 24 hours so that it gets used to the microclimate.
The technology for covering a house with clapboard is as follows:
- The installation of the material is carried out on the lathing (see Lathing under the lining according to all the rules) or a supporting structure. The slats for it can be purchased ready-made or cut to the required length from one-inch boards of small cross-section using an electric saw.
- The sheathing is rigidly attached to the wall with self-tapping screws at even intervals of approximately 50 centimeters.
- During the construction of the sheathing, using a plumb line or building level, the supporting structure should be leveled.
- In order for the clapboard cladding to serve for a long time after finishing the house, you need to leave a gap between the wall and the material, which will be a ventilation space.
- To insulate the room and increase noise insulation, special material is laid. In this case:
- insulation is installed;
- covered with a vapor barrier.
- The sheathing for laying the lining is assembled.
Advice: The lathing should be coated with a special anti-fungal primer to prevent mold, which can ruin the entire look of the cladding.
How to secure material with nails, staples and clamps
If a house is clad with clapboards, the technology provides for the choice of fastening the material. In this case, everyone chooses the most convenient and familiar option for fixing the panels.
What is the best way to cover the walls of a wooden house inside?
A wooden house is the dream of many. And therefore, when the opportunity arises to buy it or build it yourself, you want it to delight you with its warmth and comfort for many decades. And for this you need to carefully approach the finishing of the structure.
Particular attention needs to be focused on the questions: what can be used to cover the walls of a wooden house inside and how to do it correctly
Now on the market you can find many offers for the sale of houses and cottages that already have interior decoration. But not all of them can be trusted. It often happens that for the sake of economy, walls are sheathed in violation of all technologies. This will not become clear immediately, but only after a certain period. Therefore, the best option would be to cover the walls of a wooden house yourself.
In what cases it is impossible to carry out insulation on the outside of walls
It is always better to install a layer of thermal insulation coating on the outside, unless there is a visible reason not to do so. These include:
- The proximity of the house to an unheated room where insulation is problematic
- Decorative finishing has been done on the outside of a wooden, brick house or foam block building, which is expensive and labor-intensive to dismantle
In all other situations, insulation along the outside of the walls will be preferable. The only option that requires high-quality internal thermal insulation, laid at the construction stage, is frame construction.
In other cases, it is better to select materials that are characterized by vapor and waterproofing properties, and are also installed without seams.
The essence and problems of internal insulation
When insulating a house from the inside, you need to take into account some features.
Most experts really believe that insulating the inside of a house is only worth it as a last resort, recommending insulating the outside. What is meant in this case by the word “inside”? This refers to the direct covering of the walls of rooms with any materials. And if floors, ceilings and some other areas can be easily insulated, it is with the insulation of walls that many problems arise.
The main difficulty is the transition of the wall surface to the cold zone. Typically, if there is no insulation of any kind, warm air from the room passes through the walls, heating them. If insulation is laid from the inside, air masses will collide with them, unable to escape outside. In this case, all walls remain cold, and there is a risk of cracks.
For this reason alone, it is worth considering whether it is necessary to insulate a private house from the inside instead of insulating it from the outside. It’s logical: why waste money and your energy if the result is only cracked walls and a cold room? But this is only part of the difficulties. In addition to damage to insulated surfaces, there is condensation and other troubles that will appear in a minimum time if even a small mistake is made during the insulation work.
Features of the thermal insulation process
Insulation for walls in private housing, as in the case of any other object, is best laid on the outside. If thermal insulation is installed from the inside, the walls will remain cold, and due to the shift in dew point, condensation will form on the internal surfaces. This will lead to the constant presence of moisture, which is especially dangerous for a wooden house.
In a situation where the main frame of the building is made of brick or other material, for example, foam blocks, it is the thermal insulation that will suffer to a greater extent, especially when it comes to mineral wool insulation. But even under such conditions, it is possible to build the safest possible structure that will trap heat in the house.
Some features of installation work on insulation
There are some features of installation work and certain technological “tricks”, the observance of which will allow the work to be completed correctly.
When installing a vapor barrier, it is advisable to create an air gap necessary to remove excess moisture from the surface of the vapor barrier material.
When carrying out work, it is necessary to take into account that, after some time, the wood used in the construction of the house will dry out and cracks may appear in the hydro- and vapor barrier system, which will need to be eliminated.
It is undesirable to insulate the walls on both sides, isolating them from the air, in this case the moisture will concentrate and this will negatively affect the structure.