Bathhouse projects
Number of projects 681
- 1 room
- 1 bathroom
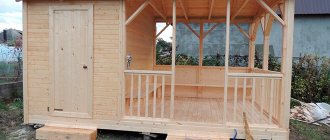
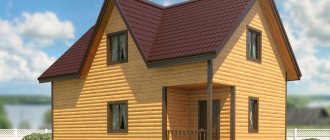
Bathhouse project "Vyatka"
- To favorites
- 31.7² Total area
- 7 x 6m Building area
from 765,000 rub.
Construction time individually
- 1 room
- 2 bathrooms
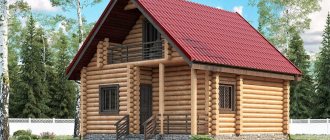
Bathhouse project No. 14033
- To favorites
- 33² Total area
- 5 x 8m Building area
from 3,737,325 rub.
Construction time individually
- 2 rooms
- 1 bathroom
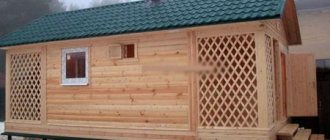
Project Banya Dobrynya-2
- To favorites
- 72² Total area
- 8 x 6m Construction area
from 846,850 rub.
Construction time individually
- 1 room
- 1 bathroom
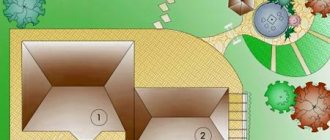
Bani Afonya project
- To favorites
- 43² Total area
- 9 x 7m Construction area
from 580,500 rub.
Construction period 35 days
Bathhouse project Standard No. 3
- To favorites
- 15.3² Total area
- 4 x 4m Building area
from 470,000 rub.
Construction time individually
- 1 room
- 2 bathrooms
Bani Toliman project
- To favorites
- 40.5² Total area
- 8 x 7m Construction area
from 546,750 rub.
Construction period 28 days
- 1 room
- 2 bathrooms
Bani Avisso project
- To favorites
- 142.57² Total area
- 9 x 19m Construction area
from RUR 1,924,695
Construction period 74 days
Available at the exhibition
- 1 room
- 1 bathroom
Bathhouse project 4x6m
- To favorites
- 24² Total area
- 6 x 4m Construction area
from 508,000 rub.
Construction period 15 days
- 1 room
- 2 bathrooms
Project Baths 11B-B
- To favorites
- 27.5² Total area
- 5 x 8m Building area
from RUR 436,590
Construction period 18 days
- 3 rooms
- 2 bathrooms
Bathhouse Kamelok project
- To favorites
- 83.65² Total area
- 6 x 10m Construction area
from RUR 1,129,275
Construction period 48 days
- 1 room
- 1 bathroom
Bathhouse Mylnya project
- To favorites
- 29² Total area
- 5 x 6m Construction area
from RUB 391,500
Construction period 30 days
- 2 rooms
- 2 bathrooms
Bathhouse project No. 12008
- To favorites
- 84² Total area
- 6 x 9m Construction area
from RUR 2,120,438
Construction time individually
- 1 room
- 1 bathroom
Project Bathhouse Golden Cone
- To favorites
- 121² Total area
- 10 x 15m Construction area
from 1,633,500 rub.
Construction period 64 days
Project Baths made of timber AR-037
- To favorites
- 17² Total area
- 5 x 4m Building area
from 229,500 rub.
Construction period 90 days
- 1 room
- 2 bathrooms
Bathhouse project "Riga"
- To favorites
- 81.5² Total area
- 12 x 10m Construction area
from 1,630,000 rub.
Construction time individually
- 1 room
- 1 bathroom
Bathhouse Dubok project
- To favorites
- 11² Total area
- 4 x 3m Building area
from 148,500 rub.
Construction period 15 days
- 1 room
- 1 bathroom
Bathhouse Zigzag project at Dacha
- To favorites
- 72² Total area
- 7 x 8m Construction area
from 972,000 rub.
Construction period 35 days
- 1 bathroom
Log bathhouse project AR-029
- To favorites
- 74² Total area
- 7 x 14m Construction area
from 999,000 rub.
Construction period 90 days
- 2 rooms
- 2 bathrooms
Bath Antoine project
- To favorites
- 115² Total area
- 11 x 7m Construction area
from 1,552,500 rub.
Construction time 62 days
Bathhouse project "Russian Izba"
- To favorites
- 26² Total area
- 5 x 6m Construction area
from RUR 362,489
Construction time individually
View all projects
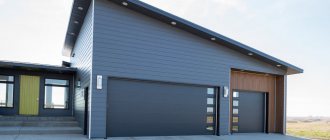
When planning to acquire a place for a car on your property, you need to know that in addition to the garage, it can be supplemented with another useful building and the optimal solution will not always be a utility block - it could be, for example, a bathhouse. One of the advantages of this solution is that there is no need to allocate additional space for a new building. Bathhouses and garages can be built in one building, placing them under one roof. Design features of such projects, as well as recommendations for the selection of materials, can be found in this article.
Garage and bathhouse under one roof Source josri.ru
Economy options
Many people dream of a summer kitchen in their country house, but often the prices for the stone most suitable for its arrangement direct our enthusiasm to something else. But in vain...
After all, a kitchen can be made from scrap materials, you just need to use your wits. For example, old window frames will reduce the cost of building an enclosed kitchen.
True, this will not save you from the need to lay the foundation.
Alternatively, a summer kitchen can be made from a railway container. It is possible that purchasing a ready-made change house that does not require additional finishing will cost much less than construction.
But still, a summer kitchen project in a country house, which falls under the category of economy class, most often involves an open-type construction. And since the concept of “simple summer kitchen” is very individual and flexible, let’s look at several different options.
1. A stove, sink and work surfaces united by an island, located on a common foundation with the house in the open air. Stone, plastic, stainless steel and thoughtful design will protect the island from the influence of moisture, but the awning installed nearby will save you and the prepared dishes.
2. Conversion of a gazebo, veranda or terrace into a summer kitchen.
3. Connecting two existing buildings with a common roof made of tarpaulin or lighter waterproof materials.
4. Stakes or metal supports covered with vines as walls and a thatched roof.
5. Arrangement of a summer kitchen near the fence wall: all that remains is to add an awning or a pitched roof.
6. Open or closed kitchen made of adobe - a mixture of earth, clay, hay and other available materials. True, adobe is suitable for buildings in hot, arid climates.
Design Features
In our realities, garages have almost never been a highly specialized “sleeping area” for a car. Inside, car enthusiasts always had a small workshop for emergency assistance to their iron horse. There was also a warehouse for all kinds of spare parts and a corner for fuels and lubricants.
In addition, all free parts of the premises were used as a regular shed. Everything that didn’t fit in the house found a place in the garage. Gardening tools were also stored here. And, of course, a cellar was built to store food for the winter.
Combining a garage with a bathhouse under one roof is a good solution for those who like to tinker with their car. When doing repairs, you can not only get very dirty, but also get soaked through with auto chemicals and exhaust fumes. It is very undesirable to bring all this dirt and unpleasant odors into the house. This is where a hot shower comes to the rescue to remove all traces of repairs on the body and the heavy garage odor. Gardeners will also appreciate the opportunity to wash off dirt when returning from their favorite garden beds.
A good solution to combine a garage with a bathhouse Source acost.ru
But most of all, those homeowners whose plots are very small will be happy with this decision. And those whose income does not allow them to expand on a grand scale. In the first case, there is no need to take away territory from your favorite garden. And in the second, it is more economically profitable to build one room instead of two or three.
Assembling the base platform
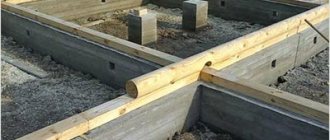
The supporting parts of the foundation rising above the ground with embedded fastening elements, no matter how accurately they are pre-aligned, do not provide an absolute horizontal position.
awn.
Therefore, the lower trim is installed and carefully checked for level. The best results are obtained by using a level. After final leveling, the voids under the beams of the lower trim are filled with cement-sand mortar. Do-it-yourself assembly of the base and frame is done only with nails, and in places of critical connections - with bolts or studs with spacers of larger diameter washers or toothed disks. Fastening with self-tapping screws is unacceptable. We use 4x100 or 3.5x90 nails. More reliable connection with twisted nails. The logs can be connected to the strapping beams using reinforced steel corners. It is preferable to use open type beam supports. But also with a nail connection.
Advantages and disadvantages
Realizing the dream of any Russian man about a comfortable garage and a bathhouse for relaxation, it should be noted that such a project has a number of undeniable advantages. But, just as any object has another side, so here too it cannot do without shortcomings.
pros
A garage with a bathhouse inside has many advantages:
- General comfort.
- The structure as a whole is quite ergonomic.
- The cost savings are obvious - it is always cheaper to build one large building than several small ones.
- The same can be said about saving the territory of the site.
- The functionality of the room is excellent. Upon completion of any work (car or garden work), you can immediately put yourself in order.
- One heating system for both the bathhouse and the garage is not only practical, but also thrifty.
- You can rationally arrange the water supply of the premises.
- The garage confirms its versatility as a place to store fuel for the bathhouse. A huge plus is that you don’t have to leave the room to get it in bad weather.
- If you equip the building with an attic, it will look like a guest house with an outdoor seating area.
- Among other things, such an object looks very attractive.
Combined building Source krov-torg.ru
Minuses
All the negative aspects come from the difficult choice during the construction of the structure:
- You need to decide on a waterproofing material.
- Find out what will be better with thermal insulation.
- Find a solution for what the walls will be made of.
- And there is no need to talk about the choice of facing materials . A variety of options for more than one week of thought and debate.
The main catch is that you need to combine the wet area of the steam room with the dry area of the garage. It would seem that condensation is inevitable. And mold and fungus are close to it. Due to the mustiness and stench, the room will soon lose its value and will be unsuitable for use.
But if you plan everything correctly and stock up on high-quality building materials, then these problems can be easily solved.
You need to think about waterproofing the room in advance Source makemone.ru
See also: The most popular garage projects.
How to build a gazebo in 3 steps
It is best for a home craftsman to build a gazebo with a utility block made of wood or metal. You need to start from the availability of tools and skills, so if you don’t have a welding machine and you don’t know how to cook, then forget about metal.
The collapsible version (with studs and bolts) is suitable for a simple canopy, but it is difficult to assemble the room in this way. But anyone who owns a hacksaw and a hammer can build a frame from timber and cover it, for example, with planed boards, so we will talk specifically about this option.
Step #1: making the foundation
In this case, there is no point in pouring a strip foundation or a reinforced concrete slab under the entire structure. These types of foundations are installed under brick or stone structures. For a wooden canopy, it is enough to arrange a row of pillars and install a frame on them.
It makes sense to pour a foundation slab only if the floor in the gazebo is planned to be made of concrete.
The pillars can be made square or round; personally, I prefer to fill round pillars, because it is simpler, faster, and most importantly, more reliable. Although the technology for arranging the pillars is the same in both cases.
Scheme of a square pillar for a gazebo.
- First, arm yourself with a garden drill and make holes 50-70 cm deep at the nodal points of the structure. Typically, the pitch of the pillars is 1 meter. By the way, if you decide to make square pillars, then they are buried there by 35-40 cm, this is due to the fact that they are larger in area;
- Now pour 10-15 cm of sand and gravel mixture into the bottom of the hole and compact it well;
- According to the diameter of the hole, roll up a pipe from roofing felt and insert it into the hole;
- Tie the reinforcement cage and insert it into the center of the hole;
The easiest way to make formwork is from roofing felt.
- There should be a long reinforcing rod or threaded rod in the very center. We calculate that after pouring the concrete, this rod will stick out from the post by 30 - 40 cm, and we will fix the floor frame to it;
- Further along the level (the same in all pillars) we pour concrete and wait a couple of weeks until it gets stronger.
It is advisable to install a pin in the center of the post.
If you are going to build a brick barbecue or stove, then you need to pour a separate foundation for it; a diagram of this foundation is given below.
Foundation diagram for a brick barbecue or oven.
- Gazebo with utility room
Step No. 2: knocking down the supporting frame
I recommend using timber with a section of 100x100 mm for the supporting frame. The floor frame is knocked down first, after which it is immediately installed on concrete pillars and secured with studs. Keep in mind that the wood should not come into contact with concrete, so before installing the frame, roofing felt pads are laid on the pillars.
The simplest design of a gazebo with a utility block.
For intermediate floor joists, timber no thinner than 50x100 mm is taken; the joists themselves are installed in increments of 30-40 cm.
The supporting frame is fixed with studs to the foundation pillars.
Now we install vertical racks for the walls. It is also advisable to make these racks from 100x100 mm timber. There is an interesting point here, professional carpenters join beams by cutting, in different ways, I recommend that you use metal corners and other similar fittings, it’s much easier and faster.
It is more convenient to join the timber using metal fittings.
What the roof on the gazebo should be like - everyone has their own opinion, but if you have never installed a rafter system, then I advise you to go with the lean-to option.
Frame diagram for a lean-to gazebo.
The most you can still try is the simplest gable design. Believe me, hip, hip, multi-level and other complex types of rafter systems are beyond your power.
The gable rafter system is relatively simple.
When the rafters are installed, an under-roof sheathing is placed on them; the frequency of this sheathing depends on the type of roofing material. The most economical would be to use corrugated sheets or asbestos-cement slate; the lathing is placed under them in increments of 200-300 mm.
Roofing made from corrugated sheets is inexpensive and can be installed quickly.
Step No. 3: cladding
Since we are talking about a summer gazebo, the cladding will accordingly be light. The simplest option is to take a planed board 20-30 mm thick and cover the frame with it. To make the structure look more original, the board can be filled not in the usual smooth way, but in a herringbone pattern, as in the photo below.
The herringbone cladding looks original.
Construction requirements
Taking into account all of the above, the structure must meet certain requirements. And they are directly related to the foundation. Here is their list:
- It is necessary to select and provide the building with excellent waterproofing. Many substances that are present in the garage can have an aggressive effect on the base of the structure. And the high temperature and high humidity of the steam room will certainly increase the negative effect on the foundation, accelerating the destruction process. All this will significantly reduce the operating time of the entire building if you do not worry about neutralizing these factors in advance.
- Due to the fact that completely different temperature conditions and humidity prevail in the two main rooms, the partition between them can quickly become unusable. It is necessary to take care of good thermal insulation. Experts advise building not one, but two walls between the garage and the bathhouse, making a storm drain between them.
- It is necessary to ensure good drainage in the premises. So that excess moisture cannot reach the foundation of the building.
- It is also necessary to take care of protection from melt and storm water. We need high-quality drainage and an efficient drainage system to remove moisture away from the building.
All these measures can protect the base of the structure from the destructive effects of water and the operational life of the entire utility unit will significantly increase Source makemone.ru
Equipment for summer kitchen
Before designing a kitchen, you should clarify what exactly it is needed for and what equipment will be installed. Under a compact canopy you can only put a grill or barbecue and some furniture.
If you plan to install a stove, it is laid out from bricks or stones. A master stove maker will help you build a tandoor or a small stove for a summer kitchen and lead the pipe through the roof, if necessary. For more complex equipment, such as stoves and sinks, it is worth including protection from wind and rain in the design.
Selection of materials
When calculating the design of a garage with a bathhouse, you need to think in advance about the materials for future construction. After all, these rooms have different functions and the reaction of the walls, as well as decoration, to all kinds of stimuli will not be the same. So, due to the high temperatures in the bathhouse, you need to take care of materials that do not release harmful substances when heated. And with regular spills of fuel and lubricants in the garage, surfaces are needed that do not absorb harmful substances. That is, they would be durable and easy to clean.
Each room has its own material that is best suited for the purpose of the building. For example, bathhouses are built from wood. An excellent material in terms of ecology and does not require the construction of a reinforced foundation. But such raw materials are not suitable for building a garage. In addition to the fact that it will absorb all harmful emissions, the appearance of the room will suffer very soon due to the inability to carry out high-quality cleaning.
The choice of materials should be given special attention, because these rooms have different functions Source uchitak.ru
Interesting ideas
The design of a summer kitchen can be simple and laconic or thought out to the smallest detail and with interesting decor - it all depends on taste and budget.
Projects
The main advantage is that when a garage and a bathhouse are built under the same foundation and roof, each person’s projects can be completely individual. The developer is free in his fantasies and can only be restrained by a small area of the site or insufficient funds.
Combined building Source pingru.ru
Bathhouse with parking
There are times when a builder is prevented from realizing his dreams by circumstances. For example, financial. The cost of materials may deter you. Or there are difficulties in isolating rooms from each other. Then you have to sacrifice one of the buildings, but not completely. Simply, instead of a permanent garage, you can attach a comfortable parking lot to the bathhouse.
In this case, you can build a classic wooden bathhouse and, in the same style, equip a nearby parking lot for a car, the roof of which is supported by wooden columns.
This will protect the car from bad weather and direct sunlight Source makemone.ru
Garage for two cars and sauna
This is a project for people who are not strapped for money and do not save every meter of the site. Near the house you can build a spacious garage for two cars and a beautiful, comfortable sauna. For ease of departure and arrival, two gates are installed. They also allow you to save heat during the cold season. And the entrance to the sauna is located on the other side of the building.
This allows you to slightly isolate the bathhouse from the garage, creating a separate place for a good rest with friends.
To do this, the building can be equipped with a terrace, placing comfortable chairs or sun loungers on it Source hi.decorexpro.com
Types of summer kitchens
Depending on the location, summer kitchens can be divided into two large groups: adjacent to the main house and free-standing.
Technologies
Our wooden outbuildings are strong and massive structures. Be sure to pay attention to the thickness of the material, the Shinglas soft roof, as well as the windows, doors and foundation included in the price. Behind the walls of the constructed structures you will always be protected from the scorching sun, rain and wind.
Our company is a manufacturer and uses high-tech equipment! This is why our prices are so low and clients can build relatively inexpensively. All products and work are guaranteed .
According to the deadlines. The wall kit, joists and rafters are pre-fabricated at the production base. Then the disassembled material is delivered to your site, after which the craftsmen begin assembly. The boards or beams themselves are supplied profiled, which allows you to optimize the process of installing the utility unit and within 1 day .
