Overall plan
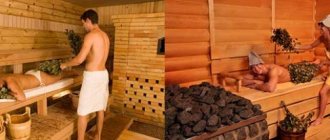
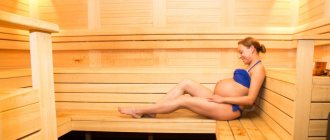
I allocated most of the barn for the sauna - about 6 square meters. m. There should be at least 2 “squares” per person in the steam room. My family is small, so this area is quite suitable for us. I planned the location of the stove and shelves in advance.
The concrete floor of the barn in the area reserved for the sauna was covered with pimply tiles, on which it is impossible to slip. Now, when we go to the sauna, we also put wooden grates on top of the tiles.
I didn’t make a hole in the floor to drain the water - we usually don’t use water in the sauna. Of course, sometimes you want to give in to the park. But if you took a steam bath, then ventilate the sauna and wipe the floor with a dry cloth.
TOOLS FOR HOME AND GARDEN, HANDCRAFTS, ETC. PRICES VERY LOW
Frame plus walls
The steam room was made from spruce beams and aspen boards 6 cm thick. I chose well-dried wood, it will last longer.
I built the frame of the walls and ceiling from the beams. The hardest part was attaching them to the floor. To do this, I drilled matching holes in the beams and floor, into which I then inserted large screws. A layer of waterproofing was placed between the beams and the floor.
The frame of the walls was first equipped with vapor-insulating boards, then covered with aspen boards. I made longitudinal grooves on the boards. They made it possible to firmly “grip” the structure. The bottom layer was also used here for waterproofing. I drove the nails with which I nailed the boards deeper into the wood so as not to get hurt or burned, because the temperature in the sauna reaches 100°.
Solving the problem of lack of space on the site
The plan of such a one-story “bathhouse-barn” structure is quite simple, which allows for some deviations in size and even the organization of a porch at the entrance (see description in the text)
The main, as it is fashionable to say today, pilot option for combining a bathhouse and a utility room could be the following, tested in more than a dozen implementations:
- A – hallway – dressing room, note that the stove is controlled from the steam room, but the wall of the stove opens into the hallway, which ensures its reliable heating;
- B – washing room, there is a small window - windows in the working rooms of the baths are either absent or small in size (in the proposed version 50 by 40 cm), which allows for better control of heat transfer;
- C – steam room – traditional floor and stove, there is everything for a true connoisseur of relaxation “with a park”, please note that in the proposed implementation there is no window in the steam room, this is the unspoken rule of all steam rooms for all designers;
- D – a barn, or, well, a utility room with an area of 4 sq.m., in such an area you can place a small machine; appreciate the thoughtful and forward-thinking approach of the proposed solution - the barn with its pile of metal has no contact with moisture-rich rooms; of course, thermal insulation and vapor permeability must be ensured at the highest level, however, such a division indicates a subtle understanding of the situation by the developers;
Perhaps the heroes of “Kalina Krasnaya” steamed in such a bathhouse, simply attached to a barn, but those days of 40 years ago are still gone and today you most likely won’t have to agonize over the question of how to attach a barn to a bathhouse
- E – porch, and this is another plus of the proposed project.
Helpful advice! But the main positive feature of the proposal is the installation of the entire structure on piles. Here, a more expensive and reliable option was chosen - square-section concrete piles. Although for such a structure as a one-story bathhouse, it is quite possible to use metal pipes, they are more convenient to install, and the load capacity will fully meet the objectives of the structure. The main thing is that piles are an ideal way to deal with unreliable, heaving soils and the main way to reliably ventilate a structure, which is very important for bathhouses.
Design Features
The technology for constructing the proposed bathhouse with a barn is so well developed that usually a team of 2-3 people undertakes to build it in no more than a working week. And the price for all this pleasure will disappear after putting the barn in order - no more than 300 thousand rubles.
Here are some more useful technical characteristics of this combination of a bathhouse and a barn:
- for external walls, planed timber measuring (mm) 95 by 145 is used;
- for the steam room - aspen lining;
- size of concrete piles – 200 x 200 x 400 mm;
- distance between pedestals – 200 mm;
- number of pedestals – 9 (8 around the perimeter and one in the middle of the building);
- roofing material must be used on top of the piles as waterproofing;
- means of insulation between the beams - jute;
- vapor barrier in the steam room is provided by special bath foil;
- 50 mm insulation is used both on the floor and on the ceiling of the bathhouse;
- all joints, bottom and top, are covered with skirting boards;
- on the outside the roof is sheathed with pine clapboard;
- ceiling height inside – 225 cm;
How to build a bathhouse from a barn with your own hands
This is not to say that you will definitely strive for this - to combine two premises such as a bathhouse and a barn under one roof.
Even if you convince yourself that from Persian “barn” is nothing more than a “palace”. We use this as a place to store odds and ends, more tools and “just in case” junk. But situations can be different - the barn is already standing, but there is not enough space anyway, or a successful bathhouse design with a “utility room” already appeals to you. One way or another, such a combination is possible, it all depends on how the “palace” for hoes and shovels will be maintained in the future.
A better solution to the question of how to make a bathhouse out of a barn is to do it radically - build a bathhouse with a utility room anew
The plan of such a one-story “bathhouse-barn” structure is quite simple, which allows for some deviations in size and even the organization of a porch at the entrance (see description in the text)
The main, as it is fashionable to say today, pilot option for combining a bathhouse and a utility room could be the following, tested in more than a dozen implementations:
- A – hallway – dressing room, note that the stove is controlled from the steam room, but the wall of the stove opens into the hallway, which ensures its reliable heating;
- B – washing room, there is a small window - windows in the working rooms of the baths are either absent or small in size (in the proposed version 50 by 40 cm), which allows for better control of heat transfer;
- C – steam room – traditional floor and stove, there is everything for a true connoisseur of relaxation “with a park”, please note that in the proposed implementation there is no window in the steam room, this is the unspoken rule of all steam rooms for all designers;
- D – a barn, or, well, a utility room with an area of 4 sq.m., in such an area you can place a small machine; appreciate the thoughtful and forward-thinking approach of the proposed solution - the barn with its pile of metal has no contact with moisture-rich rooms; of course, thermal insulation and vapor permeability must be ensured at the highest level, however, such a division indicates a subtle understanding of the situation by the developers;
Perhaps the heroes of “Kalina Krasnaya” steamed in such a bathhouse, simply attached to a barn, but those days of 40 years ago are still gone and today you most likely won’t have to agonize over the question of how to attach a barn to a bathhouse
- E – porch, and this is another plus of the proposed project.
Useful advice! But the main positive feature of the proposal is the installation of the entire structure on piles. Here, a more expensive and reliable option was chosen - square-section concrete piles. Although for such a structure as a one-story bathhouse, it is quite possible to use metal pipe ones, they are more convenient to install, and the load capacity will fully meet the objectives of the structure.
The main thing is that piles are an ideal way to deal with unreliable, heaving soils and the main way to reliably ventilate a structure, which is very important for bathhouses.
The technology for constructing the proposed bathhouse with a barn is so well developed that usually a team of 2-3 people undertakes to build it in no more than a working week. And the price for all this pleasure will disappear after putting the barn in order - no more than 300 thousand rubles.
Here are some more useful technical characteristics of this combination of a bathhouse and a barn:
- for external walls, planed timber measuring (mm) 95 by 145 is used;
- for the steam room - aspen lining;
- size of concrete piles – 200 x 200 x 400 mm;
- distance between pedestals – 200 mm;
- number of pedestals – 9 (8 around the perimeter and one in the middle of the building);
- roofing material must be used on top of the piles as waterproofing;
- means of insulation between the beams - jute;
- vapor barrier in the steam room is provided by special bath foil;
- 50 mm insulation is used both on the floor and on the ceiling of the bathhouse;
- all joints, bottom and top, are covered with skirting boards;
- on the outside the roof is sheathed with pine clapboard;
- ceiling height inside – 225 cm;
As in the “shortest joke” from Yuri Nikulin: “Bathhouse, locker room across the road.” Outside the city, this is no longer a joke, especially if you made a bathhouse from a barn with your own hands
- wall thickness – 95 mm;
- height of the ridge of the bathhouse – 150 cm;
- for the roof, ondulin is used in three colors - green, red or brown;
- floor characteristics: rough thickness - 20 mm;
- steam and waterproofing material – glassine;
- insulation material - URSA 50 mm;
- floorboard - 27 mm tongue and groove;
600 x 600 mm – one.
Useful advice! Please note. The proposed bathhouse option does not include a stove in the standard mandatory delivery. Its selection and installation is made on a separate order. We advise you not to forget about this condition and be sure to inquire about how to install the stove in the bathhouse when searching for a contractor. The decision on installation must be made in advance.
Some contractors are ready to install any stove proposed by the customer, but this usually requires approval.
Any project of a bathhouse with a barn requires a particularly careful attitude to the foundation - creating a parameter around the perimeter is a very good option
conclusions
The proposed option of combining a bathhouse and a utility room is far from the only one. Therefore, the instructions for action here will be traditional for the construction market - first, be sure to conduct research and choose the most suitable option that satisfies all your wishes and placement conditions.
If it were not for the increased demands, not even on the strength, but on the quality of the bathhouse foundation, perhaps it would be recommended to try to do everything yourself. But since the specifics of building baths require experience and qualifications, we advise you to contact professionals who work with already proven project samples.
We invite you to familiarize yourself with the optimal size of a bathhouse for 3 people
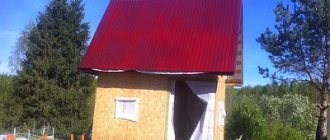
In the photo, everything was placed on a tubular pile foundation - for a bathhouse this is the best option in terms of preserving the structure for many years
in this article, perhaps, he can still convince you, for the sake of saving space, to combine a bathhouse with a utility room, if you were unable to solve the placement problem in another way.
If you are the happy owner of a summer house or a private house with a small plot, then you can set up a bathhouse in an old barn. It will give the whole family good health and wonderful relaxation after a hard day at work. Also, if the need and desire arise, you can make good money by setting an hourly wage and letting your neighbors, acquaintances and other people steam there.
We will equip an old barn, which we do not use, with a concrete floor as a steam room. The barn can be built from wood, brick, foam block or shell.
Are planning
We will allocate a considerable area of the barn for the steam room, approximately 6 square meters. m, this will be a small steam room; when calculating, take into account that there should be at least 2 sq. m per visitor. m. If you have a small family, then 6 sq. m will be enough for you, but if you plan to make money in the future using a steam room, then the area will accordingly be needed more.
Don’t forget to plan in advance the location and number of shelves, and determine the most advantageous place for the stove; the convenience of staying in your bathhouse from an old barn, which you will make with your own hands, depends on the layout.
Bath floor
It is worth laying structural tiles on a concrete floor in a barn; the surface of such tiles is a little rough, as if a little abrasive. And it is almost impossible to slip on such tiles. It is also worth making grates from boards, which we will lay on top of the tiles for comfortable movement around the bathhouse, because wood does not heat up as much as tiles and will not burn your feet when walking.
Be sure to weigh the pros and cons and decide whether to install a water drain in the floor. If you want to take a steam bath with a park, then your DIY barn sauna will need to be thoroughly wiped with a dry cloth and ventilated.
We recommend making a bathhouse from aspen boards, the thickness of which is at least 6 cm, and spruce beams. You should choose a dry tree, because dry wood retains its shape better and is much more durable than raw wood.
We construct the frame of our bathhouse from beams, it is not a complicated work at all, and then it is difficult to attach the frame to the floor. But this can be done with a little effort. We will carry out fastening by drilling aligned holes in the floor and beams, into which we will insert long screws, and do not forget to lay waterproofing between the floor and beams.
It is very important to install steam and waterproofing boards on the walls, which should be sheathed with boards. For these works, it is better to use aspen boards, having previously made grooves along the boards, which will serve for better adhesion of the boards to each other.
When driving nails, you should drive them as deep as possible into the wood, because the temperature in the steam room is high, and you can get burned by touching the hot head of an iron nail.
We install the ceiling in the bathhouse from the barn with our own hands from the boards with which the walls are covered. But to do this, we saw them in half, and we get 2, 3 cm each. We attach them directly to the frame of the bathhouse.
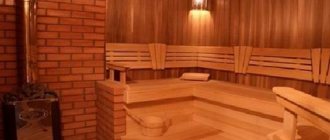
Shelves for lying
Shelf-beds should be made wide, their width should be approximately 70 cm. It is worth treating the surface of each bed very well so as not to get injured and not to drive splinters into the skin.
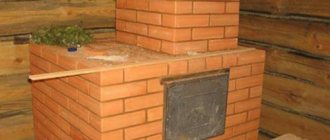
The stove should be placed near the door, on refractory bricks. We also lay the brick in the space between the stove and the wall, and take the pipe outside. Take care to enclose the stove with wooden structures and avoid getting burned.
Minimizing heat loss through doors
In order for as little heat as possible to be lost through the doors, we make it narrow, 50-60 cm, and attach a rubber seal to it. Door handles should be made of wood.
To illuminate your bath, you will need a special double-insulated cable and a lamp that is resistant to high temperatures. The switch should not be ordinary, but moisture-resistant, it should be located at the entrance to the steam room, as required by fire safety rules.
The wiring should be deepened into the walls so that the cable does not interfere, and then the bathhouse will look better and neater.
Additions:
- all boards used for lining the bathhouse must be made from deciduous trees;
- do not skimp on wiring materials, cables, lamps, switches and sockets. Buy high-quality and moisture-resistant ones, because the life and health of your family and guests who will visit your steam room depend on it;
- lamps must be made of heat-resistant glass, since the temperature in the bathhouse sometimes rises above 100 °C;
- Many people like to plunge into a cool pool after a hot bathhouse. But if you can’t afford such luxury, build a small pond in the yard, or place containers with cool water, for example, barrels, into which you can happily plunge after warm and pleasant bath procedures.
conclusions
The proposed option of combining a bathhouse and a utility room is far from the only one. Therefore, the instructions for action here will be traditional for the construction market - first, be sure to conduct research and choose the most suitable option that satisfies all your wishes and placement conditions.
If it were not for the increased demands, not even on the strength, but on the quality of the bathhouse foundation, perhaps it would be recommended to try to do everything yourself. But since the specifics of building baths require experience and qualifications, we advise you to contact professionals who work with already proven project samples.
In the photo, everything was placed on a tubular pile foundation - for a bathhouse this is the best option in terms of preserving the structure for many years
The video in this article may still be able to convince you, in order to save space, to combine a bathhouse with a utility room, if you were unable to solve the placement problem in another way.
If you are the happy owner of a summer house or a private house with a small plot, then you can set up a bathhouse in an old barn. It will give the whole family good health and wonderful relaxation after a hard day at work. Also, if the need and desire arise, you can make good money by setting an hourly wage and letting your neighbors, acquaintances and other people steam there.
We will equip an old barn, which we do not use, with a concrete floor as a steam room. The barn can be built from wood, brick, foam block or shell.
Bathhouse attached to the house: pros and cons
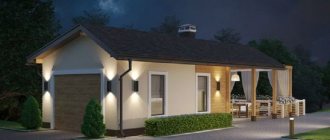
House with a bathhouse and a terrace (gazebo). Photo by Uralekodom
If the owner managed to go through all the thorns to realize his dream, then what is a plus and what is a minus in a bathhouse attached to the house?
Pros:
- At the construction stage, there is no need to stretch communications far, everything is nearby.
- At the operating stage, it is also clear that the proximity of the bathhouse is only a plus: it’s easier to keep track, everything is at hand, and there’s no need to freeze when running into the house.
Minuses:
- If a bathhouse burns down 12 meters from the house, you will only lose the bathhouse. If the bathhouse is in the house, you can lose the whole house.
IMPORTANT! One of the common causes of fire, which for some reason is rarely remembered, is a sparking chimney. Install a spark arrester, and it is advisable to choose non-flammable roofing material for the bathhouse.
- The second important disadvantage is that bath procedures increase the humidity in all rooms of the bath itself.
When you sell a house with a bathhouse extension, using, for example, the wall of a residential building as an extension wall, you need to keep in mind that it will be affected by the excess humidity of the bathhouse. Therefore, it is better to immediately take care of its protection or choose a project without using the wall of the house.
What exactly might the defense consist of? First of all - in ventilation. Focus on it, and most of the problem will be solved.
Are planning
We will allocate a considerable area of the barn for the steam room, approximately 6 square meters. m, this will be a small steam room; when calculating, take into account that there should be at least 2 sq. m per visitor. m. If you have a small family, then 6 sq. m will be enough for you, but if you plan to make money in the future using a steam room, then the area will accordingly be needed more.
Don’t forget to plan in advance the location and number of shelves, and determine the most advantageous place for the stove; the convenience of staying in your bathhouse from an old barn, which you will make with your own hands, depends on the layout.
Furnace and ventilation
I placed a stove-stove on fire bricks near the door. He also placed bricks between the stove and the wall. The pipe was taken outside. The stove was fenced with wooden railings so as not to accidentally touch the hot metal.
I drilled a small hole in the wall next to the stove to allow air flow into the stove. I also made a ventilation hole under the ceiling. Both openings were equipped with valves that allow you to regulate the inflow and outflow of air.
Link on topic: Do-it-yourself bathhouse - several options for building a bathhouse
Steam room materials
We recommend making a bathhouse from aspen boards, the thickness of which is at least 6 cm, and spruce beams. You should choose a dry tree, because dry wood retains its shape better and is much more durable than raw wood.
We construct the frame of our bathhouse from beams, it is not a complicated work at all, and then it is difficult to attach the frame to the floor. But this can be done with a little effort. We will carry out fastening by drilling aligned holes in the floor and beams, into which we will insert long screws, and do not forget to lay waterproofing between the floor and beams.
It is very important to install steam and waterproofing boards on the walls, which should be sheathed with boards. For these works, it is better to use aspen boards, having previously made grooves along the boards, which will serve for better adhesion of the boards to each other.
When driving nails, you should drive them as deep as possible into the wood, because the temperature in the steam room is high, and you can get burned by touching the hot head of an iron nail.
We provide electricity to the bathhouse
To illuminate your bath, you will need a special double-insulated cable and a lamp that is resistant to high temperatures. The switch should not be ordinary, but moisture-resistant, it should be located at the entrance to the steam room, as required by fire safety rules.
The wiring should be deepened into the walls so that the cable does not interfere, and then the bathhouse will look better and neater.
And in winter, water procedures can be replaced with snow rubdown:
- Be sure to ensure that the water in the barrels, pool or pond does not stagnate. Disinfect containers with water. Especially if other people are bothering you;
- Over time, you will be able to expand the bathhouse, add a relaxation room, and use it to earn money. After all, this is a good idea for business.
How to make a bathhouse from a barn
The bathhouse has long become one of the unchanging attributes of country life. If it is not possible to contact a construction team or you just want to have a hand in everything, a do-it-yourself brick bathhouse will be a profitable investment of money and effort. The step-by-step instructions, video and photo report below will help you create a budget sauna that will last for decades.
After a location has been chosen and markings have been made, construction of the foundation begins. The best option is a strip foundation. To do this, you need to dig a trench, put together formwork from boards, and sprinkle the bottom of the trench with sand (the sand cushion helps to evenly distribute the load). Reinforcement can be done using masonry mesh. The laying depth will depend on climatic conditions.
In this situation, a strip foundation for a bathhouse measuring 2.4 x 4.7 m was made. The height of the foundation is 30 cm, width 15 cm. You can prepare a concrete solution yourself, or you can order a ready-made one.
Since it is planned to build a brick bathhouse, you need to wait time for the foundation to stand. The time to start laying depends on the type of foundation and the characteristics of the concrete solution.
To protect against the appearance of fungus and mold, before starting masonry work, you can treat the foundation with Hydroshield waterproofing.
Walling
When building a brick bathhouse with your own hands, it is easier to use one-and-a-half red bricks.
To determine the amount of material, you need to divide the planned width and height of the walls by the height and width of the brick multiplied. This method is used if the masonry is carried out in one brick, as in this case.
In this case, it is necessary to leave ventilation gaps and plan windows and doors. Jumpers are installed above doors and window openings.
The floor beams are installed directly on the bricks in the prepared holes. The ends of the beams that will be in contact with the brickwork are wrapped with roofing felt, only the end part remains uncovered. The simplest option is a pitched roof. After laying the beams, make the flooring from the boards.
To provide waterproofing, the beams are wrapped in fabric asbestos, which is secured with a stapler. When the beams are hidden, a mixture of clay and sawdust is placed on top. For this roof, a proportion of 2 buckets x 2 buckets is sufficient. When the mixture dries, it is sprinkled with sand.
The chimney location requires special attention. Following the recommendations of specialists will help avoid a fire. Wood should not come into contact with the chimney. This area is sutured with a metal sheet.
Next, the rafter system of the brick bath is assembled and the lathing is performed. Roofing material, for example, slate or corrugated sheet, is laid on top.
The place where the stove will stand and the chimney will pass indoors is insulated with metal.
The space around the chimney in the ceiling area is insulated using expanded clay. The lower reflector is attached to the fittings.
Another sheet of metal is installed on top of the expanded clay layer.
During the construction of the brick bathhouse, the Rus-9 stove was used.
The next step in the phased construction of a brick bathhouse is the floor. Porcelain tiles are a practical and aesthetic option. To prevent the tiles from deteriorating during the winter, it is better to lay them on a frost-resistant mortar.
Errors in masonry will quickly make themselves felt with wet spots after heavy rainfall as in the photo. If such a problem manifests itself, you will have to coat all the seams.
We suggest that you familiarize yourself with How to sheathe a bathhouse from the inside: what is better to sheathe a waiting room and a sauna, a steam room inside except for the lining, than can be seen in photos and videos
After installing the stove and installing the chimney, you need to make a test fire to make sure that everything is done correctly.
Next, you need to think about arranging the floor in the dressing room. The lower part is covered with sand. Logs are installed on the projections of the foundation.
They are subsequently covered with boards. No boards are used near the firebox. Then you will get a recess suitable for storing a small amount of firewood.
As a result, a wooden floor will create comfortable conditions for people leaving the steam room. And finishing the space in front of the firebox with porcelain stoneware will ensure fire safety.
It is better to cover the ceiling in the steam room with linden clapboard.
For the ceiling in the dressing room, ordinary pine paneling is suitable.
The walls are covered with clapboard. Metal fasteners should not be used in areas where the skin will be in contact with the wall. After finishing the interior, the heating time to 80°C was reduced to 50 minutes.
The shelves are made in parallel with the cladding. They are usually installed opposite the stove. They require deciduous wood (linden, aspen) so as not to get burned by the resin that will protrude from conifers at high temperatures. Attach the shelf strips to wooden pins.
Like the entire interior space of the bathhouse, the ventilation holes are decorated with wood.
Even before decorating the walls with clapboard, water is carried out using metal-plastic pipes.
Bath floor
05.12.2013
Many, looking sadly at the old barn, where integral and important attributes of land care were previously stored, understand that the room is still in very good condition, the care attributes take up a minimal amount of space, therefore, something needs to be done. For example, create your own bathhouse. It is quite obvious that you will be faced with a difficult task, but still, converting a barn into a bathhouse is not building a room from scratch, so let’s try anyway. How to make a bathhouse from a barn? How to choose the right materials? Do you need a project?
Before you start converting a barn into a bathhouse, we recommend that you perform a thorough technical inspection.
- We check the quality of the foundation;
- We inspect the walls for cracks and corners;
- We check the integrity of openings for windows and doors;
- We carefully study the territory and the possibilities of connecting engineering systems;
- If there is light in the barn, check the quality of the wiring.
After a detailed study, we draw up a list of necessary initial actions. This way, you will be able to approach the task correctly and complete all the work quickly and efficiently.
Engineering systems
It’s very good if light is brought into the room; you only have to replace the internal wiring with external wiring, using high-quality wires and high-quality insulation. The following systems also need to be carried out:
- Sewage supply;
- Water supply.
To connect water, use polypropylene pipes, which are characterized by high quality, endurance and strength. Before starting work, you need to draw up a specific technical project that will help you lay pipes to the required depth, create high-quality additional insulation, and make the work more rational and faster.
It is quite obvious that before starting work, you need to get the room in perfect condition. This will require the following activities:
- We strengthen the foundation; in this case, you can use piles, which allows you to quickly and easily achieve your goals;
- We eliminate all cracks on the walls using high-quality building mixtures;
- We prepare openings for installing windows and doors;
It is quite obvious that windows and doors will have to be replaced, even if your shed has fairly strong windows, but without double-glazed windows they are unlikely to be able to maintain the ideal temperature in the room. Give preference to wooden windows and doors. Windows with double glazed windows, doors without additional internal locks.
We insulate the room
Of course, the main thing for a bathhouse is insulation. It is for this reason that it is necessary to initially carry out external insulation, after which, proceed to the internal arrangement. In order to create the ideal features of warmth and comfort, we will need:
- Mineral wool as insulation;
- Specialized sandwich panels for room insulation.
Instead of panels, other decorative materials can be used. Warming process:
- Clean the wall thoroughly;
- We use specialized profiles for subsequent finishing of walls with mineral wool;
- We fix the mineral wool;
- We fix the decorative material.
In principle, there is nothing difficult, but still, it is very important to act strictly according to the established plan in order to get truly gorgeous results and high quality coating.
Interior decoration
For interior decoration it is best to use natural wood. In this case, the walls can also be additionally insulated with high-quality but thin material, on top of which wooden panels or lining will be installed.
The most rational option is material made from spruce or larch. Floors can be finished with ceramic tiles, but first you need to create a sufficiently high-quality and durable screed.
Decorative stone is considered a very popular finishing option at the moment; in fact, it is very stylish and harmonious.
As for the stove, it is best to purchase a ready-made electric stove, which will require minimal installation costs.
gray glass shower screen. Euro finishing of a studio apartment from Time Build
conclusions
Now you know how to make a bathhouse from a barn with your own hands, it is not such a difficult task. By taking a steam bath, you get a lot of positive emotions, while seriously improving your health.
Yes, building a bathhouse is quite a labor-intensive process, and if you complete the job you started, you and your family will be happy, and if you approach this business with creativity, use your ingenuity and imagination, you can make good money.
>