Wood floors are considered the most comfortable and environmentally friendly. In addition, they give the room a noble look. Often people choose plank flooring because of its irreplaceable properties and because you can do it yourself. Making a floor from boards with your own hands is not difficult, of course, if it is not parquet, which is very expensive.
Plank floor plan.
Floor materials by joists
When selecting wooden materials for floor joists, you must decide in advance on the type of floor covering and select the required cross-section of the timber.
The timber for the logs is usually pine. The cross-section is selected depending on the operating conditions and restrictions on the permissible ceiling height. For laying on a flat concrete base, timber 50 × 50 mm or more is suitable. It should be taken into account that if the cross-section of the log is less than the double cross-section of the board being laid, then the timber will not be able to contain the stresses that arise in the boards when they dry out or become waterlogged. Therefore, the board for 50 × 50 timber should be no thicker than 25 mm. And depending on the thickness of the board, the optimal lag pitch is selected.
OSB, plywood, chipboard, and board can be used as rough flooring. The finished floor is made of parquet, laminate or boards. Floor boards are the most common material, which is made in different thicknesses, profile shapes and from different types of wood. The required amount of boards is calculated based on the area of the room with a 15% margin.
Floors are not made from alder, as it “spins” a lot after installation, from oak - if funds allow (expensive material). Pine and spruce are most often used. Pine wood is softer, lighter, a little lighter, and has fewer knots.
The choice of floorboard largely depends on how we will lay the floor. There are two common installation methods:
- On a prepared, level base (subfloor) made of waterproof plywood, chipboard or OSB. In this case, the floor board may not be too thick (16-25 mm).
- Directly to the logs. When laying the floor on joists, the thickness of the board depends on the distance between the joists. The table for matching the board to the lag pitch is given below in the review.
It is recommended to use a narrow board (90-105 mm) for installation. After drying, the wide board will give wide gaps (especially near heating appliances). A narrow one, even if it dries out, will not give very visible defects.
Required tools for floor installation:
- Hammer.
- Screwdriver (drill).
- A jigsaw or a hand-held circular saw (hacksaw).
- Planer, tape measure and square.
- A special tool for pulling together floorboards (you can also use improvised tools and devices).
Floor installation on joists
Structurally, logs can be compared to floor beams. But for the sake of objectivity, it should be noted that the beam is a more massive element, which after final installation cannot be moved without significant dismantling work. Logs are much easier to install and, if necessary, repair or remodel.
Having dealt with mobility, it is necessary to note an important component of the installation of floors on joists - the base. Logs have a smaller cross-section than beams, which can be supported at two points. Therefore, lags require more intermediate support points or a relatively flat plane. Based on this, we can conditionally distinguish two situations: when logs are mounted on an existing foundation and when there is no foundation (soil or uneven foundation).
Each version of flooring on logs has its own characteristics, but the basic technology of the device remains almost unchanged. First of all, we will consider a wooden floor on the ground, where there is no high-quality foundation. And the methods of fastening, the final stage of laying the logs and processing the floorboard will be common for all cases.
Commissioning
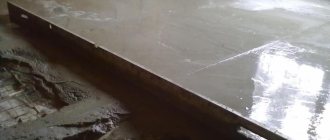
Full maturation of the cement screed occurs after a month, which is when balancing needs to be done using collector flow meters.
Using balancing valves, the coolant flow is regulated; it should become the same in all circuits. If you have no experience with self-balancing, it is better to invite a specialist.
After manipulating with cold water, if the system is working correctly, you can conduct tests with heated coolant. At this point, the installation of the heated floor is considered complete.
Wooden floor on the ground
In the case of a base in the form of soil, for a high-quality installation of a wooden floor it is necessary to provide some kind of waterproofing gasket between the wooden structures and the ground. It is also necessary to provide sufficient space for good air circulation in the underground to protect wooden structures from ground dampness. That is, in simple words, you need to build a foundation from concrete or brick columns. And if the distance between the ground and the logs is insignificant, then it is necessary to carry out additional excavation or completely abandon this structure in favor of a cement-sand screed.
Do not rush to randomly build columns for logs. At this stage, calculations are carried out. First of all, you need to decide on the thickness of the floorboard, and based on it, set the lag pitch. The following table shows the standard board sizes and the corresponding center distances between the joists:
| Floor board thickness, mm | Distance between lags, mm |
| 20 | 300 |
| 24 | 400 |
| 30 | 500 |
| 35 | 600 |
| 40 | 700 |
| 45 | 800 |
| 50 | 1000 |
Having decided on the step, you can proceed to choosing the section of the log beam. Let us highlight the standard sections of timber (mm):
- 50 x 50 mm.
- 50 x 100 mm.
- 100 x 100 mm.
- 120 x 120 mm.
- 100 x 150 mm.
- 150 x 150 mm.
- 200 x 250 mm.
The selection of the lag section must be carried out in conjunction with determining the number of supporting columns. For clarity, let's look at an example:
- The length of the logs is 6 meters.
- Floor board 40 mm thick. Accordingly, the pitch between the logs is 700 mm.
- It is intended to use timber with a cross section of 100 x 100 mm.
- It is necessary to determine the required number of supporting posts for the logs.
This problem is solved using a simple program for calculating single-span wooden beams for distribution loads.
Calculation of timber for logs
Using the substitution method, you can select the desired section or, knowing the cross-section, determine the optimal distance between the supports. To obtain zero deflection, the distance between the supports (span length L) is set to 1000 mm (more is possible). Knowing this parameter and the length of the log (6 meters), it is not difficult to calculate the required number of columns (7 pieces).
Posts for supporting logs
Now you can move on to marking and preparing places for the posts. It is important to take into account that the outer rows of pillars along which the logs will be laid along the walls are installed close to them, and the outermost pillars of each row are indented to the floor of the brick. For clarity, let’s consider this stage in more detail:
| 1 - soil. | |
| 2 - sand bedding. | |
| 3 - base of the column. | |
| 4 - brick or concrete column. | |
| 5 - waterproofing. | |
| 6 - wooden leveling pad. | |
| 7 - lag. | |
| 8 - boardwalk. |
Posts for logs must be installed on dense soil or a concrete base. Bulk and non-compacted soil is not recommended for this structure, since due to possible settlement of the columns, the floor will sag and be unsteady.
Posts for logs must have a cross-section of at least one brick. The use of sand-lime bricks and artificial stones, the strength of which decreases when moistened, is not allowed.
What is possible and what is not?
If the owners of cottages with autonomous heating do not have an alternative to connecting water floors, then those who live in apartments are sure to think whether it is possible to use hot water supply or a central heating system by connecting to them “for free”.
Some, by the way, do just that at their own peril and risk. Most often, such initiatives are directly prohibited by local legislation.
Warm water floors are one of the modern methods of creating comfortable living conditions. They can be either the main source of heat during the heating season or an additional
For example, we can mention Resolution No. 73-pp dated 02/08/05, valid in Moscow. The ban on converting public water supply systems for underfloor heating is contained in the second appendix to this document.
Violation of the rule may result in administrative punishment. You can receive a fine after an on-duty visit from plumbers or as a result of complaints from other residents of an apartment building who, due to your uncoordinated actions, lost heating.
It is possible that such a connection is allowed in your region, but only after carrying out the appropriate examination, additional calculations and drawing up diagrams that are necessary so that the overall operation of the system is not disrupted and your neighbors are not harmed.
To carry out such work technically, it is necessary to use a separate pumping and mixing unit, which will ensure that the output pressure level is maintained at the standard level.
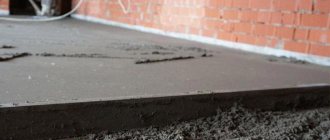
Laying joists on a concrete floor
When laying joists on a concrete floor, it is preferable that the base be fairly level and clean. If the concrete surface has some deviations in plane, spacers will have to be used to level the joists.
Scheme for laying logs on a concrete base in an apartment:
| 1 - waterproofing and sound insulation. | |
| 2 - leveling wooden block (spacer), installed in increments for a specific lag section. | |
| 3 - lags. The step of their installation depends on the thickness and type of flooring. | |
| 4 - rough board, which is installed when increased demands are placed on the strength of the floor. |
Let's look at each step in detail:
- It is known that before using lumber in aggressive environments, it must be treated with antiseptics and other protective compounds. In the case of a wooden floor on a concrete base in a heated residential room, such treatment is not necessary.
- Leveling the floor level with logs on an uneven concrete base is achieved by placing pieces of boards, bars or plywood under them.
- To improve the sound insulation of the floor, special soundproofing materials can be laid under the joists and in the space between them.
- Don’t forget about waterproofing in places where concrete and wood come into contact. Concrete gets rid of moisture very slowly, and it may take a year for it to completely dry out.
- The direction of laying the floorboard is selected according to the direction of light and the direction of movement. Usually in the hallway the board is laid in the direction of movement, in the bedroom - in the direction of light from the window. Take this rule into account and install the logs perpendicular to the direction of laying the boards. When setting the logs, try to retreat from the walls by about 1 - 2 cm on each side to compensate for the linear expansion of the wood.
- The logs are attached to the base with dowel nails, anchors, and corners. If desired (if the floor design allows), you can refuse fastening. For example, when installing a floorboard. Using slab materials, you cannot do without fixing the logs, since the logs under the sheet may shift or tip over.
If, instead of a floorboard, it is decided to use laminate, linoleum, or parquet as a floor covering, then it is necessary to provide a rough layer of slab materials.
OSB flooring on joists
Having decided to make a floor in an apartment using this technology, you need to understand that joists and flooring will take up at least 90 mm of the room’s height. At the same time, you will smooth out almost any differences in floor level without additional costs and weighting of the structure and carry out any communications inside the structure.
Laying floorboards
Before laying, the floorboard should lie in the room where it will be laid for one to two weeks. This is necessary so that the moisture content of the wood matches the microclimate of the room. At the same time, wet finishing work (plaster, putty, wallpapering) should not be carried out during this period.
There are three ways to attach a tongue and groove board:
- In the face - not the most aesthetic method, in which the fasteners are driven (screwed) into the front part of the board.
- When fastening a tongue-and-groove board into a groove, a self-tapping screw is screwed into the bottom of the groove at an angle of 45-50°. The cap should fit well into the material so as not to interfere with the installation of the next board.
- When fastening a tongue-and-groove board into a tongue and groove, a self-tapping screw is screwed into the base of the tenon (tongue).
Laying floorboards
If you place glassine strips on the joists before installing the board, you will eliminate friction between wood and wood, and, accordingly, future creaks.
The first floorboard must be attached to each joist with two self-tapping screws. Self-tapping screws must be selected so that 2/3 of their length is in the body of the joist. The first self-tapping screw is screwed in at a distance of 30-40 mm from the wall. Its cap is recessed into the board and later covered with a plinth. The second self-tapping screw is screwed into the groove or tenon of the board (depending on the chosen fastening method) at an angle of 45°. If the board is overdried, it chips easily. In this case, it is better to pre-drill a hole (in a groove or tenon) with a thin drill for each screw.
Subsequent boards are joined and screwed with self-tapping screws. If it is necessary to join boards, the joint should be in the middle of the joist, and the boards should be sawn at right angles to the long edge of the board. Also, when laying the flooring, it is necessary to provide a gap of 7 - 10 mm from the walls around the perimeter.
Screeding floor boards along joists
To tie a tongue and groove board (if necessary), you can use the following devices:
- A support bar and several wedges nailed at some distance from the board.
- Clamps, special staples and other specialized devices.
Sanding a wooden floor
To achieve the effect of a deck board, it is necessary to chamfer each side of the front face with a planer before laying it. At the same time, when the installation of the floorboard is completed, there is no need for putty and sanding of the surface.
Traditional wood floors with a smooth surface and no chamfers require additional sanding after the floorboards are laid. This is necessary in order to remove the protrusions formed during the installation process.
Grinding is carried out using a drum sander in several passes with a gradual reduction in the grain size of the abrasive belt (80 - 100 - 120). Between the first and second sanding, the cracks and flaws in the wood were puttied. For this, a special wood putty was used.
The final stage of installing a wooden floor along joists is surface protection (treatment with paints and varnishes). Solid floorboards treated with oil- and wax-based compounds look very noble. These components enable wood to fully use its natural properties to maintain an optimal room microclimate.
Features of connecting the structure to a heat source
In a floor circuit, most often the average coolant temperature is 35-40 degrees. Installation diagrams for water heated floors in a private house operate using forced mixing of flows. Part of the coolant from the return flow passes into the supply circuit.
Thermostat connection diagram
Gas boilers are equipped with special automation. Solid fuel units require a more complex device. They are equipped with circulation pumps and a special buffer tank. In this case, more complex combustion adjustment is used.
Location of the boiler in a separate room
Electric boilers are considered the best option for underfloor heating systems. Special automation allows you to maintain the desired temperature without loss of thermal power.
Electric boiler in operation
Helpful information! To heat small houses, a direct connection to an electric boiler is used. In cottages with a large area, a special distribution comb is used.