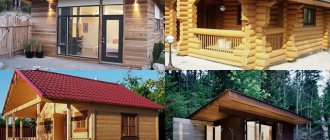
Main features of the lining
The lining got its name due to the fact that it was first used exclusively for lining the inside of carriages. Its main distinguishing feature from conventional edged boards is the grooves. They are on the long sides of the panels. Thanks to the presence of grooves, the linings are tightly connected to each other. This allows you to beautifully sheathe surfaces. There will be no gaps or cracks on them.
Manufacturers produce several types of lining. Material options differ in the wood used, quality and size.
On a note! Manufacturers produce not only wooden, but also plastic lining. This material can also be used in a bathhouse, but for finishing only the locker room and dressing room. Plastic lining is not used for steam rooms because it is not resistant to high temperatures. At the same time, lumber is able to absorb and evaporate moisture. Thanks to this feature, it regulates the humidity in the room. In addition, properly selected wood has a positive effect on the human respiratory system, as it releases aromatic substances.
Wooden lining Source kalinales.kz
Pros and cons of lining
Advantages:
- Natural and environmentally friendly material that does not emit harmful substances.
- Beautiful appearance. Depending on the type of wood, the lining has different shades and textures.
- Resistance to mechanical damage.
- A comfortable indoor microclimate is created.
- Easy to install.
Flaws:
- High cost of material.
- The need for constant wood maintenance.
Return to content
Choosing a lining for cladding the inside of a bathhouse
Regular and European standard linings are available. The first version of the material has a fleecy and rough surface. Eurolining is smooth wooden panels. On their back side there are recesses for ventilation. Thanks to the presence of such channels, moisture does not accumulate. The grooves also reduce stress in the lumber.
The permissible moisture level for wood products according to GOST 8242-88 is 12%. At the same time, conventional lining is often made from wood with a moisture content of 25%. For this reason, such panels often become deformed after installation during operation of the bath. Experts know this and therefore use wooden eurolining for finishing the steam room and other premises.
Wooden eurolining Source azbykalesa.ru
Wood for lining
When choosing lumber for the interior decoration of a bathhouse, the wood used during its manufacture is taken into account. Today you can line the inside of a bathhouse with clapboard, which is made from coniferous and hardwood. The material is selected depending on the properties of the wood and the purpose of the specific room in the building.
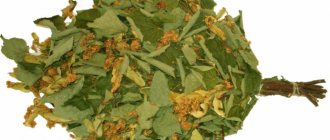
Linden lining
Linden has light wood with a brown and sometimes red tint. The material made from it has a matte shine and practically does not heat up. Low heat capacity eliminates the occurrence of burns if a person comes into contact with the surface of linden lamellas.
The material is characterized by low thermal conductivity, which allows it to distribute heat throughout the room. Thanks to this property, the walls cool down more slowly. Therefore, linden lumber is often used for cladding steam rooms. In addition, it is able to release aromatic components that have a positive effect on health. They calm and relax a person. The breed is also highly durable and practically does not dry out. The structure of linden consists of homogeneous fibers.
Linden lining Source cstor.nn2.ru
Lining made of Siberian or Canadian cedar
The lamellas of lumber from such species have a pinkish-brown color. Siberian or Canadian cedar is an expensive wood used in the finishing of luxury buildings. It has a positive effect on health, as it releases essential oils during the operation of the building. They improve the functioning of the respiratory system.
The wood of Siberian and Canadian cedar is not subject to rotting, allows for beautiful finishing, and is able to withstand mechanical loads perfectly. No cracks appear on it during the operation of the bath structure.
Canadian cedar lining Source allegroimg.com
Aspen lining
Another popular material for finishing bathrooms. It is distinguished by its white color. On the surface of the lumber you can even notice a silvery tint and barely visible yellowish growth rings. Aspen lining for bathhouses is popular because it is resistant to a humid environment, can withstand high temperatures and does not heat up, which eliminates the possibility of burns on the body.
The strength of lamellas made from this wood increases over time. This characteristic increases to the point where it becomes difficult to drive nails into the material. At the same time, it is easy to work with aspen slats because they initially have a soft structure. In addition, surfaces made from such lining do not require special care. If they darken during the use of the premises, it is enough to sand them a little to restore their former attractive appearance.
Aspen lining Source roomester.ru
See also: Catalog of companies that specialize in finishing materials and related work
Alder paneling
This lumber also cannot boast of a low price. It has a smooth surface. This allows you not to use a grinding machine for additional processing of the finished cladding. Alder slats contain tannins. The wood itself has a hygroscopic structure and is characterized by low thermal conductivity.
Oak lining
Finishing oak lumber is heavy, durable slats with a beautiful texture. They are difficult to process and have a high price. At the same time, oak lining does not rot and does not lose its properties during the operation of bathhouses. In addition, it does not require additional processing, which reduces finishing time.
Pine lining
Pine slats can be beige in color. Red-brown lumber is also available. As the premises are used, the pine panels begin to darken. The material is also distinguished by a clear pattern of growth rings. Resin channels are still visible on its surface.
Pine lining Source pilomaterial-stroi.ru
Pine lining has good viscosity. It is easy to process and has decent mechanical properties. However, after heating, resin appears on its surface. For this reason, pine slats are not used in the steam room, where human contact with the finished surfaces is possible. They are also not used for cladding the ceiling of a steam room, because after cladding it is necessary to repeatedly heat the room, and each time to remove the resin that appears. Such processes must be repeated until its appearance on the finished surfaces stops.
On a note! In the bathhouse, panels made of pine and other coniferous species are used in the dressing room and the washroom. They are cheaper than lining made from aspen for baths and other hardwoods. At the same time, pine panels are resistant to a humid environment, which is often increased by applying a water-repellent agent, for example, protective wax. Coniferous lumber is distinguished by a variety of shades, simple processing, and attractive texture. It gives off a pleasant aroma, which is why it is often chosen for decoration.
Pine lining in the washing compartment Source vsaunu777.ru
Cladding classes
Manufacturers produce lining of different classes, which include materials with a certain density and having a specific quality of the outer surface. If there are a lot of knots in the panels, they will quickly heat up and burn a person on contact. Manufacturers produce lining of the following classes:
- Extra – there are no knots or cracks in the material. Professional lining of the steam room with “Extra” clapboard allows you to get a flat and smooth surface.
- A – the lamellas have a smooth surface. In this case, slight roughness is allowed. The panel may have one knot per 1 running meter, but its diameter should not exceed 15 mm. Hairline cracks are also acceptable. Their length should not exceed half the lining. The panels may also have non-through cracks, the length of which is not more than 95 mm. The presence of crack-like defects that appeared during drying is also allowed. Their length should not exceed the width of the lamella. In addition, there may be resin pockets. Their permissible maximum quantity is 2 pieces per linear meter.
Class A lining panels Source garant-karelia.ru
How to treat the lining inside a bathhouse - a paradoxical answer “by contradiction”
How often do we take a situation to the extreme and pose questions, the answers to which sound equally simple and categorical: “No way!” This is the answer to the question in the title of the article: “Nothing!” And, most likely, it will turn out to be the most correct one.
In any case, if the lining has already been exposed to mold and mildew, then, indeed, the only way to continue dreaming about a bathhouse is to remove everything, remove it, process it and re-lay it all over again.
We invite you to read: How to fix lining in a bathhouse: a close acquaintance with the technology of work
Considering the complexity of the “habitat”, processing the lining inside the bathhouse is the most important task, which has a strange solution
Processing lining for a bath requires scrupulous attention to the joints, and there are enough joints for the whole house
Yes, a bathhouse is a place that requires thinking about it ahead of time and constantly.
Here are actions that can greatly facilitate the answer to this question:
- Under no circumstances should you start working on the rough surface of the wall until it has thoroughly dried.
- If moisture does not leave the wall, it is imperative to find out the reason for its constant appearance and eliminate it.
- It is very useful to treat the rough surface with heat-insulating plaster and antiseptic preparations.
- Use only galvanized metal fasteners - both staples for fastening the sheathing and nails, screws, clamps; rust and wood are the surest path to the destruction of the “weaker”.
- If you intend to use insulation between the sheathing, then carefully choose one that is resistant to high temperatures, its impact and high humidity. Therefore, we can say with confidence that natural fiberglass bath insulation, which is popular in other situations, will not be suitable here. Opt for the latest polymer - foam glass or any other that will meet the strict requirements of operating conditions.
- Be sure to use waterproofing, no matter what type of wood you use as lining for lining the inside of the bathhouse.
- Try to ensure that the waterproofing sheet completely covers the entire working area; if this is not possible, securely connect the joints of adjacent sheets with a double layer of waterproofing tape, above and below the joint.
Smart vertical arrangement of the lining and you may have to process it not twice a year, but only once
- If possible, choose wood species that are resistant to mold, mildew and insects as lining. These are, first of all, oak, alder, and larch.
- In any case, the lining wood must be well dried and already treated with antiseptic materials.
- When installing the lining, choose its vertical orientation. Then the moisture will be less trapped in the grooves between the strips, it will simply flow down.
- Of course, the lower the quality class of wood, the cheaper it is. But still strive for quality not lower than “A”, when no more than one knot per one and a half meters of length is allowed. Knots and cracks are a sure way to stagnation of moisture and accelerated decomposition of wood.
- It doesn’t matter fundamentally which profile of the lining you choose; everything here is determined by experience and dexterity. The only main thing is that the profile ensures reliable fastening of the lining strips without any gaps. There should be no gaps, even the slightest, under any circumstances. In this situation, it is better not to be lazy, not to regret the additional costs and replace the entire strip, or even two adjacent ones that are connected, with new ones.
- When covering a bathhouse with clapboard, still choose simpler methods of fastening. that suit your dexterity - sometimes it is better to refuse to use nails at an angle rather than increase the likelihood of inconsistencies and breakages.
Helpful advice! The general line of conduct when installing lining in a bathhouse can be expressed by the phrase: “Check each of your actions for appropriateness from the point of view of protection from excess moisture, and therefore the appearance of fungus and mold.”
In this regard, even remember that completing all washing procedures and resting in the dressing room still forces you to return to the place of the “list” and thoroughly clean and dry everything.
The cost of processing will be significantly lower if you choose higher quality wood - the photo in this context cannot serve as an example
But since the answer has been given, let’s try to recommend some remedies, perhaps some of them will be your salvation.
Among these assistants are:
- Eurotex-Sauna is a protective acrylic composition with antiseptic and wax, especially for baths and saunas. This product is very careful about the original color of the wood; it contains no organic matter, so it is comfortable to work with in enclosed spaces.
- Sauna, Supi Saunasoja – impregnation of lining for baths. A special feature of impregnations is the creation of a washable film on the surface, so that the walls of your baths will always be clean, even if done with your own hands.
- Wax protective compounds are a whole class of wax-based protective agents.
By and large, this was also done “with my own hands,” so now I’ll have to persistently fix everything
Useful advice! We can say with certainty what you cannot do during processing - use ordinary varnishes and paints.
Such traditional means of protection for bathhouses are not suitable in any form; they are a direct path to demolishing the entire structure and building the bathhouse anew.
conclusions
Treat your bathhouse like you would your dearest friend, and she will reciprocate your feelings. Don’t forget about its capricious nature, and then you will enjoy your steam room for many years and in any season. Otherwise, processing the lining will not be able to help in any way - you will have to console yourself with the fair thought that you still have to pay for mistakes.
The instructions say that it is better, of course, to treat the lining before laying it, but this will have to be done more than once during the course of life.
this article will not leave you indifferent to the results of our carelessness, if you completely forget about the question of how to treat the lining in the bathhouse. At the same time, we will offer some good tips for getting out of this situation.
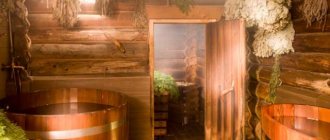
Interior decoration of the bathhouse with clapboard
Professional lining of the bathhouse from the inside with clapboard is performed with vertical and horizontal fastening of the lamellas. Therefore, the owner of the building chooses the most suitable option even when concluding an agreement with specialists.
Features of vertical and horizontal fastening of lining
Vertical placement of panels allows for faster finishing, since the material is easier and more convenient to fix. In addition, this fastening of the lamellas to a greater extent protects the tongue-and-groove system from the penetration of a damp environment.
When fixing horizontally, wooden panels are laid with the tenons facing up. This allows you to reduce water ingress into the joints. Slats fixed in this way can be easily dismantled near the floor, where they are most exposed to a damp environment. Horizontal boards are easier to replace than vertical boards. In the latter case, you will have to cut off part of the trim. Therefore, horizontal lining of the bathhouse with clapboard inside is the best option for classical buildings built in accordance with Russian traditions.
Methods for attaching lining to the wall
Listed below are the 5 main ways to attach lining to a wall.
The simplest and most convenient way that does not require specialization. Installation is carried out using small nails and clamps . In this way, it is permissible to fasten only light lining, because the grips are not capable of holding a lot of weight. A clamp is inserted into the lining, which is attached to the guide rail using a nail, screw or self-tapping screw. A rail is inserted into the groove and each subsequent rail is fastened in the same way. They must be fastened tightly enough so that there are no gaps. If the last row of lining does not fit entirely, and a large gap remains, then the top row must be cut to size and secured along the guides.
Using nails . It may seem that this method is simpler than the previous one, but in practice chips, bruises and other damage to the material often occur. In addition, the process of performing the work is not very convenient and labor-intensive. Nails are driven in every 25 - 30 cm. To install a two-meter long slats, 7 or 8 nails are needed. First, the panel is marked in the places where the nails will be driven in. Then, at an angle of 45 degrees, the nails are nailed into the edge with the groove. The panel is applied to the wall and then you can drive in nails. After installation, the caps are recessed so that the next panel of the lining easily fits into the groove. After this, the next panel is installed using a similar method.
This installation method cannot be used for thin lining, as it will break off.
This fastening option is used for old-style lining . Cladding with eurolining is somewhat different from installing older lining. The design of the product consists of fastening with screws. To avoid splitting the wood, a hole is drilled in the places where the screw is screwed in. The drill should be smaller in diameter than the screw. The hole location is countersunk to recess the screw head. The fasteners are screwed in as far as possible using a screwdriver. The caps will not be visible because they are covered by the next row of panels.
Installation of lining using a stapler and construction staples . The bracket is driven into the groove at an angle of 45 degrees. You need to have a stapler that can push the staple tightly in until it stops. In this case, the fasteners will in no way interfere with the installation of the next row of panels.
The fifth method of fastening is most often used for finishing a sauna or bathhouse . Screws act as fasteners. A hole is drilled at the installation sites and the fasteners are screwed in using a screwdriver. The screws are tightened to the point where the head is significantly recessed. To hide the heads of the screws, a plug is driven into the hole where it is screwed in. Over time, under the influence of high temperatures, the wood may dry out a little, and the locations of the plugs will appear. To prevent this problem, special compounds must be applied over the plugs.
Return to content
Video description
Video material will help you choose the mounting option for the lining
Installation of sheathing
The installation of the lathing allows not only to secure the lining, but also to insulate the bathhouse. This primed block structure is also designed to allow air circulation under the finish. Thanks to the movement of air masses, the inside of the finishing material will dry quickly. The free space will still allow condensation to drain freely. Therefore, the likelihood of mold, rot, and fungus will decrease.
Important! Galvanized profiles cannot be used under finishing lamellas.
In addition, the sheathing under the lining in a bathhouse in a steam room or in another room allows for electrical wiring. It is necessary both for lighting and for installing sockets.
Installation of steam room sheathing Source sibdok.ru
Internal insulation under the lining
At the beginning of work, waterproofing is fixed to the walls. It is nailed or pressed against the sheathing bars. Mineral wool slabs are mainly used as a heat insulator. The insulating material is installed in the empty sections of the sheathing.
Advice! It is recommended to cut the cotton wool into pieces with 10 mm overlaps on each side. In this case, the heat insulator can be placed tightly into the sheathing.
Next, the thermal insulation material together with the frame is covered with a vapor barrier. At this stage, foil material is used as it is able to reflect heat. The vapor barrier is laid with an overlap. Specialists must glue the joints with aluminum tape.
Narrow slats with a maximum thickness of 20 mm are fixed on top of the vapor barrier. Thanks to their use, a ventilation gap is created between the foil and the finishing lumber.
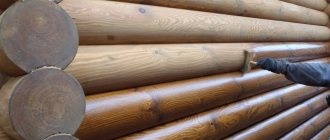
Bath cover care
When thinking about how to process wood in a bathhouse, you first need to prepare the necessary tools and buy additional materials:
- Solvent;
- Stirring brush;
- Roller;
- It is recommended to purchase a spray gun, but you can apply the varnish in other ways;
- Sponge;
- Paint tray;
- Protective equipment (respirator, goggles, gloves and overalls).
Now you know how to treat the lining in a steam bath, but such treatment will not be able to completely protect your bath, so you will have to monitor the room, following some rules:
- Always ventilate the area to minimize the chance of mold or mildew forming;
- The room must be washed frequently with a wet cloth, without using chemical detergents;
If serious contamination appears on the surface of the wood, or it has darkened, then use sandpaper. You can also use special bleaches for wood, but under no circumstances use bleach solutions, because when heated they release a huge amount of toxins, and they can even leave a burn on the skin.
Video description
The detailed process of installing lining in a bathhouse is shown in the following video.
When placing lumber vertically, the finishing process begins from the corner. Each of the lamellas that are laid across or along is fixed on a counter-lattice. This leaves a gap near the floor. Its size ranges from 10 to 30 mm. It is necessary to prevent water from rising through the lumber and protect it from rotting. Moreover, this process occurs if the finishing with paired lining was done both vertically and horizontally. In the first case, the water can rise to a height of up to 0.5 m, and in the second - up to 0.25 m.
Finishing the ceiling with clapboard in the steam room
The finishing process in the steam room begins on the ceiling. This rule also applies to other premises. This is due to the fact that the lining on the walls must rest against the ceiling structure.
The lamellas begin to be mounted on the ceiling from the door. Craftsmen fix the material as securely as possible, because after assembling the entire structure it will have a lot of weight. At the same time, they leave a gap of 50 mm at each end of the lining. It allows the panels to “play” without damaging the entire structure. After all, its geometric dimensions will constantly change due to exposure to high temperatures.
Lining on the bathhouse ceiling Source banyabest.ru
Preparatory work for wall cladding
Before quickly sheathing the inside of the bathhouse with aluminum foil and wooden clapboard, it is necessary to insulate the walls. Before laying the insulation, install the counter-lattice and sheathing. A layer of vapor barrier is laid on top of the insulation.
Thermal insulation device
The best material for insulating baths is basalt wool. This material has good thermal insulation and a high degree of fire resistance. Basalt wool does not rot. This type of insulation does not burn and does not emit harmful substances. Basalt can withstand temperatures up to 1500° C.
Experts recommend using Rockwool brand “Light Butts” mineral wool. The mineral wool of this company is of high quality, increased density and affordable price.
To cut basalt wool sheets, large, sharp knives with a high-quality blade are used. When cutting, the knife blade is held at an angle of 30-45° to the surface of the blade. When tilted, the blades dull much more slowly.
The width of the canvas is taken to be 2 cm greater than the distance between the vertical posts of the sheathing. The increased width helps to fix the blades in a constant position.
Thermal insulation sheets are laid in 3 layers with overlapping joints. The amount of overlap is equal to half the length of the canvas.
All layers are laid in height within one span of the sheathing. The laying direction is from floor to ceiling. They move to another span after laying all the layers of the previous span.
Attention! You should not choose insulation from artificial and synthetic materials. When exposed to high temperatures, they release substances harmful to health.
Laying the first layer begins from the floor. First, the whole canvas is laid. After laying all the canvases of the first layer, the second layer is laid.
Laying the second layer also begins from the bottom. For overlapping joints, the length of the first web of the second layer is taken equal to half the length of the standard web.
At intersections with obstacles, elements of the required shapes and sizes are cut out.
Before covering the bathhouse with clapboard, care should be taken to protect the walls from dampness and rotting. Therefore, after installing thermal insulation, they begin to install the vapor barrier material.
Vapor barrier device
The vapor barrier layer is designed to protect walls from condensation and increase the heat-reflecting properties of the insulation.
The work of laying vapor barriers is the most critical when constructing bathhouses. The efficiency of steam use depends on the quality of vapor barrier work.
Aluminum foil with a thickness of 50-80 microns is used as a vapor barrier. Attaching the foil begins from the corner of the room in the direction from bottom to top.
Advice. Finnish foil is in greatest demand. The products of this company have high quality, durability and increased heat-reflecting properties.
Vapor barrier sheets are sewn with metal nails or staples to the vertical posts of insulation cells. To attach the foil, use a pneumatic gun or a special construction stapler.
The foil is laid with an overlap of 2-3 cm of vertical seams. All seams are taped with aluminum adhesive tape.
Advice. To seal the seams of the foil, use Unibob adhesive tape, 50 microns thick. This tape adheres well, has high strength and durability.
In places of transition from the walls to the floor and ceiling, the foil is laid with an overlap of 5-10 cm in each direction. The free ends are sewn to the ceiling and floor with nails or tacks.
At the junctions of walls and ceilings, gaps often appear in the foil. To eliminate these gaps, use foil corners. To make such a corner, a piece of foil is placed on the corner of a table or chair. The resulting shape is carefully beaten with a light object to soften the foil. The broken corners are glued with aluminum adhesive tape. The manufactured corner is inserted into the corner and carefully taped.
Advice. To prevent damage to the foil, it is necessary to cut the edges of the bars at 45 degrees using a plane.
After completing the work, check the quality of the vapor barrier installation. Any damage found is covered with adhesive tape.
After installing the vapor barrier, the installation of the counter-lattice begins.
Counter-lattice device
The counter-lattice serves as the basis for the main sheathing. Designed to ensure air exchange in the space between the foil layer and the lining.
To construct the counter-lattice, wooden blocks with a cross-section of 20x20 mm are used. The bars are nailed to the vertical posts of the insulation cells. The distance between the slats is taken to be 400-500 mm. Installation of counter-lattice slats is carried out according to level and plumb.
Advice. Do not use cheap knives with low quality blades to cut basalt wool. Such knives cannot withstand high mechanical loads, quickly become dull and fail.
When installing a counter-lattice, a hole with a diameter of 80-100 mm is drilled in the ceiling for the exhaust duct pipe. A sealing cap (valve) is inserted into the hole. During bath procedures, the hole is closed. To ventilate the bath after washing procedures, the hole is opened.
Periodic ventilation prevents the appearance of dampness and rotting of the lining. To ensure air exchange, a gap of at least 2 cm is provided between the lower end of the lining and the floor.
Briefly about the main thing
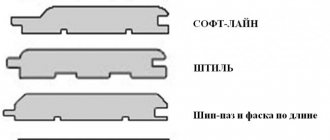
A modern finishing material is lining for steam rooms and other bathhouses. Pine, aspen, oak, linden, cedar slats and alder panels are produced with Shtil, Euro, Standard, Soft-line profiles. They differ in the presence or absence of rounded corners and the length of the spike. At the same time, manufacturers produce regular and eurolining. It is European standard lumber that is used for interior decoration of bathhouses. Its installation on the walls and ceiling is carried out after installing the sheathing, laying insulation and vapor barrier, and securing the counter-batten.
Ratings 0
Production of linden lining
For industrial purposes, mature trees up to 150 years old (usually 60-80 years old) are used. The entire technological process is standard: round timber is sawn into boards, which are then dried.
Pleasant, warm wood color - linden
The drying process can be either natural (the boards are placed in ventilated stacks and waited for several years) or chamber (special drying chambers are used in which the lumber is brought to the required humidity). During the drying process, some of the material cracks and warps. Such boards are rejected, the rest undergo further processing on machines: a groove and a tongue are formed, with the help of which the planks are connected to each other, all surfaces are processed and polished.
Conclusions and recommendations
At one time, when choosing a method for covering a steam room, I settled on the horizontal option. It has been serving well for several years without any serious damage or changes to its original shape. Every year I am once again convinced of the correctness of the choice I made.
Based not on empty space, I recommend that you also choose a horizontal arrangement of the lining. True, you have the right to do as you see fit. In any case, I hope that this article will help you take into account the above nuances so that finishing the steam room is not done in vain.
And finally, watch this video about horizontal installation of lining. Find mistakes that should not be made when decorating a bathhouse with your own hands. And I’ll tell you about them immediately after watching the video.
So:
- For a steam room, the lining must be made of wood such that when heated it does not release resin.
- The installation direction is incorrect. Even if water doesn’t get on the casing, you can’t escape the dust. And when washing the wall, moisture will inevitably get into the gaps between adjacent elements. And this will create conditions for wood rotting.
- Regardless of the nature of the room, horizontal cladding should start from the top, securing the first element with the groove down. Then neither moisture nor dust will be scary. For example, water will flow down the wall, going around the longitudinal joint along the outer surface of the groove, and will in no way be able to get inside the joint.
- There is no air space between the inner surface of the lining and the second layer of vapor barrier. To ensure air circulation and thereby prevent the processes of wood rotting, 20-30 mm thick strips should be placed on top of the vapor barrier on the vertical posts, and the lining should be fixed to them. The space under the lining will provide natural air circulation, drying and removing excess moisture.
- Remember, what you can get away with in an ordinary room is unacceptable in the steam room of a Russian bath
with its rather extreme conditions.
Go to the main article-content: Decorating a bathhouse with your own hands
Dear friends! If it’s not difficult, share it on these social networks with your friends. Thank you!
Wiring under the paneling
There is a contradiction between the standard that requires wiring inside a metal pipe with localizing ability (this is when a short circuit does not burn through the pipe wall), when the wiring is done among flammable materials (and lining is also a flammable material) and the standard that prohibits wiring in metal pipes inside steam rooms and showers.
The following is stated in SP 31-110-2003 about wiring in wooden buildings:
About wiring in the cavities of suspended ceilings and partitions with G4 flammability (G4 wood):
The thickness of pipes with localization ability is specified in this table:
The PUE regarding wet rooms says the following:
How to resolve this contradiction? It’s quite simple: in the steam room and washing room you shouldn’t do any wiring at all. Your task is to lead the wire through the wall directly to the light source. Because in the steam room and washing room only the presence of light sources is permissible.
IMPORTANT! All sockets and switches are made outside the steam room and washing room!
In other rooms, it is worth listening to the standards that talk about wiring in wooden, and therefore in wood-trimmed buildings .
Metal pipes with localization capabilities do not excite builders. At a minimum, they are trying to replace steel pipes with copper ones, because copper is softer, it does not always need a pipe bender, but a steel one does, or they make a composite structure with angles.
At the most, they think that a metal hose suitable. Or corrugation. Because you have an RCD or a difavtomat. But no. The automatic device is triggered by short circuits, but the RCD is simply not intended for this; it only reacts to leakage currents. But if there is an RCD, then there should also be an automatic machine. And what does it matter if an automatic or automatic device will turn off the current in the event of a short circuit? After all, it has already happened, and thermal energy has been released. This is why a localizing pipe is needed so that the tree does not ignite from the release of this energy.
BY THE WAY! According to the PUE, the filling of the pipe with wire should not be more than 40%, this is to select a suitable pipe cross-section for the wire cross-section you need.
In general, we believe that regulations are drawn up, in part, to prevent typical problems, so they should be followed. Even if it's expensive or time-consuming.
Therefore, we recommend doing the wiring in the bathhouse under the clapboard in steel pipes, or, if the wall allows, then with plaster protection. In the latter case, a pipe is not required. But in the vast majority of cases, the lining is placed on the sheathing on top of the film or foil that covers the insulation, so the option of plaster is eliminated.
In the steam room and washing room , we recommend wiring from the other side of the wall or ceiling, bringing only the short ends of the wires leading to the lighting fixtures inside. Otherwise, you are left with only plastic, and it is not completely non-flammable or localized. The steam room, in turn, is extremely rarely not made of wood. So there are practically no options other than what is described. Well, or with violations.
Also, for those who are interested in an in-depth acquaintance with the standards, we advise you to read our article, in which we simply squeezed out everything that is said in the PUE about baths, saunas and washrooms.
practical recommendations on bathhouse electrics in this article.
Well, another video on the theory to follow up:
***