I don't buy towels in stores anymore. I show you how to sew a comfortable bath towel for yourself and your household with your own hands. You can also sew it for friends as a gift. I'm sure they will be only happy with such a gift.
This thought occurred to my youngest daughter Caroline almost a year ago.
Once I told her that we needed to change our towels, that is, buy 10 pieces of bath towels at once. To which she answered me:
- Why buy? Just spend money! There is fabric at home, and you, mommy, know how to sew a towel with your own hands ! So we need to sew!
I described this story in detail in an article entitled: “I made a towel according to the idea of \u200b\u200bmy sweetheart-daughter and at the same time made a new plan for handicrafts for a week or two” on our Zen channel “Creative Everyday Life” .
What you will need to make your own
The minimum required set looks like this:
- a small amount of suitable fabric;
- sewing machine (you can do it manually if you don’t have one - the amount of sewing is small);
- threads, pins, scissors;
- if desired, decorative elements: ribbons, sewing, buttons, braid, etc.
A kitchen towel will have to take on a lot, and the fabric will get washed often. Therefore, practicality is its necessary quality.
ADVICE! Colorful colors are ideal - inevitable stains will be less noticeable.
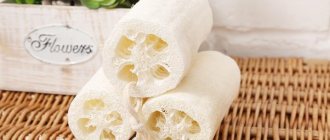
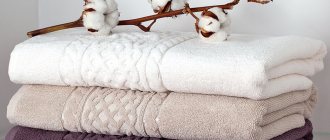
Cotton and waffle towels cope best with the main requirements - to absorb moisture well and dry quickly . The latter are also a variant of cotton fabric. But, thanks to special processing, they are more hygroscopic: tiny squares do an excellent job of this. Both linen and thin terry cloth are possible .
IMPORTANT! Linen towels will gain the desired softness only after several washes. Until then, they can take on the “ceremonial” function.
How to make a life-size budenovka pattern yourself
Budenovka consists of a visor, a base of wedges, and a backplate.
The hat is decorated with a symbolic red star with a white trim on the front of the product. Buttons are sewn over the ears so that the lapels do not interfere. If you look at the pattern, there is nothing difficult about making a life-size pattern on a sheet of paper by analogy. The very first thing you need to start from is the size of your head circumference. Then divide this value by the number of wedges, so we were able to find out how many centimeters are needed for the base of one wedge. The visor and backplate will also not be difficult to construct a pattern on paper, repeating the lines from the diagram.
Important! If difficulties arise with the construction, you can always enlarge the drawing on the computer to the size of the original and translate it by attaching a sheet of paper to the monitor.
Although the height of the budenovka is unchanged, to clarify, you can measure the distance from the eyebrows to the top of the head, then add 5 cm to this value for the pointed tip. The picture shows an example of a size 56 pattern; in the final form, the volume of the headdress will be 57.5 cm. Even if the dimensions of the pattern need to be changed, the construction principle remains the same. The pattern of the lining completely repeats the main product.
Sew a kitchen towel
Let's take a step-by-step look at how to sew your own kitchen towel.
- When cutting out a product, you need to decide on the shape and size . The standard option is a rectangle 30x60 cm. If desired, you can make a towel of any shape: oval, round, trapezoidal (with a holder).
ADVICE! Natural fabrics shrink, and it is better to wash the cut in hot water before cutting.
- Having decided on the dimensions, add about a centimeter to the allowances
.
Then carefully measure and cut along the contour . - Now carefully bend the edges
ironing them properly . To secure, you can use pins or sweep.
ADVICE
! Got an edge on one of the edges? It is better to cut a small strip of fabric in this place so that all folds have the same thickness.
- Having identified the edges, we sew with a regular seam.
A simple towel is ready. You can limit yourself to sewing a loop (from the edge of the fabric, braid or ribbon), but it’s better to use your imagination!
Let's start cutting
On the advice of my youngest daughter, I settled on terry . Yes, this is a knitted fabric with a stocking width of 110 cm .
What does stocking mean? Stocking is knitwear knitted without seams. That is, in fact, if you cut one side of the terry and unfold it, then the full width of the terry will be 220 cm .
Excellent width not only for sewing towels, but also sheets. So take note).
So, my piece of terry turned out to be 80x110 cm (220 cm) in size . My terry is single-sided, so after cutting out the cut, I left it double. In general, I did not cut the stocking along the folds. But I just cut 10 cm from the top from each fold, so that I could then process the upper cut of the towel with a drawstring with an elastic band. I decided to finish all the sections of the towel with knitted tape made from bright interlock peñe.
Decorating a towel
IMPORTANT! From decorative elements, you need to choose shedding-resistant threads, appliqués, and braid. Otherwise, the very first wash will ruin the whole look.
- An ordinary rectangular product can be made into a roll , secured with two buttons (preferably plastic). In this form it is convenient to place it on various holders.
- Appliques are an easy way to create a small home masterpiece. In addition to ready-made applications, designs cut from pieces of fabric are suitable. Having processed along the contour with a zigzag, we attach them to the main fabric of the product.
- A towel used in the kitchen is an excellent field of experimentation for a beginning embroiderer. Feel free to practice seams and patterns on it, gaining mastery!
- Sewing and thread tassels are suitable for finishing the edges of the product . You can also practice crocheting the edges.
Subscribe to our Social networks
Does fleece shrink after washing?
Pattern for children's fleece overalls
Transforming a towel: an unusual option for a bath or sauna
A simple master class on how to make an interesting version of a sauna towel from an ordinary bath towel. It is worth noting that it can also be used at home after bath procedures, when going to the pool or on vacation. Inspiration came from wonderful towels decorated with lace, knitted flowers, ruffles... it looks cozy, smells of Provence and something “delicious”.
As always, I want to start from the end, namely with the result, so that the reader understands whether it is necessary to delve into and leaf through the master class as a whole. Like it or should you run past. And so, a Velcro towel with lace and a belt.
And now, a step-by-step photo report of the work done.
Materials used: bath towel, lace for the width of the towel + loops for the lace, 1.5 m lace, elastic and Velcro 30 cm each.
I measured the desired length of the finished towel. It turned out to be about 73 cm. I decided not to cut the towel, but to tuck it in extra centimeters, thereby forming a fluffy bottom like domed skirts.
I tried on the lace from the front side and positioned it so that it would overlap the edge of the fold on the back side.
I stitched the lace in two parallel lines.
Having tried on the towel, I determined that the size of the towel would be 30 cm, i.e. 30 cm of Velcro is needed, and 30 cm of elastic band is stretched well and not too tightly for the remaining girth in the place where the towel will be held.
In the usual sauna towels, the elastic is attached inside the towel; in my work, I decided to sew the elastic on top of the towel with a zigzag to create beautiful folds on the back.
I measured out the desired 30 cm of elastic and, in order to evenly distribute the folds on the towel, did the following:
1. Divided the elastic band into 4 equal parts. To do this, I folded the elastic band in half, put a mark at the fold, then folded the two ends of the elastic to this mark and also placed marks at the folds (shown in the photo).
2. I determined a place on the towel for the elastic - along the edges I measured 30 cm for Velcro and the distance between was enough for the elastic.
3. I divided the space for the elastic into 4 equal parts.
4. Connected the marks on the towel and elastic band respectively.
5. I stitched the elastic in a zigzag pattern, pulling it between each mark.
Velcro time. The main thing is not to make a mistake! We try on the towel in which direction it is convenient to make the smell and mark where the Velcro will be - the part where the smell goes, sew the “spiky” part of the Velcro onto the face, and the “soft” part of the Velcro onto the smell from the wrong side.
Here's the towel and it's ready. Let's tie up the threads and try them on! After trying it on, I wanted to tie a belt, perhaps many of you will not like this idea and seem unnecessary, but I made two loops for the cotton lace in the place for the belt, exactly under the ends of the elastic band. The harnesses were made from lace that had already been used.
I repeat that it’s nice to wear such a towel at home after a relaxing bath or invigorating shower. It’s good to wrap yourself in a towel and pamper yourself with creams, masks and a cup of cocoa... that’s what I think 
I hope you enjoy this towel too!
Single layer fleece mittens
Before cutting, it is advisable to place your palm on the pattern to make sure that it fits in size. If necessary, adjust.
- Pin the cut parts together.
- Place the palm parts on top of each other, right sides inward, aligning the control marks of the thumbs. Sew to form a finger.
- Make notches or cut off the allowances with zigzag scissors. This manipulation will prevent excess thickness inside the finger.
- The next stage is to connect the palm part and the outer part, facing inward, and pin it together with pins.
- Bend your thumb, spread out the seam allowances.
- Machine stitch along the edge of the product. Make notches again.
- Fold the bottom of the product, hem it with a machine stitch or hand stitches.
A bath cap is an important attribute in the steam room
When planning to visit the bathhouse, many prepare very carefully for this trip.
Well, if you already have your own bathhouse, then over time you will acquire many interesting and necessary attributes for it. Of course, you have already seen bath hats on visitors to saunas and steam rooms more than once. But not everyone knows why they are needed in such establishments. It would seem that a person is going to a hot place, and there should be a minimum of clothes and accessories. But not everything is as simple as it might seem at first glance. Now we’ll find out why a hat is needed in a bathhouse.
Taking into account hobbies and professions
There are many more interesting ideas for designing bath caps. Some are produced by various small factories, but there are also original works. Let's start with the factory ones. The well-known bell hats are no longer interesting. There's only something exclusive there, that's the inscription. But finding a bath hat that will hint (or shout) about another hobby of its owner besides bathing is already interesting.
A set for an oriental lover. An interesting bath cap and a bamboo broom - extreme, however
For football fans there are ball-shaped hats. For dandies who prefer jeans and wide-brimmed “a la cowboy” hats, there are also such options.
Knowing your friends’ hobbies, it’s easy to choose a bath cap
I found an interesting bathhouse hat in the shape of a knight's helmet, there is also one with pilot's glasses, a cap, a cap, a hat with bands. So there’s already room to roam around here.
These are no longer hats. These are bath hats
There are many more interesting ideas for designing bath caps. Some are produced by various small factories, but there are also original works. Let's start with the factory ones. The well-known bell hats are no longer interesting. There's only something exclusive there, that's the inscription. But finding a bath hat that will hint (or shout) about another hobby of its owner besides bathing is already interesting.
We sew and detail budenovka
After cutting out the budenovka and processing the edges of the parts, the hat can be sewn. The best place to start is with the cap. The front and back pieces are sewn together first, then the side wedges are sewn in. You can insert a plastic tip into the pommel, as was done in the original. In a real Budenovka, the visor was made of rags, so it was convenient to wash the hat. For a better appearance of the final product, you can make the insert from a denser material. The visor and backplate are inserted between the cloth and lining parts of the budenovka, then the lower part of the hat should be sewn on a typewriter.
Detailing will make Budenovka beautiful. Take a close look at the photo of the real headdress. Pay attention to how neatly the visor and buttonholes are stitched. It is better to find bronze-colored metal buttons. The star must be made of cloth of the same quality as the dress itself. On the first budenovkas, the star fit into a black circle.
Hats for baths and saunas
Have you ever seen how many residents of Central Asia and other hot places dress? In Turkmenistan, for example, in 40-degree heat they wear warm cotton robes and large shaggy hats on their heads. Many will find this attire strange. But don’t rush to be surprised.
The thing is that in this way the “thermos effect” is achieved. In other words, under a hat or under warm clothing, a constant body temperature is maintained, regardless of the ambient temperature. The sun's rays do not pass through the shaggy hat, the head remains fresh. And by sweating in a cotton robe, its owner thus protects himself from overheating.
Let's emphasize individuality
But there are even cooler examples. This is already handmade. Below are the original works of Elena Fedoriv (if you wish, you can order such a wonderful thing from her). If you want to pleasantly surprise a person, this is your option.
Author's works by Elena Fedoriv
Well, what man wouldn't be flattered if you gave him a hat with a bear or an eagle? Some people will be more pleased with a tiger or a wolf. It all depends on the character. And in the bathhouse wearing such a hat you will be in a better mood than ever.
Flatter your man by giving him such a hat.
By the way, there are also options for bath hats for women. You can't always joke with them and you can't guess how they'll react, but no one will be against such beauty. So as a gift for a girl, this is a win-win option.
Ladies' version of a bath cap
By the way, there are also options for bath hats for women. You can't always joke with them and you can't guess how they'll react, but no one will be against such beauty. So as a gift for a girl, this is a win-win option.