If the stove in a bathhouse is often compared to its heart, then the canopy is the soul of the steam room. The basic sensations of our relaxed and steamed bodies depend on its convenience and safety. It is this thought that makes many owners take on making their own canopy. How to make a bath canopy with your own hands so that it lasts long and reliably?
For an error-free result, you need to think through and consistently go through several stages:
- location;
- material;
- design.
Types of shelves for a bathhouse with your own hands: photos of various options
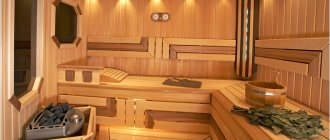
Shelves can differ according to four criteria - type of fastening, design, material of manufacture and number of tiers. Let's try to figure out what exactly the differences are and what the shelves look like in different variations.
Almost no private sector farmstead is complete without a bathhouse.
Differences between regiments by material of manufacture
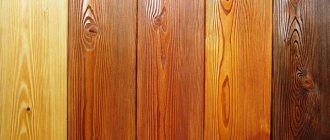
Even at the stage of planning the shelves, you should decide on the material for their manufacture. Any synthetic raw materials are immediately excluded - only natural wood is suitable for a real steam room. At the same time, not every tree can be used in a bathhouse. The main criterion should be the absence of resin, which under the influence of temperature will melt and stick to the body. It is also worth paying attention to the density - the wood should not absorb moisture like a sponge.
This is what African abashi wood boards look like
You can make your own shelves in the steam room from linden, aspen or birch. Recently, making shelves from African abashi wood has become quite popular. However, true steam room connoisseurs do not approve of such delights.
Types of shelf fastening, how they differ
Depending on the type of fastening of the shelves, it can be stationary or removable. In the first case, the boards are fixed to the frame with screws or nails. But the second option is more suitable for less dense wood species. It is simply boards laid on a frame, which after washing can be easily removed and taken outside so that they can dry.
The shelves are removed for drying, making cleaning easier
Shelf sizes and number of tiers
The number of tiers directly depends on the size of the steam room. However, it should be understood that if we are talking about a Finnish sauna, then here the shelves are made narrower, only for sitting, and in a Russian steam room the dimensions of the shelves in the bath are larger. This mainly concerns the width, which should allow a person to lie down so that he can get enough steam.
It turns out that in a regular steam room the shelves can be located in a maximum of two tiers, while in a Finnish sauna there may well be three.
Everyone chooses the number of tiers independently, depending on who is more comfortable
Photo of shelves on the wall in a bathhouse with your own hands
Wall shelves for washcloths and soap can be made from any material, but products made from the same material as the shelves will look more practical and aesthetically pleasing. Many people buy metal shelves, but this material is not very safe. In high temperature conditions it may become too hot. As a result, you can easily get burned when touching it. Below you can see several examples of shelves for a bath.
Quite an interesting do-it-yourself corner shelf
Another homemade shelf option
But you shouldn’t use such metal shelves in a bathhouse.
Today we won’t consider how to make shelves on the wall with your own hands; it shouldn’t be difficult.
Material selection
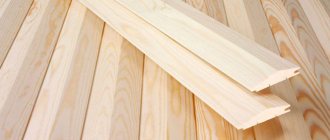
Edged boards
When choosing a material, you should take into account the characteristic features of various wood species, as well as the specific conditions of their practical use. To ensure comfortable operating conditions, the following requirements apply to the wood used to make shelves:
- low level of thermal conductivity;
- strength of the fibrous structure;
- absence of resin secretions;
- resistance to high temperatures and moisture.
Of all the types of wood familiar to us, the specified requirements are fully satisfied by such varieties as cedar, linden, alder and aspen. When choosing a specific material from the specified range, as a rule, preference is given to linden.
How to make shelves in a bathhouse with your own hands: step-by-step instructions with photo examples
Arranging wooden shelves with your own hands is not a very difficult task, but it requires a careful and rational approach. You should initially think through every little detail and, if possible, draw up a drawing of the future design. The material must be prepared in advance by cutting the boards to size so that you are not distracted during the assembly process. Let's try to consider step by step the entire algorithm for arranging regiments.
Shelves for a sauna or bath: a step-by-step guide
The shelf shown in the photo examples can be used both in a sauna and in a steam room. To make it easier for the reader to perceive information, all actions performed and described will be supported by photographic examples.
| Illustration | Description of action |
| First of all, you need to make a drawing. If the home master is familiar with modeling programs, then this work is greatly simplified. On a computer you can create a three-dimensional model with all the necessary dimensions | |
| Next, you need to cut the timber for the frame to size. When you have a drawing at hand, this will be quite easy to do. | |
| After all the necessary parts of the frame have been cut, you can begin assembling it. Fixation is best done with self-tapping screws | |
| Having completed the assembly of the frame, you can proceed to processing the boards for the shelf. They need to be carefully sanded on top and sides, chamfering. This will save people from splinters. The more thoroughly the boards are polished, the more pleasant it will be to sit or lie on them. | |
| It is best to attach boards from below. For this purpose, self-tapping screws are selected, the length of which is sufficient for fixation. At the same time, the screw should not go through, coming out from above | |
| Having assembled the main shelves, you can proceed to making the steps. They are needed to make it convenient for people to go upstairs. Steps should be located so that they do not interfere with washing. In this case, it was decided to place them only on the short side of the shelf | |
| This is what the finished shelf looks like. In the photo it is the short side with steps, intended for sitting | |
| Here's the long side. It will be very comfortable to lie on it. After the shelf is ready, it must be impregnated with a special composition. Typically, this is linseed oil or wax-based impregnation, which, when melted, is absorbed into the wood and protects it. |
You can learn more about the master class on making shelves in a steam room in this video.
Types of benches for baths
Bath shop
The design features of the benches and their sizes depend on the area and purpose of the room, the number of people simultaneously coming to the bathhouse, and the shape of the rest of the furniture. In steam rooms, benches are made in several tiers so that you can choose the degree of air heating. Mobile models are placed in the dressing room; small benches made without a back are used as a footrest.
The spacious steam room can accommodate a three-tier bench. There should be a distance of at least 120 cm from the top tier to the ceiling to make it comfortable to sit. This shelf is made the longest and widest, its dimensions reach 180 by 60 cm. This design makes it possible to comfortably lie down. The distance between each tier should be about 1 meter. The lower rows of benches are made shorter and narrower. Their sizes will be 90 and 50 cm.
Bunk bench
A two-tier bench is set up in a medium-sized room. The structure is mounted against a blank wall; if the presence of a large number of people is expected, then the benches are installed against two walls. It is important that there are no windows or hoods that create a draft. It is also worth keeping a sufficient distance from the stove to avoid accidentally getting burned. You will have to climb to the top shelf using a ladder.
Note! In a small bathhouse it is enough to install a single-tier wide shelf. When installing benches, leave free space underneath for air circulation.
Features of bath benches that will be installed in the steam room:
- The product is not varnished or painted.
- Treatment can be carried out exclusively with environmentally friendly antiseptics that do not produce dangerous fumes when heated.
- The benches are not installed flush against the walls, but leave a gap for water to drain.
- Sanding the wood must be thorough so as not to injure the skin with a splinter or hit a corner.
Drawings of regiments for a bathhouse with your own hands: photos of interesting solutions
As an example, you can consider several examples of ready-made drawings of shelves for a bathhouse with your own hands, as well as ready-made designs. Perhaps the reader will find something suitable for himself. If not, then based on the presented examples of drawings of shelves for a bathhouse with dimensions, you can always create something of your own.
Next you will see photos of wooden shelves made by yourself.
How to properly make shelves in a bathhouse: a few tips
The first thing to consider is the type of wood, this has already been mentioned. Also, do not place shelves in close proximity to the stove. If the flooring boards are fixed from above, be sure to recess the heads of the nails or screws. Otherwise, they will burn when the steam room warms up.
It is important to leave small gaps between the deck boards. This will help the wood dry faster, which means it will extend its service life. As for the width of the shelf, it all depends on the preferences of the owner. After all, some people like to lie in the steam room, while others, after sitting for a while, run away to the cool dressing room.
The height of the shelf in the bathhouse from the floor may also differ, depending on the thermal insulation and the design of the water drain. The higher the height of the shelves in the steam room, the more steam will fall on the steamer.
Gaps between shelf flooring boards are required
Dimensions
The ideal length for the canopy so that the average person can lie on it freely at full height without bending their legs. Typically the minimum bench length dimensions :
- sun lounger – 180–220 cm;
- recliner – 150 cm;
- seat – 40–90 cm.
The most important dimensions for the height of the canopy tiers are the distance from the floor and ceiling of the bathhouse, the optimal location of the upper and lower shelves. The main point of these dimensions is that there is enough space so that an average adult can sit down without hindrance when taking a steam bath. And also so that the steamer or massage therapist does not take uncomfortable, crooked positions during the procedures. Recommended height:
- from the ceiling to the top canopy – 110 cm;
- interlevel height – 60–80 cm.
The standard width of the canopy is considered to be 60 cm, but the upper bed should have a larger transverse dimension - 90 cm. It is quite acceptable to reduce or increase all dimensions to suit the existing standards of the bathhouse room. If the width of the main canopy is designed for two steamers, then this will already be paid. How to make a canopy in a bathhouse to suit the needs of a particular family is up to the owner to decide.
Prices of shelves for a bath: what amounts should you expect when purchasing
Let's try to figure out what the cost of ready-made shelves for a bathhouse or planed boards for them might be.
| Name | Material | Size, mm | Average cost for December 2020, rub. |
| Board | Linden | 90×27×2000 | 220 |
| Board | Linden | 26×90×1900 | 200 |
| shelves | Aspen | 600×1500 | 2 300 |
| shelves | Poplar | 600×1200 | 1 600 |
| shelves | Linden | 400×1200 | 1 200 |
It turns out that prices for linden shelves are lower, which, frankly, is strange.
How to make shelves in a sauna steam room durable: tips for caring for wood
The dampness that is constantly present in the bathhouse, plus the high temperature, creates favorable conditions for the proliferation of various bacteria and microorganisms. As a result, mold and mildew may appear quite soon, and the boards may begin to rot. To avoid such problems, it is necessary to periodically treat the wood with various compounds.
You can install ultraviolet lamps that will turn on after washing
The first is treating shelves and walls with antiseptics. They remove all unwanted flora and also prevent insects from breeding. Today, there is a huge range of similar products on the shelves of Russian stores. However, it should be remembered that processing must begin immediately after arranging the shelves. If the boards are already affected by rot, no antiseptics will help.
According to numerous surveys, Russian consumers trust Finnish and Danish-made impregnations more. These compositions are more effective and require application much less frequently than domestic ones.
It is also necessary to clean the bathhouse after each wash. Particular attention should be paid to foam residues on the shelves. After complete cleaning, the steam room doors should be left open so that the room is ventilated and excess moisture evaporates. The shelves should be periodically cleaned with a wire brush or iron scraper, trying to remove all dirt from them without any residue. It is worth looking through all the cracks between the boards. Leaves left there from a broom can cause wood to rot.
Thorough cleaning of the bathhouse will help extend the life of the shelves
Means of protection
Many people believe that it is only necessary to protect the wood of a bench if it is not in a steam room. In fact, it is in the steam room that the tree needs protection most of all, but previously we had to abandon this idea, because at high temperatures any chemical tends to become volatile and poison the air that those steaming breathe.
But progress is progress - the Finns have plenty of compounds that are suitable even for their hot sauna , not to mention the much “cooler” Russian bath. Such impregnations can protect wood from water, darkening, rot, etc. In this case, the surface will not feel greasy to the touch.
IMPORTANT! Varnishes should not be used in a steam room - this is a fact.
But in all other rooms, except for the steam room, you are completely free to use any compositions that can protect the wood from the action of water, bacteria, fungi, insects and rodents. If desired, you can also coat it with fire retardants - compounds that make the wood non-flammable.
Why it is necessary to protect wood in a washing room - it’s clear, water flows there. But the rest of the bath rooms are not entirely dry either. Be that as it may, the humidity in the bathhouse is high everywhere. So saturate and varnish with whatever you see fit.

