Hello, dear readers!
A concrete screed on the floor in a bathhouse is considered the best option. It is durable. No matter how you look after the wood, after 5-10 years the floors need to be re-laid. Do you understand the humidity...
Concrete does not rot, does not deform, does not require special care, and lasts for more than 40 years. Today we’ll talk about how to fill the floor in a bathhouse with a slope for drainage. It is not easy to do the work of arranging such a floor with your own hands, but it is possible if desired.
Pouring the floors in the bathhouse can be done both in the washing room and in the steam room. A concrete floor is essentially a concrete screed on top of which a waterproof, non-slip coating is laid. Typically, tiles are used for these purposes. When laid on the ground, the slope of the floor is ensured by creating a slope of the very base of the ground. For small areas - due to changes in the thickness of the underlying layer.
Why is concrete flooring preferable?
Concrete floors in a bathhouse on the ground today are considered the most appropriate option.
For a bathhouse, one of three floor options is usually chosen: adobe, wood and concrete. To understand why the latter option is preferable, it is worth taking a closer look at the features of all materials.
What kind of floors can be made in a bathhouse:
- Clay - the oldest option, made in the format of a compacted dense layer of clay and acting as a water seal, where a drain was created outside the building. A layer of wood was laid on top of the clay, which had to be dried and ventilated after each visit to the bathhouse. Today, clay is no longer relevant, as it is not very comfortable to use.
- Wooden floors are made from species that are resistant to water. They are easy to install, warm, and make it easy to install a water drainage system. But in any case, wood and water interact poorly - wood is susceptible to the spread of insects, rodents, and microorganisms. It would be possible to protect the material from these influences with special impregnations, but they can be dangerous to human health.
- A concrete floor on the ground in a bathhouse is the most relevant option today: it demonstrates excellent strength, resistance to moisture, lasts a very long time, provided that a layer of thermal insulation is installed or a floor heating system is installed, it is comfortable to use. You can lay any coverings on concrete or leave the surface in its original form by installing wooden flooring.
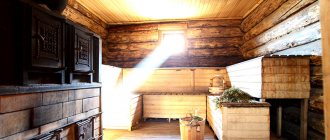
Working with walls and ceilings
The traditional option for finishing walls with ceilings is wooden lining. There is an opinion that the material initially has all the necessary qualities and does not need protection. However, it is not.
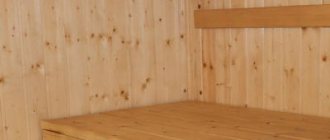
Damaged lining in the dressing room Source ilya-les.ru
Here's what's typical for the cladding:
- Water absorption is relatively high. But since wood has breathability, moisture release also occurs actively. However, good ventilation must be ensured.
- Low heat capacity and thermal conductivity. With this decoration the room slowly cools down. Wood, unlike stone and ceramics, does not heat up to a level similar to air temperature, which prevents burns.
- Resistance to extreme operating conditions . Compared to other materials, changes in temperature and humidity lead to deformation and destruction to a lesser extent.
To extend the service life of the decorative finish, it is necessary to carry out pre-treatment of the lining and finishing. The first occurs before installation, the second after it with periodic updates. There can be several solutions for treating lining in a bathhouse: oils, impregnations, varnishes, antiseptics and fire retardants.
Covering bathhouse walls with clapboard Source www.zaggo.ru
Floor Pie Composition
Before pouring the floor in a concrete bathhouse with your own hands, you need to thoroughly study the technology. In order for the floor to be durable and warm, a structure is made of several layers: the compacted soil is covered with a layer of sand, then gravel, a dense polyethylene film is laid, a rough screed is applied, a layer of waterproofing and thermal insulation is installed, and the process is completed with a finishing screed. This option is suitable for arranging a floor on any type of soil.
Today, there are two methods by which a concrete floor in a bathhouse is poured: directly on the ground or on special logs (creating a ventilated subfloor). The choice of technology depends on the budget, requirements and conditions of the work.
Installation of a concrete floor on the ground
You can make a concrete floor in a bathhouse on the ground with your own hands directly on the base, having first removed a layer 40-50 centimeters thick. After compaction, gravel is poured into the hole in a layer of 15 centimeters, compacted, then sand is poured in a layer of up to 50 centimeters and compacted again. A screed is poured onto the sand at a certain slope, in accordance with the design and markings.
Usually two layers of screed are poured - one rough, the second finishing, always laying layers of thermal insulation and waterproofing between them.
Concrete floor with ventilated subfloor
The concrete floor on wooden joists in the bathhouse is made to create a ventilated space under the floor. Thus, there is no need to install additional ventilation systems in the concrete screed. Wooden logs are pre-treated with special antiseptics, and then mounted in a system of beams with a diameter of 10x20 centimeters in the form of a grid.
A plank subfloor made of boards 2-4 centimeters thick is attached to the joists. A layer of waterproofing and thermal insulation is also performed. Only after this is the concrete screed reinforced with steel mesh poured.
How to fill the floor in a bathhouse with a slope
A concrete screed on the bathhouse floor can be called the most optimal option. Such a floor has many advantages over a wooden structure, the key ones being its strength and durability. Everyone knows that there is always high humidity in bath rooms. It negatively affects even wood treated with special compounds, while concrete in a humid environment is first strengthened and then reacts very little to its influence.
How to fill the floor in a bathhouse with a slope
The main difficulty of installing a screed on the floor in a bathhouse is that the surface must be located at a certain angle. Therefore, when starting work on installing a sewer system and drain ladder, you should first thoroughly understand how to fill the floor in a bathhouse with a slope to quickly remove used water.
Materials for work
To create a good, durable, insulated concrete floor with a drain hole, you will need certain materials:
- Sand, sand-gravel mixture and cement for making mortars and backfills. In addition, it would be optimal to use special plasticizing additives and microfiber to increase the strength of the top concrete layer.
- Ruberoid, polyethylene film with a thickness of at least 200 microns - for waterproofing the floor.
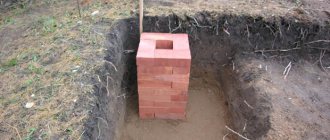
- Sewage polypropylene pipe with a cross-section of 50 mm.
- The insulation material is best extruded polystyrene foam, 30 ÷ 50 mm thick, with a density of at least 35 kg/m³.
- Reinforcing mesh with cells from 50×50 to 80×80 mm.
- Guides for beacons or a special kit for forming a floor slope.
One of the drainage drain models
- Drain ladder with a diameter suitable for the selected pipe section.
- Tile adhesive - for wet rooms or for outdoor use.
- Ceramic floor tiles - it is important that they are rough and non-slip in wet bath conditions.
Prices for extruded polystyrene foam
extruded polystyrene foam Penoplex
Drain ladder
Separately, we should consider one of the most important elements of water drainage in a sloping floor system - the drain. It performs several functions at once:
- Provides a tight connection between the drain pipe and the drain.
- It filters the water entering the sewer pipe, thanks to the presence of a filtration grid, which significantly reduces the number of blockages - for example, leaves from bath brooms will linger on the grid.
- A water seal installed inside the siphon protects the room from the penetration of unpleasant odors from the sewer well and cold air.
Drain ladders are manufactured in two versions - with direct and with lateral connections.
Drain with vertical connection
- If the pipe is buried and its exit into the room occurs vertically, then a ladder with direct connection is used.
Drain with side connection
- In the case when the pipe is stretched in such a way that it comes out of the wall, or it is embedded in the floor layers almost horizontally, then a drain ladder with a side connection should be used.
Next, we will consider both options for installing a sewer pipe and pouring a floor with a slope.
The drains are made of durable polymers that are not subject to metal corrosion or in a combined version.
Approximate drainage system
Before purchasing a ladder, you need to check whether it is suitable in height for the given room when installing a floor in several layers. Therefore, you first need to calculate how much it is possible to raise the floor in the bathhouse as much as possible. If you cannot find a ladder of the required height, you will have to make each of the ties a little thinner, or reduce the thickness of the backfill layers.
It is also necessary to remember that the height of the drain ladder is a parameter that must be taken into account when calculating the rise of the floor in the area where the drain is connected, which means that near the walls, the surface will rise even higher.
When buying a drain, you must immediately equip it with all the necessary parts - connecting couplings and drain pipes of the required diameter.
It is recommended to purchase a drain with a square top grate - in this case, you can avoid complex round cutouts in ceramic tiles.
Before installing the ladder into the screed, it is recommended to assemble and disassemble it, thoroughly understand the design and the interconnection of all parts, so that there are no problems during installation.
Installation of sewer pipe
In order for the work to be of high quality, control over it must begin with the installation of a sewer pipe to a certain place on the floor of the bathhouse. This process begins after the foundation is erected and the formwork is removed from it, and often even during the “zero cycle” work.
If the floor drain is supposed to be installed in the corner of the bathhouse, then the pipe is routed along one of the foundation walls.
Trench for sewer pipe
Provided the drain ladder is located in the center of the room, the pipe is laid diagonally across the room. Here you need to remember that its direction should not have sharp turns, otherwise the pipe in these areas may often become clogged. Therefore, the rotation angle should be approximately 140 ÷ 150 degrees, but it is best if the installation locations of the bath drain and the drain well (pit) are connected in a straight line.
When digging a trench, it is necessary to maintain a slope of at least three to five degrees from the building to the hole throughout its entire length.
If a hole for the passage of a sewer pipe was not provided under the foundation or in its wall, then you will have to dig under it under the tape.
Digging under the foundation strip
Therefore, it is recommended to think through this issue in advance. Before pouring the solution into the formwork, a piece of pipe is placed in it in a certain place with a diameter that will exceed the size of the sewer pipe by 50 ÷ 100 mm. The laid pipe must have a length equal to the width of the formwork, and it is lowered to a depth from the ground surface of approximately 450 ÷ 500 mm. Having carried out such preparation, you can get rid of unnecessary, rather labor-intensive work.
Pipe passing through the sleeve
Another option is when a pipe of the required diameter is embedded directly into the foundation stack, which will then become part of the sewer pipe itself.
Next, a pipe is laid in a trench under the foundation and led into a cesspool.
Its other end, on which the drain will be mounted, is extended with a pipe of the required height.
Vertical riser – it is possible to increase it to the desired height
If you plan to drain two rooms of a bathhouse, for example, a washing room and a shower room, then a wiring is made from the pipe, and each room has its own pipe installed.
After installing the sewer pipes, the trenches are backfilled and placed on the ground inside the foundation, i.e. underground, a sand cushion is poured and compacted. During the work, it is recommended to plug the pipe openings with a stopper made of thick fabric or close them with a special lid to prevent construction waste or concrete mortar from getting into the cavities.
Formation of floor layers
This diagram clearly shows the sequence of arrangement of layers of a concrete floor in a bathhouse.
Layer-by-layer diagram of a bath floor with a drain
- The first step after filling the soil with sand is to install a protective box made of boards or several layers of roofing felt around the pipe. It is necessary so that if there is an error in choosing the height of the pipe, it can be replaced with a shorter or longer one.
- Next comes the installation of a concrete rough foundation.
- To keep the floor relatively warm and not freeze in winter, insulation is laid on the hardened concrete slab. Extruded polystyrene foam is well suited for this room. The optimal insulation thickness is 50 mm.
- The insulation is covered with another reinforced screed, the thickness of which should be at least 40 ÷ 50 mm.
- After drying, the middle screed is covered with a waterproofing material - roofing felt or thick polyethylene film.
- Metal guide profiles are placed on top of the film at a slope towards the drain pipe. Their slope angle should be 3–4 degrees.
- Then the top screed is poured, forming a slope.
- The leveled screed is decorated with tiles or covered with one of the waterproof materials.
To carry out all of the above work correctly, you need to consider the technology features of each stage. In addition, an important point in arranging the bathhouse floor is the correct installation of the drain ladder. All layers of the “pie” are mounted around the sewer pipe pipe.
Prices for roofing material
roofing felt
Basic concrete base
The strength of the upper layers of the floor determines the reliability of the base concrete base, so this work must be carried out with the utmost care.
- The first step was to fill in and compact the sand cushion - its compacted height should be 100 ÷ 120 mm.
- Crushed stone is poured on top and compacted. This layer is made with a thickness of 100 ÷ 150 mm. It is good to compact it with a hand roller, while the bottom layer of crushed stone will be pressed into the sand. It should be noted that crushed stone can be replaced with expanded clay, which will create an additional insulating layer.
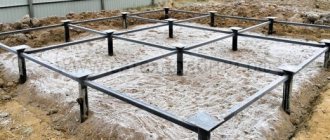
Reinforcement of the base layer and placement of guide beacons
- A reinforcing metal grid with cells of approximately 80×80 mm is laid on the crushed stone - this option is suitable for this stage of work. The mesh can be secured in some places using staples bent from steel wire to the already laid layers. Thanks to this fixation, its edges will not rise and interfere with further work.
- Beacons made of metal profiles are also placed on top of the mesh. They are leveled to the building level and fixed onto piles of gypsum-based mortar. This composition hardens quickly and helps save time on work.
Leveling the poured mortar
- Next, a concrete solution made of sand and cement or a sand-gravel mixture and cement is laid out on the prepared surface in proportions of 3:1 or 4:1, respectively. The thickness of this layer can be from 80 to 120 mm. The solution is leveled using a rule that is moved along the profiles of the beacons.
- After this, the concrete base is left to gain initial strength. This will require a minimum of 7 ÷ 10 days, depending on the thickness of the poured layer.
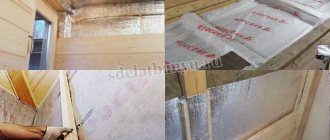
Installation of insulation
Before laying the insulation, it is recommended to lay a polyethylene film on the concrete slab with a bend of 150 ÷ 200 mm on the walls, which will become additional waterproofing. The strips are laid overlapping each other by 200 ÷ 250 mm, and the joints are glued with waterproof tape.
Laying thermal insulation boards
After this, polystyrene foam is laid on the surface, the plates of which are tightly joined to each other. The gaps formed between the wall and the insulation must be filled with foam. It will not only close the cold bridges, but also fix the insulation in the right place.
Expanded polystyrene panels can also be laid with tile adhesive
If polystyrene foam will be installed without covering the film, directly on concrete, then it can be laid with tile adhesive.
Second layer of screed
Since polystyrene foam is a fairly fragile material, before laying the second layer of concrete, it is recommended to cover it with a reinforcing mesh with 50x50 mm cells. Some craftsmen lay another layer of polyethylene under the mesh.
Reinforcement over insulation
Beacons are again installed on the grid, along which the screed will be aligned. While the gypsum solution is drying under the leveled guides of the beacon system, damper tape is glued along the perimeter of the room, at the bottom of the walls. This element is necessary when constructing a concrete screed, since during temperature changes, which are quite likely in a bathhouse, the concrete layer can expand, and the damper tape compensates for these linear fluctuations.
Installation of damper tape
Next, concrete mortar is poured onto the reinforced insulation and leveled along the beacons. This layer must be at least 40 mm.
After the screed has hardened, the protruding edge of the damper tape is cut off.
Waterproofing and slope formation
- Before laying a layer of waterproofing, it is necessary to dismantle the box installed around the sewer pipe. If necessary, the pipe can be replaced with another one of a suitable height.
- The space around the pipe is filled with cement mortar mixed with foam chips or pieces of foam and polyurethane foam. You can fill the space with ordinary concrete mortar.
- Next, the entire surface is covered with roofing felt, the sheets of which are overlapped one on top of another by 100 ÷ 150 mm and hot glued using bitumen mastic. This layer of waterproofing should rise and adhere to the walls by 150 mm, rounding the junction of the floor and walls.
- To pass the pipe through the waterproofing, a hole is cut, and then the lower part of the drain ladder is fixed to it.
- Instead of roofing felt, to waterproof the floor and lower parts of the walls, you can use a special composition - “liquid rubber”, which forms a dense elastic waterproof film on the surface, or a modern rolled material - “isoplast”.
- On top of the waterproofing around the drain, pieces of metal profiles are placed at an angle, which rise against the walls, forming a slope towards the drain. The minimum slope that can be is 10 mm per linear meter.
Using special profiles to form a slope
- Today, special kits are sold, consisting of profiles made at the desired angle - they are installed and secured on a flat surface, where they form a frame for screeds at an angle.
- A drain ladder is temporarily installed in the sewer pipe, and the height of the future screed is determined from it.
- The drain grate should be flush with the ceramic tiles that will be laid on top of the screed.
Gangway installation
- After this, the inner part of the drain ladder is installed, which must be recessed into the screed. Its grid is installed after gluing the tiles, and is a removable part.
Slope-forming screed and subsequent finishing
- A fairly thick concrete solution is laid out on the prepared frame. Using the rule of the required length, the screed is aligned along the frame guides.
- The leveled solution is left to mature completely. This process will take quite a long time, since the concrete must be completely ready for finishing. In order for the screed to be strong and not crack, it must be sprayed with water, starting from the second day after pouring, and then covered with plastic wrap.
Concrete floor with a slope towards the ladder
- Once the screed is ready, a cable or infrared heated floor can be installed on its surface, under the tiles.
You can use some types of heated electric floors
- Next, ceramic tiles are laid on top of the finished concrete surface using tile adhesive.
- Small tiles mounted on a flexible backing will work well on a floor that has a slope. It can be easily cut and adjusted to the location of the sewer drain.
Small mosaic tiles are very convenient for laying on the floor.
- For example, it is very simple to cut a square of the required size in the middle and put it on the pipe, having previously applied tile adhesive around it. And from this already tiled area of the floor, it will be easy to lay finishing material in all directions.
Its fairly flexible structure allows you to repeat all the “relief fractures” of the floor
- The seams between the tiles are sealed with a special grout, which is usually matched to the color of the material.
- The last step is to install the drain grate.
Floor installation with installation of a drain with side inlet
Above were instructions for creating a floor using a ladder with direct connection. The sewer pipe ran along the ground, and its branch pipe was located at a right angle to it and passed vertically through the floor layers.
Now we will consider the second option, when the pipe runs horizontally and connects to the drain on the side. This arrangement is convenient if the main sewer line runs in the next room and it is necessary to connect the drain in the bathhouse to it, or if the pipe from the waste pit immediately goes at a certain angle.
The basic screed is arranged in the same way for both options for connecting the drain, so it should be immediately considered from the next stage of work.
| Illustration | Brief description of the operation performed |
| The diagram on the left clearly shows how a drain with a side connection to the sewer pipe is installed and connected on a flat concrete base, and what is the possibility of organizing the required slope of the pipe from the drain. | |
| In this case, a drain ladder is connected, which is connected to a pipe from the drain in the adjacent room and discharged into the sewer line, which is embedded in the floor - this drain is called a walk-through. To do this, measurements are taken between the pipes and the location of the drain is determined. If necessary, the ladder rises a little - for this purpose, pads are made under it and one of the pipes. For them, it is better to choose a material that is not affected by moisture, for example, pieces of old ceramic tiles are perfect. | |
| Next, sections of pipes are attached to the ladder, which will connect it to the pipes. All pipe connections are sealed with silicone or a special sealant. | |
| The next step is to install the floor insulation. This option uses two layers of material. The first of them is laid around the pipes - it should have a thickness of 50 mm and should be pressed tightly against them. The density of polystyrene foam for the floor must be at least 35 kg/m³. | |
| For the second layer, the thickness of the insulation is selected depending on the height of the drain. Expanded polystyrene is placed directly under the edges of the bottom drain box. The bath room is completely covered with insulating material, and then narrow foam strips are installed along the entire perimeter of the room, along the walls, or a damper tape is secured. In the future, it will serve as expansion joints during thermal expansion of the screed material. It is recommended to reinforce the foam with fiberglass mesh - it will add strength to the surface, which will extend the life of the floor. In addition, beacons made of perforated metal strips are placed on the insulation, along which the screed will be aligned. It is better to secure them with wire staples to the foam. | |
| The next step is to lay out a concrete solution on the surface of the insulation, which should fill all the cavities around the flange protruding from the insulation. The solution must be well compacted. | |
| Next, using the rule, the screed is leveled, bringing it to the same level as the flange of the ladder. The concrete layer is left until completely hardened and matured, periodically, starting from the second day, moistened with water. | |
| After the concrete layer is ready, the highest points of the future screed, which will form the slope of the surface, are marked on the walls using a level. Here you need to take into account the thickness of the waterproofing material, the screed itself and the finishing material from the tiles, and the slope should be at least 2 cm per linear meter. | |
| Next, it is recommended to lay a waterproofing material on the flange - most often “isoplast” is used for this. It is cut in the shape of a square with a round hole in the middle, with a diameter equal to the drain hole in the flange. | |
| The upper part of the flange is pressed hermetically on top of the “isoplast” with screws. | |
| The next step is to lay roofing felt waterproofing on the surface of the entire floor. But before this, it is tried on, and a hole is cut out in the material, approximately 50 mm larger than the diameter of the flange. | |
| The prepared waterproofing material is spread over the entire surface and hot glued. In the case when several roofing felt sheets are used, they are laid with an overlap of at least 100 mm, and also glued together using a burner. The coating must be completely sealed. | |
| Particular attention should be paid to waterproofing the joints of the floor and walls, as well as corners. At corner joints, “isoplast” is fused onto the walls, and then solid strips of roofing material are glued to the walls and floor. | |
| Next, a siphon with a grid is installed in the built-in part of the drain, using an O-ring to seal the connection. After this, only the top grill will remain removable. | |
| Now guides are installed to form an inclined screed. They can have a ready-made shape, or they can take metal or wooden (plywood) planks, set them at the desired angle and glue them to the concrete mortar. When installing the guides, you need to remember that for the siphon they must be lower than its height by the thickness of the ceramic tiles and the glue to which they will be glued. | |
| Next, the concrete solution is carefully laid out on the surface and leveled along the guides with a trowel and rule. A slope is formed along the guides, along which water will flow freely into the drain. In order not to clog the siphon grille at this stage, it is recommended to protect it by covering it, for example, with a piece of roofing felt. | |
| The set solution must be rubbed until smooth. To do this, the surface is moistened with water and smoothed using a trowel. If the guides were made of boards or plywood, then they must be carefully removed and the resulting gaps filled with concrete mortar. If the gaps are wide, then pieces of foam plastic can be installed in them - they will serve as deformation inserts. | |
| After this, all joints are taped with waterproof waterproofing tape. | |
| After all the solutions have dried, ceramic tiles are installed on the surface. Its installation begins from the ladder. The tiles must be cut with high precision so that they fit perfectly together. It is advisable to select the size of the tiles, which will be a multiple of the distance from the walls to the ladder, then you can save yourself from unnecessary work - trimming the tiles installed near the walls and the ladder grating. It is very important that the ladder grate does not protrude above the tiles, but is on the same level with them. To lay tiles in this wet room, you need to purchase a special contact adhesive that will create good adhesion for the materials to adhere. After the glue has completely dried, the seams between the tiles are sealed only with special waterproof grout. |
Acting according to the instructions presented in the article, and having some experience in laying ceramic tiles, the work can be done independently, without inviting outside craftsmen.
As a “bonus” - another original way of forming a slope to the drain hole using semi-dry screed technology.
Video: creating a screed with a slope for ceramic tiles
Preparing the base
Before pouring concrete on the bathhouse floor, it is necessary to properly prepare the base. Otherwise, the floor will have low strength and reliability characteristics, will last much less and is unlikely to provide adequate comfort.
Alignment
Before starting work, remove a layer of soil from the base along with any remaining organic matter. Usually 40-50 centimeters is enough. Then the surface is leveled, making sure to make a pit in the center of the room where the water from the bathhouse will go.
Drainage from the pit is carried out beyond the foundation and is realized through a drainage pipe with a cross-section of 10-20 centimeters dug in the corner under a slope. Thanks to this design, it will be possible to ensure maximum comfort in the operation of the bath and avoid the accumulation of large volumes of water.
Seal
Before concreting, the surface must be compacted with a vibrating plate or a manual tamper made from scrap timber or logs. Sand is poured onto the compacted soil in a layer of 5-10 centimeters, then a layer of gravel 10 centimeters thick.
Both layers must be thoroughly compacted. They will protect the concrete floor in the bathhouse from rising moisture from the soil and other troubles.
The nuances of arranging a concrete base
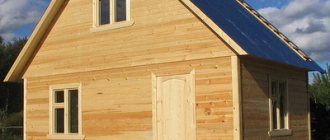
Figure 1. Concrete floor in a bathhouse
Arranging a concrete floor in a bathhouse allows you to achieve a solid foundation whose service life exceeds 10 years. This material is resistant to repeated exposure to moisture. It is environmentally friendly as it is made from natural ingredients. The solution contains sand, natural filler, cement and water. To improve the properties of the material, plasticizers and other polymer components are added to it. Mold and mildew do not grow on concrete, which is typical for wet rooms without a constant temperature regime. This flooring is not susceptible to damage by insects and rodents.
after using the sauna . This material is heavy and therefore requires a strong foundation. In order for the floor screed to dry completely, you need to wait 30-45 days. Over time, the material shrinks, the duration of which is determined by the amount of liquid in the solution.
When pouring a concrete floor in a bathhouse, it is important to choose the right components from which the solution is prepared. You should also strictly follow the technology for pouring the mixture. It involves preparing the base, laying out the composition, finishing and sealing the joints.
Rough screed
Before making a concrete floor in a bathhouse, it is necessary to perform a rough screed. Typically, the thickness of such a layer is no more than 10 centimeters (optimally 5-7).
Mixture recipe
To prepare the mixture, you will need sand, cement, gravel, crushed stone. When wondering what kind of concrete is needed for the foundation of a bathhouse (base), it is better to choose M400. Saving on materials can cause poor quality coatings.
Concrete mortar recipe:
- Cement M400 – part
- River sand – 1.2 parts
- Crushed stone, gravel fraction 5-10 millimeters - 2.7 parts
If M500 cement is used for pouring, the volume of gravel and sand can be increased to 3.2 and 1.6 parts.
Mixing
All components must be carefully measured and then mixed. The volume of water is determined during the process: the solution must be of optimal consistency: exceeding the permissible volume of water prolongs the hardening period and leads to cracks, while reducing it makes leveling the surface impossible.
When pouring the floor in a bathhouse with concrete with your own hands, you usually add water in portions and mix the mixture until a thick, plastic, evenly moistened consistency is obtained.
Insulation
Before pouring the rough screed, a polyethylene film with a density of 200 microns is laid on the gravel. It will not allow water and solution to penetrate into the gravel, eliminating the risk of a bridge for capillary moisture and reducing the strength level of the concrete screed.
After the insulation layer has been laid, the floor in the concrete bathhouse can be poured. Filling is carried out layer by layer and quickly, carefully leveling the surface with the desired slope. Then they pause in work, waiting for the screed to harden and gain strength (2-3 days). These days the floor is moistened by spraying water or covered with a damp cloth.
Wood floor paints: a large and complex choice
The modern construction market offers a large selection of paints and varnishes for wooden surfaces. When choosing paint for wood floors, it is important to consider:
- The type of wood used for flooring;
- Operational features of the premises (humidity, temperature conditions, conditions of use, etc.);
- The need for re-processing;
- Compatibility of paint and varnish coatings with the original decor.
Currently, all wood paints can be divided into two large groups: transparent (impregnations and varnishes) and opaque (oil, acrylic, alkyd, polyurethane, perchlorovinyl).
Transparent compounds
This group includes impregnating agents and varnishes on a transparent basis.
Acrylic impregnations
Such products are practical, reliable and have good absorption.
They provide high protection of wood from mold, rot and destruction, and provide for easy coloring of wood in natural shades.
Acrylic-based impregnating compositions are applied with a wide brush or roller, in some cases using a sprayer.
Oil impregnations
Oil-based impregnations are intended for effective and timely protection of wood from destruction due to prolonged exposure to increased moisture and mechanical loads.
They are quickly absorbed and provide resistance to abrasion and sudden changes in temperature conditions. When properly applied, wooden floors acquire an attractive natural shine.
Natural modified oil resins included in the impregnations provide the flooring base with a long service life under special conditions. For this reason, oil impregnations are often used for bathhouses.
Clear varnishes
Varnishes are designed to preserve the natural attractiveness of wood, as well as to protect against the negative effects of humidity and temperature changes.
Transparent varnishes give the wooden floor elasticity and mobility, but do not protect against mechanical damage and intense loads. Therefore, such compositions are used extremely rarely for bathhouses.
Opaque paints
This group includes opaque organic paints, which provide reliable protection of wood from rotting, destruction and exposure to pests and microorganisms.
Oily
The once popular type of paint is now largely giving way to more progressive coloring materials. Oil-based wood floor paint takes more than 24 hours to dry, yet provides a very durable surface finish. In addition, it is resistant to sudden changes in temperature and water.
Acrylic
A fairly popular type of wood paint, made on the basis of water, resins and coloring components.
Such products are distinguished by durability, practicality, frost resistance, inertness to high moisture and rotting.
In addition, acrylic is available in a wide color palette. Wood floor paint is applied with a soft roller or spray.
Alkyd
Painting compounds are intended for painting interior and exterior wooden surfaces. They provide reliable protection from the negative effects of external factors, temperature changes and high air humidity.
Alkyd floor paint comes in rich colors.
A significant drawback of the materials is the presence of a chemical odor that does not disappear even after drying. Therefore, it is not recommended to use a similar composition for painting floors in steam rooms.
Polyurethane
Expensive paints have good performance characteristics of resistance to mechanical abrasion, temperature changes, as well as durability and practicality.
Despite the obvious advantages, polyurethane floor paint has a major drawback.
The special solvents included in the composition make it quite toxic.
Perchlorovinyl
This type of floor paint is intended for painting interior and exterior surfaces.
It is resistant to the negative effects of various factors, easy to use, has a wide range of colors, and low cost.
Disadvantages include toxicity, fire hazard, susceptibility to cracking and fading.
According to many experts, the most effective option for painting materials for treating wooden floors is acrylic paints on an opaque base.
Performing hydro- and thermal insulation
When studying the issue and trying to understand how to properly pour a concrete floor in a bathhouse, you cannot ignore the laying of layers of insulation. Without proper protection, the floor will not last long and will not provide comfort. Protection is needed both inside the room itself from moisture and from the ground.
Laying roofing felt
Waterproofing is usually made of roofing felt, which is laid in two layers. The roofing material is rolled out over the entire area of the room, overlapping with a bend on the walls of 3-5 centimeters. Where the sheets adjoin the walls and overlap, they are coated with bitumen mastic.
The second layer of waterproofing is laid in the same way, slightly moving it tangent to the first. The bottom and walls of the pit must also be covered with two layers of waterproofing.
Installation of EPS
Before pouring a concrete floor in a bathhouse, you also need to take care of thermal insulation. It is best to choose extruded polystyrene foam, which comes in slabs 5 centimeters thick. The material is not afraid of moisture and demonstrates good mechanical strength and density. Along the perimeter, the slabs have tongue-and-groove projections, thanks to which you can easily and quickly create a continuous thermal insulation layer.
Work begins from the pit, then the walls are lined flush with the floor, then the slabs are mounted on the floor itself. Any gaps between the material are carefully filled with polyurethane foam to create a monolithic layer of thermal insulation.
How to do
The above does not exhaust the issues related to waterproofing. But a complete coverage of the topic is hardly possible. Let's look at a couple more questions that are often asked.
How to make a frame bath
If you are making a frame bathhouse with mineral wool insulation, then there is a high probability that you will use the same mineral wool to insulate the floor. And mineral wool differs from extruded polystyrene foam, which was mentioned above, in that it requires protection from moisture. Those, in fact, don’t like it .
In general, polystyrene foam should not be used in a bathhouse, but if it is in the floor and under a concrete screed, it is completely fireproof . But in a frame bathhouse, the floors are often made on joists and stilts.
The video below shows an option on how to cover a floor with slate sheets . But it's your choice. We are talking about waterproofing the floor in a frame bath.
So, it’s correct to make the layer at the very bottom from a one-sided waterproofing membrane, which releases water vapor from the insulation to the outside, but not to the inside. And on top the insulation is covered with a vapor barrier, which does not allow anything to pass through at all - neither steam nor water. These are two layers of waterproofing designed solely to preserve mineral wool .
Then you can do it as in the video - before laying the tiles, cover the subfloor (in essence, slate simply replaced the concrete screed) with mastic waterproofing for bathrooms, and then lay the tiles on the mastic. Why do we consider the use of mastic justified here? Because below is mineral wool.
Finishing screed
To properly fill the floor in a bathhouse with concrete, two screeds are made. After the rough and insulating layers, the finishing coating is poured. The solution is prepared in the same way as for a rough screed; the layer is made up to 10 centimeters, remembering the need for a floor slope towards the water drainage.
Reinforcement
To strengthen the screed, a reinforcing mesh of steel rods with a cross section of 5 millimeters is used. In some cases, it is possible to replace the steel mesh with fiberglass, which is explained by the absence of serious loads on the floor of the bathhouse. The screed is made 7-10 centimeters thick, the reinforcement frame should be located in the middle, and be filled with a layer of concrete of at least 3 centimeters on all sides.
Preparation of the solution
When choosing a brand of concrete for the foundation for a bathhouse (finishing layer of the floor), preference is given to M400 or M500. The proportions are the same as when preparing the mixture for rough filling. It is better to prepare the mixture in a concrete mixer.
You can use a mixture of cement and sand in a ratio of 1:3 for pouring, or ready-made dry mixtures created for use in rooms with high humidity levels.
Work progress
The installation of a concrete floor in a bathhouse (finishing layer) begins with a pit. First, a finishing screed is made on the bottom, then wooden formwork is created and the walls are poured at the level of the thermal insulation layer. Here, be sure to ensure that the mixture does not get inside the drainage pipe (it must be covered with a lid or a rag).
Next, the mixture must be distributed evenly over the entire surface of the floor in a layer up to 7 centimeters thick, lay out the reinforcing frame, and fill it with a solution of the required thickness (at least 3-4 centimeters).
Drying and removing imperfections
The final screed takes 2-3 days to dry, with the layer always being moistened during the process. If cracks begin to appear as the concrete dries, it is most likely due to the rapid evaporation of moisture. In this case, the coating can be repaired - carefully open the cracks, fill with a special repair composition of sand and cement mixed in equal volumes.
Briefly about the main thing
Products for protecting the floors and walls of the bathhouse must be resistant to increased load in relation to temperature and humidity with sudden changes.
The materials used are aimed at preventing damage to the foundations by fungus, mold, bacteria, and insects.
The most extreme conditions are in the steam room, so compounds that release toxins when heated to high limits should be excluded.
For floor treatment, in addition to the main selection criteria, the requirement for wear resistance is considered.
Regardless of the chosen protective agent and the number of layers applied, it is important to follow all recommendations from the manufacturer so that the result meets the stated characteristics.
Ratings 0
Finishing options for further use
When studying the question of how to make concrete floors in a bathhouse, every master thinks about further finishing. Concrete allows you to implement any option - leave the screed in its original form and arrange wooden pallets or cover the floor with any material.
Ceramic tiles (an ideal choice in terms of durability, environmental friendliness, and resistance to moisture), a wooden false floor, or simply wood flooring (a less durable option) are perfect for a bathhouse.
When planning to create concrete floors in a bathhouse with your own hands, you need to study the whole process very carefully. Subject to compliance with technology and established rules, as well as the selection of high-quality materials, it will be easy to create a durable and durable floor covering.
Video description
From the video, using the example of German products, you can learn about the use of wax for processing lining:
Processing lining in a steam room
The solution to how to treat the inside of a sauna steam room lies in its resistance to high temperatures and humidity. Environmental friendliness is also taken into account. Previously, wax and oils were used for this purpose: sunflower, hemp, linseed. Less commonly considered is rose, lavender or anise. All options create a barrier to dirt and moisture, protection from rotting.
Today, trading floors offer a variety of impregnations and coatings suitable for harsh operating conditions. So, in order to treat the lining in a steam room, the property of deep penetration and the formation of a wear-resistant film is important. Preference, as a rule, is given to water-soluble heat-resistant compounds with minimal water absorption and breathability.
Regarding technology, the procedure is similar to working with floors. First, an antiseptic with a fire retardant is applied, then oil, impregnation, varnish or paint. The manufacturer's recommendations regarding the number of layers and drying time must be followed.
Applying impregnation to the lining Source isu.org.ua