During a summer holiday on the seashore, lake or river, you can not only enjoy excellent weather, beautiful scenery, swim and sunbathe. For those who love making crafts from natural materials, there is an opportunity to collect original stones, polished with water, or shells (of a wide variety of shapes and shades) for creativity. We offer you diagrams, videos, methods and options for creating beautiful crafts using this technique. The finished applique of shells and stones turns out to be very impressive, unusual and durable.
- Rules for selecting materials in the form of shells and pebbles
- Materials that will be useful in creating applications
- Photo and video master classes for beginners
- Ideas on what you can do using shells in the form of panels
- Examples of ready-made crafts
Rules for selecting materials in the form of shells and pebbles
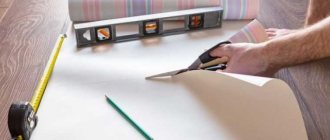
In order for the applique of shells and stones to be neat and durable, you should adhere to certain rules when choosing a material:
- After collecting shells and stones on the shore (sea, river), they are thoroughly washed under running water, then soaked in a solution of water and chlorine-containing product at a rate of 50:50 for 20-30 minutes.
- For severe dirt, you can use a brush.
- Then the shells are again rinsed well in running water and dried naturally, spread out in a thin layer on a straight surface.
- In the case where the remains of mollusks in shells are preserved, they should be immersed in boiling water for 3-6 minutes, then after cooling, remove the “excess” using tweezers or a thin knife. Next, the sink should also be treated with chlorine-containing products and rinsed at the end.
- For crafts, it is advisable to select undamaged shells, but if there are small sharp chips, they should be sanded with sandpaper or a sanding disc.
- This material will look much more presentable if it is varnished. If necessary, holes can be drilled in the sinks.
- For better adhesion to surfaces when fixing stones and shells, the joints should be degreased by treating with acetone or alcohol-containing liquids.
Stones can be flat or convex, round, oval or triangular. Depending on the shape, color and size of the material, you can choose a future composition for the applique of shells and pebbles. You can simulate a variety of subjects: figures of people, animals or trees, flowers, ornaments and patterns.
Materials that will be useful in creating applications
To create a picture from shells with your own hands, you will need the following materials:
- shells and stones;
- hot glue, or PVA;
- acetone or alcohol;
- twigs, sand;
- simple pencil or chalk;
- decorative elements - beads, beads;
- paints, brushes.
To create the base, you should choose a durable material - thick cardboard or plywood. Spectacular frames will not be superfluous. Feathers, glass balls, “running” eyes, bright or colorless varnish, gold or silver paint are suitable for decoration.
Photo and video master classes for beginners
Thanks to the video preview of the step-by-step master class, the creative process will go faster, there will be no questions, and the craft will definitely turn out beautiful and original.
https://youtu.be/0STyR66TrSI
?list=PL7EzngyO8RITgN7owx4vfC806HrNRVjuX
One of the easiest options for beginners is making a sea panel; let’s look at how to make it step by step:
- on a base made of thick cardboard or plywood, draw with a simple pencil (chalk) or translate the plot of the composition, for example, the shape of a heart, according to a chosen template;
- the selected and prepared material is laid out along the contour - the composition can be made up of shells or pebbles of different or identical sizes;
- all elements of the composition are fixed with glue, pressing tightly to the base and to each other;
- the gaps between shells and stones are filled with river sand, beads, beads;
- decorate the background with paints or putty with glue and the desired color (acrylic paint).
If desired, the application can be treated with varnish or 3D gel for a more impressive and beautiful look. The finished craft can be hung on the wall like a panel. To do this, make holes in the upper part of the base and thread a decorative rope. An applique placed on a support with a leg will also look great on a table, chest of drawers or bedside table.
Very popular applications, when the desired base shape is cut out of cardboard, and then, using the same technique described above, the craft is assembled and fixed with glue.
Panels in the form of a mermaid or seahorse will be relevant:
Panels made of seashells look impressive and rich on the design of photo frames, paintings or mirrors:
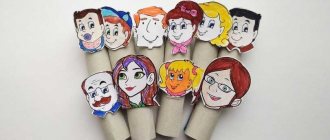
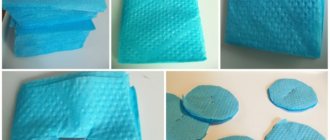
A very easy and simple shell applique for children is done like this:
- the simplest pattern or silhouette is selected (using a template, you can take something simple from coloring books);
- select the most suitable shells;
- if necessary, they can be painted in the desired colors;
- the “plot” of the future application is laid out on a thick colored cardboard base;
- All parts are fixed with glue, and the glue is allowed to dry.
Decorative elements are added, details are drawn, and plasticine is used to hold the elements together.
Kids can be asked to fix the shells to the base of the applique not with glue, but with plasticine. The work process is accelerated - there is no need to wait for the glue to set with the components and dry.
DIY decorative panel on a marine theme. Step-by-step master class with photos
Master class on creating a decorative panel on a marine theme using pebbles
Author: Anastasia Nikolaevna Guseva, teacher at GBOU School No. 2098 “multidisciplinary educational center” named after Hero of the Soviet Union L.M. Dovatora, Moscow
Description of material: I bring to your attention a master class on creating a decorative panel on a marine theme. The master class will be of interest to school-age children, educators, teachers and parents. Purpose: interior decoration, making souvenirs and gifts with your own hands. Goal: - Creating a panel on a marine theme. Objectives: - teach how to use natural materials to create unusual crafts, - develop aesthetic taste and creativity, - develop compositional skills, - develop the skill of harmonious use of colors, - continue to develop unconventional thinking. Material: - thick cardboard or wood scrap, or part of plywood, - glue or adhesive moment, - sea pebbles, - glass fragments ground by sea water, - acrylic gouache, brushes.
We start by creating the background. Let's paint our wooden base. We choose colors by analogy with a seascape - green (grass), blue (sky) and rich blue (sea).
Next, we select pebbles according to their shape - we will have houses, trees, sun.
Let's start painting the pebbles. The future “trees” become green, the “sun” becomes yellow, and the “houses” become white to begin with.
After drying out the “houses,” we paint the roofs red.
All that remains is to draw the outline of the roofs and draw the windows in black.
Now we distribute the “houses with trees” along the seashore and glue the stones on our future panel using instant glue or a glue gun. We glue “clouds” and “ship hulls” from white pebbles, and make “masts” from hewn fragments.
Photo of the finished work
Using hooks that we purchased at a hardware store, my son and I turned the finished panel into a key holder, since we had long needed it at the dacha.
I suggest you follow our example, and next time be sure to bring some pebbles from the sea. Thank you for your attention and good luck to you!
We recommend watching:
DIY sea panel. Master class with step-by-step photos How to make a wall-mounted key holder with your own hands, step by step with photos Do-it-yourself key holders. Templates. Master class with step-by-step photos Original key holders using the decoupage technique with your own hands. Master class with step-by-step photos
Similar articles:
DIY wall key holder
Ideas on what you can do using shells in the form of panels
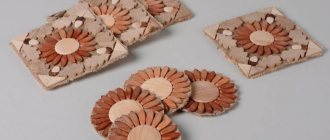
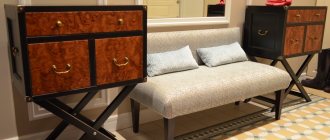
You can create unusual panels of shells or stones with your own hands on a cut (round) from a tree trunk; twigs and paints will perfectly complement the work.
Large numbers and initial letters of names look beautiful in the form of decorated applications; they are appropriate for celebrating birthdays and anniversaries.
A panel of stones and shells will look very expensive and noble if it is created on a thick canvas stretched on a stretcher. For this:
- acrylic paint (base) of the desired tone is applied to the canvas;
- after it dries, outline the template with the silhouettes of the composition in the right places;
- glue pebbles and shells in dense layers.
The panels are complemented with decor, varnish, and sparkles.
Unusual seashell decor ideas
Above we described the most popular ways to use shells in the interior. In fact, there are many more of them, and among them there are quite unusual options.
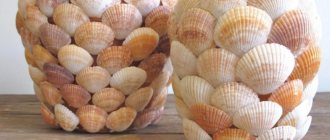
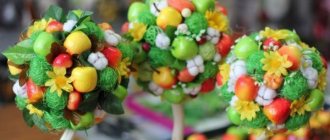
- Shell topiary is a round tree with a foam base, which is covered with shells, pearls and other decorative elements.
Today, topiary is a fashionable decoration for any interior, which is becoming increasingly popular.
- Panel - wood, plywood, cardboard, mesh or burlap are used as a background. Sometimes it is sprinkled with sand or laid out with pebbles. The shells are arranged in a chaotic manner or arranged in a certain shape.
This product can decorate any room.
- Decorative letters – stencils are cut out that can form a word or represent the first letters of the owners’ names. The finished letters are decorated with seashells using the same principle as regular photo frames.
If there are a lot of shells and they are very large, then you can make individual letters by gluing them together.
- Candles – take one or more voluminous shells. Secure the wick inside and fill it with wax. A stylish accessory for the bathroom or bedroom is ready.
Shells are almost ready-made miniature candlesticks that are just waiting to be supplemented with paraffin and wick.
- Garlands - shells are hung on a string in one or several rows or attached to a Christmas tree garland in place of light bulbs. The second option looks more festive and is useful for party decorations.
They will not only decorate the interior, but will also prevent sea gifts from turning into a pile of garbage.
- A dream catcher is a popular Indian amulet that wards off bad dreams and can be made in a nautical theme. It is somewhat complicated to perform, but the result looks very impressive.
Decorations in the form of beads, feathers and shells make the Dreamcatcher bright and elegant.
No matter how many shells you bring from vacation, there will always be a use for them in the interior. Working with such material is easy and interesting.
Exclusive decor with shells, made with your own hands, will remind you of the best moments of your holiday at sea all year round.
See also Bottle decor for rooms in different styles
Examples of ready-made crafts
A panel of shells or pebbles on the wall can be with any subjects, for example:
Compositions made from seashells and pebbles always turn out very beautiful and original. Creating such a durable and effective craft with your own hands brings satisfaction and joy to both children and adults. This “masterpiece” will definitely find a worthy place in decorating the interior of your home; it can be presented to a loved one as a gift.
Shell panels: themes, motifs and original ideas
Shells are an eternal source of inspiration . They themselves suggest the theme of the future panel of shells. An eternal classic is the image of the seabed. Placed on a complex sandy or pebble mosaic background, the shells can be complemented with a figurine of a dried crab or starfish. A few souvenir coins attached between the stones will breathe the spirit of wandering and an atmosphere of adventure into the picture. Wooden floats, hemp and a souvenir anchor will enhance the impression.
Snow-white shells and pearls, including artificial ones, on a blue background are a stylish accessory suitable for a Mediterranean or romantic interior. Pieces of lace or beads will help support the delicate theme. The background can be a collage of embossed wallpaper: such a panel will look great in the living room.
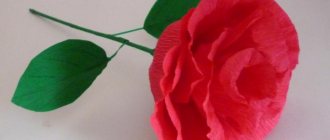
Flowers made from shells on the panel are a fascinating symbiosis of a marine theme with floral motifs. The shell valves are ready-made petals. Tropical pink and red elements can be attached unpainted, and the gifts of the rivers of the middle zone can be covered with bright enamel or nail polish.
An interesting find from handicrafts is pasta in the form of shells . This material for panels can be purchased at any grocery store. Children will be delighted by the offer to participate in a fun activity that parents usually forbid: playing with food. The shells are painted with gouache or watercolor and mounted on a cardboard base: a spectacular panel for the kitchen is ready.
Creating a panel of shells is not difficult. This material is unpretentious and can be easily attached to any base using glue, mastic or even salt dough. Shell accessories are inexpensive and stylish at the same time. However, it is also possible to characterize dozens of interior ideas that the masters of the Westwing shopping club regularly share with their subscribers. The interior guide proves year after year that stylish living can be affordable.