The bench can be called a universal piece of furniture. Over the decades, its form and purpose have not changed. The banquette is located in various rooms of the apartment - in the hallway, bedroom, living room. This piece of furniture is a practical pouf, which is comfortable to sit on and put on shoes.
In modern stores you can find a fairly wide selection of banquettes, which vary in shape and design. Each manufacturer makes this piece of furniture in such a way as to make it more comfortable and attractive. However, it is not always possible to find an option for your hallway. A DIY bench is a way to get a piece of furniture that fits perfectly into the interior of the room. The work won’t take much time, and it’s always nice to look at the fruits of your efforts.
The benefits of creating a banquette with your own hands
A popular piece of furniture can be constructed with your own hands, even if you have minimal skills in using carpentry tools. The basis of a banquette is most often a stool. This product has some decorative features and is very simple to make.
Advantages of DIY hallway furniture:
- You can independently choose the color design of the banquette in accordance with the interior style of the room. In addition, depending on the location of existing pieces of furniture, the dimensions of the product are selected. In addition, independent work opens up the possibility of making an original and attractive design.
- A pouf that you can make yourself will cost significantly less than a store-bought equivalent.
- In addition, the bench can be made from old pieces of furniture that have become unattractive over time. Stools and coffee tables are often chosen for this purpose.
- When creating useful furniture for your home, the creator who does the work will be morally satisfied.
Even a large banquette, which will be installed in a spacious hallway, will not require much time and effort to create. From the fabric chosen to create the bench, you need to cut a piece of the required size. In this case, you should remember about the allowance.
Before work begins, you should consider the design of the finished pouf and familiarize yourself with popular product options. It is important to decide on the size and color palette. Only a master with minimal carpentry skills can avoid mistakes.
First you should lay burlap or similar material, and then secure the foam rubber. The material is fixed using a stapler.
Types of banquettes
There are several common types of banquettes. They differ in shape and strength, but each has its own undeniable advantages that deserve attention:
- Forged. Similar products are chosen for installation in hallways in the Empire or Baroque style. The base of such a pouf is forged and twisted. Often such specimens do not have internal shelves or pull-out sections. Products made in this style are best installed in hallways.
- Wooden. These banquettes are distinguished by wide functionality. They often have many built-in drawers and shelves. Such products look great in the kitchen, hallway or guest room. The advantage of the models is that over time they only acquire a special charm.
- Banquettes with backrest. Such models are small sofas. They are very comfortable to sit on. Banquettes with a back should be decorated with small pillows.
- Collapsible. Such designs are quite functional. They are easy to disassemble and transport. Each element is fixed with bolts. Typically, such banquettes have a simple design. This is explained by the need for their quick disassembly.
- With boxes. In the hallway, such a copy will come in very handy. It's a great space saver. You can store seasonal clothes or shoes or care items in the drawers.
These banquettes are the most popular. If you create any of these models yourself, you can add your own original details to the pouf.
Materials
The soft seat is filled with foam rubber. To do this, cut a suitable piece from a large piece of material. To make a bench, it is enough to become familiar with the types of existing upholstery used for such work.
The fabric that will cover the pouf can be made of linen or cotton. Textile models are quite easy to care for. This upholstery is often chosen due to the large selection of material shades.
Other materials for cladding:
- Leather. This material is quite expensive, and may not suit every interior style. However, such a pouf will look quite aesthetically pleasing. The disadvantages of this material include the high price and the need for careful care.
- Faux leather. This option is similar to the previous one, but costs much less. The material looks as elegant as genuine leather. However, such a banquette will not last so long.
Forged products or poufs with a steel frame should be made only with full confidence in your skills in working with metal. The easiest way to make a banquette is from wood. The pouf is usually filled with foam rubber. This material is durable and practical. It is able to hold its shape for a long time and is quite elastic. To make the legs of the pouf more attractive, you should decorate them with hand carvings.
To construct a banquette for the hallway, you will need to prepare the following materials:
- For a pouf that will have legs, you should find wooden beams of different sections - 30x40 and 30x50 mm. You can find and use old legs that used to support a stool.
- Plywood sheets.
- Various fasteners - staples, screws.
- Paint or stain.
- Thick foam.
- The fabric with which the bench will be covered.
If desired, you can sew a cover to cover the pouf. This will make caring for it much easier. The fabric for the pouf should look organically with the textiles of the hallway. When constructing a soft seat, in addition to foam rubber, you should use padding polyester. If you are creating a bench with legs, you need to attach 4 wooden planks to its bottom so that they protrude 2 cm beyond the edges of the product.
Master class on making your own banquettes that will look good in the hallway
The banquette is a popular piece of furniture in the hallway. With its help it is much more convenient to put on shoes, undress and even store things. After all, the designs of such poufs amaze with their diversity.
They can be equipped with bookcases, shelves, seats, hangers and other elements.
In addition, the banquette is a beautiful object that can decorate the interior not only of the hallway, but also of the living room, kitchen and even bedroom . They can be purchased at the store or made with your own hands from various tools.
Peculiarities
The main advantages of making a banquette yourself include::
- The ability to independently choose the shape, color and type of construction of a furniture item.
- Use of natural and environmentally friendly materials
- Opportunity to save your own savings. Making furniture yourself is much cheaper than buying ready-made items.
According to their design features, banquettes are divided into:
- Products with backs. Such ergonomic sofas will not only decorate the interior of the room, but will also delight you with high comfort in use. They can be decorated with small pillows or carvings.
- Collapsible structures. They are distinguished by functionality and practicality. Their elements are secured with bolts, so they can be quickly disassembled if necessary. These models do not have decorative elements.
- With boxes. They will save space and you can store personal items in them.
Of what?
You can make a banquette from different materials:
- Forged metal. This option is suitable for Baroque, Renaissance or Empire styles. Forged products can be decorated with leaves and flowers, vines, and numerous curls of different shapes. They will give the product openwork, airiness and exclusivity. They do not have drawers, additional shelves and cabinets. It is appropriate to install them in hallways or on verandas. Making forged furniture yourself is quite difficult. This requires special equipment, materials and the ability to work with a welding machine.
- Tree. This is the most common option. Such furniture can be functional and equipped with drawers, shelves, and cabinets. It can be placed in the hallway, kitchen or living room;
also used to make a soft bench :
- Textile. It can be silk, cotton, linen. Such fabrics are easy to care for, have a wide color palette and are environmentally friendly.
- Leather. This material is suitable for upholstering furniture in classic interiors. But genuine leather is difficult to care for and has a high cost. Nevertheless, banquettes with such upholstery look noble, elegant and luxurious.
- Faux leather. Its advantages include affordable cost, ease of maintenance and aesthetic appearance.
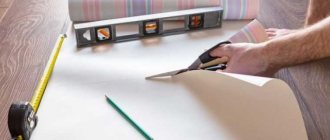
Scheme and drawing for the hallway
Before you start making a bench, you need to think about its design, dimensions and materials. Take into account the size and design of the hallway in which the furniture will be located. After this, a drawing of the future piece of furniture is created. You can do it in different ways:
- by hand using a pencil and a piece of paper;
- using special computer programs;
- using a ready-made drawing found on the Internet.
Each individual option has its own advantages.
Tools and materials
The easiest way is to make a banquette with your own hands from wood and textiles. Foam rubber is used as a filler .
Materials you will need:
- a wooden beam for making legs measuring 30 by 40 cm or 30 by 50 cm (instead, you can use restored old legs from a table or stool);
- plywood;
- fastening systems;
- paints and varnishes;
- stain;
- antiseptics;
- foam;
- upholstery fabric;
- buttons;
- fabric scrap for the invisible side of the product.
The tools you will need to prepare are:
- drill and screwdriver;
- screwdrivers;
- hammer;
- stapler;
- sandpaper;
- level;
- scissors;
- roulette;
- pencil;
- chalk and a sewing machine (for making a cover).
How to do it at home?
The process of making a bench with your own hands is as follows:
- First, the legs are made from timber.
They will be attached to the frame of the product with screws and corners. If possible, it is better to process the timber with a hand router. Then it will be possible to make original protrusions and the products will turn out to be more exclusive. It is recommended to paint the timber with stain or paint. - If you have finished legs from an old table, they need to be restored. To do this, the surface of the products is cleaned with sandpaper and painted with stain or paints and varnishes.
- Now we take plywood of the required size and shape and cut out foam rubber along its contour. It should be a few centimeters larger.
- The foam rubber is glued to the plywood with glue, and, armed with a tape measure and chalk, we begin marking the lines where the decorative buttons will be located.
- Next, we cut out the upholstery (leather, cotton, linen) according to the shape of the seat. In this case, it is necessary to reserve several centimeters of fabric on each side. Carefully attach the fabric to the seat and shoot it with a furniture stapler.
- Now we move on to decorating the product with buttons.
We have looked at the simplest option for making a bench, which even a beginner in carpentry can handle. This model is distinguished by quick assembly times, aesthetic appearance, and ease of use.
Master class on decorating
As for the finishing, it all depends on the materials used to make the bench. Metal frames are treated with anti-corrosion compounds, protected and covered with varnish or paint .
Wooden products are also treated with antiseptics, and then covered with varnish or paint in several layers.
As for the upholstery of the product, the color of the textiles must be chosen according to the overall interior of the room. When using buttons as decoration, they are matched to the color of the upholstery material . Their number depends on personal preference.
To make the bench more practical, it can be upgraded with a removable cover. This will make it much more convenient for you to maintain a clean and tidy appearance of the furniture item.
Photo
The house begins with the hallway. And its main decoration will be this banquette:
You can watch the detailed process of making a bench with a carriage screed in the following video:
Conclusion
In conclusion, it is worth noting that in this article we looked at how you can make a banquette with your own hands, familiarized yourself with their design features and materials of manufacture. Now you will need to make a drawing of the future product, stock up on consumables and necessary tools, and you can safely get to work.
Tools
To create a high-quality and durable bench, you will need to use the following tools:
- Screwdriver and drill - these tools will be used to make various holes for fasteners.
- A hammer and a screwdriver are indispensable assistants for every carpenter.
- Construction stapler.
- Level – to determine the vertical position of the bench legs.
- Sandpaper - it should be of different hardness.
- Manual milling - in the case when the base of the bench is made of beams.
- Sewing machine – for sewing upholstery and covers. For such work you will also need scissors and a tape measure.
- Chalk.
First you need to cut out the seat. This is necessary because the creation of the remaining structural elements depends on its size. They are subsequently adjusted to fit the seat. In the absence of sufficient experience in creating pieces of furniture, it is necessary to divide all the work over several days. This way every detail will be done with due attention.
What materials and tools are needed?
To assemble the bench, you need to select suitable materials. The easiest way is to make a wooden product at home. Creating a metal frame will require certain skills. In general, the following materials will be required:
Note! For the upholstered part of the furniture, fabric and foam padding are used.
Tools you will need:
Important! To cover a wooden surface you will need varnish. You can use paint.
Instructions for making a banquette
Once the seat is completed, you can proceed to the remaining steps. These include making legs or finishing them, marking and cutting foam rubber and plywood, assembling and finishing the product.
Leg finishing
If there are no ready-made legs, they must be built from prepared bars. However, if you use existing parts, they can simply be restored. The surface must be cleaned. Afterwards it is covered with stain or varnish.
The legs will be attached to the seat with self-tapping screws. If you have your own tool, you can process the timber with a hand mill. Thanks to this, you can get the original protrusions of the product. This DIY banquette for the hallway turns out to be quite interesting.
Foam rubber and plywood
It is necessary to prepare foam rubber of the required sizes. The prepared piece of material should protrude beyond the edges of the plywood for the seat by 3 cm on all sides. Dimensions can be selected independently.
Now you can glue the foam rubber to the plywood. It is better to apply glue closer to the edges. Using a tape measure and chalk, markings are made, along which the buttons will then be sewn. Several holes should be made in the plywood. They should be the same distance from each other. It is better not to touch the foam rubber when performing such work.
Product assembly
Then you should cut the seat of the desired shape from the upholstery fabric. Upholstery sizes are carefully selected in advance. It is then adjusted under the seat. Leave a margin of 2-3 cm on each side. Then the fabric is carefully wrapped and secured with a stapler.
Now you can start installing the buttons. Using a needle, the thread is threaded first into the button, and then into the hole located in the plywood. The rough finish located at the bottom of the seat is covered with textile fabric. The cut piece must be sewn along the edge of the lower part.
If you are using legs from another product, you should choose where to place them, and secure their bases with self-tapping screws. The legs, made of timber, are attached to the seat with screws and corners.
Do-it-yourself furniture upholstery
The method described above allows you to obtain a product with a smooth surface. But if on two- or three-seat models this option is quite presentable, then a single-seat banquette looks boring. A pouf with a carriage tie looks much more interesting.
To do this, you will need the same tools, including a hand cutter, softer and thinner fabric, since it needs to be folded, and large buttons covered with the same fabric.
This product looks very decorative and is quite simple to make.
The next master class will teach you how to sheathe a banquette with your own hands using the carriage screed technique:
Decorating a banquette
Buttons should be selected in accordance with the shade of the upholstery of the bench seat. Their number depends on personal desires. The bench can be diversified with a decorative cover. It is usually performed in the same style as the upholstery. This kind of work is not difficult. You just need to know how to operate a sewing machine.
If you do not have cutting skills, you should choose a ready-made pattern. You can learn how to create it using certain master classes. Calculate in advance what capacity the banquette will have. For one person an area of 45x50 cm is required.
Elements of the bench are cut out using a jigsaw. Their edges should be sanded. When installing a pouf in an Empire style hallway, a carriage screed can be made. Such products look presentable and original.
It is important to determine the size of the hallway and the dimensions of the banquette to be made. In the case of a large number of parts, you should first make a pattern, and then start cutting the plywood.
Tools and materials
Before you begin making an attractive and practical bench, the home craftsman will need to prepare the necessary tools and materials. It is possible to make a good product from various materials. The bench can be wooden, forged or even plastic. Wood is the most pliable to work with, so it is best for inexperienced craftsmen to turn to this option.
It also makes sense to use MDF, chipboard or plywood sheets. If the legs of the banquette are planned to be made of natural wood, then you will need to prepare the bars.
The base for the seat is in most cases made of foam rubber, and then covered with leather, eco-leather, or synthetic material.
Let's take a closer look at exactly what materials will need to be prepared to assemble the banquette into the hallway:
As for the tools, there is no need to look for professional devices that are very expensive. All you have to do is prepare:
It is recommended to immediately place all the necessary items in one place, next to the work. This will make it much more convenient and easier to make a banquette.
conclusions
Making a banquette for the hallway with your own hands is quite simple if you know the sequence of work and accurately determine the shape of the product. Materials are selected based on the style of the room and the intended purpose of the banquette. Don't rush while working. This will help avoid serious mistakes. As a result, you can get a beautiful and practical structure. Such furniture is not only useful for guests to relax, but can also serve as a storage place for various small items. With the right choice of banquette style, it becomes a decoration for the hallway.
Recommended Posts
Wardrobe wardrobe in the hallway + photo
Hallway interior for a narrow corridor + photo
Wallpaper in the hallway under the doors
Decorating the walls in the hallway with decorative plaster
Sliding wardrobe in the hallway
DIY plasterboard arch