From cardboard
Anyone can make such a fake, even a child.
Action plan:
- Cut 2 rectangles, in one of which make a rectangular hole in the center. Its size will be smaller than the photo size.
- Attach the sides and bottom sides of the resulting elements together with glue.
- Cut out a support leg from thick paper and glue it to the back of the photo frame.
- If you plan to hang it on the wall, then you need to secure a loop of rope.
- All that remains is to insert the photo into the upper unglued part of the homemade frame.
Making your own photo frames from cardboard: how to create it easily and simply
You can make a variety of photo frames with your own hands from cardboard. This will be a stronger and more durable option, unlike paper.
What you need to find for work
We will look at a standard method that anyone can do. It is better to take very thick cardboard, in this case the frame will last much longer. Accordingly, you need scissors that can easily cut through such cardboard, Moment glue or hot glue with a hot glue gun.
In addition, you need a loop for hanging or an additional piece of cardboard for the leg.
How to make your own photo frame from cardboard
From cardboard you need to cut out a shape for the photo, taking into account its size. Nobody requires perfect geometry; in fact, the frame can be anything.
In addition to the base, you need to cut out additional strips that will add thickness to the future product, and also attach a leg (or loop).
We do everything as in the photo PHOTO: novamett.ru
If everything is done correctly, then inside there will be an ideal place for your photo PHOTO: novamett.ru
After the frame is ready, we begin to decorate it.
Decorating a photo frame
If the question arises, how to make a photo frame with your own hands from cardboard, then there are a lot of answers to it.
An example of eggshell decor PHOTO: novamett.ru
In addition, sequins, coins, even pieces of unnecessary puzzles will work great as decoration. Cardboard as a dense base is a wide area of activity for decoration. You can cover it with paper, paint it, decorate it with textiles using felt, lace, satin, and ribbons.
Cardboard allows you to take different materials for decoration PHOTO: dekormyhome.ru
From the branches
This is the most budget-friendly way to decorate an old frame with your own hands. The material for its creation can be easily collected by simply leaving the house.
In addition to thin branches you will need:
- cardboard;
- glue;
- varnish;
- decorative elements (flowers, beads, ribbons).
We make a beautiful frame at home using the following procedure:
- Cut out a rectangular base from dark cardboard.
- Clean the twigs, removing excess bark, and cut them to fit the sides of the frame to the same length.
- Secure the branches by intertwining their ends in the corners.
- All that remains is to glue the decor and open the photo frame with decorative varnish.
We make wooden frames with our own hands for photos or paintings
Make beautiful frames with your own hands. You can buy them in stores, but store-bought frames lack personality and style. Here we will show you the basics of making a frame at low cost.
Making frames with your own hands
Step 1. Wood
You need to start making a frame by choosing the right material. It is better to take a tongue and groove board (from the right edge). You can also cut the groove yourself. In stores you can find finishing boards that can also be used for framing.
I used leftover lumber that is easy to find at construction sites or in my yard.
Wooden boards or slats should be 25 mm or more wide. I took 25x75mm boards, cut a groove and rounded them using a router.
Step 2: Tools
The tools on the left are essential: miter saw, wood glue, 90 and 45 degree combination square, pencil, tension straps.
Tools on the right are optional: drill, acrylic knife, sandpaper. They will help, but you can do without them.
Step 3. Cutting the boards
First, cut the end of the board at a 45 degree angle. Cut at a 45 degree angle on one end, making a 135 degree angle on the left side. The top of the corner will be on the inside of the frame. (See photos).
Measure the length of the inside of the frame, make a mark and cut at a 45 degree angle.
Step 4: Continue cutting
After cutting the first side, you will be left with a 45 degree angle at the end of the board. You should cut the end at a 135 degree angle.
Holding the board well in place will give an accurate cut.
Now it's time to assemble your frame. Place all sides together and check if the joint is tight at the corners.
Gaps in corners may appear:
1. If one of the sides is longer than the opposite. To fix this, trim the long side.
2. You have not adjusted the 45 degree angle accurately. Cut some wood.
If the gaps are large, you need to trim them again. If they are small, you can cover them with putty.
Dry all parts of the frame, put them together, and tighten them with a tightening strap.
If all sides fit tightly together, you can glue.
Apply a sufficient amount of glue to both sides of the corner. Glue all sides together.
Then tighten the strap around the perimeter of the frame. Remove excess glue with a damp sponge.
Once the glue is dry, start sanding. First fill the cracks, then sand.
Step 8. Laser engraving (if
laser )
I don't have a laser, but they lent me one and I made the inscription.
Engraving will add personality and creativity to the frame.
Step 9: Photo Mount
You will need to secure your entire structure of glass, photography and back wall. You can buy fastenings in the store. But I made it with my own hands from pieces of wood and secured it with screws.
Step 10. Coloring
After sanding, paint the frame (optional). Or varnish. I prefer spray varnish, it dries quickly and looks great.
I took plexiglass for my frame. It's cheap, safe and you can cut it yourself. You can buy real glass in a store, where they will cut it to size for you.
You can cut plexiglass in different ways, I cut it with an acrylic knife.
Let's make a sandwich: glass on top, a picture in the middle and something underneath the picture.
You can put cardboard, thick paper, or hardboard on the back.
Step 13. Finished frame
Now my frame is ready. Incomparable to store bought. You can hang it on the wall or give it as a gift.
Source: doit-yourself.ru
From shells
Seashells can be found in every family's arsenal. Now you can find a use for them too, namely to make a beautiful photo frame in a marine style out of them. And if you are looking for a way to decorate an old frame with your own hands, then shells will come in handy.
As a base, you can take a regular frame made of wood or plastic. You need to select whole shells, wash them thoroughly, dry them and stick them in any order. At the end of the work, open the fake with varnish.
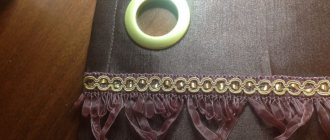
Skirting frame
If after a successful repair you have a few extra meters of baseboard left, then use it wisely. We will tell you how to make a frame from a plinth with your own hands.
There's really nothing complicated about it. The principle of all work is the same as when making a cardboard photo frame.
The only difference will be that the frame is fixed not with glue, but with a stapler or nails. Such a frame will look unusual, but beautiful.
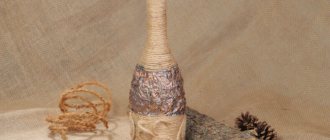
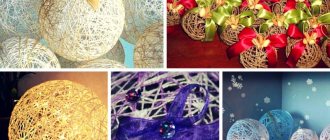
From yarn
A photo of a homemade yarn frame is best suited for a family or child.
Necessary materials:
- knitting threads of different shades – 80 g;
- 2 cardboard bases;
- decor: beads, buttons, artificial flowers.
Procedure:
- Wrap one and the other base tightly with yarn, make 2 passes each so that there are no voids.
- Cover the photo with two frames and go through the threads again so that the photo does not fall out.
- During the winding process, you can decorate the product by stringing beads and buttons on threads. The finished product can be decorated with artificial flowers.
From the test
A durable and original photo frame can be made from puff pastry.
Materials:
- flour – 1 glass;
- water – 100 ml;
- food coloring;
- sunflower oil – 50 ml.
Procedure:
- Knead the dough from the above ingredients.
- Leave it for 2 hours.
- Make a frame and place it in a preheated oven, bake for 2 hours, turning over from time to time.
- At the end, the product can be cut out with paints after cooling, and at the end it can be opened with varnish.
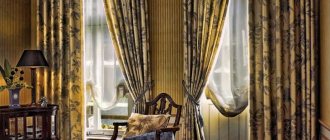
From the window frame
Using a regular old window frame, you can create an original panel in the shabby chic style. Moreover, a frame with old paint and chips will do. They will become the “highlight” of the future masterpiece.
Process of creation:
- Disassemble the frame, install one large picture or several small ones (it all depends on the number of windows).
- Glue the photo onto cardboard in advance. Black and white photos will look best.
- Assemble the finished product and place it on the shelf.
DIY oval frame
Today I want to tell and show how to make an OVAL FRAME with your own hands at home. I needed it to decorate the embroidery that was embroidered for me, namely for my shabby-style bedroom)) Naturally, I couldn’t buy it in the store, and framing workshops in Yaroslavl don’t produce such frames. An Internet search showed that prices for similar frames of the size I needed start from 5-6 thousand rubles. I didn’t find any master classes to help either, so I had to rack my brains, and I just want to show what came out of it.
I really hope that the information will be useful.
This is the first part of the master class on making the frame itself.
We will decorate it in another story))
1. 1 sheet of polystyrene. Sold in construction stores as insulation. 3 cm thick. It looks like dense foam with a fine-grained structure. A sheet measuring 60*120 costs about 100 rubles.
2. Dummy knife (stationery knife)
3. Manual small file or man’s hands and sawing unit))
4. A sheet of paper for the layout.
5. Large skin.
6. Ruler, pencil, pins.
We have embroidery in custom sizes. So as not to bother with drawings, I simply take a suitable dish, place it in the middle and take measurements.
From cereals
In addition to cereals, the frame can be decorated with coffee beans.
Materials:
- thick cardboard;
- colored paper;
- glue;
- paints;
- any cereal.
Procedure:
- Prepare a cardboard base and cover it with colored paper.
- Coat the frame with glue (the layer should be thick) and sprinkle cereal on top.
- In order for the composition to last longer, it must be coated with decorative varnish.
From clothespins
Using this method, you can get a fun sun frame where the pictures will be arranged in a circle.
Procedure:
- Form a circle from thick paper and cut out the core.
- Secure the clothespins with glue along the entire length of the circle so that the opening side of each of them is directed upward.
- It is best to use clothespins of different shades to make the fake colorful and original.
Paper photo frame
Do you have a desire to do handicrafts, but no ideas on how to materialize your dream? Take a look around. There will probably be remnants of wallpaper from renovations in the house. You can use them to build a magnificent three-dimensional frame for a photo.
Do you know the art of origami? Then you can make more complex versions of products that are assembled from several sections. It is worth involving children in such an exciting activity. Give them a home workshop on how to create a photo frame. For origami, you can take the most inconspicuous paper and subsequently decorate it at your discretion.
Photo frame – origami
Is there nothing in the house but newspapers? But they, too, may well be put into use. By the way, this material is the easiest way to create unusual photo frames. You can work with newspapers using a variety of techniques. For example, they can be rolled into tubes, from which frames for photographs are then woven.
Photo frame made from newspaper tubes
From children's hairpins
If there are girls in the family, then you probably have collected a considerable amount of decorative hairpins and elastic bands. Most often they are decorated with various flowers, twigs, and berries. You can safely cut them off from the elastic bands and paste them over the entire frame in a circle.
Alternatively, you can attach the decor only to the upper part of the product, leaving the lower part untouched. If the flowers are white, then the part of the frame free from decor can be coated with silver paint.
Cardboard photo frame: tools
Creating beautiful frames without the appropriate equipment is problematic. Therefore, collect a minimum set of tools. It should include:
large scissors; stationery knife; PVA glue; simple pencil; tape; small scissors; fine-grained sandpaper; ruler.
Note: it is advisable to get a cutting mat; it makes it much easier to mark out the parts of the future frame.
If you are not happy with the color of the cardboard for the frame, purchase a can of spray paint. To decorate photo frames, use shells, pebbles, glass, rhinestones, beads, etc.
In addition to the basic tools, you will need: a paint brush with soft bristles, a spray bottle, water and tongs. They will be needed to prepare the material for use.
From books and newspapers
To create another masterpiece of handicraft, you need the same base of cardboard or wood, as well as old newspapers, books or glossy magazines. All you need to do is just cover the newspaper into pieces of different sizes and then cover the frame with them. You can make a whole pattern using a large geographical map.
All the ideas presented for what you can make a frame from are simple and budget-friendly. You just need to show a little imagination to get a bright, stylish and original fake that serves not only a decorative role. After all, photographs are a memory of happy days and important events.