Materials
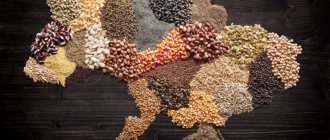
Papier-mâché is paper, either regular colored paper (sometimes newspaper is used), which is torn or cut into pieces and mixed with an adhesive. You can also use toilet paper for the base. It has the excellent property of dissolving uniformly with both water and glue.
Subtleties of material manufacturing
Papier-mâché is a method of making crafts from paper and glue. There are several paper craft techniques, the essence of which boils down to the fact that different options for gluing paper are used to enhance strength.
- The first method is to glue small pieces of paper in several layers onto the base. This technology for making the base for crafts is called maching, or multi-layer papier-mâché.
- The 2nd method involves breaking the paper into separate fibers, mixing it with glue and working with a plastic, easily moldable mixture.
- The 3rd method is that the paper is crumpled, treated with paste and used in this form for work.
To make papier-mâché from toilet paper and PVA, the 2nd method is used. The resulting mass is:
- plastic;
- easy to process;
- inexpensive;
- durable;
- easy.
Christmas decorations and masks are usually made from toilet paper-based papier-mâché. If you add gouache to a mass of such material, the basis for further creativity will be colored.
Adhesive composition
Used as an adhesive
- PVA glue. This is the most suitable ingredient, as it quickly mixes with strips or pieces of paper and is suitable for simple crafts made by preschoolers or younger schoolchildren.
- Wallpaper glue. It is easy to brew and easy to mix with paper.
- Paste. Store-bought or hand-made, I use starch boiled in boiling water.
Structural strength
To increase the strength of the structure, other ingredients are added. This can be plaster or putty, pre-diluted with water, the consistency of thick sour cream.
Any detergent or a small amount of vegetable oil will add plasticity.
In fact, any master has his own tricks, which he acquired through experience or experimentation. During the creation process, he modifies the recipe and improves the skill.
Manufacturing technology
There are several required steps in order to begin creating your masterpiece. This is a small instruction, consisting of the basics, for beginners to work with papier-mâché crafts.
What is interesting and useful about papier-mâché?
- Of course, by doing papier-mâché, the baby trains his fingers and develops their fine motor skills.
- When creating his masterpiece, the child fantasizes, comes up with shapes and colors, and develops aesthetic taste.
- While doing papier-mâché, a child can play around with glue and get a lot of pleasure from it.
- Crafts made from papier-mâché are unusual and can be interesting gifts for loved ones.
- Joint creativity brings family members very close, which is very important for a little needleworker.
Craft design
Once the form has completely hardened, you can begin painting. Here you can let your imagination run wild and decorate it in all the colors you want, subtly drawing out all the details. Acrylic paint is best suited for decoration. It is sold in stores, has good stability, does not crumble or fade.
At the end, you can coat the finished product with varnish, transparent or with glitter, matte or glossy - at the choice of the creator.
Description of crafts using the mashing technique
- Pre-cut strips of newspaper, soft toilet paper or plain paper of any color.
- For the frame, you can take a simple plate/cup of any desired size. Do not forget that the surface of the mold must be greased with oil to make the craft easier to remove.
- The first layer requires care. Moisten the paper with water and carefully apply it to the mold. Do this until the entire plate or cup is covered with a thin layer of prepared paper.
- Cover the first layer with PVA glue, wallpaper glue or homemade paste.
- Continue layering the paper pieces and coating them with glue. The thickness should be about 4-5 mm.
- Leave the workpiece to dry for a day. Once cured, carefully remove from the mold.
- All you have to do is remove the protruding edges and sand the inside and outside of the craft with fine-grained sandpaper.
- Paint the craft with gouache or acrylic paint. Leave until completely dry and coat with varnish.
DIY papier-mâché dishes are ready to use!
How to make your own papier-mâché plate
Beginning handicrafts are advised to start this hobby by making a plate. Try to involve your children in this activity. This will make the process of making papier-mâché crafts of any complexity more exciting and fun.
First you need to cut paper (white) or newspaper into small strips. Next, prepare the base for the craft - a plate. In a separate bowl, mix water and PVA glue.
Grease the plate with butter or cream. This will make the paper come off easier from the base. Next, dip the cut pieces in water and glue them on. First, lay out one layer. It must be thoroughly coated with glue and the next one placed on it. The process should be repeated until the layer thickness reaches three to five millimeters.
Once the workpiece reaches the required thickness, it is left to dry at room temperature. After complete drying, carefully remove the workpiece from the base.
To make the surface beautiful and smooth, treat it with sandpaper and apply a layer of putty on top.
Next, you can begin decorating the finished craft. You can paint the plate with thick colors (for greater saturation), attach decorations, or draw a picture.
Read here: Felt crafts: a master class on creation techniques. Schemes, templates and patterns of beautiful crafts (90 photos)
Such plates will perfectly decorate the interior of an apartment, house, or area in a photo studio. Show your imagination and be inspired by photos of papier-mâché crafts on the Internet. Creating a product from papier-mâché is inexpensive, but the fake will look interesting.
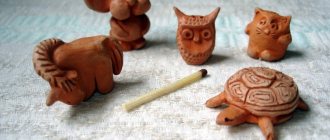
Craft Kolobok
This is the easiest craft for children. You can just play with it, you can study fairy tales or use it in a puppet theater.
It can be made by analogy with a plate or mug, but for the initial frame you will need an inflatable ball.
Manufacturing stages
- Inflate a small balloon.
- Tie it with a thread so that it holds the ball tightly tied.
- Moisten the paper cut into pieces with water and place it on the ball in layers.
- After the product has completely dried, untie the thread on the ball and remove it from the resulting Kolobok.
- Varnish and decorate. Draw a funny face - eyebrows, eyes, nose and smile.
- You can use wire or thick thread for the arms and legs of the toy.
Note!
- DIY paper origami craft step by step: ready-made diagrams for creating beautiful origami at home (90 photo ideas)
Crafts from paper and glue for children: step-by-step instructions for creating interesting crafts with your own hands (90 photo ideas)
Children's paper crafts: 110 photos of the best ideas for creating unusual crafts with your own hands. Master class + step-by-step instructions
Techniques used
Having chosen the materials that will be used as raw materials, you need to choose a work technique . There are three ways in total:
- layer-by-layer method;
- hot method;
- industrial process.
The methods differ; only the first two are used at home, although industrial production involves the same manufacturing principles.
Layer method
To gradually cover the form with paper, a suitable object is selected. It is better that it be clay or plaster. The mold is greased with oil or wrapped in film. Paper pre-cut into small strips is overlapped onto it. To prevent the first layer from sticking tightly to the mold, you need to wet the newspaper and only then apply glue from the outside. The process is then repeated until a rigid structure is obtained. There are many layers involved in this. Ideally, there should be about 100 of them, but you can’t glue them all at once.
The strips must be carefully applied with a sticky base on both sides and dried after applying every 4 layers. The latter are best made from white paper. This is necessary so that the newspaper pattern does not show through the paint of the finished product.
At the end, you need to apply undiluted PVA glue to the craft, dry it very thoroughly, and then carefully remove it from the mold. To be able to carefully remove the shell and not damage it, it is better for beginners to choose simple objects - plates, balls or vases. More complex designs can be used as experience is gained.
The shell, cut with a stationery knife, is glued together with tape, which is masked with new pieces of newspaper. After this, the product can be painted. If possible, it should also be varnished to make it moisture-resistant and durable.
The method is lengthy and requires painstaking work by a master, but the result is usually very successful.
Hot way
The hot method gives the material a resemblance to plasticine . This is how you can make papier-mâché at home using this method.
The newspaper is torn into small pieces, folded into a container and kept in hot water for 10 hours. After this time, the wet mass is heated until the fibers are completely destroyed, and then the liquid component is drained through a sieve. The remaining paper is beaten with a mixer until smooth, and glue is added at the end to give it plasticity. Almost finished material, being wrapped in polyethylene, should spend several hours in a cool place.
With this method, there is no need for a long process of gradually gluing paper pieces: you can simply stick a layer of the required thickness over the form and wait until it dries completely.
After this, the shell is also cut, glued again and subjected to artistic processing.
This is an easy and fairly quick method, but you have to wait until the paper gets wet.
Industrial production
Products manufactured on an industrial scale are usually intended for artistic painting. The principles of manufacturing in industrial and home conditions are generally the same, but there is a difference between them. For example, in industry there is a stage of pressing material, which is difficult to perform without special equipment. In general, the process looks like this.
Making dolls
A doll for children or a masterpiece doll for an exhibition? With a little paper and glue in your arsenal, you can make both options. Making a doll is suitable for both children and adults. This will require more time and components, but the result will definitely be worth the time and effort.
Arms and legs can be made movable. You can sew a suit or dress for the doll. Decorate the face so that the doll looks like a real little person.
Manufacturing instructions
You will need: plasticine, paper, glue, water, wire, acrylic paint and thread of medium thickness.
- Make an egg shape from plasticine, this will be the frame for the finished product. Cover with a thin layer of dampened paper and glue. Give time to harden. Cut the already dried form and remove the plasticine. Carefully cover the fragile shape with layers of paper and leave to dry. For a more natural and realistic image of the doll, make a relief of the nose, eyes and lips.
- For the body you need to take a wire. Give it the shape of a human body. It is desirable that there is a lot of wire and that it is thick enough to hold its shape well. When the frame is assembled, paper coated with glue is applied to it in the same way. The wire parts remain in the doll and cannot be removed.
- The head is attached to the body with PVA glue or super glue for good fixation.
- After complete drying, coat the product with acrylic paint and allow time to dry. Draw the necessary details - mouth, nose, lips and eyebrows. Varnish.
- For hair, floss, cotton or wool thread is used, the hair is attached using the same glue.
- You can buy an outfit for a doll in the toy department or sew it yourself.
Papier-mâché is an excellent pliable material for creating toys and tableware for beginners. This craft technique is suitable for even the youngest children.
A large number of adults around the world are fond of creating these crafts, and such creativity can often turn into a hobby, decorating not only the apartment and interior, but also exhibition studios.
I make papier-mâché with my own hands from toilet paper
In this article we will talk about how, at home, I made a lot of papier-mâché from absolutely incredible ingredients at hand. It's very simple and doesn't take long from the moment the toilet paper softens. But first things first.
I came across products made from a mass called papier-mâché by accident when I was looking for information about modeling on websites.
I admit, I didn’t know that by mixing such unexpected ingredients you could get a moldable mass.
Browse products for inventors. Link to the store.
And as a result of molding and further work with the workpiece, you can get surprisingly stunning and very cute things.
The main components of the papier-mâché mass are paper or cardboard, PVA or wallpaper glue, putty, starch, flour, gypsum, etc. Everything is much simpler for me. If it’s paper, then toilet paper is the cheapest option; if it’s glue, then I only had wallpaper in my house. I was sorry to use starch. I'll see what happens as a result, and then I'll diversify the ingredients.
How did I make the mass, where did I start the process?!
DIY electronics in a Chinese store.
First, I took a roll of the cheapest (7 rubles) toilet paper and poured a glass of hot water into a container. I took a glass container. It makes everything easier to wash off. I left it to soften for several hours.
The recommended time for softening paper is 5-8 hours. My paper stood in water for about 18 hours, since I didn’t have time to deal with it.
After softening, I cut the paper into small pieces and, adding a little water, crushed the resulting mixture with an immersion blender.
To be honest, the show is not for the faint of heart.
Then she placed the mixture on cheesecloth and squeezed out the excess liquid.