Topiary art
People involved in gardening have probably heard about the art of Topiary. This art involves the formation of figures from trees or bushes, trimming them in an artistic style.
It became known from the Roman Empire and gradually spread throughout Europe. After the fall of the empire, the monks created their own topiary gardens; in Russia it was used only hundreds of years later.
At first, at first, the creation of figures was very simple - they were square and round, then they acquired a more accurate shape. But now the choice is very wide and you can choose many figures at your discretion.
This art was created during the Renaissance, when figures were used to create garden systems; a feature of these times was that they gave rise to the depiction of living beings.
In the beginning, gardeners created small paintings that then appeared on the site. It is believed that the first topiary was made in Persia, and the Romans only then began to use it at home.
Creativity lessons
Any gift made with love with your own hands invariably surprises, impresses, and touches to the core. As you know, the cost of handmade products is high because each item is unique in its own way. It was created by the skillful hands of a creative artist, is an inspiration, and contains a mysterious appeal. Many lovers of handicrafts eventually dream of moving to the next level, turning their favorite pastime into a successful and profitable business. You can start with the basics of creating simple crafts, over time complicating the work, imagining, supplementing them with new decorative details, giving them unusual, intricate shapes. We offer several simple but incredibly beautiful lessons on how to create a bright, stylish, original flowering garden.
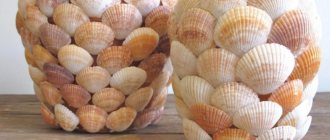
Beautiful flower topiary will be an excellent gift
Delicate topiary made from napkins
Paper napkins are an amazing material that craftswomen actively use in their creativity. A tree with delicate rose foliage will not only decorate the living room interior, but will also be a wonderful gift for newlyweds. To work, you will need white and pink paper napkins, a foam base ball, wire for the frame, and a pot stand.
Beautiful roses from napkins
The algorithm is as follows:
- Let's prepare paper flowers. We make them in the form of roses, rolling them or twisting them onto a knitting needle. You can glue sparkling rhinestones and pearl beads into the center of each flower, so the product will take on a more sophisticated and festive look.
- We paste flowers around the base ball in a circle and leave the crown to dry.
- We wrap the wire for the trunk with floral or satin ribbon to match the tree crown, smearing each turn with glue. We make a hole in the sphere by stringing a decorated ball onto the barrel.
- A delicate plant can be “planted” in a painted clay pot, or you can prepare a container from a plastic glass, wrapping it in corrugated paper or cloth.
- To make the structure stable, fill the container with alabaster mixed with water. After this, we insert the tree, holding it until the solution sets.
Creating a topiary from napkins
Tip:
To better bond the paper elements to the base, you can use PVA glue, covering the surface with a thin layer of varnish, using the principle of decoupage technique.
To cover the frozen alabaster, you can make a clearing of sisal, drape it with tulle, organza, or cover it with glass pebbles for an aquarium. A beautiful and delicate gift made with your own hands will certainly surprise you and give you a romantic mood.
DIY napkin topiary
Stylish flower
Topiary can take any form, the process is so individual that any idea has a place in the art of creating a spectacular garden. A bright interior accessory in the shape of a flower will help create coziness in the dining room, kitchen or children's room. What do you need for work? Take several scraps of bright fabric, bamboo sushi sticks, large buttons, soft filling, and a piece of floral sponge.
Tools for creating topiary
The tools that will be useful for your work are a thread with a needle, chalk, and simple office glue. The process of creating an elegant accessory is simple:
- Let’s prepare a pattern on paper: draw two even circles, one of a smaller diameter for the center of the flower, the second of a larger diameter for the petals. We transfer the templates to the fabric and cut out the blanks.
- We sew each circle along the edge, like a bag, and fill it tightly with cotton wool, padding polyester or any soft filler. We sew the individual elements together to create a soft flower.
- Paint the stem stick green or wrap it with green satin ribbon.
- We put a floral sponge in the pot, and plant a flower stem in it.
- We attach the flower to the frame, covering small flaws with various details: multi-colored buttons, flaps, ribbon bows or any other material.
- The floral sponge can be covered with moss and decorative grass.
A bright, stylish and incredibly cozy topiary is ready to decorate the living room, dining room and even the interior of a room for a little princess.
Flower topiary
[Show slideshow]
DIY fragrant tree
Topiary is a great addition to a stylish design. Using spices, dried orange or lemon slices, coffee beans or cinnamon sticks as decoration, you can create not only a beautiful, but also a fragrant tree.
Fragrant coffee tree
To work, you will need a base for decoration, wire for the trunk, twine or twine, a coffee cup for the stand and a package of coffee beans. If you don’t have a ready-made foam base at hand, you can make it yourself from scrap materials. Let's take several old newspapers or sheets of paper and crumple them into a tight ball. We wrap threads around it on top to prevent the paper from unwinding. Secure the top with an even layer of PVA glue and leave until completely dry.
Materials for creating a fragrant tree
When it’s ready, let’s start creating the fragrant decoration:
- For the frame, take a strong wire and wrap it with twine. The turns need to be made thickly, tightly one to one and coated with glue. The ends of the rope need to be secured with a few drops of superglue.
- We make a hole in the paper base using a knife or scissors, insert the barrel into it and secure it with glue.
- Let's proceed to the most important part of the process - decorating the base with coffee beans. Be patient, because the work is painstaking, almost filigree. We glue each grain tightly to each other so that there are no gaps left. We develop the technique ourselves, because you can glue the grains randomly, or you can glue them in a certain order, in vertical or horizontal rows.
- When the entire surface is thickly pasted over so that the paper is not visible through it, we proceed to the second layer.
- We decorate the pot. To do this, wrap the cup in burlap or coarse linen, secure the fabric with a wide brown ribbon or the same rope that was used to wrap the barrel.
- Traditionally, we pour a gypsum solution inside the pot, install the tree and let the substance dry.
Tip: To make aromatic coffee trees, you need to select beans with smooth edges of the same shape. The first layer is always glued with the flat side down, and the second - vice versa.
Master class on creating a coffee topiary
To emphasize the theme, you can attach several cinnamon sticks, dried citrus slices, or spicy star anise stars to the coffee crown. There are a lot of ideas on the topic of creating coffee trees, for example, original baobabs with a spreading crown, a heart-shaped tree, a fancy plant with an ornate trunk, and many other creative ideas.
Money Tree
Do you want to creatively congratulate on the holiday? We offer a master class on decorative wood with a money crown.
Money topiary will surprise everyone with its originality
To work, you will need a twig that needs to be opened with varnish, as well as a set of souvenir bills. Glue banknotes in random order onto the prepared branch and let the crown dry. We pour plaster into a decorative stand, insert our tree, and decorate the top with coins.
Money tree making process
A simple and original souvenir can be given to friends, colleagues or business partners. It will become a symbol of financial well-being and success in career endeavors. There are many options on how to make decorative trees with your own hands. Craftswomen with imagination use the most unusual materials for decoration, skillfully combining gifts of nature and synthetic materials. Original and eclectic masterpieces can bring notes of sophistication and elegance to the interior. They will be appreciated by lovers of exclusive hand made crafts.
Learning to create money topiary
Which plants to choose
Nowadays, it is not enough just to have greenery to create a beautiful garden plot, so gardeners are striving to find new ways to decorate. To create topiary with your own hands in the garden, you need to choose plants, for example, conifers are perfect, they are not whimsical and are easy to shape.
If you need to make a larger figure, you can plant an elm or linden tree; they are attractive in appearance and fragrant. Deciduous plants are also used: hawthorn bushes, barberry.
Trees of happiness: home topiary
Topiary. What is this?
Topiary is called the tree of happiness. This is a kind of offshoot of landscape design. Even in ancient Rome, there was the gardening art of topiary, which involved cutting trees and shrubs to shape. By the 21st century, connoisseurs of beauty had a desire to contemplate topiaries not only in the garden. This is how home topiary appeared. A stable composition on a solid base, reminiscent of wood. As a rule, topiary is round, but if desired, it can be given any shape. Some craftsmen even make topiary from dry branches so that the crown is not round, but spreading.
@wo_rld_country_
@__topiarii__
Types of topiary
In the manufacture of topiary, not only materials familiar to handicrafts are often used, but also fresh flowers. Therefore, they can be conditionally divided into two main types:
Alive
Living topiaries are rarely made at home, but they are still worth mentioning. The product, although not durable, is still popular. Most often, topiary from fresh flowers is made by florists to order. The basis is a floral sponge or other material on which the flowers will feel good. The composition may contain additional details that do not require special care, but the main content is flowers.
@myatnie_oblaka_flowers
Artificial
Artificial topiary is the most popular among needlewomen. With proper care, they can decorate your apartment for years. Foam or cotton wool is most often used as the basis for such a product, since they are most convenient to work with. After processing, various decorations are attached to the base. This can be any material, from coffee beans to eggshells.
www.diy.ru @home_sweet_home_ukr
Seasonal compositions are often made using appropriate materials. For example, in winter topiary you will definitely find pine needles, cinnamon sticks or Christmas tree decorations.
@lilovii_les
And in the autumn there will be dry leaves, cones or berries.
kuzmenko5835
What elements does topiary consist of?
Even the most complex topiary usually consists of three basic elements:
- crown
- trunk
- the base where you will need to “plant” the topiary
The crown, as we have already said, is a foam ball, which will need to be decorated in the future.
The barrel is made from different materials. Plastic tubes, dry branches, iron rods.
And the base of the tree is any stable surface or some kind of container, for example, an ordinary flower pot.
Now that we have figured out the components, we need to understand how to decorate the product.
What to use?
What the topiary will consist of depends only on the flight of your imagination, but there are several of the most popular materials that are suitable for a beginner.
Coffee beans. One of the most popular topiary details is coffee. It is easy to handle and does not require any processing.
@tulun_nyushen_dolls__
Many needlewomen use buttons, yarn and ribbons in compositions
@lesya_t_
If you know how to handle polymer clay, then it won’t be difficult for you to make a few nice details for your future product before starting work. More often, craftsmen make flowers.
@ol.esia1188
Sometimes topiaries are made from candies and other sweets; this version of homemade topiaries is especially loved by children.
@dagldiyan_olesyadagldiyan_olesya
Common Mistakes
- Crown smaller than pot
If you want to use a large pot for topiary, then the base of the crown should be larger than it so that your tree does not get lost against the general background.
- Overloaded with color
It is important to maintain the same color scheme in topiary and not mix incompatible colors, so the product will turn out stylish and will be pleasing to the eye.
- Overload with details
As a rule, topiaries are made in a specific theme, and a clutter of details will blur the whole picture, depriving the tree of happiness of its individuality.
How to make topiary at home
All topiaries are made according to the same principle, so first you should master the basics of needlework in order to eventually learn how to make complex, multifaceted compositions.
@i.am.osipova
If you want to make topiary yourself, we suggest watching several available master classes on this topic.
DIY crown base
How to make a coffee topiary
DIY summer topiary
Ball of fresh flowers
Frame for topiary
To create a topiary frame, you must adhere to the following requirements:
- you need to choose the shape of the topiary; these can be figures of animals, birds, fairy-tale characters, geometric shapes.
- create from steel wire and then fasten with ties or welding.
- pour out the base, which will contain the nutrients, add a substance to impart viscosity, then add water.
- secure with a steel mesh for stability and to prevent soil from spilling out, then water onto the structure.
- add soil and fill with water. The resulting mixture should be viscous and not go beyond the frame. Then remove the excess layer of earth with a trowel; carefully monitor the gaps so that they do not remain, otherwise this can lead to the disintegration of the workpiece.
- sow the soil with seeds; to create a better effect, you can combine flower and grass seeds.
To care for plants, you need to take care of them for a long time, watering them with a watering can so that this structure does not spoil its appearance.
The frame must necessarily correspond to the figure, the emphasis is placed either on the animal’s tail, ears or nose. You can add uniqueness and install lamps. Dynamics is very important when creating any animal or character, you need to convey all their individuality.
How to make the easiest topiary from beads with your own hands: instructions
Of the many options, the wish tree made from beads or artificial pearls is undoubtedly the easiest to make. Let's look at a detailed master class on how to create it.
It turns out very beautiful
What you need to have:
- Foam ball base.
- A bunch of beads, pearls of one or more colors. In handicraft stores you can purchase several small beads at once, so as not to glue them individually.
- Two pieces of strong steel wire of the desired length, to which is added the depth of the pot and half the diameter of the ball, since the stem of the tree will go halfway into the base, and into the pot to the very bottom.
- Satin ribbons, preferably thin ones, matching the main colors.
- Satin roses, a little felt to decorate the bottom of the pot.
- Corrugated paper, organza, satin or rapeseed ribbon of medium thickness.
- Quick-drying glue or glue gun.
- Pebbles for filling the pot, plaster for pouring.
- Paint and pebbles for ground decoration.
- Plastic pot.
Let's start making the simplest wish tree
- We start by making holes in the ball to attach steel wires and try them on. We wrap the flying wire so that at the top it is close to the ball, and at the bottom – 5 cm below the expected height of the ground. Set aside.
- Then we take a low number of beads and carefully, starting from the very top exactly above the holes for the barrel, attach the first bead. Then we gradually apply transparent glue and immediately fasten the beads without removing them from the thread. When there are only a couple of turns left to the holes, insert the wires for the barrel, having previously generously lubricated them with glue, and finish the winding, tightly closing the entire ball.
- Let's start working on the pot. We wrap it with corrugated paper, cover it with organza on top and secure it with ribbon. We glue the joints. Glue a felt circle to the bottom.
- Now we plant a tree. First we put the trunk in the pot. We fill in the stones and immediately fill them with prepared plaster. Please note that plaster expands when it dries, so do not fill it to the very top, leave a little space. It will dry within a few minutes.
- All that remains is to decorate the ball itself, its bottom and the surface of the plaster in the pot at your discretion. That's how simple it is to create beauty with your own hands.
Options may vary
Tip for a beginner: when making it, it is most convenient to use a heat gun. The glue in it is always transparent, dries very quickly and holds securely.
Tools
Having simple tools will be enough. All you need is: wooden slats, pruning shears, garden and trellis shears, and a lopper.
To create an incredible masterpiece, it’s worth working hard; the main thing here is patience and imagination. Simple figures can be easily converted into complex ones. For example, a cube into a ball by applying certain actions.
Greening filler
This is the last stage of creating topiary in the garden. You need to sow this way: first the flowers, then the lawn grass. Here is an example of the procedure for creating a lion shape:
- Flowers are planted on the skin of a lion.
- We decorate the lawn grass, the so-called mane, with long stems.
- A muzzle, ears, tail, paws are created.
- Seeds need to be poured into a hole in the soil.
- Cover the sealed holes with moss.
- To prevent the figures from collapsing, install supports.
- Water either using a watering can or using a special watering system (irrigation).
The result is worth it to create a unique topiary figure, what it will be depends on you. Your imagination can help you choose plants and planting schemes. In winter, it is necessary to insulate the figures, because under the influence of snow everything can die.
How to make topiary from pine cones
As in the previous MK, first of all we pierce a hole under the barrel, try it on and decorate it. If you took a simple twig, then you can leave it unchanged.
- We take the base and glue the selected nuts or cones onto it, placing them tightly next to each other.
- Shortly before the end of the work, insert the barrel into the hole and finish the ball. If you cover pine cones with artificial snow, you will get a wonderful New Year's option.
- Chestnuts and acorns complement the fall leaves perfectly. And walnuts and hazelnuts look better if combined together and decorated with bright rowan berries.
- The last step is to plant the tree in a prepared container; for example, a brown flower pot would be very appropriate here.
Tip for a beginner: the finished nut craft should be coated with acrylic varnish or paint for durability. Gold and silver colors work best.
Tips and tricks
It is better to give preference to plants with small leaves, they form shoots. It’s good if there are dormant buds on the branch, because they are capable of growing the next foliage. Care must be taken by watering and feeding the plants.
It is necessary to level the crown using a tool regularly, cutting off shoots that grow. The soil for the frame must be chosen very carefully. Soil, peat, and nutrient mixture are mixed in a container, balls are made and placed in the frame container.
You can make a so-called express topiary. It’s easy to do; to do this, plants are planted in the ground in the spring; it can be ivy or hops; they quickly form shoots. Then a metal frame is installed on top, it will serve as the base.
As the plant branches grow, they become distributed and need to be secured with natural material using rope and trimmed. At the end of the season, the frame becomes overgrown, the twigs hide under the green cover, you need to try to water and feed the topiary on time.
For classic topiary, it is advisable to practice on simple figures. Having decided on a bush or tree that has a well-developed root system, it should be larger in size than the intended figure. The haircut is carried out in the spring or summer so that the plant does not weaken before winter.
For topiary of complex shape, for example, in the form of a ball, it is made from a cube by truncating the edges. Both western thuja and common spruce are very suitable here.
A cylinder-shaped topiary can be made from Thuja occidentalis, which has the shape of a column. Small-leaved linden can also make a good cylinder.
Master class 1. Corrugated paper topiary
Topiary with paper flowers is especially suitable for decorating a holiday table or festive interior design. For example, this rose topiary was made for Valentine's Day.
Materials:
- Base ball with a diameter of 12 cm;
- Corrugated (creped paper) of medium density (in the master class we use corrugated paper in the form of a tape, but you can use regular rolls);
- Floral foam bars and/or any fixing mixture (see basic instructions);
- A flowerpot or flowerpot for the base of a topiary;
- The trunk is about 30 cm long;
- Dry moss for pot decoration;
- Ribbon for trunk decoration;
- Glue gun.
Step 1. Cut the corrugated paper into strips 60 cm long and approximately 4.5-5 cm wide. If the paper is too thick and stiff, knead the strips a little to make them more flexible.
Step 2. Now you need to roll the resulting ribbons into rosebuds. This is done very simply, just a couple of workouts are enough and the principle becomes clear. Take one of the resulting paper strips and fold it 1/3 as shown in the photo below.
Then fold one end of the ribbon diagonally at a 45-degree angle and begin rolling it into a log. After three turns you will have the core of the bud. Now wrap the free end to the outside, and continue to roll the core of the rose - voila, you have the first petal.
Step 4. Once the crown is completely covered with roses, attach the trunk to it (see Basic instructions). In this master class, the barrel was pre-painted white with spray paint.
Step 6. Place dry moss on the “soil” and glue it in some places with thermal glue. Finally, tie a bow on the trunk.
The following selection of photos presents other topiary design ideas that you can make with your own hands using this master class, not only from corrugated paper, but also from satin ribbons, silk paper, etc.
By the way, you can make not only roses from paper, but also lush peonies or hydrangeas. Methods for making such flowers are easy to find on the Internet.
Today, making your own products is a fairly popular activity, and craftsmen most often choose materials that can be called garbage, for example, used plastic bottles. You can simply throw them in the trash, or you can turn them into something beautiful.
Flowers made from plastic bottles can decorate your garden plot, playground and even your home interior. For such a handmade project, you do not need to purchase expensive equipment and materials, and the result can lead to real delight.
A common plant among gardeners, the bulbous plant blooms in a beautiful, lush cluster of many small, fragrant flowers.
Of course, you can’t make a fragrant hyacinth from bottles, but you can create a magnificent copy, just have the materials at hand, desire and step-by-step instructions:
Using the same method, you can make as many luxurious plastic hyacinths as you want - for the garden, home or other needs.