Topiary - a universal gift
Topiary is a win-win solution if you want to make an original gift for March 8, New Year, wedding, birthday or Valentine's Day.
To make one of the versions of this “European tree” with your own hands you will need:
- one package of split green peas, which can be purchased at any grocery store;
- a foam ball with a diameter of 20 cm, sold in art stores or through Internet sites with decoration themes;
- PVA and hot melt glue;
- package of floral moss;
- pots, preferably a durable clay one;
- a small wooden skewer or branch, a knife;
- floral foam or polystyrene foam;
- acrylic or water-based paints.
After visiting a craft store and purchasing materials, start implementing:
- Paint the flowerpot and stem in the desired tone, or you can apply a design.
- Then tint the base ball green.
- When the paint has dried, make a 3 cm indentation at the base of the crown.
- Glue part of the ball, sprinkle peas.
- Gradually you will fill the entire surface with peas. The future crown must be left until the glue has completely polymerized, about 10-12 hours.
- You need to apply glue into the recess and secure the barrel.
- Now put the foam in the flowerpot and decorate the surface with moss.
- Topiary is ready to surprise your friends!
Topiary
Using grains you can make a so-called tree of happiness or topiary. Such an unusual item will fit well into the kitchen interior and become its original decoration. The most beautiful crafts are made from coffee beans.
To create a topiary you will need a small decorative pot for the tree, a wire or pencil for the trunk, a foam ball or plain paper (you can also use foil) to create a crown, a heat gun with glue sticks, coffee beans, tape, plaster mixture and elements for decoration (ribbons, beads, paint).
First you need to form a crown. It can be either simply round or have the shape of a heart, square, cone or any other - it depends on your imagination.
Immediately make a mark on the crown in the place where the trunk will be attached - this will prevent damage to the topiary in the future if the decor is applied to the attachment point.
Next, you need to tint the ball well with paint so that the gaps between the decor are not so noticeable. To do this, you need to pour a little acrylic of the desired color into a container and apply the paint to the foam using a dry sponge.
After the ball has dried, you can begin gluing the decor. It is best to think through and try on all the decorations on the ball before you glue the first grains or beads. For inspiration and new ideas, you can look online for photos of similar crafts made from grains.
Read here: Crafts from eggs: a master class on making stylish and beautiful decorations with your own hands (80 photos)
The trunk of the tree also needs decoration. It is best to use tape for this purpose - tape or acrylic. If desired, you can also use satin ribbons.
After the crown and trunk are completely ready, they can be connected to each other. To do this, a recess is made in the ball with a diameter corresponding to the width of the trunk. The recess is filled with hot glue and the end of the barrel is placed there until it stops.
To install the topiary evenly in a pot, you need to fill it with a gypsum mixture, place the free end of the trunk there and wait until the mixture hardens completely. The top of the plaster can be covered with small stones, beads or moss. The original topiary is ready!
Magnet photo frame made of cereals for the refrigerator
Prepare for work:
- cereals of different colors, shapes and sizes;
- cardboard and regular pencil;
- scissors with a ruler, a heat gun, a couple of magnets.
Steps for making a magnet frame from cereals:
- Draw a frame on the cardboard, then cut it out.
- Using a heat gun, cover the base with cereal.
- Glue the magnet to the back of the frame.
At this point the work is completed - the magnet in the form of a frame made of cereal with decor is ready to settle on the refrigerator door!
Check out the photo gallery, here you will find ideas for crafts in the form of frames made from cereals.
Where to begin?
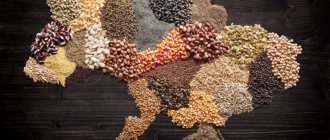
Of course, the main material is pasta and cereals. Manufacturers offer a huge selection of pasta of various shapes and sizes. Stars, leaves, spirals, shells, hearts and bows seem to be created for making various crafts. Quality and price don't matter at all. There will be no problems with the assortment of cereals either - on the shelves of any grocery store you can find buckwheat, rice, peas, wheat and barley porridge. The more types of cereals are used, the more textured and beautiful the finished product will be.
To make crafts from pasta with your own hands, in addition to the main material, you will need: glue, brushes, a base (if you plan to make a painting), paints (aerosol or acrylic) and other elements for decoration. Almost all of the above items are found in every home, so the manufacturing process will not be too financially expensive.
DIY cereal wreath
Prepare for this work:
- two base wreaths made of straw with a diameter of 20-25 cm;
- peas in green halves;
- glue with a brush;
- foil and twine.
Subsequence:
- Apply glue in zones, starting from the inside.
- Sprinkle portions of peas onto the glue.
- After the glue has set on the inside, decorate the outside.
- Prepare a piece of twine 20-50 cm.
- Make a pendant out of twine and decorate the wall.
What to make from cereals and pasta with your own hands: a selection of home decor ideas
Cereals, peas, beans, seeds, pasta and many other dry products are excellent raw materials for creating beautiful and practical crafts. Homemade creativity is useful for people of any age, but such activities are especially important for children to develop manual dexterity, perseverance, patience and the formation of a craving for beauty.
Spectacular panels will decorate any room, but most of all they suit the interior of the kitchen. The “picture” is formed on a durable base (a sheet of thick paper, cardboard or canvas) according to your sketch or ready-made template. The raw materials are thoroughly washed, dried in the oven and glued to a backing.
Images of multi-colored cereals and seeds look impressive. Such work requires artistic talent and a lot of diligence, but the result will make a strong impression.
You can supplement the composition with a variety of spices or herbs. The application will not only be beautiful, but also fragrant.
The basis of the work can be plates, dishes or any other flat objects covered with plasticine, which will act as glue. Children will be happy to take part in creating simple crafts.
It is very convenient to mount vinyl discs for the player to the wall using the central hole.
An unusual element of kitchen decor can be colored cereals poured into glass containers. The combination of shades is selected by the authors. The main thing is that the bright stripes look picturesque.
Frames for paintings and photographs are effectively decorated with bulk products. You can preserve the color and texture of natural materials. But if the product is painted, it will make it not only more elegant, but also more durable.
To decorate a table or window sill, it is easy to make an original topiary “tree” with a “crown” of peas. And for the convenience of the housewife - a useful device for knives.
Dry food products will be a reliable support for candles in homemade stands. In addition, the candlestick will become more colorful and will be able to effectively decorate a festive feast.
Light and flexible material can be used to update tarnished Christmas tree decorations. Kids will love this simple activity. And an elegant Christmas tree made of spaghetti will surprise your guests.
Children will be delighted with homemade pasta toys. Beginners can create simple designs, and experienced craftsmen can even create miniature copies of technical equipment.
A wonderful gift for little fashionistas is an unusual accessory chest, which, however, will require careful handling. The box is only suitable for lightweight items.
In the box you can put not very durable, but very unusual hand-made hairpins, pendants and bracelets.
The beautiful decor of the apartment, festive events, as well as colorful souvenirs will delight both adults and children. Working together with a preschooler will teach him the necessary manual skills.
- Author: Olga Zagainova
Rate this article:
- 5
- 4
- 3
- 2
- 1
(5 votes, average: 5 out of 5)
Share with your friends!
What you can use to make a rug with your own hands: 20 practical ideas
What to make from cardboard boxes with your own hands: a few simple ideas
Interior ball decorated with beans
For this item, prepare:
- a ball of polystyrene foam and bean grains;
- paints with brushes, PVA glue.
Steps:
NOTE!
- Peonies made of corrugated paper - how to make a beautiful paper bouquet with your own hands quickly and easily (110 photos)
Frameless furniture - tips for choosing a design, the best models and tips for their use (110 photos)
- Cardboard house - step-by-step instructions on how to make a beautiful toy house with your own hands (75 photos)
- Paint the ball and let dry
- Coat half of the ball with glue and apply cereal.
- After drying, you can paint the item if desired.
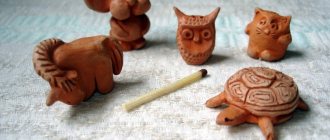
Blackberry
A master class on crafts made from millet grain is gaining popularity. This material produces unusually realistic blackberries and raspberries.
To make berries, you will need: thin floral wire, foil, silicone or hot melt adhesive, millet, acrylic, sponge, acrylic varnish, green corrugated paper.
The creation of berries begins with their formation using wire and foil. To do this, take a piece of wire 3-5 cm, one end of which is bent into a loop. The loop is wrapped in foil, which must be pressed with your fingers to give the raspberries a slightly triangular shape.
Afterwards, glue is applied to the entire surface of the foil blank and grains are sprinkled. They should be carefully adjusted with your fingers to distribute them evenly.
The workpiece can be stuck into the sponge until the glue dries completely - this will protect the workpiece from deformation during the drying process.
After the glue has dried, you can start coloring the berries. Using a dry sponge, you need to apply acrylic to give the berries color. After coloring the berries, you need to dry them again for several hours.
At this time, you can start making sepals. To do this, you need to make a sepal template from plain paper and transfer it to corrugated paper. Next, you need to cut out the resulting parts and give them a more natural shape by slightly twisting the tips of the sheets and giving the edges the shape of small teeth.
Read here: Crafts from foam plastic: a master class on making, a review of original crafts and the best options for creating jewelry (70 photo ideas)
After the paint has dried, you need to cover the crafts with a final layer of varnish, make a puncture in the sepals and stick them to the berries.
Decorative berries can become a hair decoration, an element of an artificial bouquet or topiary.
Christmas tree toys made from different seeds and cereals
For this work, prepare:
- plastic bases;
- various cereals;
- PVA with a tassel, satin ribbons;
- acrylic varnish and a disposable plate.
Work steps:
- Pour grains or cereal into a plate.
- Cover the base with thick PVA.
- Roll the toy in the filling.
- Apply fine grains in 2 layers.
- Dry the toys, varnish them, add ribbons.
- Hang crafts on the Christmas tree with your children - now your family is ready for the holiday!
How to color an entire pasta product?
If you want to make any figure from pasta that requires a single color color, then it will be much more convenient for you to use aerosol dye.
Fast, high quality and plus a huge color spectrum! In Easter colors you are unlikely to find gold, silver, bronze or the usual white color.
Acrylic paints are also suitable, but only for drawing details, exclusively. They cannot cover a large volume of material as evenly as we would like. In general, these paints are quite durable and form an indelible film when dry.
We think you don’t need to tell you that gouache and watercolor are not suitable at all. If you cover a product with them, then paint stains will remain on your hands if you just want to pick them up.
Contrasting pattern of black and white beans
For this work, prepare:
- beans of two colors;
- frame and base;
- brush and PVA glue, black with white paint;
- simple pencil.
Steps:
- Draw a plot.
- Color the zones.
- Apply glue to the details of the design and glue the beans.
- Let the painting dry, then frame and hang.
Using this technique, you can create multi-colored scenes to suit every taste. Choose simple shapes. Take large fallen leaves and make a grain craft with the children on the theme of autumn.
Features of creativity using natural materials
Not only schoolchildren can make crafts from cereals with their own hands, because such joint creativity is suitable even for small children. True, you will need to be with the kids constantly so that they do not harm themselves in any way.
So, the following materials may be useful to you:
- all kinds of cereals and grains - buckwheat, rice, millet, semolina;
- legumes - peas, lentils and multi-colored beans;
- any seeds and seeds - watermelon, pumpkin, melon and sunflower, etc.
You can even take it. Also in the process you will need: thick paper or cardboard, glue, scissors, fabric, plasticine, templates of various patterns, decorations (at your request).
The best DIY crafts made from cereals, seeds and sunflower seeds are appliqués and paintings. You can come up with stories with your child yourself, or use some ready-made templates and transfer them to paper. The complexity of the work should depend on the age of the children; keep in mind that the child should be interested in making the craft on his own, even with your help, but not be completely aloof.
Cereal decor on eggs
Such crafts will come in handy before Easter, and children will really enjoy making fun paraphernalia. Prepare:
- hard-boiled eggs;
- various small cereals;
- PVA, felt-tip pens and a brush.
Steps:
- Apply glue to the top of the egg.
- Dip into a mound of cereal.
- Leave to dry.
- Finally, draw in the eyes and smile.
Cereal napkin rings
Prepare a cardboard roll, this can be the basis of disposable towels or something similar. Other materials:
- PVA glue and brush;
- sharp knife and paints;
- different cereals.
Steps:
- Cut the cardboard roll into discs 4-5 cm wide.
- Lubricate with glue, sprinkle with cereal, let dry.
- Tint to your taste.
The decor for table setting is ready!
Simple decor with cereals
Cereals are great for filling clear bottles, jars and vases. Use this technique to add accents to your interior. Depending on your style, choose grains in natural colors or color your own!
Crafts from cereals - 10 ideas with rice, buckwheat, beans, coffee beans
Cereals are an ecological product that is often used when decorating any objects. Since cereals are varied in shape and color, they can be used in different ways. This article presents some variations of the use of cereals for handicrafts.
With the help of grain crops you can create real masterpieces. All types of cereals are suitable for this, and such pictures look more interesting if you use grains of different colors and sizes. Images of flora and fauna work well. The finished work will look great in the kitchen. You can involve young children in creating simple applications - they will definitely be interested in such creativity.
- For the base of the panel, it is better to take thick cardboard or fiberboard.
- The surface should be primed with glue and dried under a press to avoid future deformation.
- The future application should be marked on the base with a pencil.
- Then spread a small area with PVA glue (it is better if it is thick) and arrange the grains in some pattern. It is convenient to place legumes and other large elements with tweezers, small ones - simply by sprinkling them on the glued area. To prevent the background from showing through, it can be pre-tinted.
Homemade topiary made from coffee, beans or peas
This type of interior decoration is becoming increasingly popular. It is perfect for a gift.
- To create a topiary you will need a base (a foam ball), a pot, material for the stem and glue.
- First you need to paint the foam base, depending on the color of the cereal used.
- Next, you should glue the grains using PVA, leaving as few gaps as possible.
- After the crown dries, you can insert the trunk and secure it in the pot.
- To make the pot stable, it is better to pour gypsum into it.
- The base of the topiary should be decorated with sisal, moss or some kind of cereal.
Owners of parrots have seen similar feeders for sale. It turns out that making such a delicacy is not at all difficult and you can treat it not only to domestic birds, but also to outdoor birds.
To prepare, in addition to birdseed, you will need gelatin, cookie cutters and twine. You should dilute the gelatin according to the instructions, add food to it and fill it into cookie molds. Before the mixture hardens, you need to stick a loop of twine into the feeder. It hardens within a day.
Decor for photo frame
When decorating, you can play on contrast and use cereals of two different colors - light and dark. Another option: completely cover the surface of the frame with a layer of plain fine grain, and then use paints. You can experiment with this material as much as you like.
Christmas balls made from cereals
This is a great option for involving children in creating crafts. These balloons will look most elegant if you use golden spray paint, but you can choose any other color.
- You need to roll a ball out of newspaper, then wrap it well with thread. It will be convenient to immediately make a loop from the tip of the thread.
- After this, you should coat the workpiece with PVA glue and roll it properly in cereal (buckwheat is perfect for this).
- Then all that remains is to spray the ball with paint and the magnificent decoration for the Christmas tree is ready.
- You can experiment a little with toys and make not only balls, but also other shapes.
Watch decoration
Such a useful element of the interior can be played out in a very interesting way using the same grains. The watch frame can be completely covered with grain. The combination of cereals of different colors looks beautiful. Only coffee beans can be used. The glue for this craft is selected depending on the material of the watch frame.
Pumpkin seed flowers
Making these flowers is very simple. To do this, you will need a cardboard circle, onto which you need to attach pumpkin seeds in a circle with PVA glue, from the edge to the center. The seeds can be glued either with the sharp edge outwards or inwards - you get two versions of the flower. This way you will get about four tiers of seeds (depending on the size of the circle). Then turn the flower over and do the same. A few grains of peas or black pepper should be glued to the very center on one side, and a stem should be attached to the other. These flowers make a very original bouquet.
Candlesticks with coffee beans
Coffee beans are perfect for decorating candlesticks. There are several design options:
- If you have a suitable candlestick, you can cover it with grains over the entire area, leaving room for a candle.
- The option is even simpler: pour coffee into a clay or ceramic pot, and place a floating candle on it, drowning it a little inside.
- Similar to the previous method, you can use a glass beaker. In this case, you can add something to the grains, for example, cinnamon sticks or citrus rings. A brown ribbon or twine is suitable for decorating a glass.
Vase
For this craft you will need a glass jar or bottle. It is possible to use plastic, as well as cardboard tubes from chips or building materials.
The outside of the vase must be painted, even if you plan to then completely cover it with grains. It will look more beautiful this way. And then there are two decor options:
- Use large grains to apply flowers or other patterns, and simply leave the rest of the vase painted.
- Cover the entire outside of the vase with cereal; coffee beans will look especially good.
Decorating a bottle with cereal patterns
An excellent decorative element can be made by filling a glass bottle with different types of cereals. In this case, the container is filled in layers. How to do this beautifully, watch the video.
Cereals are perfect for needlewomen to create or decorate various items. This material is easily accessible, it’s pleasant to work with, and you can experiment as much as you like!
Such a useful element of the interior can be played out in a very interesting way using the same grains. The watch frame can be completely covered with grain. The combination of cereals of different colors looks beautiful. Only coffee beans can be used. The glue for this craft is selected depending on the material of the watch frame.
Cereals and seeds
Moving from simple to complex in their creativity, most come to the conclusion that cereals can be combined with other natural materials:
- pasta;
- tea;
- seeds;
- dry berries;
- elements of the herbarium - leaves, inflorescences, buds.
Such combinations can be used both in the production of paintings, panels, and in the decoration of vases, boxes, photo frames and paintings. It is worth considering these techniques in more detail using practical examples.
Cereals can be combined with other natural materials
You can make a decorative plate with the image of a goose from semolina, apple and melon seeds. To do this, you need to prepare cereals, cardboard, and PVA glue.
In order not to waste time cutting out plates from thick cardboard, you can take a ready-made disposable white paper plate. You need to draw a big, cheerful goose on it and start laying out the grains.
Combinations of grains can be used both in the production of paintings, panels, and in the decoration of vases, boxes, photo frames and paintings
There is no need to apply glue to the entire sketch at once, otherwise due to slow, painstaking work it may dry out on the empty parts. It is applied in stages. The goose's body can be lined with melon or pumpkin seeds, and the contours of the wings can be emphasized with apple seeds.
The paws and beak are lined with cucumber seeds (it will be easier to paint them red). The background of the picture is covered with semolina. You can paint it in 2 colors: green for the “grass” and blue for the “sky”.
Attention! It will not be difficult for children to lay out images of various animals and birds from seeds and cereals with their own hands if sketches of such paintings are prepared in advance.
There is no need to apply glue to the entire sketch at once, otherwise due to slow, painstaking work it may dry out on the empty parts. It is applied in stages. The goose's body can be lined with melon or pumpkin seeds, and the contours of the wings can be emphasized with apple seeds.
Coloring of cereals
Young family members willingly create children's crafts from cereals; children are especially attracted to colorful materials.
There are 2 approaches to coloring cereals:
- Enhance the natural color of the grains.
- Repaint the cereal in a bright tone.
To get a vibrant color like a paint can, you need a white base. Therefore, choose rice, pumpkin seeds or white beans.
If you need a shape or texture, for example, buckwheat, then paint it in 2 stages - first white, then bright.
Making topiary
The finished craft can become a beautiful interior decoration or take first place at exhibitions in kindergarten or school.
To create it you will need:
- a package of green peas (it is better to take split peas);
- foam ball;
- glue gun;
- glue, preferably PVA;
- dry moss;
- pot - clay or any other;
- long wooden skewer or stick;
- green paint;
- brush;
- stationery knife.
Take green paint and a brush, paint the ball and put it away until completely dry. Take a wooden skewer and make a hole in it for the topiary trunk.
Gradually glue the peas to the ball: small areas are gradually coated with glue and carefully sprinkled with peas. Using this technique, fill the entire ball with peas and leave it to dry overnight.
After the ball has dried, fill in the empty spaces with peas if necessary. Attach the barrel - drop a little glue on the tip of the skewer and place the stick in the prepared hole.
Fill the pot with floral foam and stick the stem into it. Finally, decorate the surface protruding from the pot with dry moss. Your DIY cereal craft for kids is ready!
Single color dyeing
Prepare
- bags made of dense polyethylene, zip bags of a suitable size;
- alcohol or vinegar, food coloring, grain measure and disposable plates.
Steps:
- Take a bag, add 50 grams of cereal.
- Pour in 50 ml of alcohol or 100 ml of vinegar.
- Add some coloring.
- Close the bag and spread the paint inside over the cereal.
- Pour the cereal onto a plate and leave to dry
Coloring pasta
This is an important, somewhat frightening process for many at first, which, in reality, is not anything complicated. In principle, you can paint a finished product, or you can assemble it from already multi-colored elements. It is best to combine both approaches to achieve the best result.
Read also DIY crafts from recycled materials for children for school
Pre-coloring of pasta is usually done using dyes for Easter eggs: having prepared the solution according to the manufacturer's instructions, add a little vinegar to it for greater color durability and place the dry pasta - stir it with a stick to ensure uniform coloring. Then place the painted elements on a sheet of foil and dry at room temperature.
It is convenient to paint a finished craft with paint from an aerosol can in the space of a large cardboard box, which will protect surrounding objects from paint drops. It is best to paint elements with acrylic paints using a brush: watercolors and gouache are not suitable for this purpose, since they will then remain on your hands and be smeared.
As a final finish, especially in the case of New Year's decorations, gold and silver sparkles and artificial snow are popular.
Let's get started
There are a great many options for crafts made from pasta, since it is a very successful material that involves very few restrictions (except perhaps the general fragility of the product). Craftsmen and novice amateurs have created many different boxes, photo frames, vases, New Year's decorations and Christmas tree decorations, flowers, decorative dishes and even paintings! We offer photographic examples of such work. As you can see, the great thing about “pasta” crafts is that it’s easy to understand their structure and repeat the example you like with your own hands, although high-level products will require more skill and practical experience in working with the material. Therefore, Dominafiesta strongly recommends starting your creative journey with the simplest crafts, which will allow you to quickly move forward and acquire real mastery.
Please note: in order to correctly assemble a bulky item - a box, vase, etc. – it is advisable to use a cardboard or other frame, previously covered with cling film, which is then carefully removed
In some cases, a cardboard or other dense substrate is used, onto which the pasta is glued in the required order and which, after painting, forms a permanent frame and is integral with the entire product: a typical example is a photo frame.
Read also DIY paper flowers: examples, instructions, 50 photos for decoration
Additional elements of pasta products have also proven themselves to be excellent - beads, rhinestones, openwork and satin ribbons of different widths, fabric and leather inserts, foil, multi-colored wire, etc.
So, prepare pasta of all possible shapes and sizes and get to work. We assure you: very soon you will be able not only to repeat a magnificent product that has already been made by someone with a complex structure, but also to independently invent and improve crafts that will cause real delight and admiration among those around you!